参考にしたサイト https://learn.adafruit.com/adafruit-micro-sd-breakout-board-card-tutorial?view=all
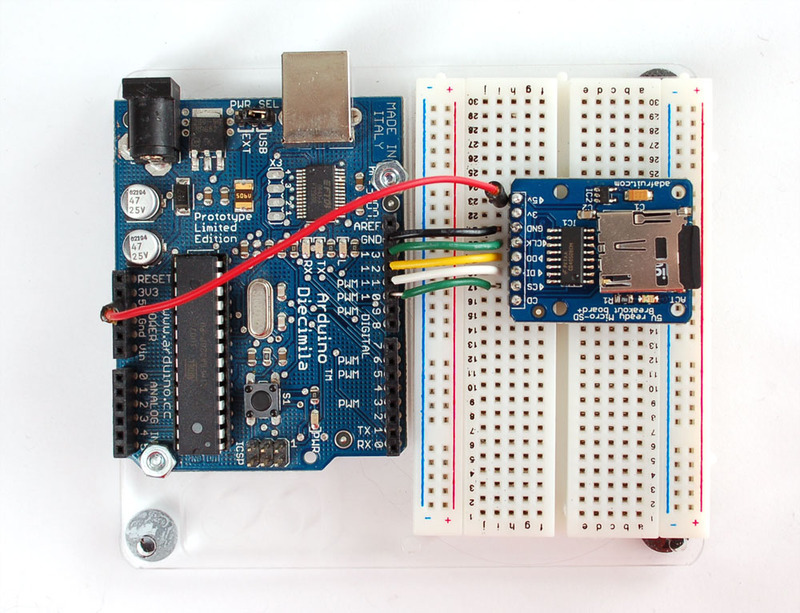
5V は5V
GND はGND
CLK が pin 13
DO が pin 12
DI が pin 11
CS が pin 10
# include <SD.h>//breakeaut borde micro sd  sprak  fan

File myFile;

void setup()
{
  Serial.begin(9600);
  Serial.print("Initializing SD card...");
  // On the Ethernet Shield, CS is pin 4. It's set as an output by default.
  // Note that even if it's not used as the CS pin, the hardware SS pin
  // (10 on most Arduino boards, 53 on the Mega) must be left as an output
  // or the SD library functions will not work.
   pinMode(10, OUTPUT);

  if (!SD.begin(10)) {
    Serial.println("initialization failed!");
    return;
  }
  Serial.println("initialization done.");

  // open the file. note that only one file can be open at a time,
  // so you have to close this one before opening another.
  myFile = SD.open("test.txt", FILE_WRITE);

  // if the file opened okay, write to it:
  if (myFile) {
    Serial.print("Writing to test.txt...");
    myFile.println("testing 1, 2, 3.");  //ここを書き込む
	// close the file:
    myFile.close();
    Serial.println("done.");
  } else {
    // if the file didn't open, print an error:
    Serial.println("error opening test.txt");
  }
}

void loop()
{
	// nothing happens after setup
}