PONOS Advent Calendar 2019の6日目の記事です。
昨日は私の「MonKey - Productivity Commands」のカスタムコマンドでさらにUnity上の作業を効率化するでした。
はじめに

MonKey - Productivity Commands - Asset Store
本記事はPONOS Advent Calendar 2019の以下の記事の続編となります。
- 「MonKey - Productivity Commands」のコマンド操作でUnity開発を効率化する
- 「MonKey - Productivity Commands」のカスタムコマンドでさらにUnity上の作業を効率化する
今回はコマンドにパラメータを渡して実行する方法について紹介します。
なお、
- Unity 2019.2.12f1
- MacOS 10.14.6
の環境で動作確認しています。
コマンドのパラメータを指定する
コマンドの実行時にパラメータを追加するためにはMonKey.Command属性の付与されたstaticメソッドの引数に対してMonKey.CommandParameter属性を付与します。
MonKey.CommandParameter属性の第一引数にはパラメータ表示時の説明文を設定してください。
using MonKey;

public static class SampleCommands
{
    [Command("Sample Parameter Command",
        QuickName = "SPC",
        Help = "好きな数字を選んでコンソールへ出力する。"
    )]
    public static void SampleParameterCommand(
        [CommandParameter("好きな数字を選んでください。")] // 「value」をコマンドのパラメータ化する。
        int value
    )
    {
        Debug.Log($"選んだ数字は\"{value}\"です。");
    }
}
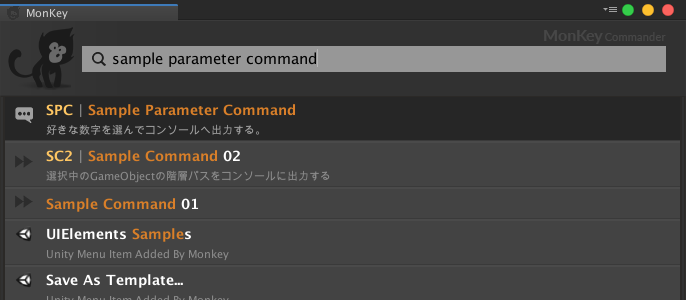
このコマンドをコマンドパレットで開くと以下のような表示になります。
パラメータが設定されたコマンドは、コマンド名の左側に吹き出しアイコンが表示されており、パラメータの有無を判別できます。
このコマンドを選択すると、以下のようなパラメータ入力画面が表示されます。
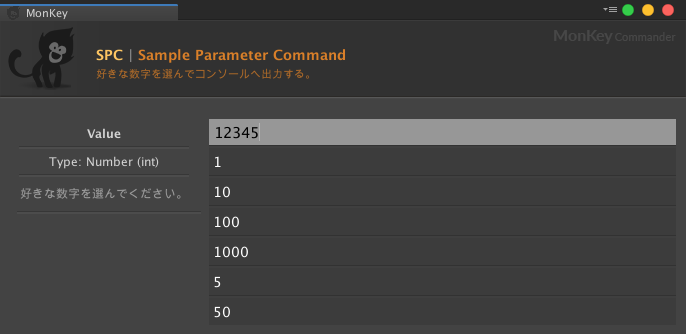
任意のパラメータ(今回はint型のパラメータなので整数値)を入力して実行します。

コマンドに渡されたパラメータの値を使用して、処理が実行されました。
利用可能なコマンドパラメータの型
MonKeyがデフォルトでサポートしているパラメータの型は以下の通りです。
これらの型の引数はMonKey.CommandParameter属性を付与するだけでコマンドパラメータ化が可能です。
- String
- Int
- Float
- Double
- Byte
- Bool
- Char
- Long
- Short
- Enum
- Vector2
- Vector3
- Vector4
- Quaternion
- Color
- Object
- Component
- GameObject
- LayerMask
- Scene
- Type
- Arrays
なお、MonKey.Editor.Internal.CommandParameterInterpreteを継承したクラスを用意することで、ここにある以外の型もパラメータとして利用することが出来ます。
使用例:Rect型のコマンドパラメータを受け取り、コンソールに矩形情報を出力する
今回は使用例として、デフォルトで定義されていないRect型のコマンドパラメータに対応してみましょう。
Rect型を入力するルールを決める
MonKeyのコマンド実行に入力されるパラメータは文字列です。
そのままではRect型のコマンドパラメータとして渡すことはできないので、入力された文字列を適切にRect型へパースする処理が必要となります。
Rect型のオブジェクトを作成するためには「x」「y」「width」「height」の4個の数値が必要ですので、今回はこれらの4個の数値をカンマ(,)区切りで入力してもらうルールにします。
このルールに従うとコマンドパラメータに
1, 2, 100, 200
という文字列が入力された場合、
x = 1, y = 2, width = 100, height = 200
というRectオブジェクトが作成されます。
Rect型のコマンドパラメータを持つコマンドを作成する
次にRect型をパラメータに指定したコマンドを用意します。
[Command("Rect Parameter Command",
    QuickName = "RPC",
    Help = "矩形情報を出力する。"
)]
public static void RectParameterCommand(
    [CommandParameter]
        Rect value
)
{
    Debug.Log($"入力された矩形の情報:{value.ToString()}");
}
入力された矩形情報をコンソール出力するだけの、シンプルなコマンドです。
さて、試しにこのコマンドを実行してみますが…
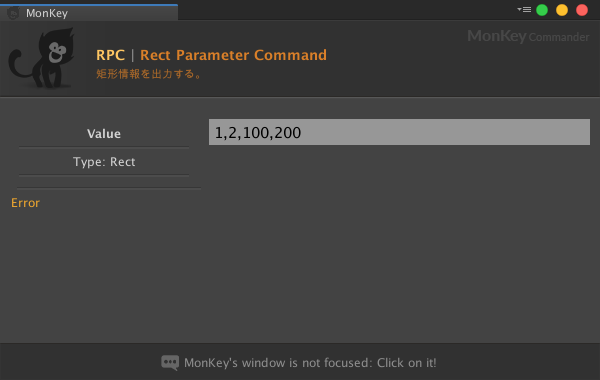
パラメータの入力後に「Error」と表示され、コマンドを実行することができませんでした。
Rect型はデフォルトでサポートされている型ではなく、「文字列を適切にRect型へパースする処理」もまだ実装していないので、Rect型のコマンドパラメータをコマンドへ渡せずにエラーとなってしまっているようです。
また、コマンド内の以下の処理についても、valueがnullで渡されてしまうため、NullReferenceExceptionが発生していました。
Debug.Log($"入力された矩形の情報:{value.ToString()}");
Rect型に対応するためのCommandParameterInterpreterを作成する
さて、それでは「文字列を適切にRect型へパースする処理」を実装するために専用のCommandParameterInterpreterクラスを用意しましょう。
今回はRect型に対応するので、RectInterpreterという名前にします。
スクリプトはEditor以下に設置してください。
// Rectの構造体をコマンドパラメータで使用するためのCommandParameterInterpreter。
class RectInterpreter : MonKey.Editor.Internal.CommandParameterInterpreter
{
    [InitializeOnLoadMethod]
    static void AddInterpreter()
    {
        // CommandParameterInterpreterの定義を追加する。
        AddInterpreter(new RectInterpreter());
    }

    RectInterpreter() : base(typeof(Rect)) // 対応する型を指定する。今回はRect。
    {
    }

    // 入力された文字列を、コマンドパラメータの型にパースする。
    public override bool TryParse(string text, out object obj, System.Type subType = null)
    {
        // カンマ区切りでx, y, width, heightの4個の数値を指定させる。
        var parts = text.Split(',');
        if (parts.Length == 4)
        {
            // それぞれの数値をfloatへ変換し、Rectを作成する。
            float[] values = new float[4];
            for (int i = 0; i < 4; ++i)
            {
                float result;
                if (float.TryParse(parts[i], out result))
                {
                    values[i] = result;
                }
            }
            var rect = new Rect(values[0], values[1], values[2], values[3]);
            obj = rect;     // パースした結果はobjに格納する。
            return true;
        }

        obj = null;
        return false;
    }
}
では、もう一度実行してみましょう。

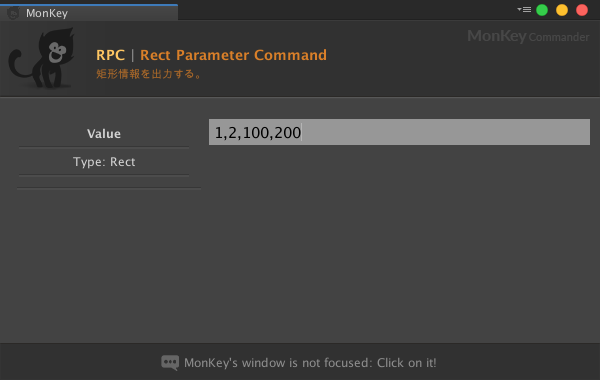
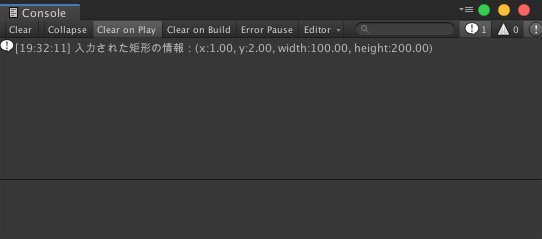
入力した文字列から矩形情報を作成し、コンソールに出力することができました!
おわりに
コマンドパラメータを指定してコマンドを実行することで、柔軟に処理を実行することができます。
MonKeyの優れている点の一つだと思うので、是非活用していきましょう。
明日は@karizumaiさんです!