おはようございます、cloudpack の @dz_ こと大平かづみです。
Prologue - はじめに
さぁ、いよいよ IoT プラットフォームにつなぐ準備ができました!
Bluemix Advent Calendar 2015 でお披露目するべく、着々と準備を進めていたこの ESP-WROOM-02 !
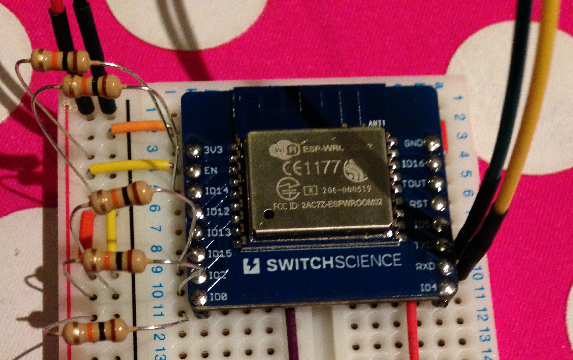
(WiFiモジュール、Arduino互換のプログラム書き込み可能)
キミを、 IBM IoT Foundation で Bluemix につなげてあげるよー!(/・ω・)/
準備
前提
ESP-WROOM-02 がインターネットに接続できる状態であることが前提です。
過去の記事で ESP-WROOM-02 の準備をしたので、ぜひご参照くださいませ。
- Check! IoT ができるようになるまで ~ まずはシリアル通信を使えるようになる
- Check! IoT ができるようになるまで ~ ESP-WROOM-02 にシリアル通信で接続する
- Check! IoT ができるようになるまで ~ ESP-WROOM-02 にプログラムを焼く
おおまかな手順
さて、準備ができたら Bluemix IBM IoT Foundation に接続する準備を進めましょう。
- Arduino IDE に MQTT ライブラリを導入する
- Bluemix で IoT Foundation サービスを作成する
- IoT Foundation にデバイスを登録する
- Bluemix で IoT Foundation Starter を作成する
- データを送ってみる
Arduino IDE に MQTT ライブラリを導入する
Arduino IDE に MQTT ライブラリを導入します。
今回は、参考にしている IBM developerWorks レシピ で紹介されている Arduino Client for MQTT を利用します。
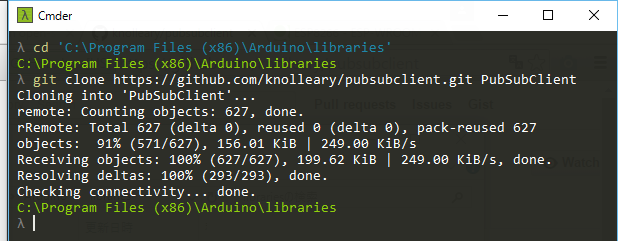
Git で導入する場合
Arduino IDE のインストールディレクトリに、 libraries があるので、その下に任意のディレクトリを作って git clone してください。
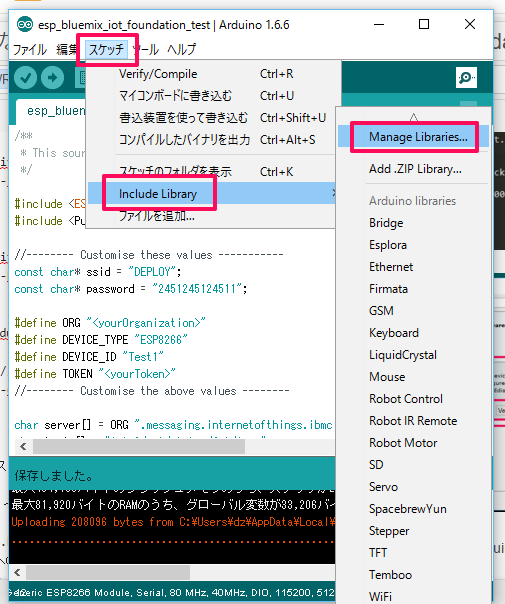
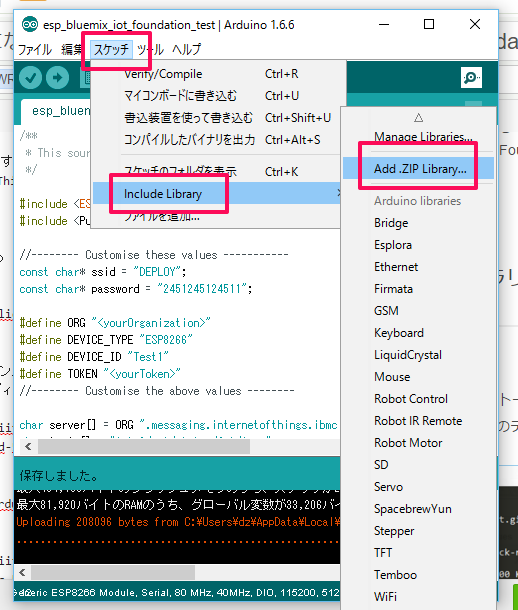
「スケッチ」>「Include Library」>「Manage Libraries...」を開きます。
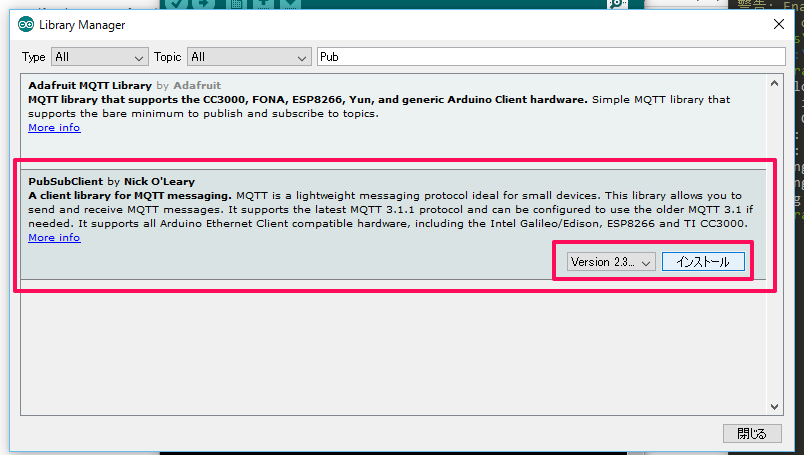
PubSubClient をみつけて、インストールしてください。
Zip で導入する場合
もし、Zip をダウンロードして導入する方は、 Arduino IDE の 「Add .ZIP Library...」を利用できるかと思います。
Bluemix で IoT Foundation サービスを作成する
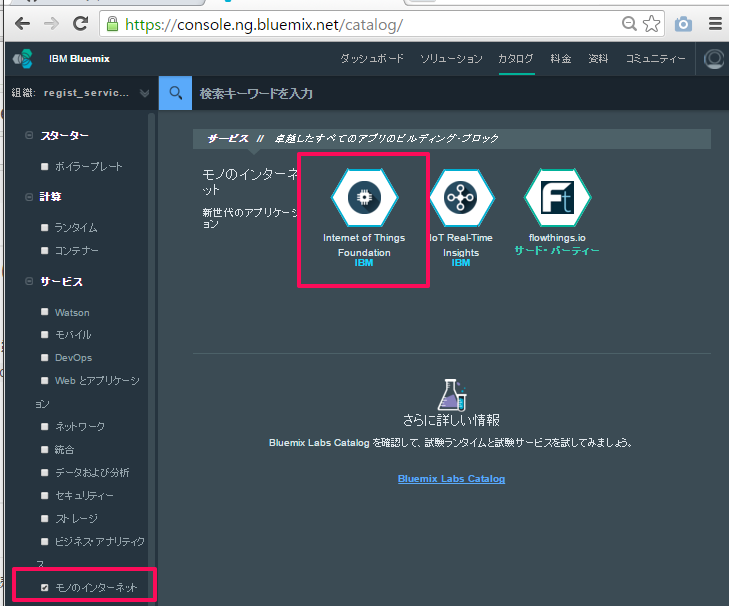
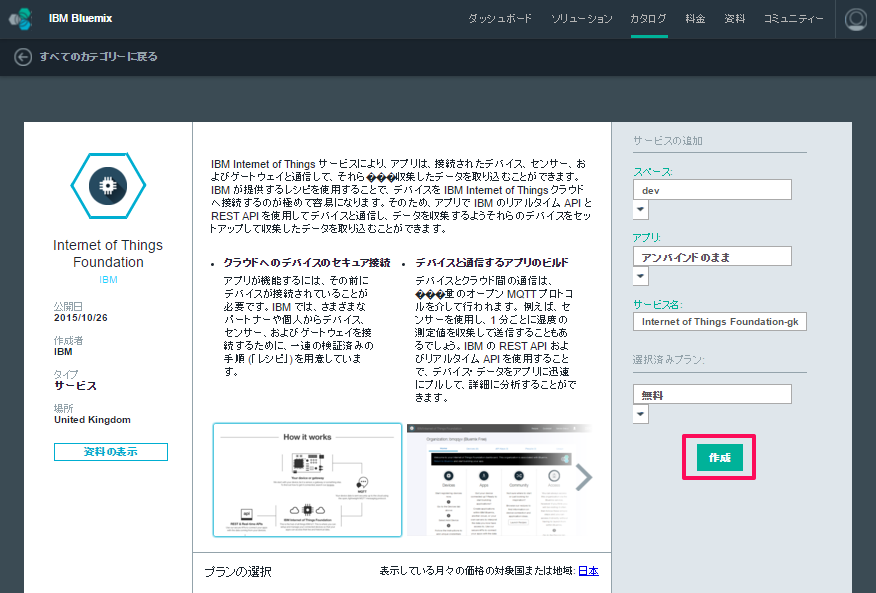
それではさっそく、 Bluemix カタログ から、「Internet of Things Foundation」を作成します。
名前を付けて、アンバインドのままで作成します。
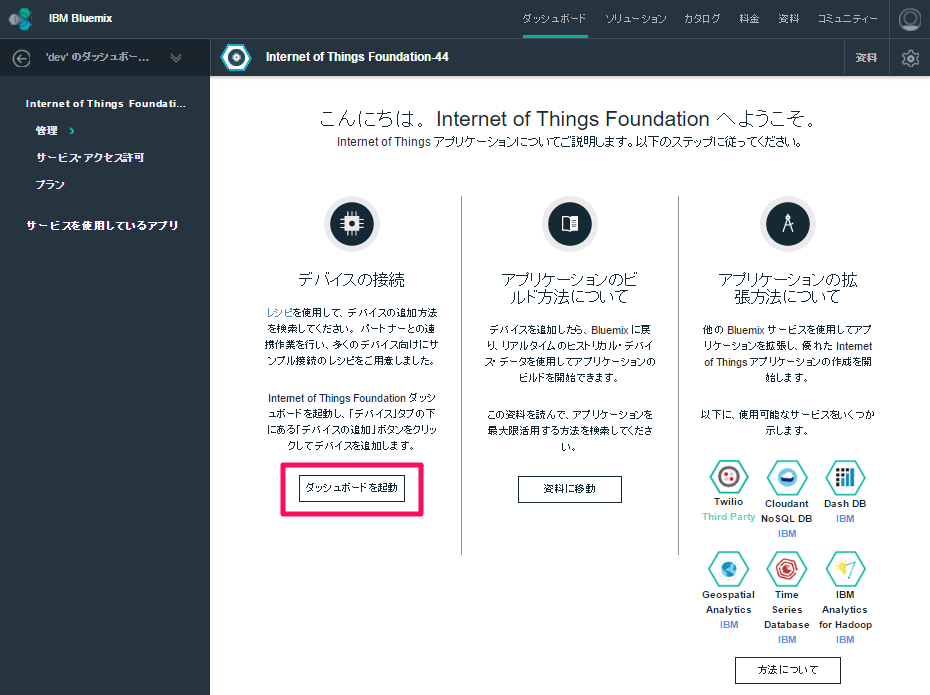
「ダッシュボードを起動」で、Internet of Things Foudation のダッシュボードを開きます。
IoT Foundation にデバイスを登録する
次に、 ESP-WROOM-02 を想定したデバイスを IoT Foundaiton に登録します。Internet of Things Foundation へのデバイスの登録 を参考にしました。
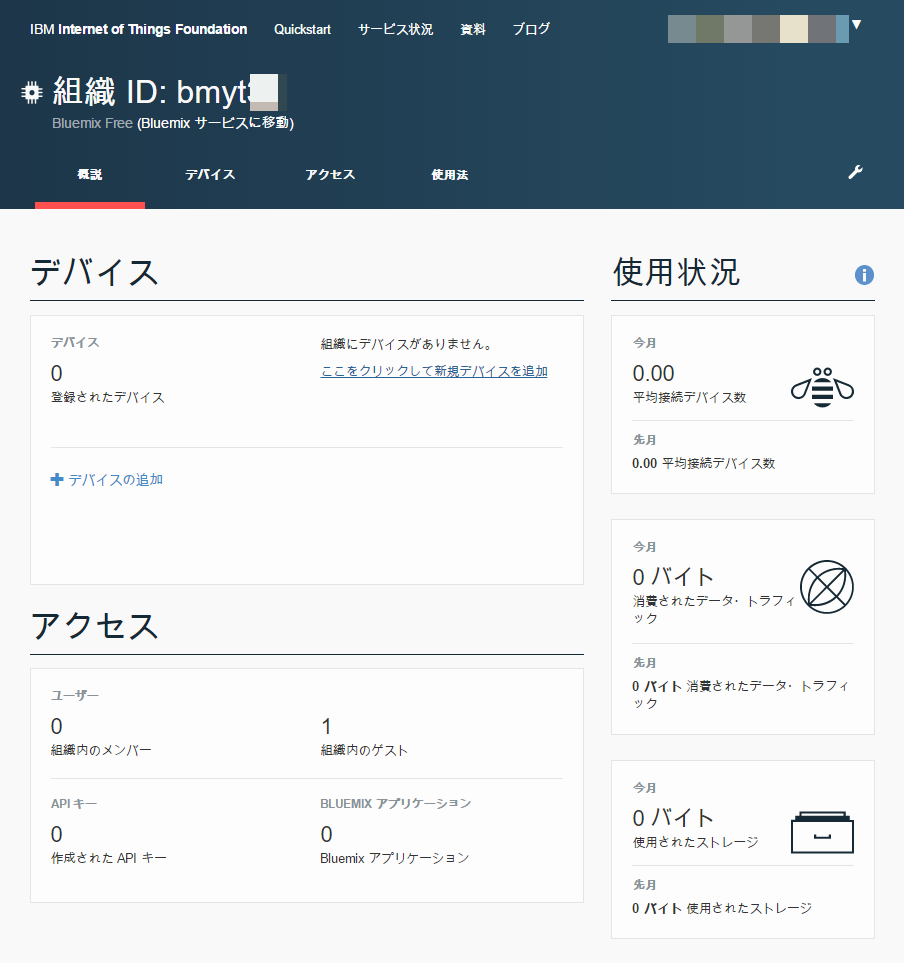
Internet of Things Foundation のダッシュボードはこのようになっています。デバイスの追加をクリックします。
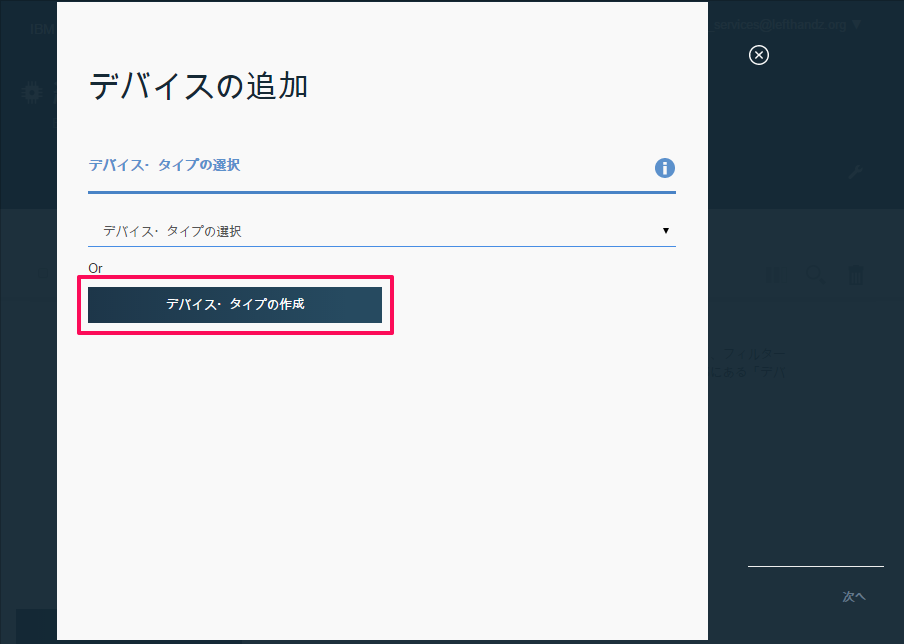
作成直後は、デバイス・タイプがないので、作成しましょう。
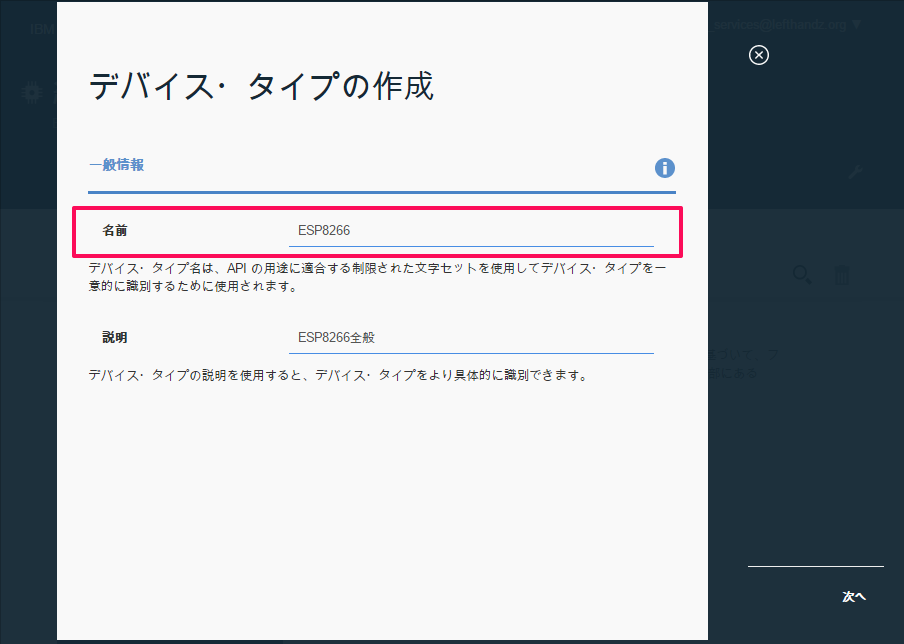
任意のデバイス名を入力します。この後オプションでいろいろ入力できるので、好みで入力してください。
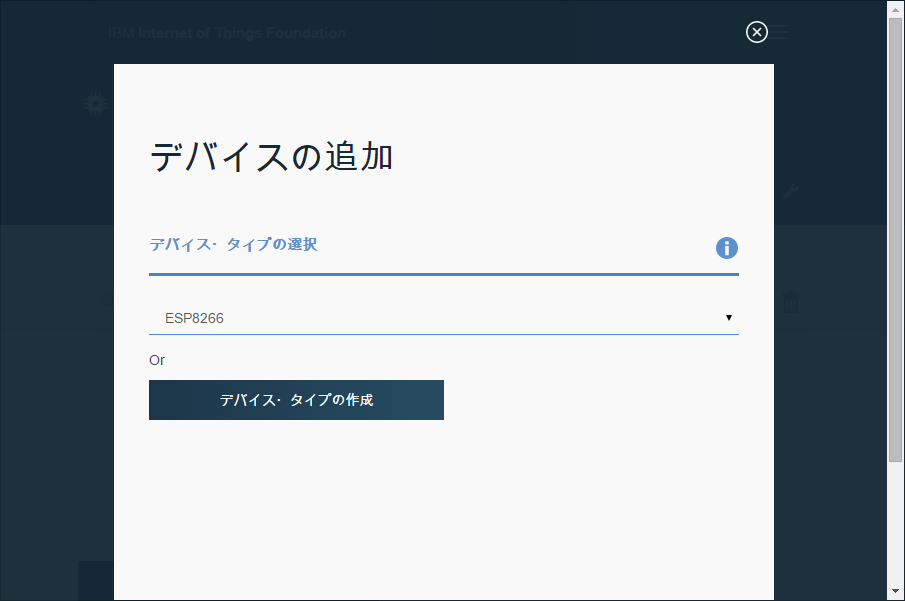
デバイス・タイプが作成できたので、デバイスの追加に進みます。
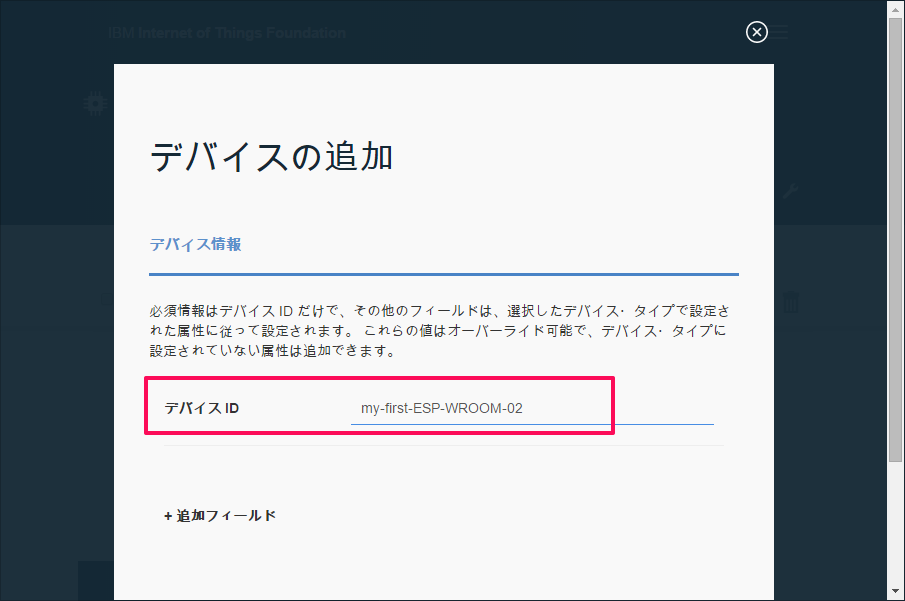
任意のデバイス名を入力します。この後もオプションでいろいろ設定できるのでお好みで設定してください。
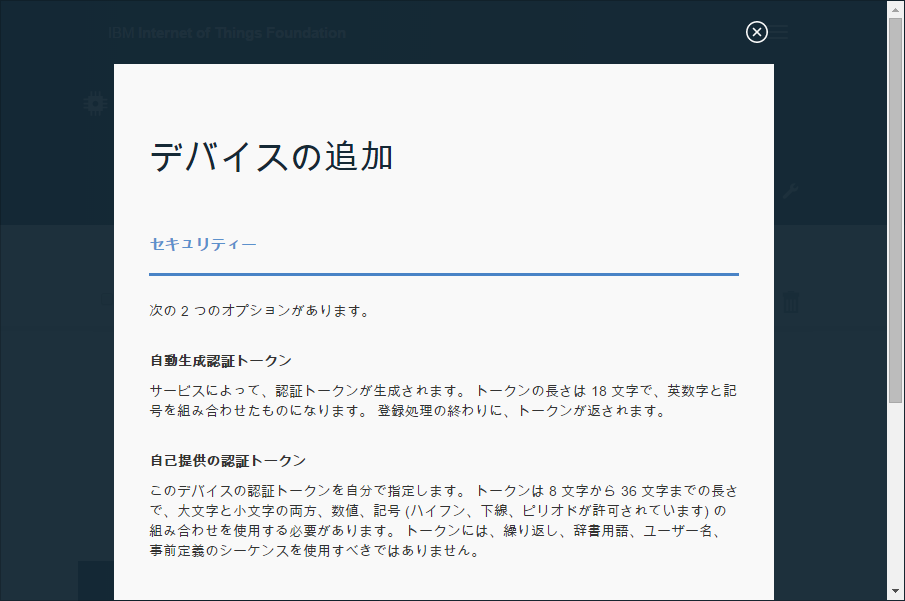
トークンの設定をします。私は「自動生成認証トークン」を利用しました。
デバイスの登録が完了しました。

この情報はプログラムで使いますので、控えておいてください。トークンはこれ以降は表示されないので、ここで必ず控えておいてください。
- 組織ID
- デバイス・タイプ
- デバイスID
- 認証トークン
Internet of Things Foundation Starter を作成する
それから、データの受け手も作成しましょう。
モノのインターネット・スターター・アプリケーションによるアプリの作成 を参考に、IoT Foundation と連動するスターターアプリを使ってみます。
これは Node-RED というGUIで処理を描けるオープンソースのツールを用いたアプリケーションがつくれます。私は今回初めて触ってその簡単さにびっくりしました。
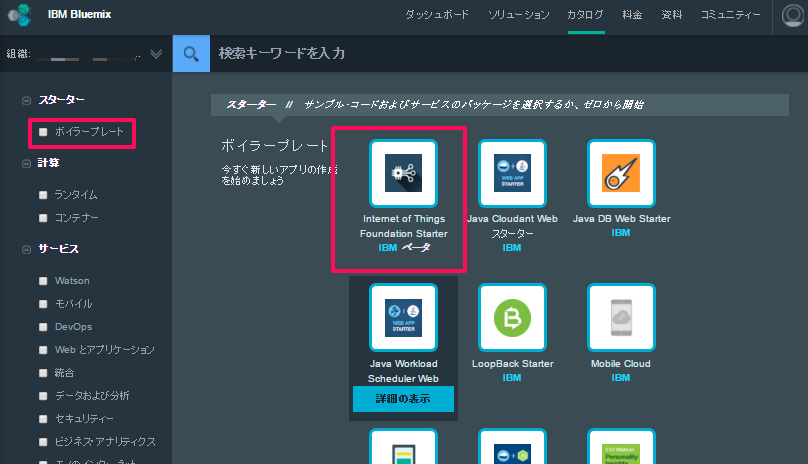
Bluemix カタログ から、今度は「Internet of Things Foundation Starter」を作成します。項目を入力して作成を進めてください。
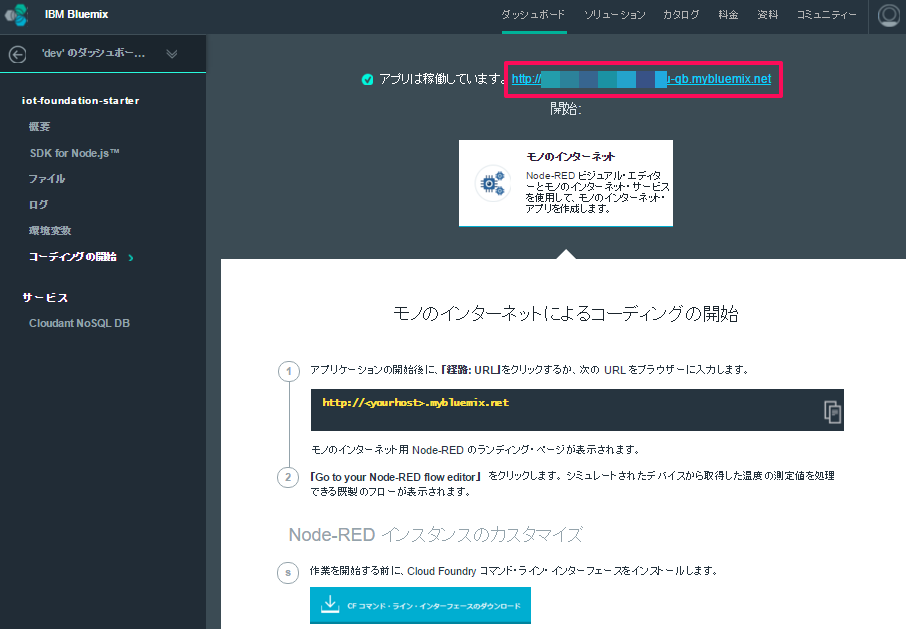
作成できたら、アプリケーションの起動を待ちます。
起動できたら、URLをクリックして開いてください。
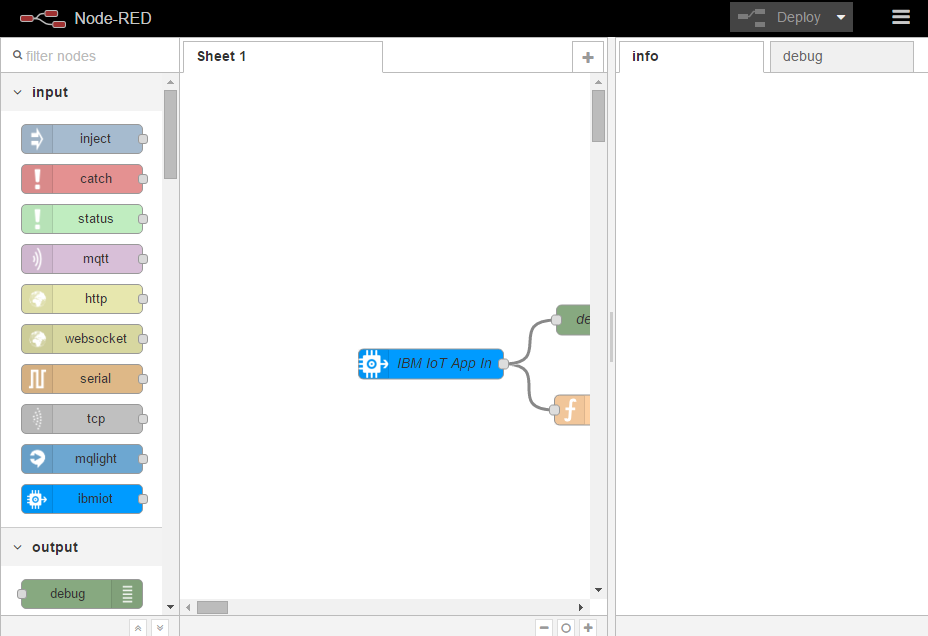
Node-RED のフローエディタを開きます。
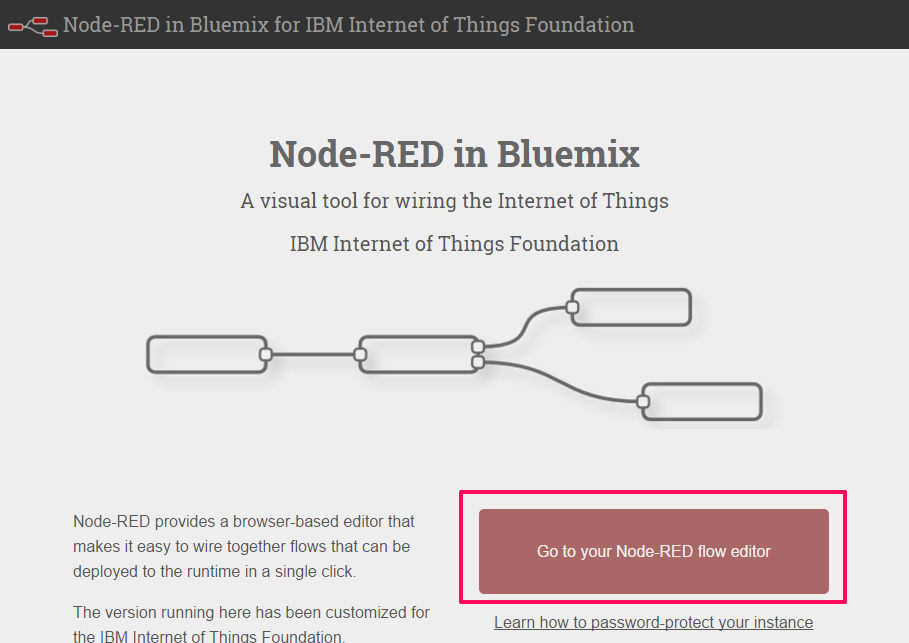
こんな画面です。ノードをつなげて処理を作っていきます。この時点ですでに IoT Foundation からの入力を受けてデバッガに出力する処理が設定されています。
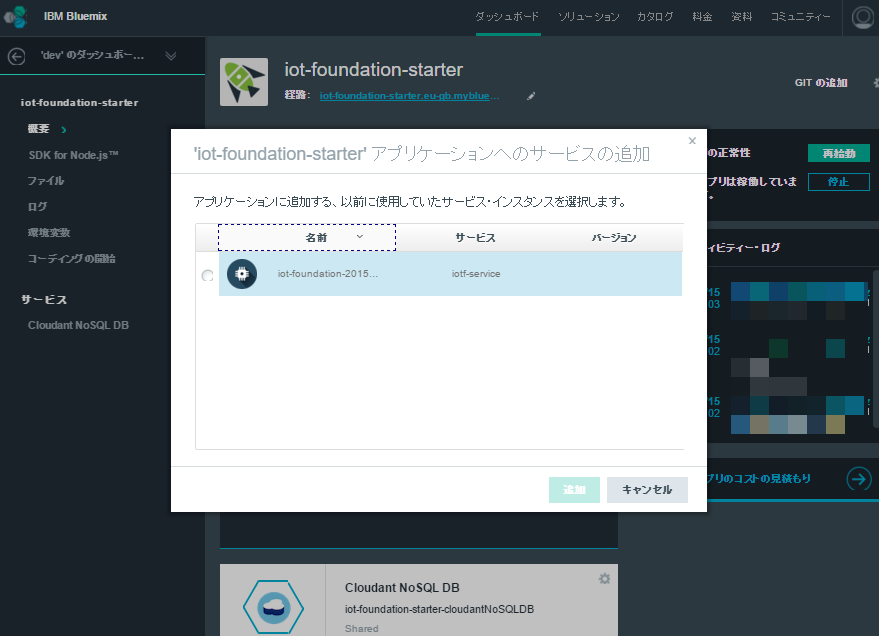
ここで、Bluemix のダッシュボードに戻って、このスターターアプリケーションに「Internet of Things Foundation サービス」をバインドします。(アプリケーションの再起動があります。)
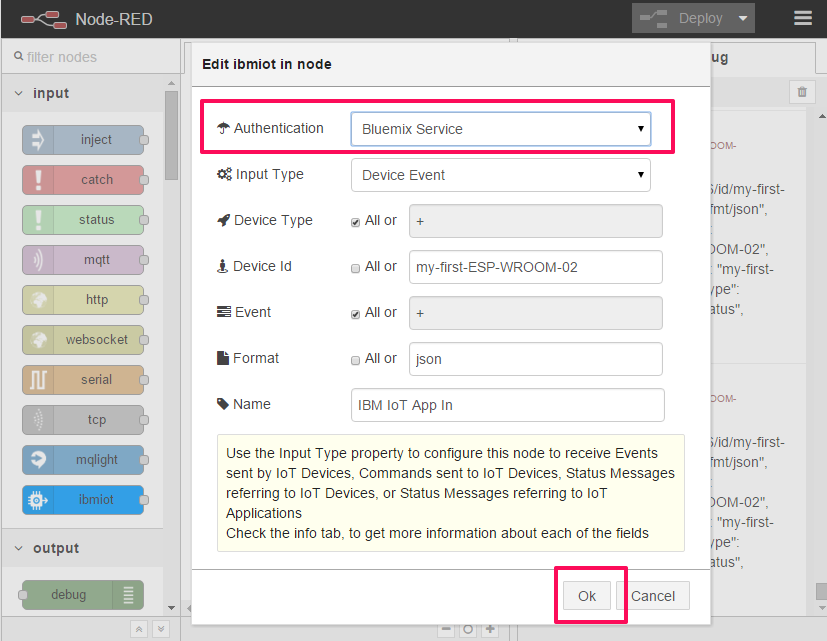
アプリケーションの再起動が終わったら、IoT Foundation からの入力を調整するので、Node-RED フローエディタの「IBM IoT App In」をダブルクリックしてください。
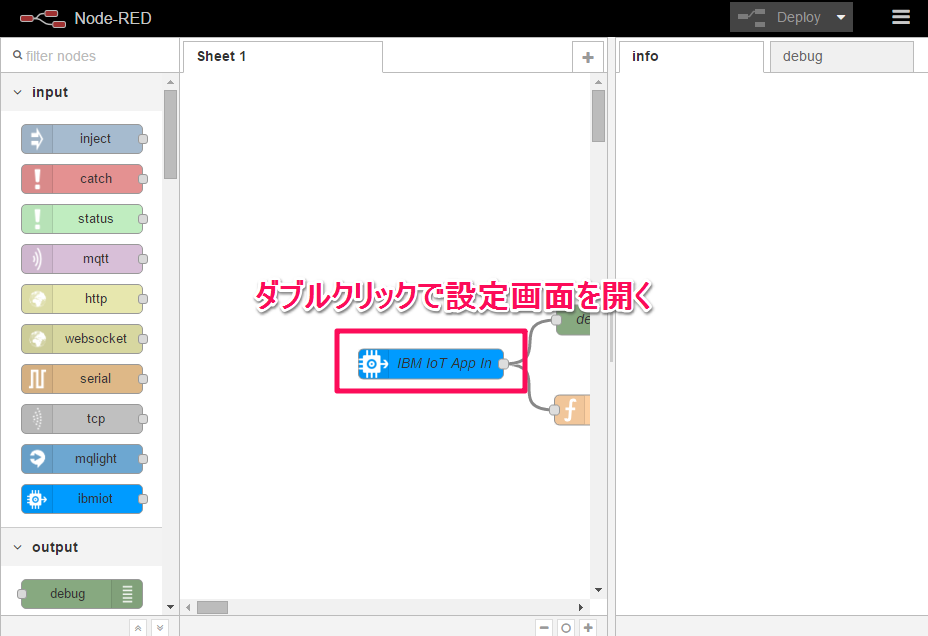
「Authentication」に「Bluemix Service」を選択して「OK」をクリックします。(適宜、「Device Id」を指定してもいいかもしれません。)
これで準備は完了です。
データを送ってみる
いよいよデータを送ってみましょう!
ソースコードは、IBM developerWorks レシピ のサンプルコードをベースに、PubSubClient の ESP8266向けサンプルコード を参考に調整しました。
/**
 * This source code refer to the recipe of IBM developerWorks, https://developer.ibm.com/recipes/tutorials/connect-an-esp8266-with-the-arduino-sdk-to-the-ibm-iot-foundation/ .
 */

# include <ESP8266WiFi.h>
# include <PubSubClient.h>

//-------- Customise these values -----------
const char* ssid = "<WIFI SSID>";
const char* password = "<WIFI PASSWORD>";

# define ORG "<ORGANIZATION_ID>"      // 組織ID
# define DEVICE_TYPE "<DEVICE_TYPE>"  // デバイス・タイプ
# define DEVICE_ID "<DEVICE_ID>"      // デバイスID
# define TOKEN "<TOKEN>"              // 認証トークン
//-------- Customise the above values --------

char server[] = ORG ".messaging.internetofthings.ibmcloud.com";
char topic[] = "iot-2/evt/status/fmt/json";
char authMethod[] = "use-token-auth";
char token[] = TOKEN;
char clientId[] = "d:" ORG ":" DEVICE_TYPE ":" DEVICE_ID;

WiFiClient wifiClient;
PubSubClient client(wifiClient);

void callback(char* topic, byte* payload, unsigned int length) {
 Serial.println("callback invoked");
}

void setup() {
 Serial.begin(115200);
 Serial.println();

 Serial.print("Connecting to ");
 Serial.print(ssid);
 WiFi.begin(ssid, password);

 while (WiFi.status() != WL_CONNECTED) {
 delay(500);
 Serial.print(".");
 }
 Serial.println("");

 Serial.print("WiFi connected, IP address: ");
 Serial.println(WiFi.localIP());

 client.setServer(server, 1883);
 client.setCallback(callback);
}

int counter = 0;

void loop() {

 if (!!!client.connected()) {
 Serial.print("Reconnecting client to ");
 Serial.println(server);
 while (!!!client.connect(clientId, authMethod, token)) {
 Serial.print(".");
 delay(500);
 }
 Serial.println();
 }

 String payload = "{\"d\":{\"myName\":\"";
 payload += DEVICE_TYPE;
 payload += ".";
 payload += DEVICE_ID;
 payload += "\",\"counter\":";
 payload += counter;
 payload += "}}";

 Serial.print("Sending payload: ");
 Serial.println(payload);

 if (client.publish(topic, (char*) payload.c_str())) {
 Serial.println("Publish ok");
 } else {
 Serial.println("Publish failed");
 }

 if (1000 < counter) {
  counter = 0;
 }
 else {
  ++counter;
 }
 delay(10000);
}
いざ!
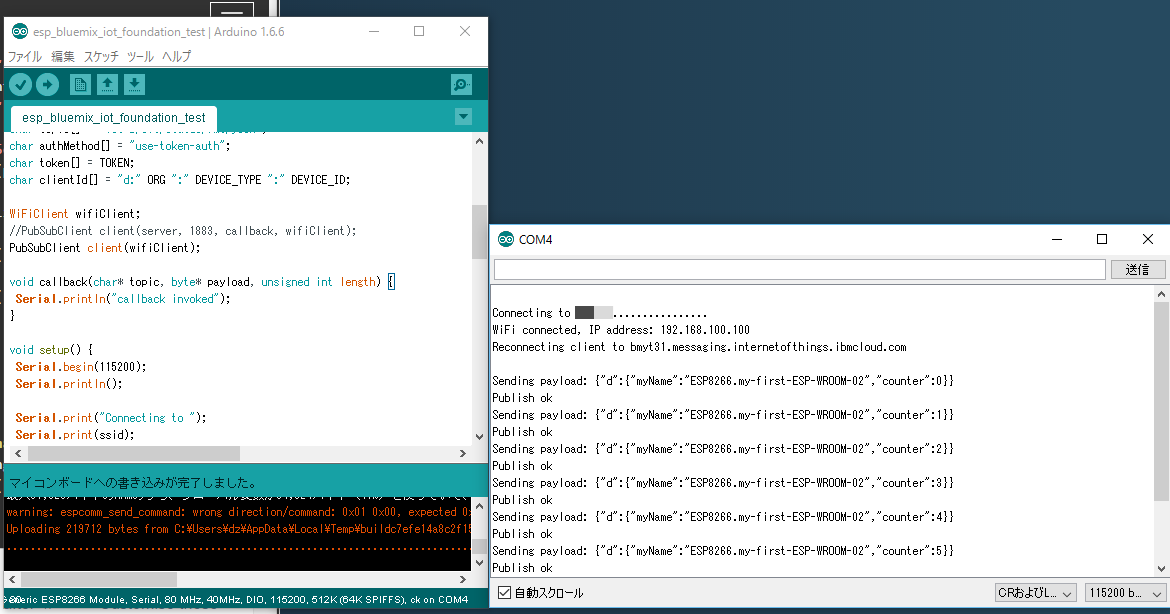
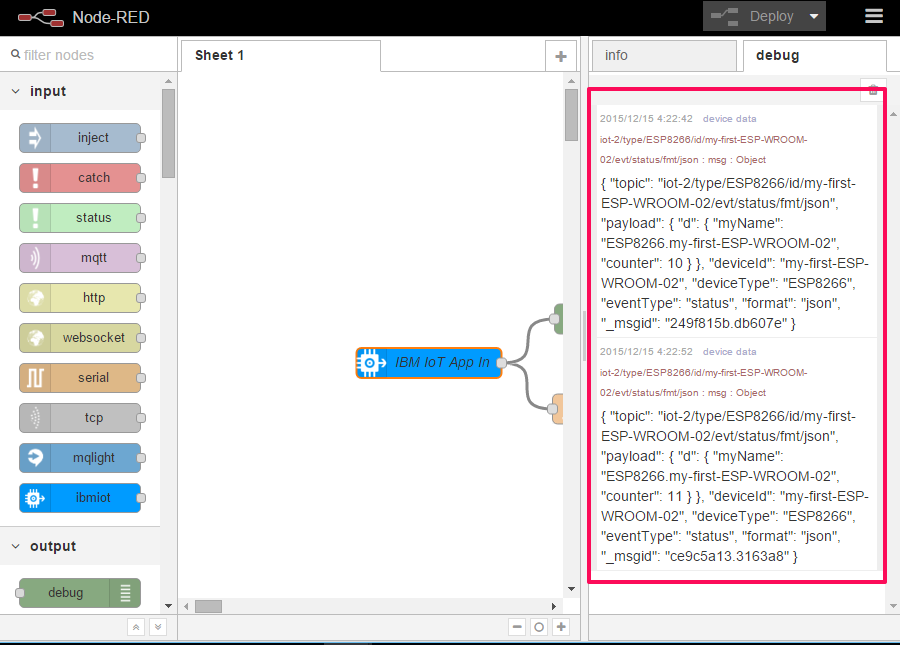
この ESP-WROOM-02 から Bluemix につながったーーーー!!!(*ノωノ)
朝4時の感動。
Epilogue - おわりに
実は、意気込んで作業開始するも Bluemix の計画メンテナンスにぶつかり、500エラーの連続…(;´Д`)
普段使ってる米国リージョンをあきらめ、仮眠してヨーロッパがメンテナンスが終わるのを待ち、4時に晴れて繋がるというぎりぎりな Advent Calendar 参戦と相成りました(/・ω・)/
あー!もう朝だけど 12/14 の Advent Calendar として投稿します!おやすみなさい!