こんにちは、 @dz_ こと大平かづみです。
Prologue - はじめに
enebular developer Meetup Vol.5 - connpass でお話する枠をいただけたので、 enebular で遊んでみることにしました!
AWS 周りはすでにどなたかがやってそうなので、私は mbed cloud 経由で Raspberry Pi にデプロイする方法を試しました。
なお、 Mbed Cloud は、現在は Pelion Device Management という名称に変わり、組織を意識したポータルになっているようです。ツールの名称は旧名のままだったりと名称が混在しています。適宜読み替えてみてください ![]()
enebular から Pelion Device Management 経由で Raspberry Pi にフローをデプロイする
準備するもの
ハードウェア
ソフトウェア、パッケージ
Pelion Device Management (旧Mbed Cloud)
- Pelion Device Management または Mbed Cloud のアカウント
- アカウント取得については後述
手順
Raspberry Pi の下準備
- Rasprian をインストールしておく
- インターネット接続ができることを確認しておく
- 操作しやすくするため、SSHを有効にしておく
Pelion Device Management ポータルへのログイン
Pelion Device Management ポータルへログインするには、 まず Mbed のアカウントを取得しログインします。
そして、下記ページを開き、中段の request access here のリンクがから Pelion Device Management 接続のリクエストをします。簡単なアンケートに答えてリクエストすると、 Trial としてアクセスできるようになります。
Before we start, let's make sure you have everything you need:
...
Access to Pelion Device Management - request access here.

Pelion Device Management ポータルからクレデンシャルを取得する
Pelion Device Management ポータルへログインできたら、クレデンシャルを発行します。
-
Mbed Cloud ポータル にログインする
-
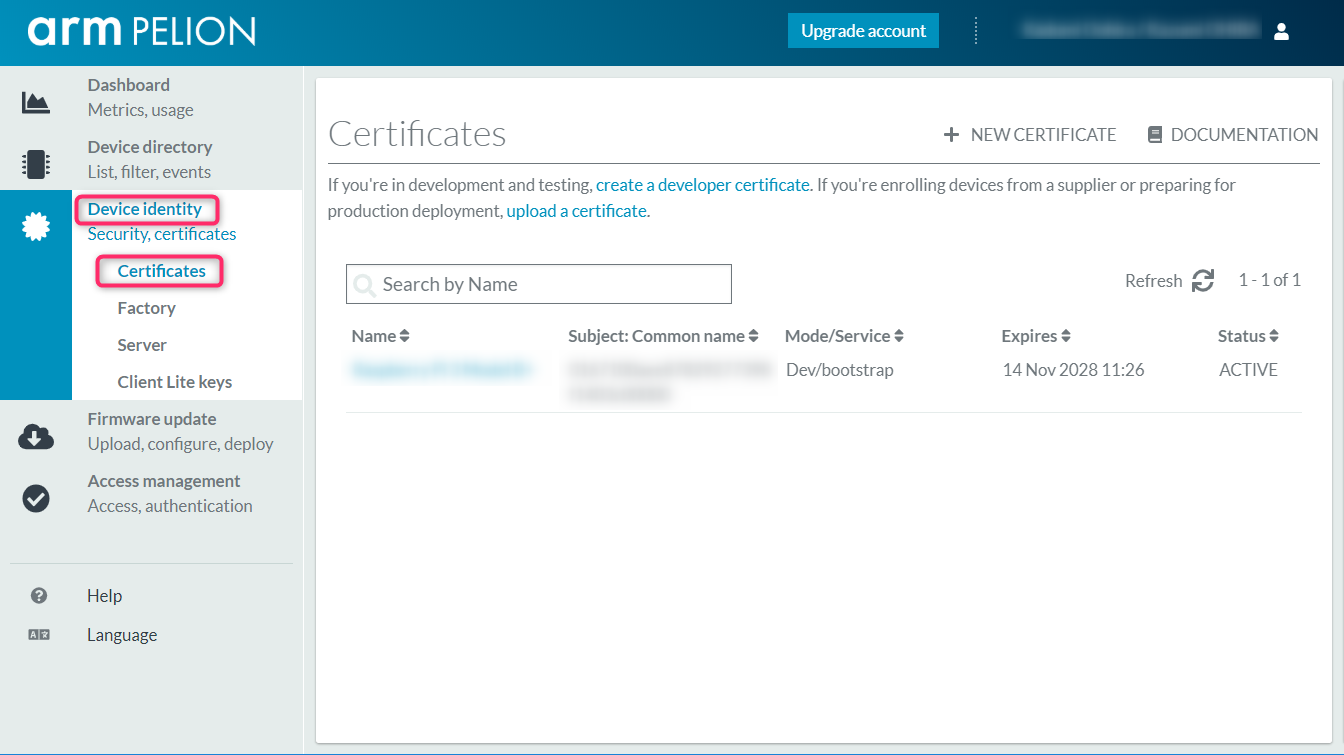
Device identity > Certificates を開く
-
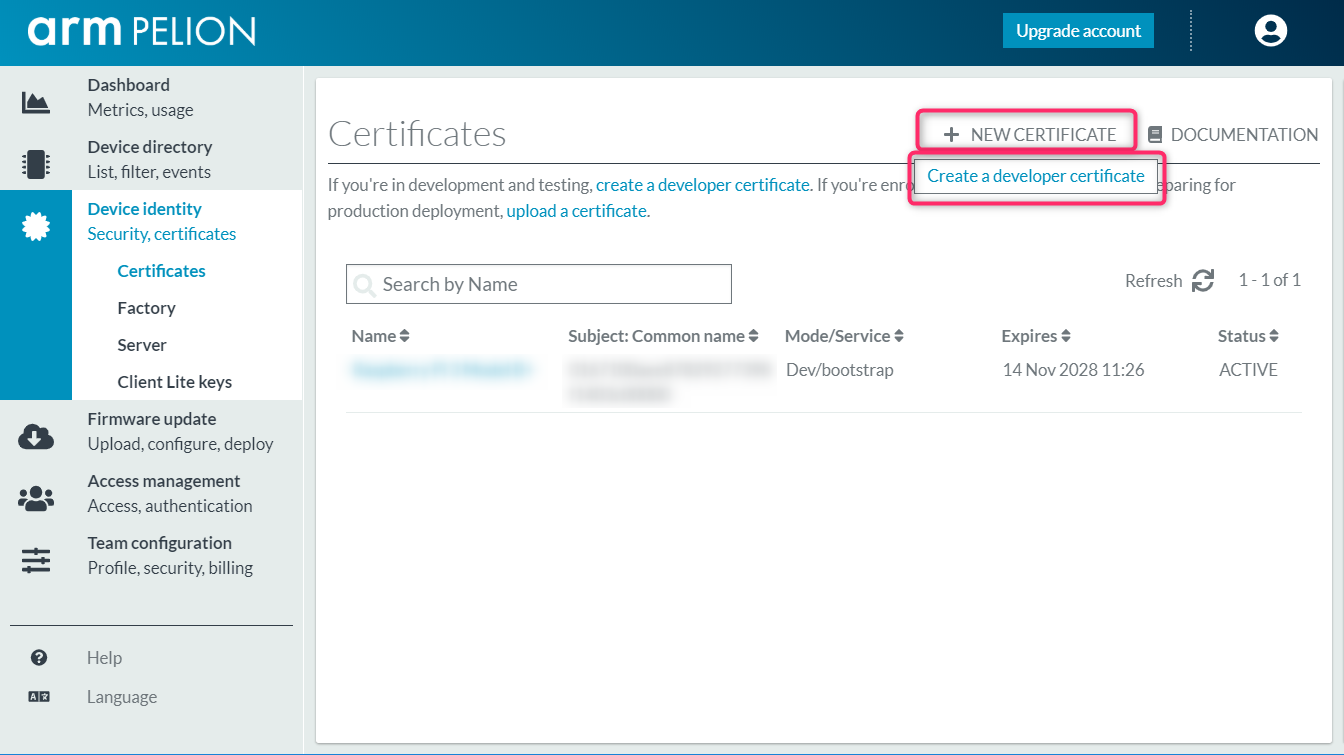
画面右上の New Certificate > Create a developer certificate をクリックする
-
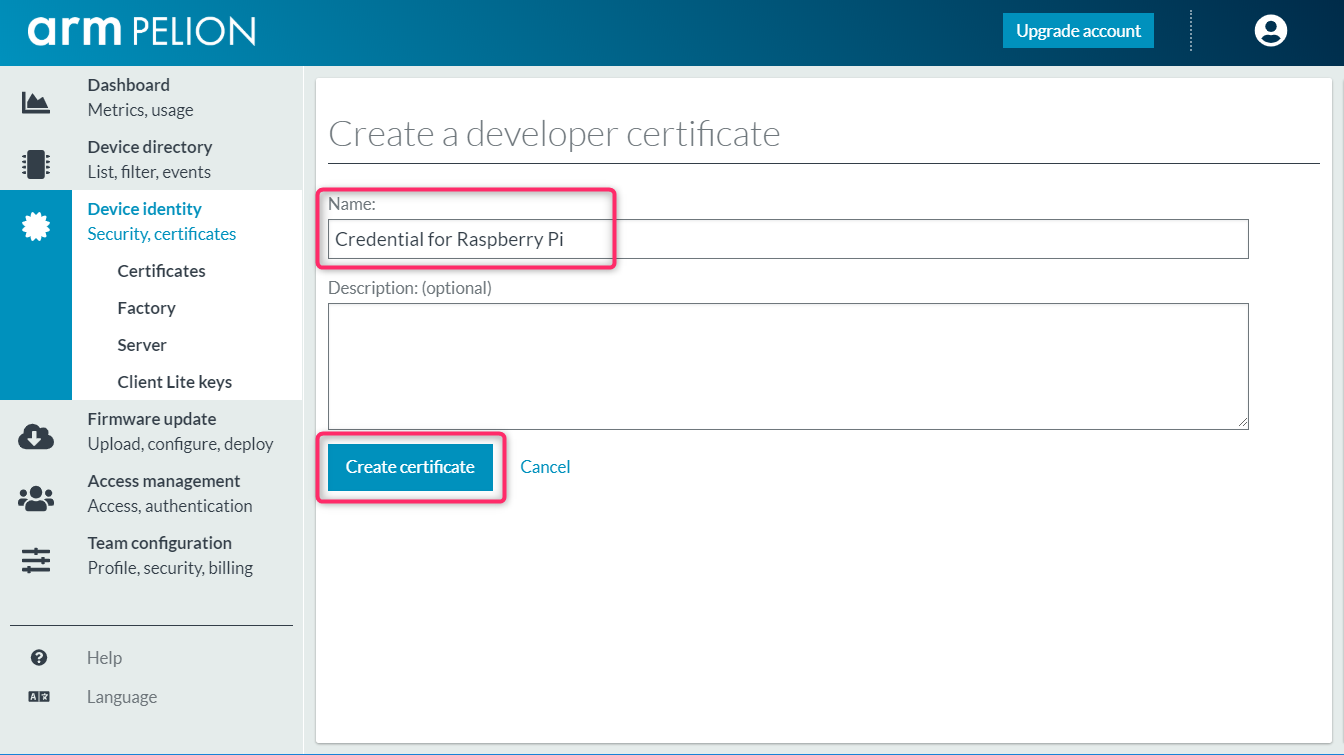
Name と Description (任意) を入力して、 Create certificate をクリックする
-
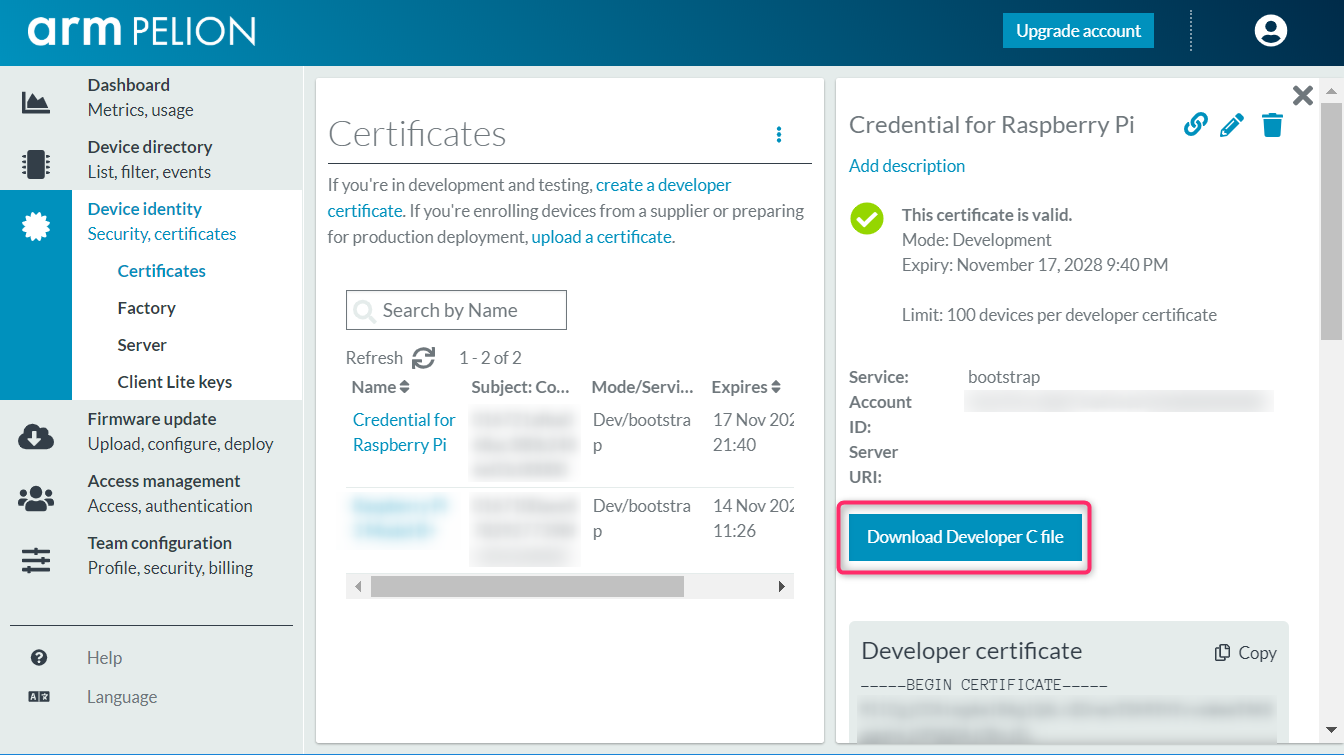
作成された certificate の名前をクリックすると詳細が表示されるので、 Download Developer C file をクリックして証明書の C ファイルをダウンロードする
Raspberry Pi でのセットアップ時に使うので、このファイルを Raspberry Pi に転送しておきます。
scp <path-of-the-credential>/mbed_cloud_dev_credentials.c pi@<your-raspberry-pi-ip-address>:~/
Raspberry Pi に enebular-agent をインストールする
次に、Raspberry Pi に enebular-agent をインストールします。
enebular-agent は利用する環境によって Port が異なります。今回は、 mbed cloud と接続するため Local ポートで設定します。
インストールスクリプトは、デフォルトの Port が AWS IoT なので、明示的に Local を指定してインストールします。
それでは、SSHで Raspberry Pi にログインし、下記コマンドを実行しましょう。
# Local ポートを指定して enebular-agent をインストールする
wget -qO- https://raw.githubusercontent.com/enebular/enebular-runtime-agent/master/tools/install/install.sh | sudo -E bash -s -- --port=local
以下のように表示されたら、インストール完了です。
...
---------
 enebular-agent has been successfully installed ✔
 Version: 2.2.0
 Location: /home/enebular/enebular-runtime-agent
 User: enebular
 enebular-agent is running as a system service.
 To check the status of agent, run the following command on the target device:
   sudo journalctl -ex -u enebular-agent-enebular.service
---------
Raspberry Pi に enebular-agent - Mbed Cloud Connector をセットアップする
次に、Pelion Device Management に接続するため、 Mbed Cloud Connector をセットアップします。
ここで必要になる Mbed CLI Tools については、こちらも併せてご参考ください。
それでは、SSHで Raspberry Pi にログインしたままで、下記を実施します。
# Mbed CLI tool をインストールする
sudo apt install cmake
sudo apt install mercurial
sudo pip install --system mbed-cli

# enebular-runtime-agent-mbed-cloud-connector リポジトリを mbed プロジェクトとしてインポートする
mbed import https://github.com/enebular/enebular-runtime-agent-mbed-cloud-connector.git
cd enebular-runtime-agent-mbed-cloud-connector

# 先ほど用意した mbed_cloud_dev_credentials.c をプロジェクト配下に配置する(同名のファイルがあるので上書きする)
mv -f ~/mbed_cloud_dev_credentials.c .

# ビルドする
python pal-platform/pal-platform.py fullbuild --target x86_x64_NativeLinux_mbedtls --toolchain GCC --external ./../define.txt --name enebular-agent-mbed-cloud-connector.elf
下記のように表示されれば、ビルド完了です。
2018-11-17 20:06:20,992 - pal-platform - INFO -
Completed fullBuild running for target = x86_x64_NativeLinux_mbedtls
With toolchain = GCC.
Output directory: enebular-runtime-agent-mbed-cloud-connector/out
生成された <project-directory>/out/Release/enebular-agent-mbed-cloud-connector.elf を起動することで、 Pelion Device Management にデバイス登録・接続を行います。
# enebular-agent mbed cloud connector をバックグラウンドで起動する
sudo ./out/Release/enebular-agent-mbed-cloud-connector.elf &
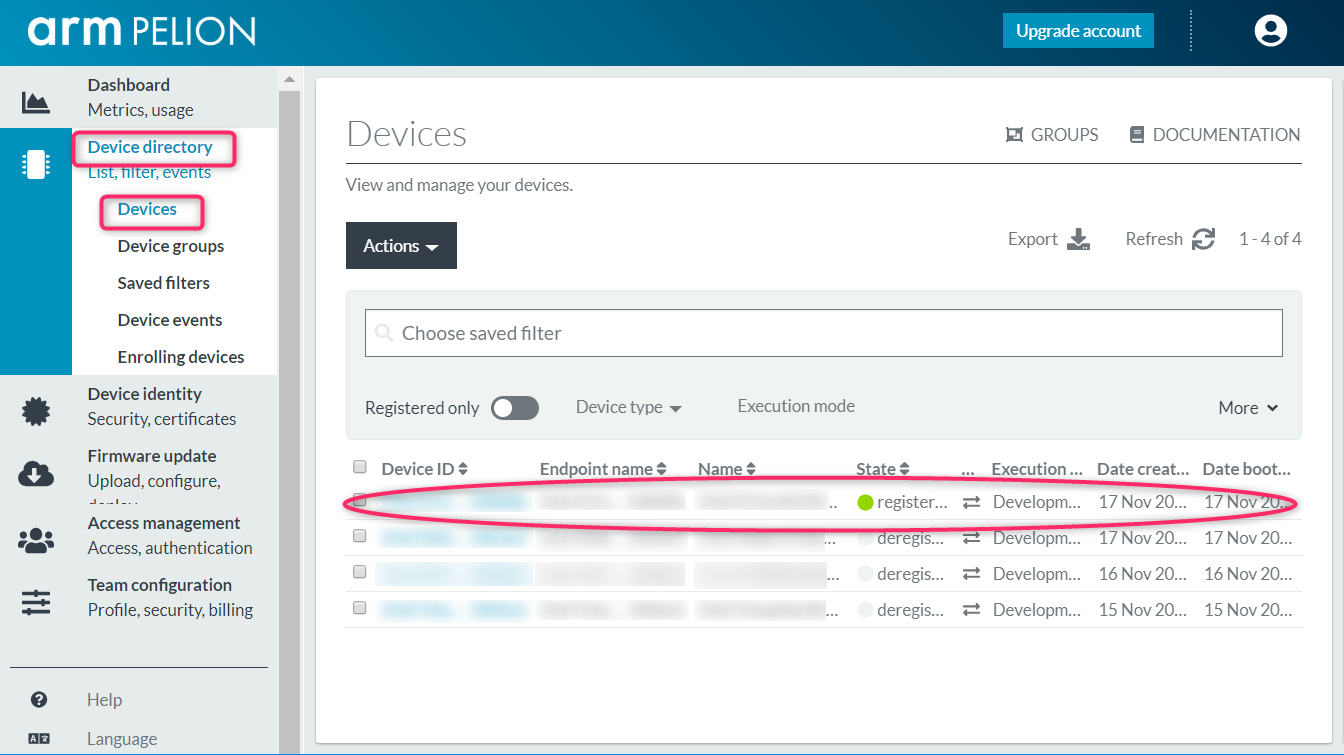
この状態で、 Pelion Device Management の Device directory > Devices を開くと、登録したデバイスが registered という Status で表示されていれば成功です。
これで、 Raspberry Pi の準備が整いました!
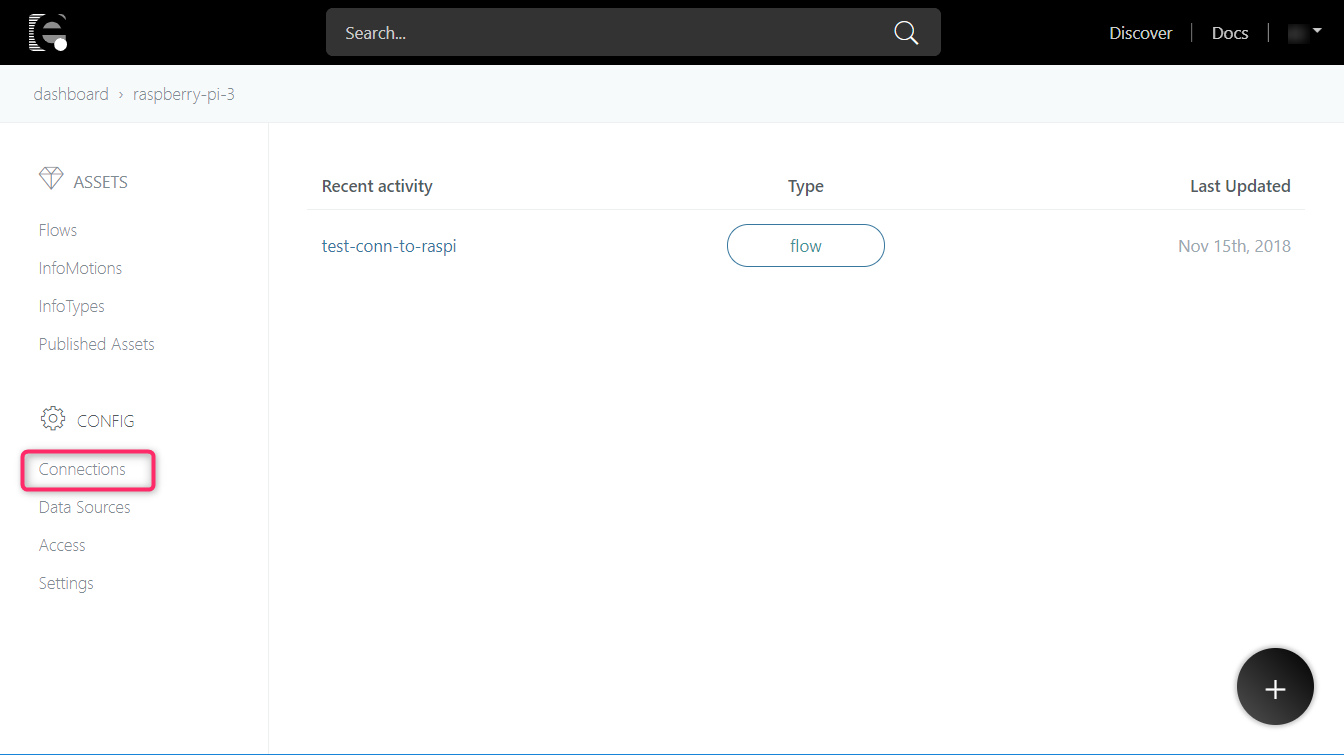
enebular で Connection を作成する
つぎに、 enebular の設定に移ります。Pelion Device Management(mbed cloud) と接続する Connection を作成しましょう。
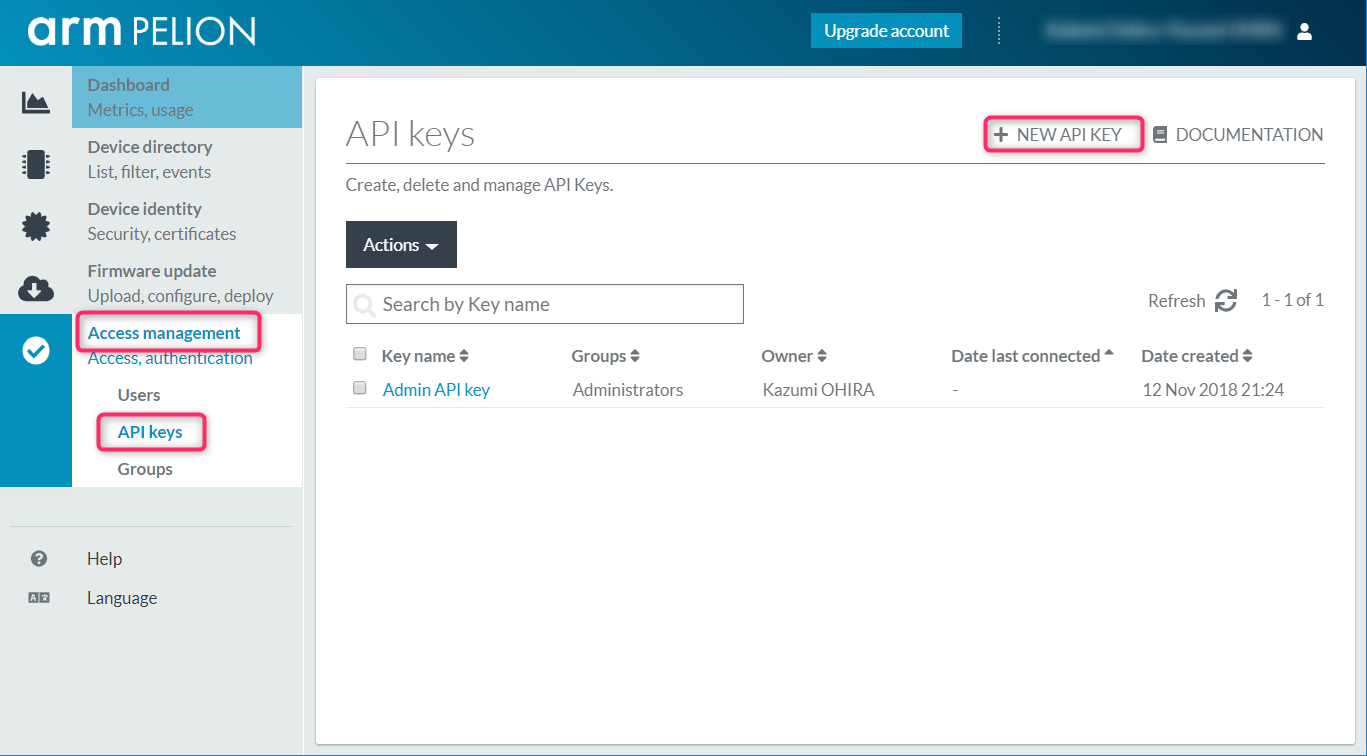
- Pelion Device Management ポータルで、 Access management > API keys を開き、 + NEW API KEY をクリックする
-
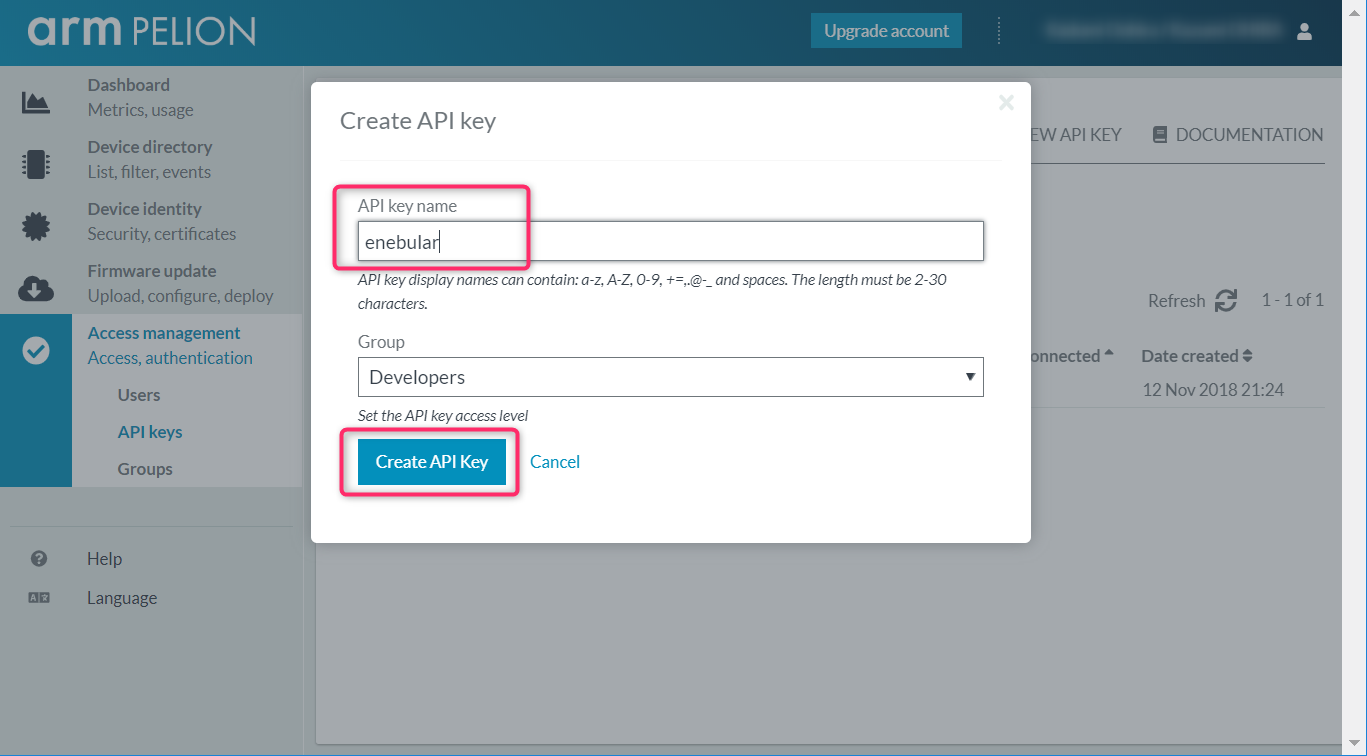
API key name に任意の名前を入力し、 Crate API Key ボタンをクリックする
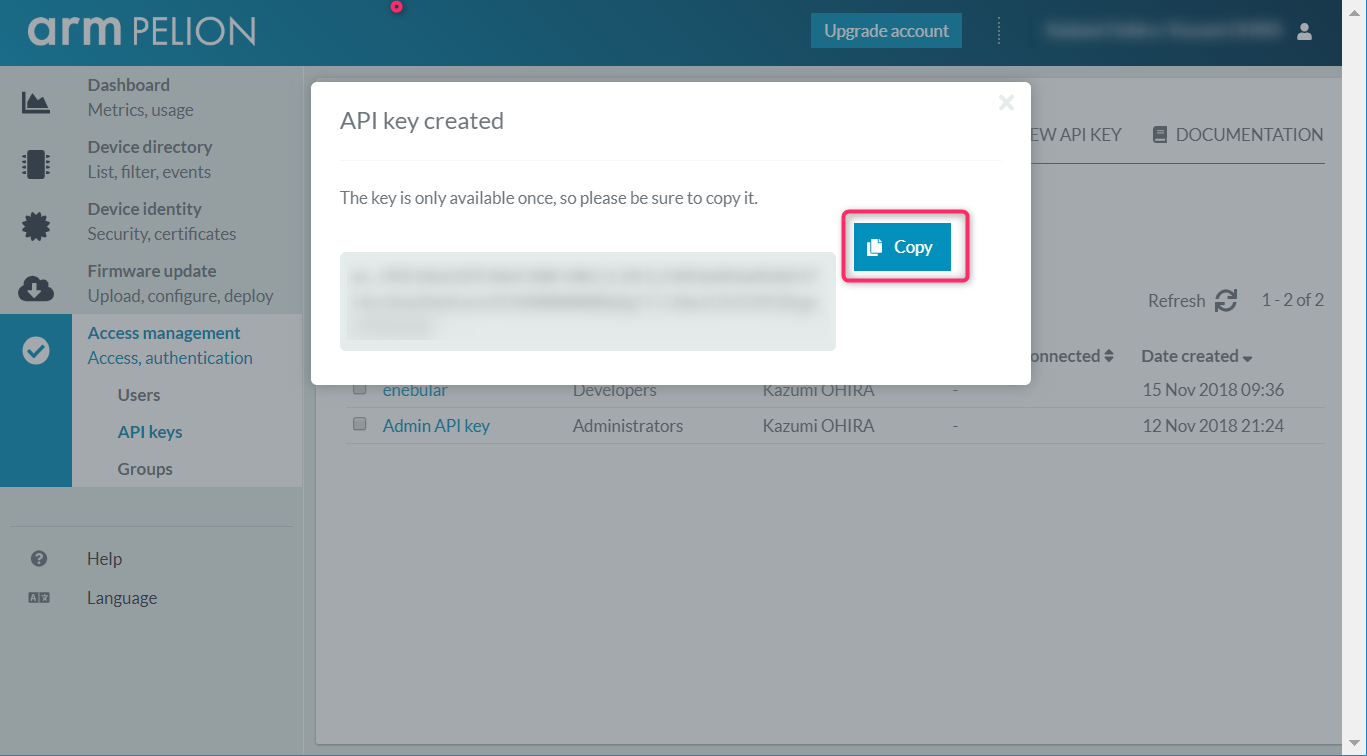
- 表示された API キーをコピーする
- enebular のポータルで、プロジェクトを作成する
-
Mbed を選択し、 Connection Name に任意の名前を、 MBED API Key に先ほどコピーしたキー文字列を張り付け、 Save ボタンをクリックする
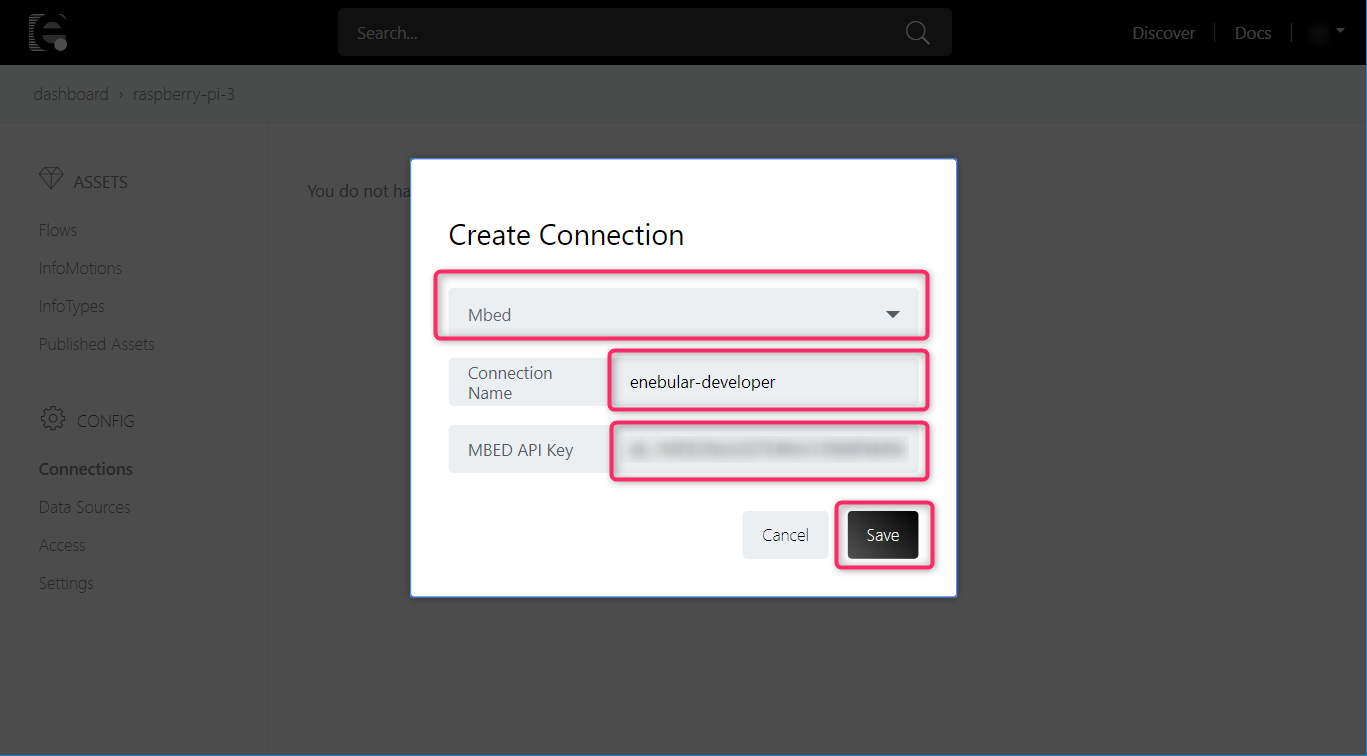
これで、 Pelion Device Management (mbed cloud) を利用する Connection 野設定ができました。
enebular で作成したフローを Pelion Device Management 経由で Raspberry Pi にデプロイする
それではいよいよ、 enebular で作成したフローを、 Pelion Device Management 経由で Raspberry Pi にデプロイしてみましょう!下記ドキュメントを参考に進めます。
- 先ほど作成したプロジェクトで、新規フローを作成する
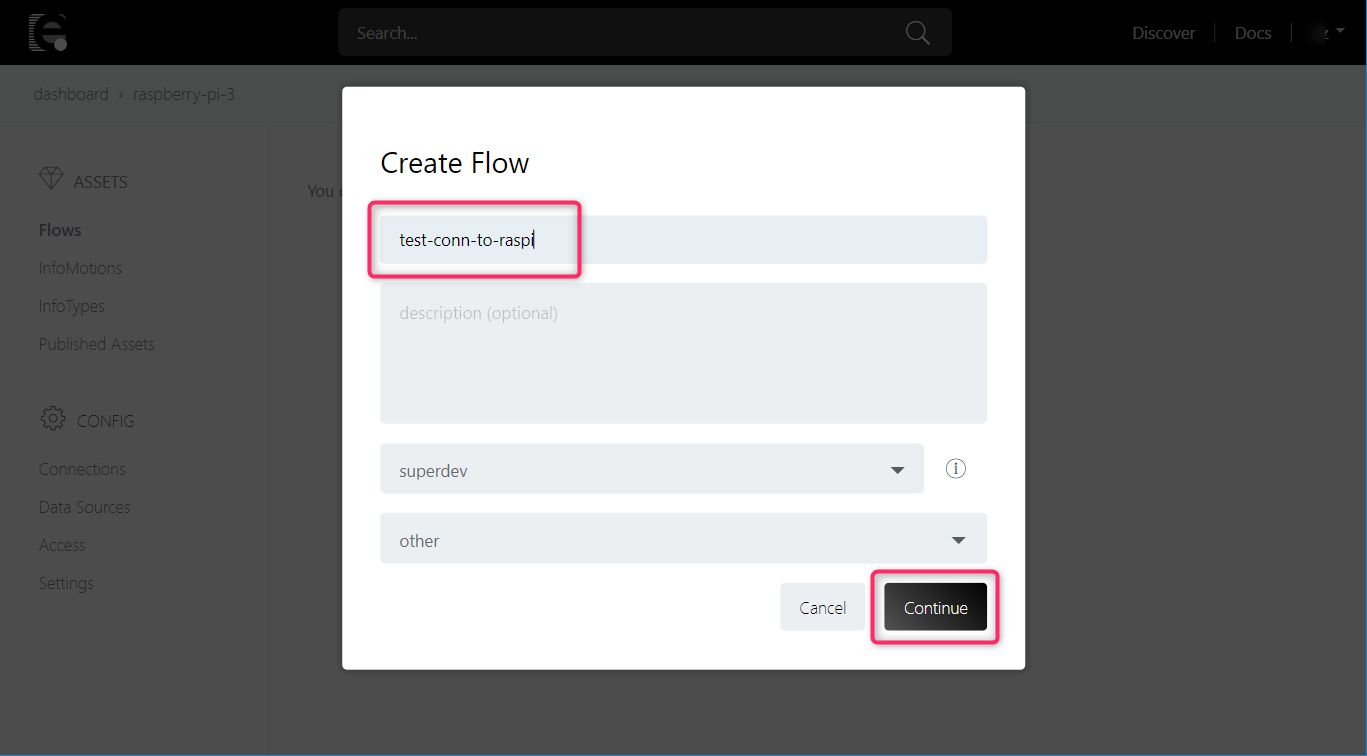
- 任意のフローを作成し、 Deploy しておく
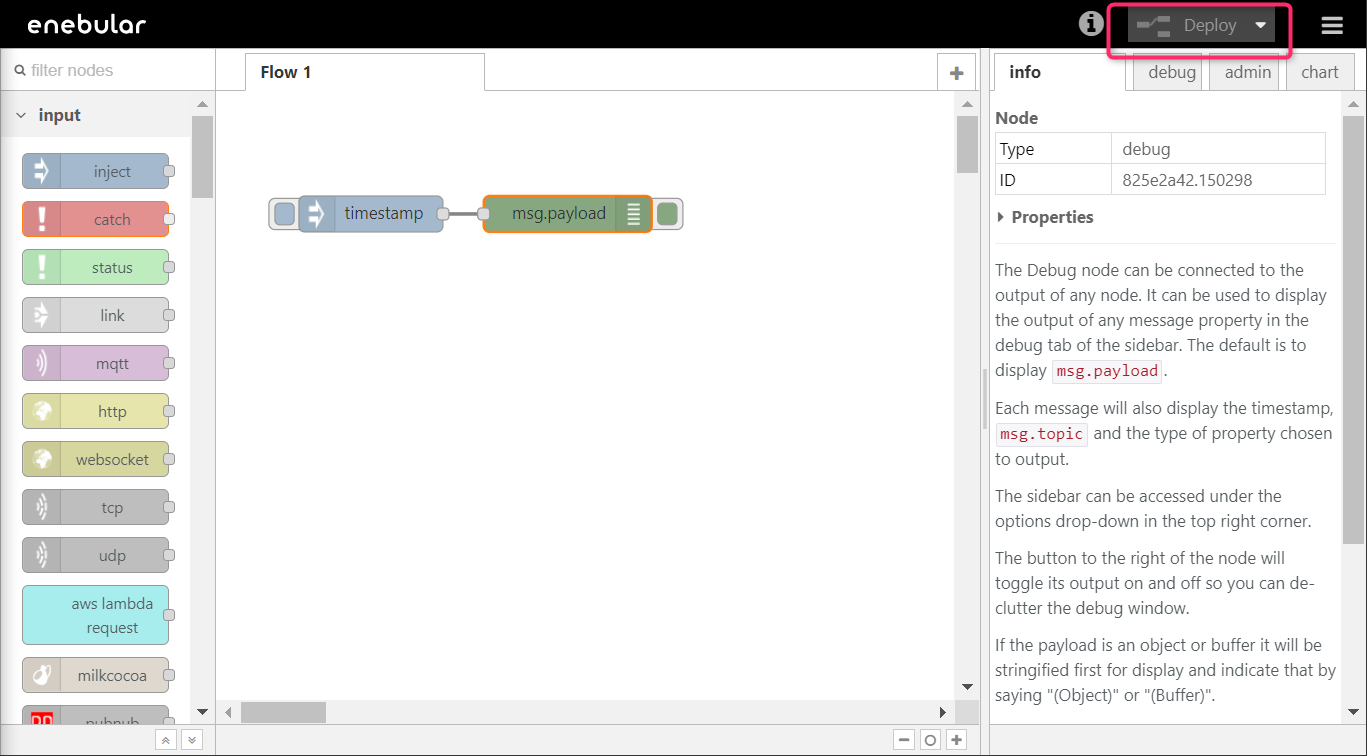
-
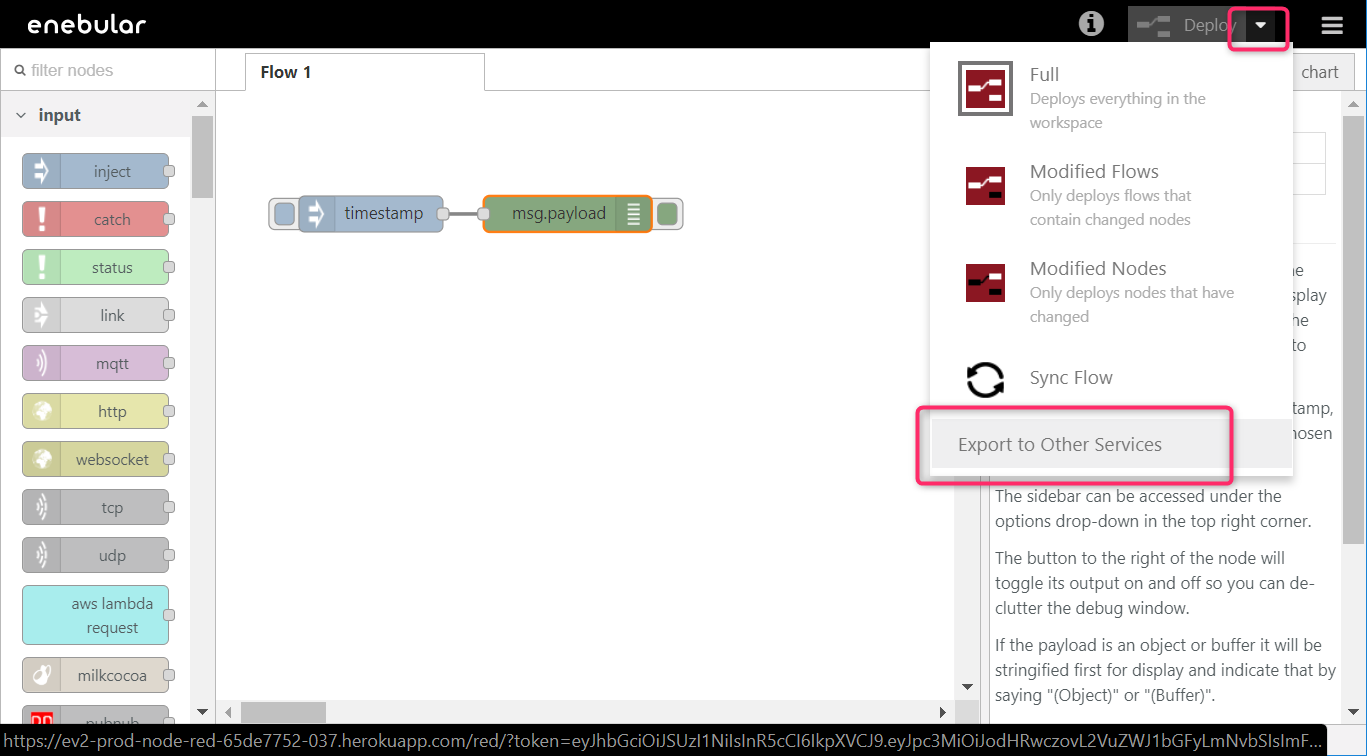
Deploy ボタンの横の下矢印▼から Export to Other Services をクリックする
-
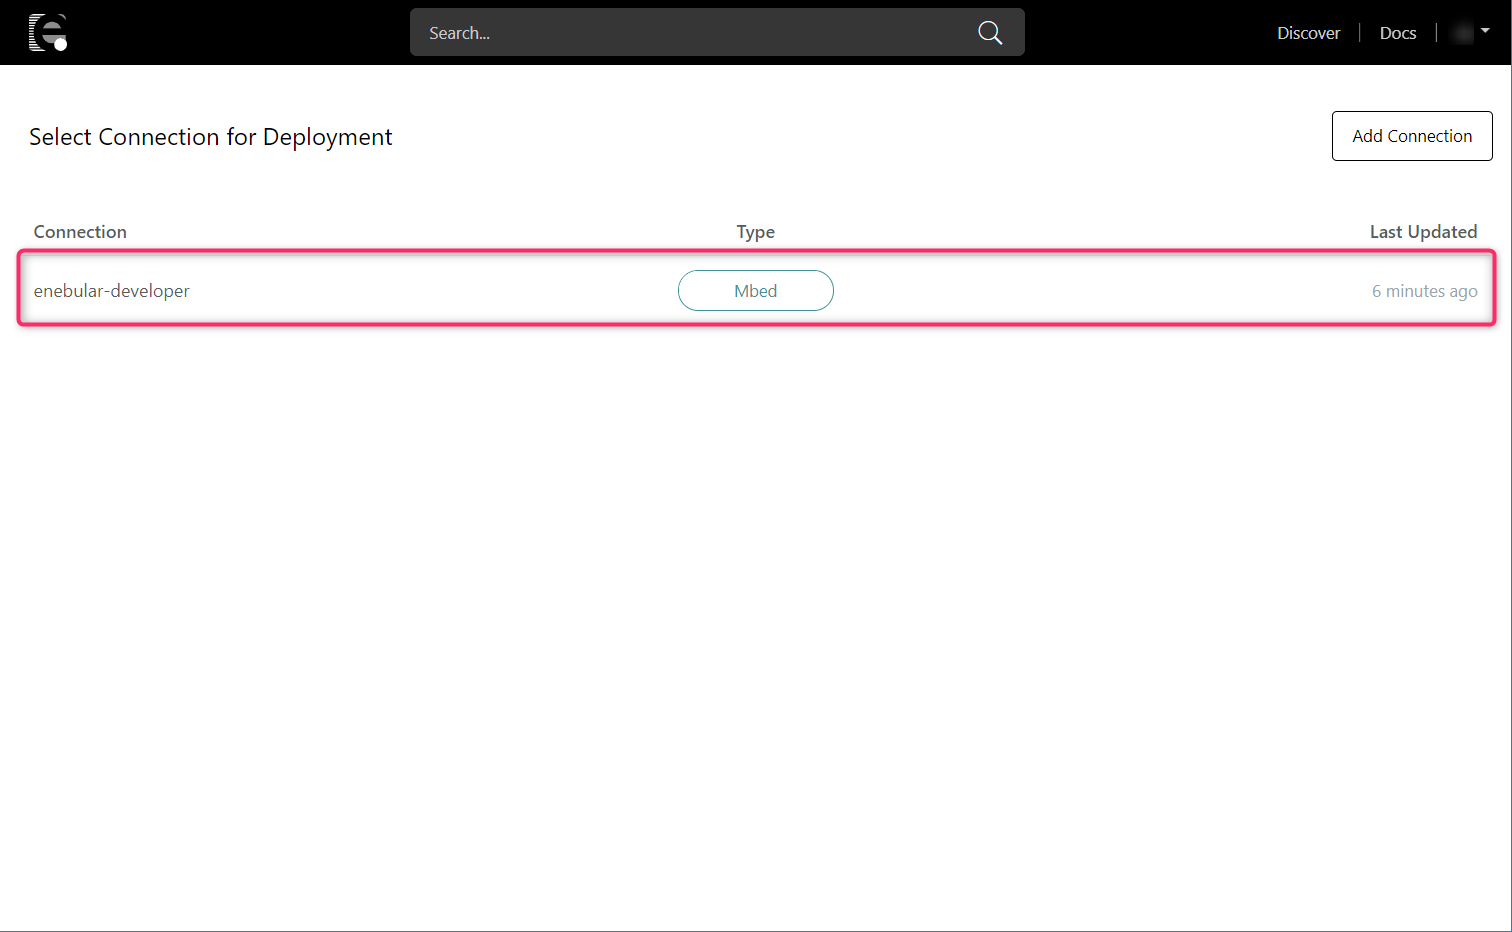
Connection を選択する画面が開くので、先ほど作成した Connection を選択する
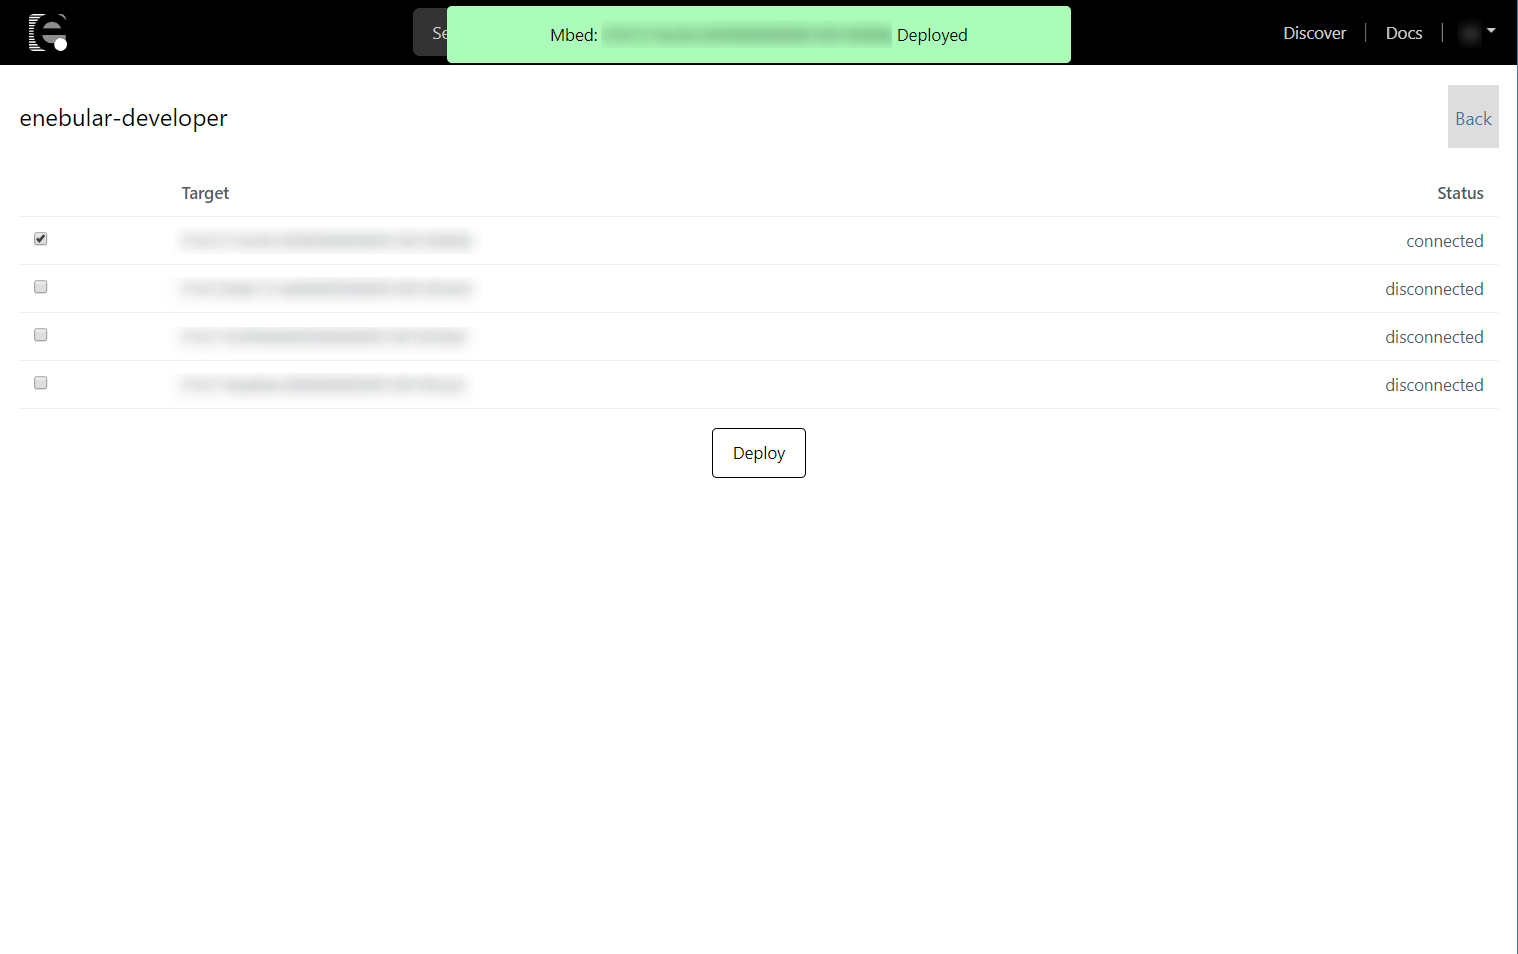
- 対象の _Target_ の Status が connected になっていることを確認し、チェックを付け、 Deploy ボタンをクリックする

- デプロイされたメッセージが表示されたら、Raspberry Pi でも確認してみましょう。
Raspberry Pi で下記コマンドを実行します。
# enebular-agent-enebular サービスのログを表示する
sudo journalctl -ex -u enebular-agent-enebular.service
enebular-agent-enebular サービスのログに、以下のようにデプロイしたフローが表示されていれば成功です!
Nov 17 22:57:16 raspberrypi node[1417]: localhost enebular-agent[1417]: info: Updating flow module=node-red, context=internal
Nov 17 22:57:16 raspberrypi node[1417]: localhost enebular-agent[1417]: info: Downloading flow: https://uhuru-enebular-agent-manager.s3.ap-northeast-1.amazonaws.com/production/8d49cdf9-a7f3-4882-9fb0-d4a42a50
Nov 17 22:57:17 raspberrypi node[1417]: localhost enebular-agent[1417]: info: Updating package { flow:
                                           [ { id: 'c60b379f.b5d768', type: 'tab', label: 'Flow 1' },
                                             { id: '69ae8d66.28d3c4',
                                               type: 'inject',
                                               z: 'c60b379f.b5d768',
                                               name: '',
                                               topic: '',
                                               payload: '',
                                               payloadType: 'date',
                                               repeat: '',
                                               crontab: '',
                                               once: false,
                                               x: 129.09896850585938,
                                               y: 102.484375,
                                               wires: [Array] },
                                             { id: '825e2a42.150298',
                                               type: 'debug',
                                               z: 'c60b379f.b5d768',
                                               name: '',
                                               active: true,
                                               console: 'false',
                                               complete: 'false',
                                               x: 293.0963439941406,
                                               y: 102.44270324707031,
                                               wires: [] } ],
                                          cred: {},
                                          packages: {} } module=node-red, context=internal
Nov 17 22:57:18 raspberrypi node[1417]: localhost enebular-agent[1417]: info: Agent state change: unauthenticated => registered context=internal
Nov 17 22:57:18 raspberrypi node[1417]: localhost enebular-agent[1417]: info: Starting authentication... module=device-auth, context=internal
以上です。これで Raspberry Pi のフロー開発も楽になりますね!
Epilogue - おわりに
無事デプロイできてほっとしております。
実は、当初、mbed cloud に Raspberry Pi を登録せねば!と張り切って Yocto で証明書入りのOSイメージを作成して… とやってみたのですが、登録できてもOSがブートせず「???」。meetup の運営スタッフの皆さまにアドバイスをもらい、 agent を使えばいいことを教えてもらってようやくできたのでした!