環境構築
作業フォルダにて
$ npx create-react-app chatbot-demo
$ cd chatbot-demo
$ code .  #chatbot-demoをvscodeを開いている
vscode上にて
$ npm start
material-uiをインストールする(ReactのUIフレームワーク)
npm install --save @material-ui/core @material-ui/icons @material-ui/system
インストール後以下が追加される
{
  "name": "chatbot-demo",
  "version": "0.1.0",
  "private": true,
  "dependencies": {
    "@material-ui/core": "^4.11.3",    //追加
    "@material-ui/icons": "^4.11.2",   //追加
    "@material-ui/system": "^4.11.3",  //追加
    "@testing-library/jest-dom": "^5.11.9",
    "@testing-library/react": "^11.2.5",
    "@testing-library/user-event": "^12.8.3",
    "react": "^17.0.2",
    "react-dom": "^17.0.2",
    "react-scripts": "4.0.3",
    "web-vitals": "^1.1.1"
  },
Robotoフォントと、フォントアイコンを設定
.
.
-->
<!-- 追加 -->
<link rel="stylesheet" href="https://fonts.googleapis.com/css?family=Roboto:300,400,500,700&display=swap" />
<link rel="stylesheet" href="https://fonts.googleapis.com/icon?family=Material+Icons" />
<!-- 追加 -->
<title>React App</title>
.
.
html:public/index.htmlのコメントアウトしている部分は必要ないため消す。
Firebase
Firebaseはgoogleが提供するアプリのプラットフォーム
下記に移動
https://console.firebase.google.com/
①プロジェクト名を記載し、国を選択し作成
②左上の歯車を押し、GCPにasia-northeast1を選択
③マイアプリの>を押し、アプリ名を記載しfairebase Hostingを設定する
④Cloud Firestoreに移動し使用を始める
その後、作業フォルダのターミナルにて下記実行
$ npm install -g firebase-tools
(上記はPCの環境全体にインストールするため、一度でも行っていれば無視)
$ npm install --save firebase
下記が追加されているのを確認
"firebase": "^8.3.1"
作業フォルダのターミナルにて下記実行
$ firebase login
(yes,noはエンターキーで進み、許可をブラウザ上で求められるため、許可する)
$ firebase init

下記選択(スペースキーで選択)
Firestore: Deploy rules and create indexes for Firestore
Functions: Configure and deploy Cloud Functions
Hosting: Configure and deploy Firebase Hosting sites

Use an existing projectを選択

プロジェクト名を選択

What file should be used for Firestore Rules? enterを押す

What file should be used for Firestore indexes? enterを押す

What language would you like to use to write Cloud Functions? 記載したい方 typeにした

Do you want to use ESLint to catch probable bugs and enforce style? enterを押す

Do you want to install dependencies with npm now? enterを押す

What do you want to use as your public directory? buildと記載

Configure as a single-page app (rewrite all urls to /index.html)? Yを押す

Set up automatic builds and deploys with GitHub?  enterを押す
下記に変更
allow read;
allow write: if request.auth.uid != null;
$ npm run build
1行目をコメントアウトする
// import * as functions from "firebase-functions"; コメントアウトする

// // Start writing Firebase Functions
// // https://firebase.google.com/docs/functions/typescript
.
.
package.jsonの「"react-app"」の部分だけ削除します。
  "eslintConfig": {
    "extends": [
      "react-app"  ←ここだけ
      "react-app/jest"
    ]
  }
 "functions": {
    "predeploy": [
      "npm --prefix \"$RESOURCE_DIR\" run lint", 削除
      "npm --prefix \"$RESOURCE_DIR\" run build" 削除
    ]
  },
$ cd functions
$ npm run build
もとの作業フォルダに戻って
$ firebase deploy
stateとモデルの設計
App.js⇒App.jsxにする
App.jsxをクラスコンポーネントにして、中身をdivタグのみにする
(ロゴのインポートも削除)
function App() {
  return (
.
.
  );
}

export default App;

⬇

export default class App extends React.Component {
  render() {
    return (
      <div>
      </div>
    );
  }
}
stateを追記
export default class App extends React.Component {
  constructor(props) {
    super(props);
    this.state = {
      answers: [],
      chats: [],
      currentID: "init",
      dataset: {},
      open: false
    }
  }
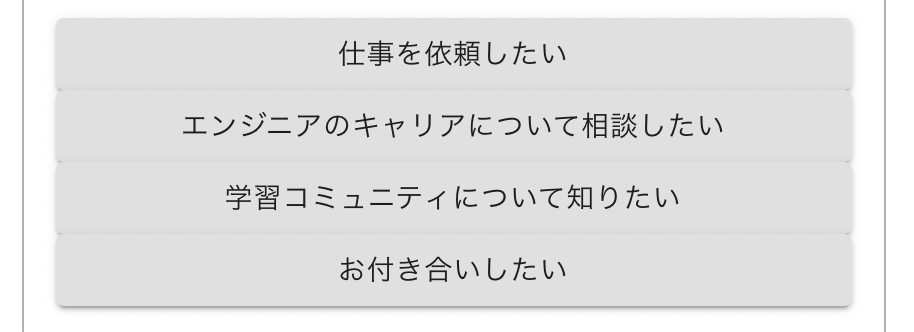
srcフォルダにdataset.jsを作成し、以下要領でデータを作成する。
const defaultDataset = {
    "init": {
        answers: [
            {content: "仕事を依頼したい", nextId: "job_offer"},
            {content: "エンジニアのキャリアについて相談したい", nextId: "consultant"},
            {content: "学習コミュニティについて知りたい", nextId: "community"},
            {content: "お付き合いしたい", nextId: "dating"},
        ],
        question: "こんにちは!🐯トラハックへのご用件はなんでしょうか?",
    },
.
.
export default defaultDataset
App.jsで上記をインポートし、stateのdatasetの中に入れる
import React from 'react';
import './App.css';
import defaultDataset from './dataset'; //追記
.
.

    super(props);
      .
      .
      dataset: defaultDataset, //変更
      .
      .
src/assets/stylesフォルダを作成し、index.cssを移動、style.cssを作成
import './assets/styles/index.css'; //変更
import './App.css'; //削除
import './assets/styles/style.css'; //追加
returnに以下を記載
    return (
      <div>
        <section className="c-section">
          <div className="c-box">
            {this.state.currentID}
          </div>
        </section>
      </div>
    );
関数コンポーネント
    return (
      <div>
        <section className="c-section">
          <div className="c-box">
            <AnswersList /> //追記
          </div>
        </section>
      </div>
    );
AnswersList.jsxをsrc/conponents内に追加
import React from 'react'

const AnswersList = () => {
    return(
        <></>
    )
}

export default AnswersList
エントリーポイントを作成したいため、src/conponents内にindex.jsを追加
export {default as AnswersList} from './AnswersList'
import {AnswersList} from "./components/index"
Answer.jsxを追加
import {Answer} from './index' //追加
.
.

  return(
    <div className="c-grid__answer">
      <Answer />
      <Answer />
      <Answer />
      <Answer />
    </div>
  )
import React from 'react';

const Answer = () => {}

export default Answer
export {default as AnswersList} from './AnswersList'
export {default as Answer} from './Answer' //追加
material ui buttonで検索し、ボタンを追加する
import React from 'react';
import { makeStyles } from '@material-ui/core/styles';
import Button from '@material-ui/core/Button';

const useStyles = makeStyles((theme) => ({
  root: {
  },
}));

const Answer = () => {
  // const classes = useStyles();

  return(
    <Button variant="contained">Default</Button>
  )
}

export default Answer
ボタン内の文字をpropsで受け取る
const Answer = (props) => {
  // const classes = useStyles();

  return(
    <Button variant="contained">
      {props.content}
    </Button>
  )
}
    <div className="c-grid__answer">
      <Answer content={"hoge"}/>
      <Answer content={"huga"} />
      <Answer content={"foo"} />
      <Answer content={"bar"} />
    </div>
実際のdatasetを送る
const AnswersList = (props) => { //propsを追記
initAnswer = () => {
    const initDataset = this.state.dataset[this.state.currentID];
    const initAnswers = initDataset.answers;

    this.setState({
      answers: initAnswers
    })
  }
  componentDidMount() {
    this.initAnswer()
  }

  render() {
           //.
          <div className="c-box">
            <AnswersList answers={this.state.answers}/>
          </div>
           //.
const AnswersList = (props) => {
  return(
    <div className="c-grid__answer">
      {props.answers.map((value,index) => {
        return <Answer content={value.content} key={index.toString()} />
      })}
    </div>
  )
}
条件分岐、コールバック関数のバインド
Chats.jsx,Chat.jsxをsrc/conponents内に追加
import React from 'react'

const Chats = () => {

}

export default Chats
import React from 'react'

const Chat = () => {

}

export default Chat
export {default as Chats} from './Chats'
export {default as Chat} from './Chat'
import {AnswersList, Chats} from "./components/index" //追加

<div className="c-box">
  <Chats /> //追加
  <AnswersList answers={this.state.answers} />
</div>
chats.jsxにmaterial ui listのAlign list itemsを適応する
import React from 'react'
import { makeStyles } from '@material-ui/core/styles';
import List from '@material-ui/core/List';
import ListItem from '@material-ui/core/ListItem';
import Divider from '@material-ui/core/Divider';
import ListItemText from '@material-ui/core/ListItemText';
import ListItemAvatar from '@material-ui/core/ListItemAvatar';
import Avatar from '@material-ui/core/Avatar';
import Typography from '@material-ui/core/Typography';

const useStyles = makeStyles((theme) => ({
  root: {
    width: '100%',
    maxWidth: '36ch',
    backgroundColor: theme.palette.background.paper,
  },
  inline: {
    display: 'inline',
  },
}));

const Chats = () => {
  const classes = useStyles();
  return (
    <List className={classes.root}>
      <ListItem alignItems="flex-start">
        <ListItemAvatar>
          <Avatar alt="Remy Sharp" src="/static/images/avatar/1.jpg" />
        </ListItemAvatar>
        <ListItemText
          primary="Brunch this weekend?"
          secondary={
            <React.Fragment>
              <Typography
                component="span"
                variant="body2"
                className={classes.inline}
                color="textPrimary"
              >
                Ali Connors
              </Typography>
              {" — I'll be in your neighborhood doing errands this…"}
            </React.Fragment>
          }
        />
      </ListItem>
    </List>
  )

}

export default Chats
listitemはchat.jsxで使用するため、いらないものを削除しながら分ける
import React from 'react'
import { makeStyles } from '@material-ui/core/styles';
import List from '@material-ui/core/List';
import {Chat} from "./index";

const useStyles = makeStyles((theme) => ({
  root: {
    width: '100%',
    maxWidth: '36ch',
    backgroundColor: theme.palette.background.paper,
  },
}));

const Chats = () => {
  const classes = useStyles();
  return (
    <List className={classes.root}>
      <Chat />
      <Chat />
      <Chat />
    </List>
  )
}

export default Chats
import React from 'react'
import ListItem from '@material-ui/core/ListItem';
import ListItemAvatar from '@material-ui/core/ListItemAvatar';
import Avatar from '@material-ui/core/Avatar';

const Chat = () => {
  return (
    <ListItem>
      <ListItemAvatar>
        <Avatar alt="icon" src="/static/images/avatar/1.jpg" />
      </ListItemAvatar>
      <div className="p-chat__bubble">ダミーテキスト</div>
    </ListItem>
  )
}

export default Chat
chatsに初期状態を渡す
  initChats = () => {
    const initDataset = this.state.dataset[this.state.currentID];
    const chat = {
      text: initDataset.question,
      type: 'question'
    }

    const chats = this.state.chats
    chats.push(chat)

    this.setState({
      chats: chats
    })
  }

  componentDidMount() {
    this.initChats();
    this.initAnswer();
  }
const Chats = (props) => {
  const classes = useStyles();
  return (
    <List className={classes.root}>
      {props.chats.map((chat, index) => {
        return <Chat text={chat.text} type={chat.type} key={index.toString()} />
      })}
    </List>
  )
}
chatで受け取る
const Chat = (props) => {
  const isQuestion = (props.type === 'question');
  const classes = isQuestion ? 'p-chat__row' : 'p-chat__reverse'
  return (
    <ListItem className={classes}>
      <ListItemAvatar>
        <Avatar alt="icon" src="/static/images/avatar/1.jpg" />
      </ListItemAvatar>
      <div className="p-chat__bubble">{props.text}</div>
    </ListItem>
  )
}
return内の条件分岐の書き方
ifのみ
{(list.length === 0) && (
  <Loading/>
)}
if else
{ifQuestion ? (
  <Avatar src={Torahack} />
) : (
  <Avatar src={NoProfile} />
)}
上記を用いて、chat画像を変更する
      <ListItemAvatar>
        {isQuestion ? (
          <Avatar alt="icon" src={Torahack} />
        ) : (
          <Avatar alt="icon" src={NoProfile} />
        )}

      </ListItemAvatar>
対話を実装する
コールバック関数にはbind()を用いる
(renderの度に、新しく関数が生成されるのを阻止するため)
export default class App extends React.Component {
  constructor(props) {
    .
    .
    }
    this.selectAnswer = this.selectAnswer.bind(this) //bind()処理
  }
  .
  .
  displayNextQuestion = (nextQuestionId) => {
    const chats = this.state.chats
    chats.push({
      text: this.state.dataset[nextQuestionId].question,
      type: 'question'
    })

    this.setState({
      answers: this.state.dataset[nextQuestionId].answers,
      chats: chats,
      currentID: nextQuestionId
    })
  }


  selectAnswer = (selectedAnswer, nextQuestionId) => {
    switch(true) {
      case (nextQuestionId === 'init'):
        this.displayNextQuestion(nextQuestionId)
        break;
      default:
        const chats = this.state.chats
        chats.push({
          text: selectedAnswer,
          type: 'answer'
        })

        this.setState({
          chats: chats
        })

        this.displayNextQuestion(nextQuestionId)
        break;
    }
  }
  componentDidMount() {
    const initAnswer = ""
    this.selectAnswer(initAnswer, this.state.currentID)
  }
.
.
          <div className="c-box">
            <Chats chats={this.state.chats}/>
            <AnswersList answers={this.state.answers} select={this.selectAnswer} />
          </div>
return <Answer content={value.content} nextId={value.nextId} key={index.toString()} select={props.select} />
  return(
    <Button variant="contained" color="primary" onClick={() => props.select(props.content, props.nextId)}>
      {props.content}
    </Button>
  )
Material-UIのカスタマイズ
Hook APIの使い方
①インストール
$ npm install --save @material-ui/style
②import
import {createStyles, makeStyles} from "@material-ui/core/styles";
③関数を定義
const useStyles = makeStyles(() =>
  createStyles({
    "root": {
      padding: 0
    }
  }),
);
記述ルール
①json形式
②キャメルケース(javascriptはハイフンを使えないため)
③数値はそのまま
④クォーテーションで文字列を囲む
適用方法
①コンポーネント内で宣言
②オブジェクト型として使える
const Answer = (props) => {
  const classes = useStyles();
  return(
    <Button className={classes.button}>
      {props.answer.content}
    <Button>
  );
};
ライフサイクルの活用
3種類のライフサイクル
Mounting:コンポーネントが配置される瞬間
constructor()⇒render()⇒componentDidMount()
Updating:コンポーネントが変更される瞬間
render()⇒componentDidUpdate()
Unmounting:コンポーネントが破棄される瞬間
componentWillUnmount()
自動スクロールの実装
idの付与
<List className={classes.chats} id={"scroll-area"}>
componentDidUpdateを記載
  componentDidUpdate(prevProps, prevState, snapshot) {
    const scrollArea = document.getElementById('scroll-area')
    if (scrollArea) {
      scrollArea.scrollTop = scrollArea.scrollHeight
    }
  }
setTimeout()で遅延表示
selectAnswer = (selectedAnswer, nextQuestionId) => {
    switch(true) {
      case (nextQuestionId === 'init'):
        setTimeout(() => this.displayNextQuestion(nextQuestionId),500)
        break;
      default:
        const chats = this.state.chats
        chats.push({
          text: selectedAnswer,
          type: 'answer'
        })

        this.setState({
          chats: chats
        })

        setTimeout(() => this.displayNextQuestion(nextQuestionId), 1000)
        break;
    }
  }
別urlに飛ばす
      case (/^https:*/.test(nextQuestionId)):
        const a = document.createElement('a');
        a.href = nextQuestionId;
        a.target = '_brank';
        a.click();
        break
問い合わせ用モーダル
components/Forms/formDialog.jsxを作成
Material-UIのAlertsを一部用いて作成する。
.
.
export default class App extends React.Component {
  constructor(props) {
    super(props);
    this.state = {
    .
    .
    }
    this.selectAnswer = this.selectAnswer.bind(this)
    this.handleClose = this.handleClose.bind(this)
    this.handleClickOpen = this.handleClickOpen.bind(this)
  }
.
.
  handleClickOpen = () => {
    this.setState({ open: true });
  };

  handleClose = () => {
    this.setState({ open: false });
  };
.
.
          <div className="c-box">
            <Chats chats={this.state.chats}/>
            <AnswersList answers={this.state.answers} select={this.selectAnswer} />
            <FormDialog open={this.state.open} handleClose={this.handleClose} />
          </div>
.
.
import React from 'react'
import Button from '@material-ui/core/Button';
import Dialog from '@material-ui/core/Dialog';
import DialogActions from '@material-ui/core/DialogActions';
import DialogContent from '@material-ui/core/DialogContent';
import DialogContentText from '@material-ui/core/DialogContentText';
import DialogTitle from '@material-ui/core/DialogTitle';

export default class FormDialog extends React.Component {
  constructor(props) {
    super(props);
    }


  render() {
    return(
      <Dialog
        open={this.props.open}
        onClose={this.props.handleClose}
        aria-labelledby="alert-dialog-title"
        aria-describedby="alert-dialog-description"
      >
        <DialogTitle id="alert-dialog-title">{"Use Google's location service?"}</DialogTitle>
        <DialogContent>
          <DialogContentText id="alert-dialog-description">
            Let Google help apps determine location. This means sending anonymous location data to
            Google, even when no apps are running.
          </DialogContentText>
        </DialogContent>
        <DialogActions>
          <Button onClick={this.props.handleClose} color="primary">
            Disagree
          </Button>
          <Button onClick={this.props.handleClose} color="primary" autoFocus>
            Agree
          </Button>
        </DialogActions>
      </Dialog>
    )
  }
}
お問い合わせしたいを選択した際に、モーダルが表示されるようにする。
case (nextQuestionId === 'contact'):
        this.handleClickOpen();
        break;
TextInput.jsx作成(Material-UIのTextfiledを使用)
import React from 'react';
import TextField from '@material-ui/core/TextField';

const TextInput = (props) => {
  return(
    <TextField
      fullWidth={true}
      label={props.label}
      margin={"dense"}
      multiline={props.multiline}
      rows={props.rows}
      value={props.value}
      type={props.type}
      onChange={props.onChange}
    />
  )
}

export default TextInput
import React from 'react'
import Button from '@material-ui/core/Button';
import Dialog from '@material-ui/core/Dialog';
import DialogActions from '@material-ui/core/DialogActions';
import DialogContent from '@material-ui/core/DialogContent';
import DialogTitle from '@material-ui/core/DialogTitle';
import TextInput from './TextInput'

export default class FormDialog extends React.Component {
  constructor(props) {
    super(props);
    this.state = {
      name: "",
      email: "",
      description: ""
    }
    this.inputName = this.inputName.bind(this)
    this.inputEmail = this.inputEmail.bind(this)
    this.inputDescription = this.inputDescription.bind(this)
  }

  inputName = (event) => {
    this.setState({ name: event.target.value})
  }
  inputEmail = (event) => {
    this.setState({ email: event.target.value})
  }
  inputDescription = (event) => {
    this.setState({ description: event.target.value})
  }


  render() {
    return(
      <Dialog
        open={this.props.open}
        onClose={this.props.handleClose}
        aria-labelledby="alert-dialog-title"
        aria-describedby="alert-dialog-description"
      >
        <DialogTitle id="alert-dialog-title">お問い合わせ用フォーム</DialogTitle>
        <DialogContent>
          <TextInput
            label={"お名前(必須)"} multiline={false} rows={1} value={this.state.name} type={"text"} onChange={this.inputName}
          />
          <TextInput
            label={"メールアドレス(必須)"} multiline={false} rows={1} value={this.state.email} type={"email"} onChange={this.inputEmail}
          />
          <TextInput
            label={"お問い合わせ内容(必須)"} multiline={true} rows={5} value={this.state.description} type={"text"} onChange={this.inputDescription}
          />
        </DialogContent>
        <DialogActions>
          <Button onClick={this.props.handleClose} color="primary">
            Disagree
          </Button>
          <Button onClick={this.props.handleClose} color="primary" autoFocus>
            Agree
          </Button>
        </DialogActions>
      </Dialog>
    )
  }
}
slackへ問い合わせ内容を通知する
Incoming Webhook
https://test-fwz7429.slack.com/apps/new/A0F7XDUAZ--incoming-webhook-
  submitForm = () => {
    const name = this.state.name
    const email = this.state.email
    const description = this.state.description

    const payload = {
      text: "お問い合わせがありました\n" +
            "お名前:" + name + "\n" +
            "Email:" + email + "\n" +
            "問い合わせ内容:\n" + description
    }

    const url = "Incoming Webhookで出てきたurl"

    fetch(url, {
      method: 'POST',
      body: JSON.stringify(payload)
    }).then(() => {
      alert('送信が完了しました。追ってご連絡致します。')
      this.setState({
        name: "",
        email: "",
        description: ""
      })
      return this.props.handleClose()
    })
  }
.
.
          <Button onClick={this.submitForm} color="primary" autoFocus>
            送信する
          </Button>
Firebase Firestore(データベース)の利用
REST APIを作る
①dataset.jsをjsonファイルに変える
最後の,は使えないなど注意
②Cloud Functions でhttps関数の作成
import * as functions from 'firebase-functions';
import * as admin from "firebase-admin";
admin.initializeApp(); //adminの初期化
const db = admin.firestore(); //admin権限でfirestoreを操作するもの

//APIを叩くとレスポンスがかえってくるため、それを作成する
const sendResponse = (response: functions.Response, statusCode: number, body: any) => {
  response.send({
    statusCode,
    body: JSON.stringify(body)
  })
}

export const addDataset = functions.https.onRequest(async (req: any, res: any) => {
  if (req.method !== 'POST') { //POSTじゃないとエラーを返したい
    sendResponse(res, 405, {error: 'Invalid Request!'})
  } else {
    const dataset = req.body //渡すデータを定数化(dataset.json)
    for (const key of Object.keys(dataset)) { //rubyのeachメソッドっぽいことしてる(Object.keys(dataset).each do |key|)
      const data = dataset[key] //keyに紐づくvalueを取得
      await db.collection('questions').doc(key).set(data) //questionsフォルダのKeyドキュメントにdataが入っている
    }
    sendResponse(res, 200, {message: "successfully added dataset!"})
  }
})
③デプロイ
$ cd functions
$ npm run build
$ cd ../
$ firebase deploy
④curlコマンドでAPIを叩く
-X⇒メソッド指定 -H⇒データ形式指定 -d⇒渡すデータ指定(@をつけるとローカル)
Cloud FunctionsのURLを指定
$cd src
$curl -X POST -H "Content-Type: application/json" -d @dataset.json {firebaseのurl}
Firestoreを使う準備
src/firebase/config.jsを作成
firebaseの設定(プロジェクトを設定)をクリック
Firebase SDK snippet 構成を選択
コードをコピーして貼り付け
// For Firebase JS SDK v7.20.0 and later, measurementId is optional
const firebaseConfig = {
.
.

};

export default firebaseConfig
src/firebase/index.jsを作成
import firebase from 'firebase/app'
import 'firebase/firestore'
import firebaseConfig from "./config"

firebase.initializeApp(firebaseConfig)
export const db = firebase.firestore()
import {db} from './firebase/index'
  componentDidMount() {
    (async() => {
      const dataset = this.state.dataset;

      await db.collection('questions').get().then(snapshots => {
        snapshots.forEach(doc => {
          const id = doc.id;
          const data = doc.data();
          dataset[id] = data;
        })
      })

      this.initDataset(dataset);
      const initAnswer = "";
      this.selectAnswer(initAnswer, this.state.currentID);
    })()
React Hooks
useState()の使いかた 関数コンポーネントでstateを扱えるようにするもの
①import React, {useState} from 'react';
②const [state変数名, state変更関数名] = useState(state初期値);
③<input onclick={() => state変更関数名(値)
useEffectの使い方
useEffect(() => {
  Renderごとに呼ばれる処理
  return () => {
    アンマウント時に呼ばれる処理
  }
})

useEffect(() => { return() => {} } )
第二引数を与えれば、前回レンダーと今回レンダーで比較し
変更がある場合に、Callback関数を実行
※空の配列を渡すと、最初の1回のみ実行(componentDidMount)
useEffect(() => {
  Renderごとに呼ばれる処理
}, [])

useEffect(() => {}, [])
useCallback()を使うメリット
通常時:コンポーネント内で宣言したコールバック関数は、renderごとに生成される
使用時:コールバック関数の再生成を抑止=不変値化
(bind()と似た役割)
子コンポーネントにprops関数を渡す場合に使う
useCallback(() => {},[再描画の条件])
  const addChats = (chat) => {
    setChats(prevChats => {
      return [...prevChats, chat]
    })
  }