今回は、備忘録として、Spring Boot(Gradle)で作成したウェブアプリをHerokuにデプロイする方法を書きます。
準備
・Spring Bootで作ったプロジェクト
・Herokuアカウント
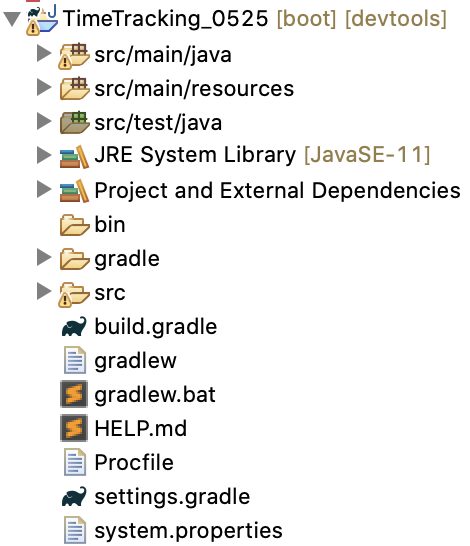
フォルダ
 これから作るファイルは、プロジェクトの直下に作成します。
やること
①build.gradleに追記
task stage(dependsOn: ['build', 'clean'])
build.mustRunAfter clean
②Procfileを作成
web: java -Dserver.port=$PORT $JAVA_OPTS -jar build/libs/SampleApp-0.0.1-SNAPSHOT.jar
SampleAppには作成したアプリの名前を入れてください。
③system.propertiesを作成
java.runtime.version=11
Javaのバージョンを記載してください。ここでは、11を指定しています。
ここまで準備を終えたら、下記コマンドを実行してください。
$ git add .
$ git commit -m "first commit."
$ heroku login
$ heroku create
$ git push heroku master
プロジェクトが無事にHerokuにデプロイされたはずです。
データベースを追加したい場合
こちらの記事が大変参考になりましたので、ご覧ください。
Heroku データベースの管理(ClearDB アドオンによる MySQL の利用)
ただし、この方法だけだと文字化けする可能性があります。
文字化けした場合、次のコマンドを叩いてみてください。
$ heroku config:add DATABASE_URL='mysql://ユーザー名:パスワード@DBのホスト:3306/データベース名?reconnect=true&characterEncoding=UTF-8&characterSetResults=UTF-8'
正しく設定できているか確認するために、次のコマンドを叩いてみてください。
heroku config --app アプリケーションID
以上です。最後まで読んでくださりありがとうございました。
参考
Deploying Gradle Apps on Heroku
Heroku データベースの管理(ClearDB アドオンによる MySQL の利用)
Heroku+ClearDBで文字化けしていた件