Flutter2個目の投稿です。
備忘録として使用する予定ですが
皆さんの解決策にもなれば幸いです。
今回はFlutterのボタンと画面遷移に関して記載します。
目次
-完成イメージ
-1.構成
-2.ボタンの種類
-3.画面遷移①_main.dartの整理と構成
-4.画面遷移②_遷移元画面の作成
-5.画面遷移③_遷移先画面の作成
-6.画面遷移④_ボタンの設定
-7.おまけ_画面遷移方法
-8.全体コード
-参考文献
-最後に
完成イメージ
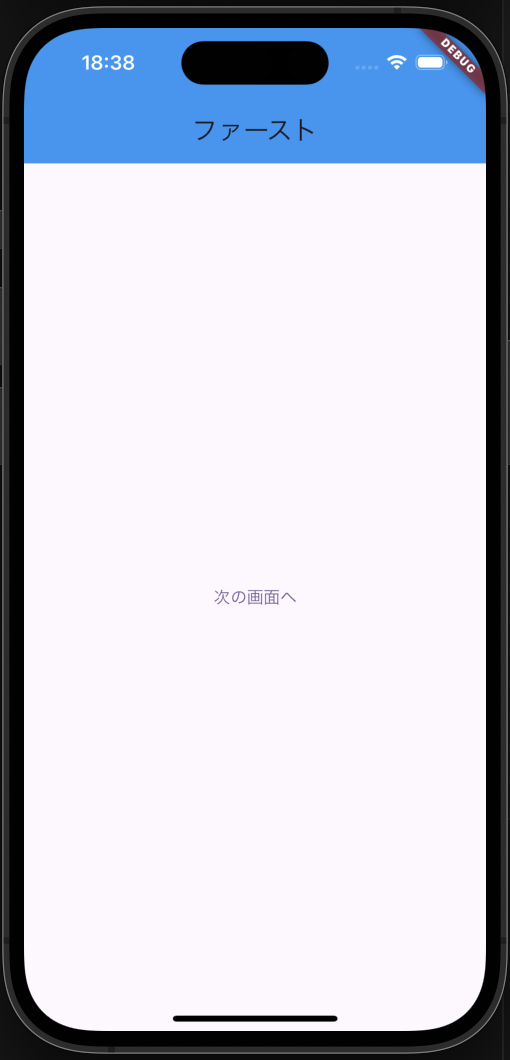
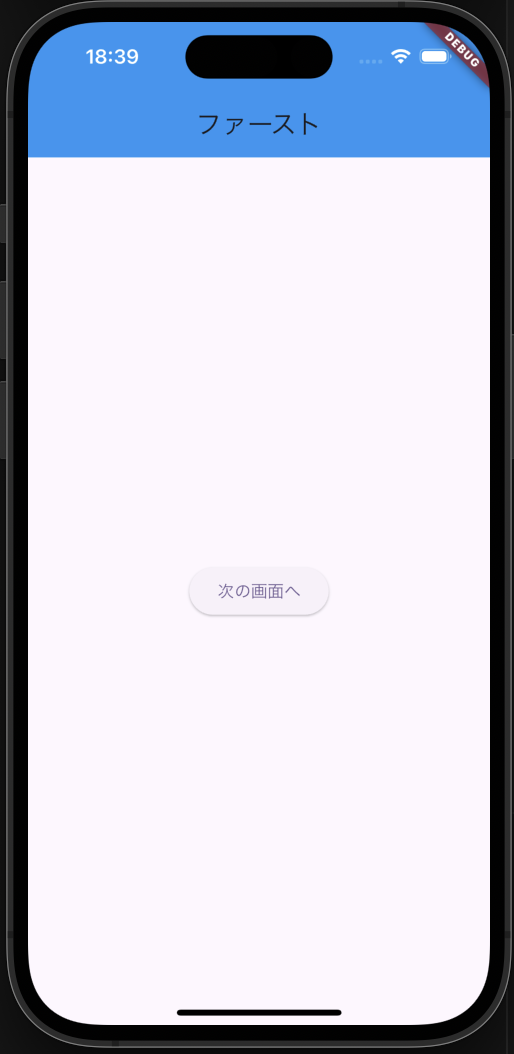
・遷移元画面と遷移先画面を作成し、ボタンを押すことで遷移が可能になる
・画面遷移先で×を押せば画面遷移元に戻ることもできる

1.構成
・ボタンを真ん中に配置(Center Widget)し
ボタンを押す(〜Button(onPressed: () {}) )ことで画面遷移する
・AppBarは分かりやすいように
タイトルを「ファースト」・「セカンド」としAppBarColorも赤と青で分ける
・遷移方法を下から上へ遷移するようにする
2.ボタンの種類
・Flutter公式サイトによると
ボタンの種類は「TextButton」「ElevatedButton」
「OutlinedButton」の3種類に分類される
・今回は下記の種類から「ElevatedButton」を採用する
◯TextButton
・外枠がない
・テキスト文のようなボタン

◯ElevatedButton
・外枠がある
・影と奥行きのあるボタン

◯OutlinedButton
・外枠がある
・影のないボタン

3.画面遷移①_main.dartの整理と構成
・main.dartの不要コードを削除する
※今回StatefulWidgetは全く使用しない
→動的な状態(いいねボタンを押すと色が変わるなど)のボタンがないため
・MyApp Class(アプリ全体)と
MyHomePage Class(ファースト画面)の2つで構成されている
・extendsは継承しているという意味
例:class MyHomePage extends StatelessWidget
→StatelessWidgetを継承してMyHomePage Classを作成している
import 'package:flutter/material.dart';

void main() {
  runApp(const MyApp());
}

class MyApp extends StatelessWidget {
  const MyApp({super.key});

  @override
  Widget build(BuildContext context) {
    return MaterialApp(
      title: 'Flutter Demo',
      theme: ThemeData(
        colorScheme: ColorScheme.fromSeed(seedColor: Colors.deepPurple),
        useMaterial3: true,
      ),
      home: MyHomePage(),
    );
  }
}

class MyHomePage extends StatelessWidget {
  @override
  Widget build(BuildContext context) {
    return Scaffold(
      appBar: AppBar(
        title: const Text('ファースト'),
        backgroundColor: Colors.blue,
      ),
      body: Center(
        child: ElevatedButton(
          onPressed: () {
            //ボタンを押した時に呼ばれるコードを書く
              ),
            );
          },
          child: const Text('次の画面へ'),
        ),
      ),
    );
  }
}
4.画面遷移②_遷移元画面の作成
・新しいプロジェクトを作成する
Android Studio=main.dartを右クリック→New→dart.file→first_pageという名前で作成
VScode =libを右クリック→新しいファイル→first_page.dartという名前で作成
※Android Studioではファイル名に.dartが不要だがVScodeは必要
・main.dartのコード内のMyHomePageをFirstPageに変更
・FirstPage Classを切り取りfirst_page.dartへ移行
・first_page.dartに
import 'package:flutter/material.dart'; を記載
※dartにある基本Widgetをインポートした
・main.dartに
import 'package:introduction2_screen_transition/first_page.dart'; を記載
※main.dartがFirstPageを使用できるようになった
import 'package:flutter/material.dart';
import 'package:introduction2_screen_transition/first_page.dart';

void main() {
  runApp(const MyApp());
}

class MyApp extends StatelessWidget {
  const MyApp({super.key});

  @override
  Widget build(BuildContext context) {
    return MaterialApp(
      title: 'Flutter Demo',
      theme: ThemeData(
        colorScheme: ColorScheme.fromSeed(seedColor: Colors.deepPurple),
        useMaterial3: true,
      ),
      home: FirstPage(),
    );
  }
}
import 'package:flutter/material.dart';

class FirstPage extends StatelessWidget {
  @override
  Widget build(BuildContext context) {
    return Scaffold(
      appBar: AppBar(
        title: const Text('ファースト'),
        backgroundColor: Colors.blue,
      ),
      body: Center(
        child: ElevatedButton(
          onPressed: () {
            //ボタンを押した時に呼ばれるコードを書く
              ),
            );
          },
          child: const Text('次の画面へ'),
        ),
      ),
    );
  }
}
5.画面遷移③_遷移先画面の作成
・新しいプロジェクトを作成する
Android Studio=main.dartを右クリック→New→dart.file
→second_pageという名前で作成
VScode =libを右クリック→新しいファイル
→second_page.dartという名前で作成
※Android Studioではファイル名に.dartが不要だがVScodeは必要
・FirstPage Classをコピーしてsecond_page.dartへ移行
・second_page.dartに
import 'package:flutter/material.dart'; を記載
※dartにある基本Widgetをインポートした
・first_page.dartに
import 'package:introduction2_screen_transition/second_page.dart'; を記載
※SecondPage使用できるようになった
・AppBar名を「セカンド」、ボタンテキストを「前の画面へ」に変更
import 'package:flutter/material.dart';

class SecondPage extends StatelessWidget {
  @override
  Widget build(BuildContext context) {
    return Scaffold(
      appBar: AppBar(
        title: const Text('セカンド'),
        backgroundColor: Colors.red,
      ),
      body: Center(
        child: ElevatedButton(
          onPressed: () {
            //ボタンを押した時に呼ばれるコードを書く
          },
          child: const Text('前の画面へ'),
        ),
      ),
    );
  }
}
import 'package:flutter/material.dart';
import 'package:introduction2_screen_transition/second_page.dart';
6.画面遷移④_ボタンの設定
・first_page.dartのonPressed Widget内にボタンで画面遷移する処理を作成
※AppBarがある場合
遷移を作成すると遷移先画面(second_page)にバックボタンも付随される
onPressed: () {
            //ボタンを押した時に呼ばれるコードを書く
            Navigator.push(
              context,
              MaterialPageRoute(
                builder: (context) => SecondPage(),
              ),
            );
          },
・second_page.dartのonPressed Widget内にボタンで画面に戻る処理を作成
onPressed: () {
            //ボタンを押した時に呼ばれるコードを書く
            Navigator.pop(context);
          },
7.おまけ_画面遷移方法
・first_page.dartのonPressed Widget内に画面遷移処理を上から下へ遷移させるために
fullscreenDialog: true,を記載する
onPressed: () {
            //ボタンを押した時に呼ばれるコードを書く
            Navigator.push(
              context,
              MaterialPageRoute(
                builder: (context) => SecondPage(),
                fullscreenDialog: true,
              ),
            );
          },
これで完成!!!
8.全体コード
import 'package:flutter/material.dart';
import 'package:introduction2_screen_transition/first_page.dart';

void main() {
  runApp(const MyApp());
}

class MyApp extends StatelessWidget {
  const MyApp({super.key});

  @override
  Widget build(BuildContext context) {
    return MaterialApp(
      title: 'Flutter Demo',
      theme: ThemeData(
        colorScheme: ColorScheme.fromSeed(seedColor: Colors.deepPurple),
        useMaterial3: true,
      ),
      home: FirstPage(),
    );
  }
}
import 'package:flutter/material.dart';
import 'package:introduction2_screen_transition/second_page.dart';

class FirstPage extends StatelessWidget {
  @override
  Widget build(BuildContext context) {
    return Scaffold(
      appBar: AppBar(
        title: const Text('ファースト'),
        backgroundColor: Colors.blue,
      ),
      body: Center(
        child: ElevatedButton(
          onPressed: () {
            //ボタンを押した時に呼ばれるコードを書く
            Navigator.push(
              context,
              MaterialPageRoute(
                builder: (context) => SecondPage(),
                fullscreenDialog: true,
              ),
            );
          },
          child: const Text('次の画面へ'),
        ),
      ),
    );
  }
}
import 'package:flutter/material.dart';

class SecondPage extends StatelessWidget {
  @override
  Widget build(BuildContext context) {
    return Scaffold(
      appBar: AppBar(
        title: const Text('セカンド'),
        backgroundColor: Colors.red,
      ),
      body: Center(
        child: ElevatedButton(
          onPressed: () {
            //ボタンを押した時に呼ばれるコードを書く
            Navigator.pop(context);
          },
          child: const Text('前の画面へ'),
        ),
      ),
    );
  }
}
参考文献
Flutter大学. 「Flutter超入門2022】②ボタンを押して画面遷移【Flutter3.0】」. YouTube. 2022/06,https://www.youtube.com/watch?v=Cpg3otpYG9w,
(参照 2024-06-19)
Flutter. 「New Buttons and Button Themes」. 更新日不明. https://docs.flutter.dev/release/breaking-changes/buttons, (参照 2024-06-19)
Flutter. 「New Buttons and Button Themes」. 更新日不明. https://docs.flutter.dev/cookbook/navigation/navigation-basics, (参照 2024-06-19)
最後に
・動画の中でもFlutter公式サイトでの確認が多いイメージでした
・不明なときはFlutter公式サイトの確認も必要だと思いました
・遷移画面作成後、遷移先情報のインポートが必要なのは遷移元のみということも
発見できた
遷移先画面(second_page.dart)は基本のdart(flutter/material.dart)の
インポートのみだった