Google Apps Script のログ管理を Google Cloud Platform で行なう
Google Apps Script と Google Cloud Platform の連携方法がわからなかったので、備忘録代わりに記録する。
Google Cloud Platform の設定
Google Cloud Platform にアクセス後にログインする。
Google Cloud Platform のプロジェクトを新規作成する
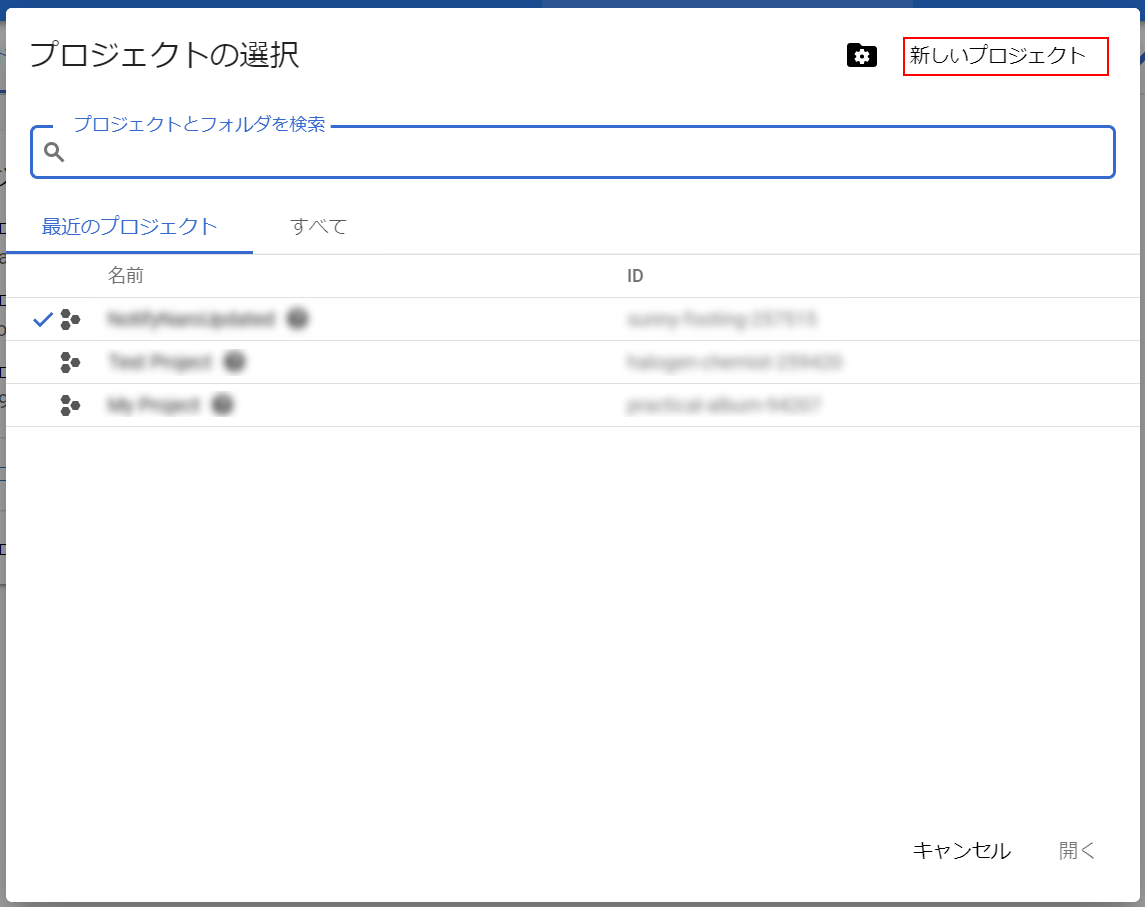
- 左上の現在選択中のプロジェクト名をクリックし、プロジェクトの選択ダイアログを表示させ、新しいプロジェクトをクリックする。
- 新しく作成するプロジェクト名を指定し、作成をクリックする。

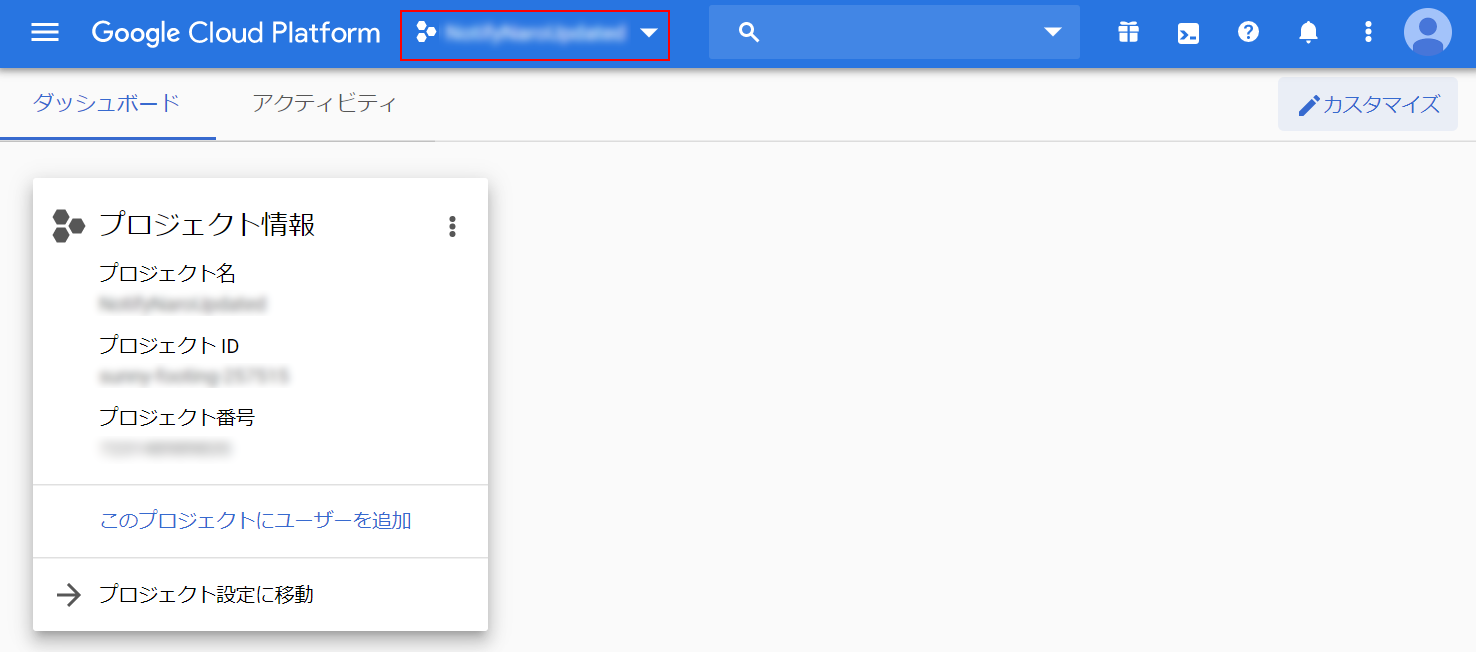
- ダッシュボード画面に戻るので、作成したプロジェクトを選択してから表示されるプロジェクト情報カードのプロジェクト番号をメモしておく。

OAuth を設定する
- 左上のメニューから「API とサービス」->「OAuth 同意画面」をクリックする。


- OAuth 同意画面が表示されるので、アプリケーション名を入力し、保存をクリックする。

Google Apps Script の設定
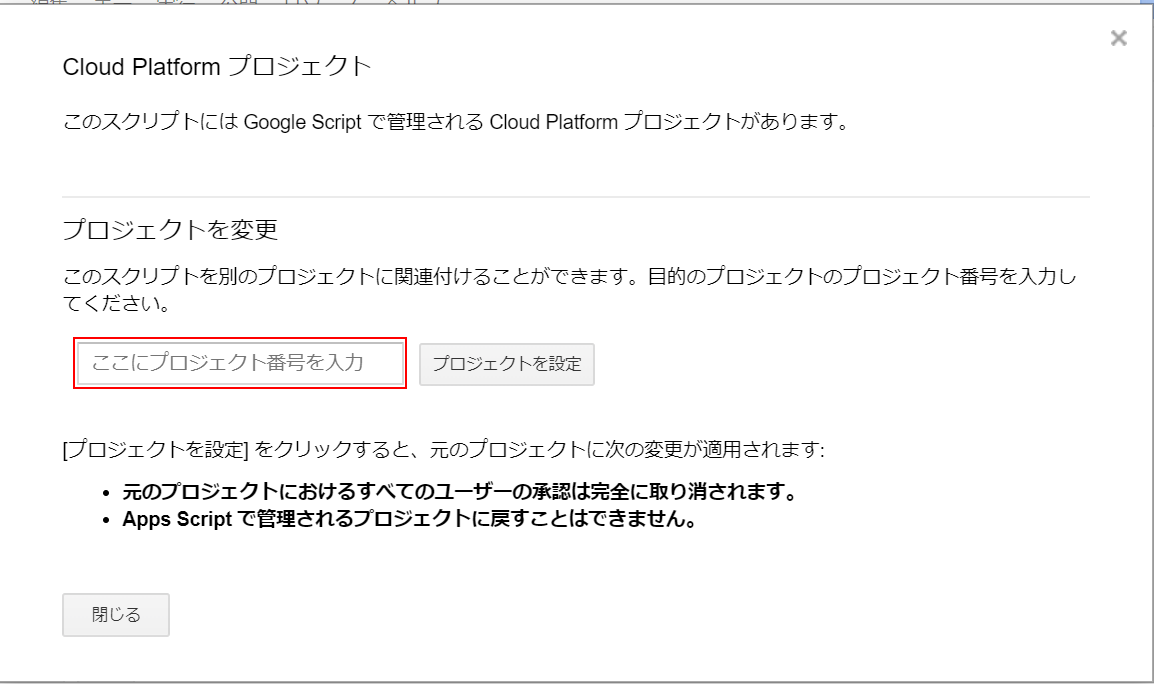
- スクリプトエディタのメニューから「リソース」->「Gloud Platform プロジェクト...」をクリックする。

- Cloud Platform プロジェクトの設定画面でメモしておいたプロジェクト番号を入力し、プロジェクト設定ボタンをクリックする。
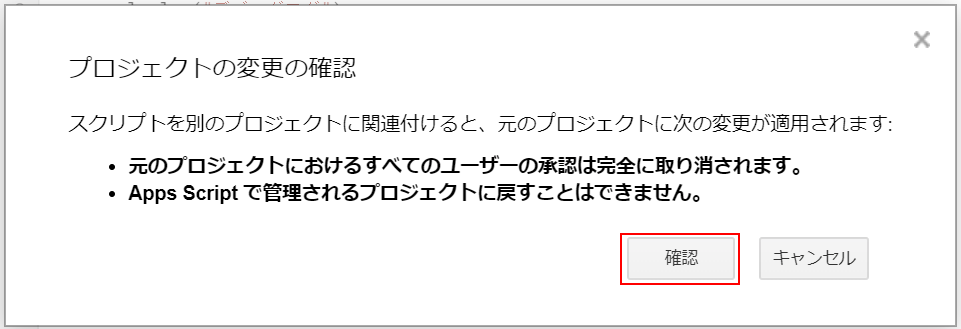
- プロジェクトの変更の確認ダイアログが表示されるので確認をクリックする。
ログ出力の確認
- Google Apps Script のエディタからログを出力するテストスクリプトを実行してみる。
function myFunction() {
  console.log("デバッグログ");
  console.info("情報ログ");
  console.warn("警告ログ");
  console.error("エラーログ");
}
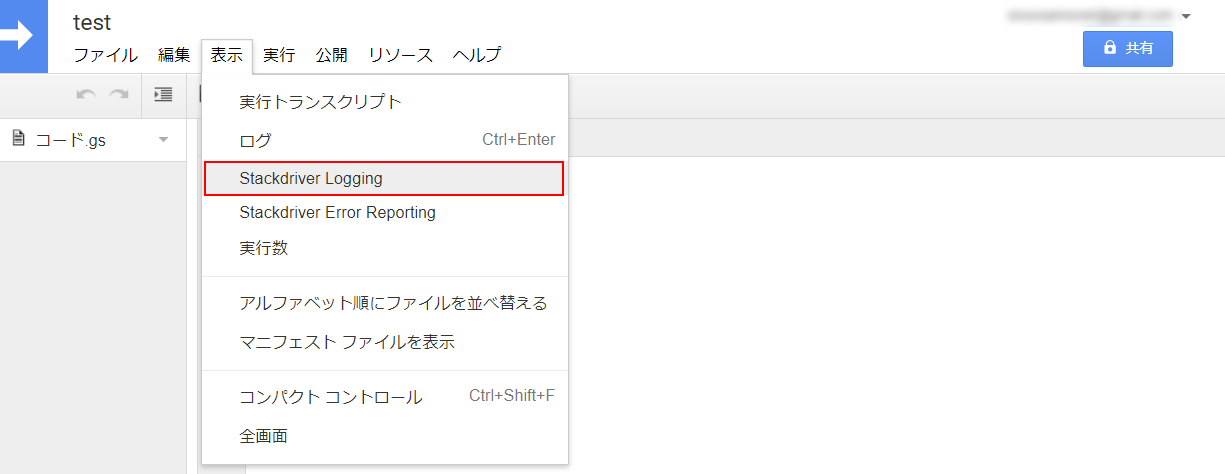
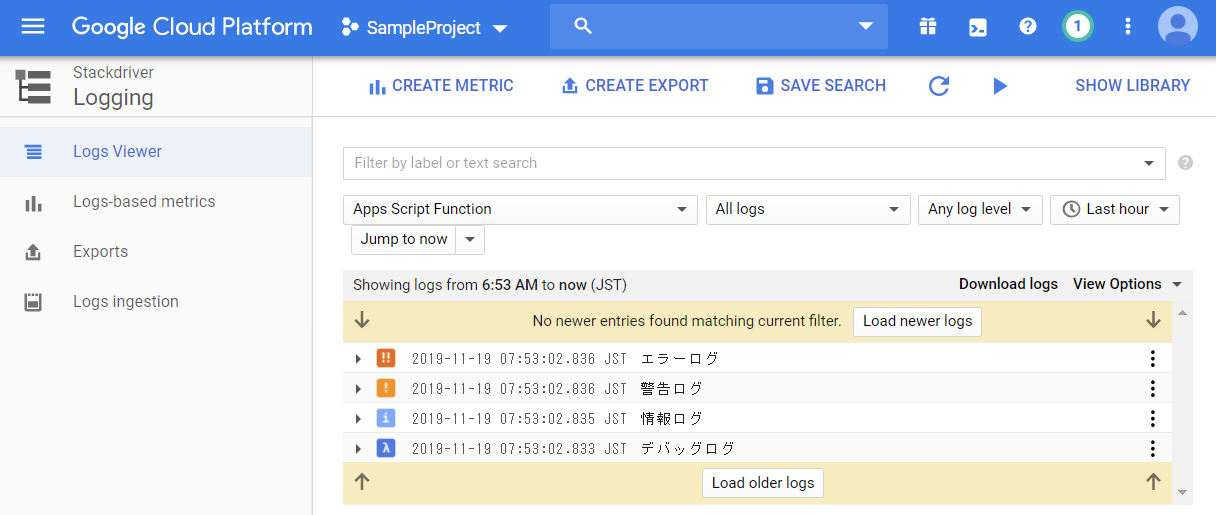
- メニューから「Stackdriver Logging」をクリックすると、Google Cloud Platform のログビューアが開くので出力されたログを確認する。