ArduinoからIoTサーバーへ
今までやった内容をつなげて、Arduinoにつなげたセンサーの値をIoTサーバーに送信し、蓄積します。
1.前提
下記のことをやってあることが前提となります。
2.プログラムを組み合わせていく
2と3のプログラムを組み合わせて
Arduino→Python→IoTサーバーを実現します。Arduinoの配線、プログラムはArduino→Pythonで設定したものをそのまま使うので、今回触る必要はありません。
Pythonのプログラムだけを修正します。
2-1.main.pyを書き換え
Python→IoTサーバーのステップでダウンロードしたプログラムのmain.pyを書き換えます。
main.pyに書かれている内容を全て消去してから、下記のプログラムをmain.pyにコピペしましょう。
コピペをしたら、
- serial_port
- user_key
- sub_id
を入力しましょう。
import dfLink

#端末設定---------------------
#端末idを指定してください。
pkey=''
#-------------------------------------------

#シリアルポートを入力-------------------------
serial_port=''
#-------------------------------------------
#Arduinoとのシリアル通信設定-------------------
my_arduino = dfLink.set_serial(serial_port,9600)
#-------------------------------------------


#while Trueは無限ループ#----------------------
while True:
    # Arduinoからreadlineコマンドでデータを取得し、data_from_arduinoという変数に格納
    data_from_arduino=my_arduino.readline()
    #stripコマンドで、data_from_arduinoの中の余計な文字を削除
    #さらにintで文字で送られてきたデータをint型に変換
    data=int(data_from_arduino.strip())
    print(data)

    # データの設定--------------------------------
    int_data = data #Arduinoから受け取った値をここでint_dataにいれる
    float_data = ""
    txt_data = ""
    # -------------------------------------------

    # データの送信---------------------------------
    # 整数データ:int_data
    # 実数データ(小数を含むデータ):float_data
    # テキストデータ:txt_data
    ret = dfLink.sendData_To_dfLink(int_data=int_data,float_data=float_data,text_data=txt_data,pkey=pkey)
    print(ret)
    # -------------------------------------------
#-------------------------------------------
3.実行
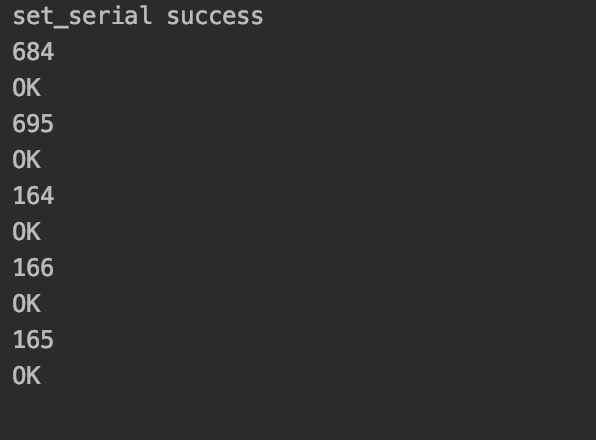
main.pyを実行して、Arduinoの明るさセンサーの値がパソコンに表示されるか確認しましょう。
3-1.pythonの確認
下記のように何かしらの値とOKが交互に表示されれば、おそらく正常に動いています。

3-2.IoTサーバーの確認
IoTサーバーの確認でIoTサーバーに明るさセンサーの値が送られているか確認しましょう。
