はじめに
ヘッダー付きのリストの実装をいくつか紹介します。
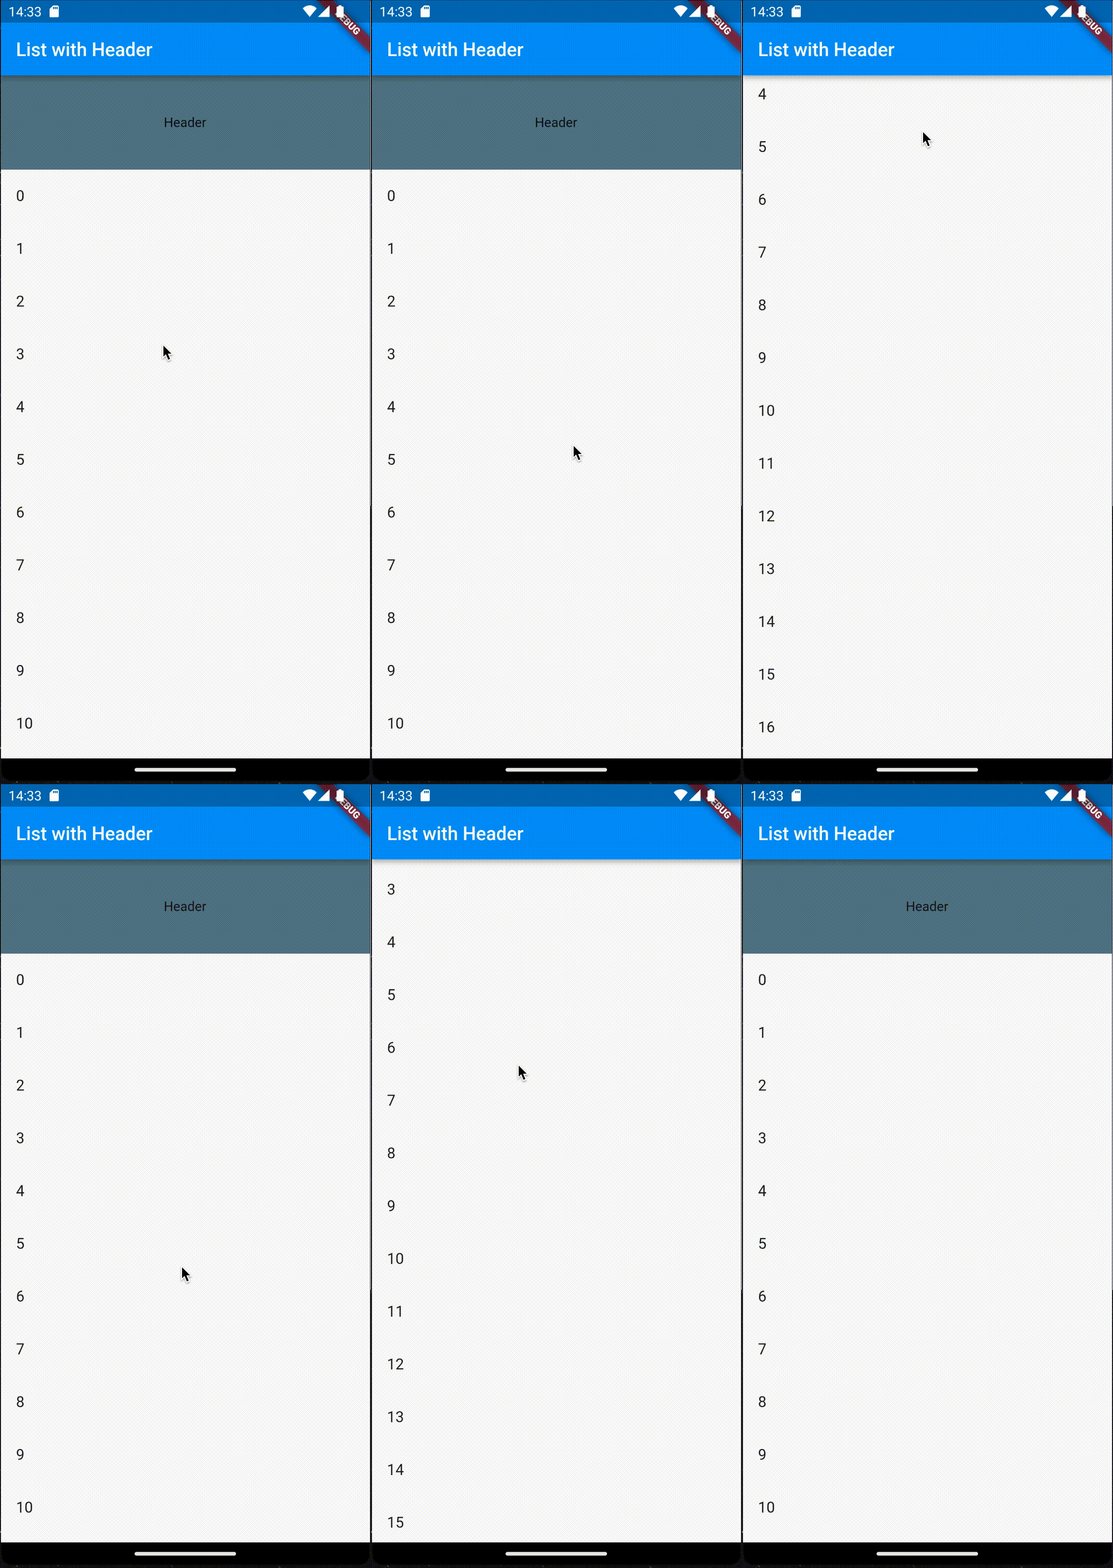
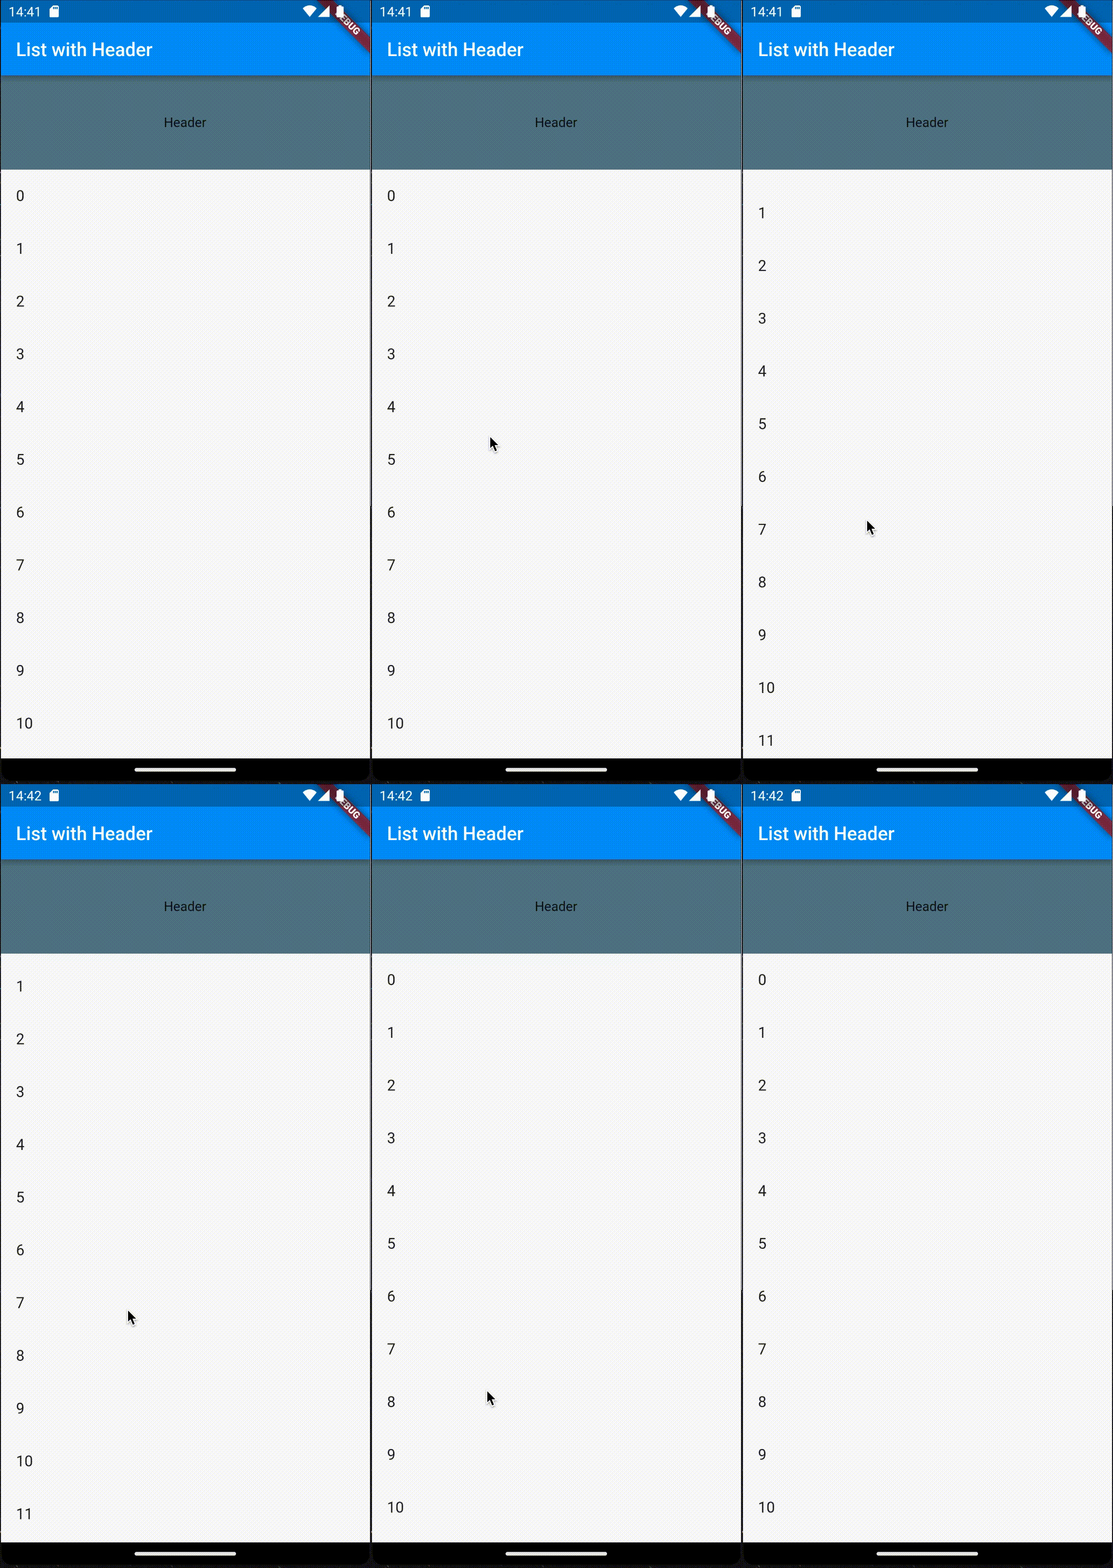
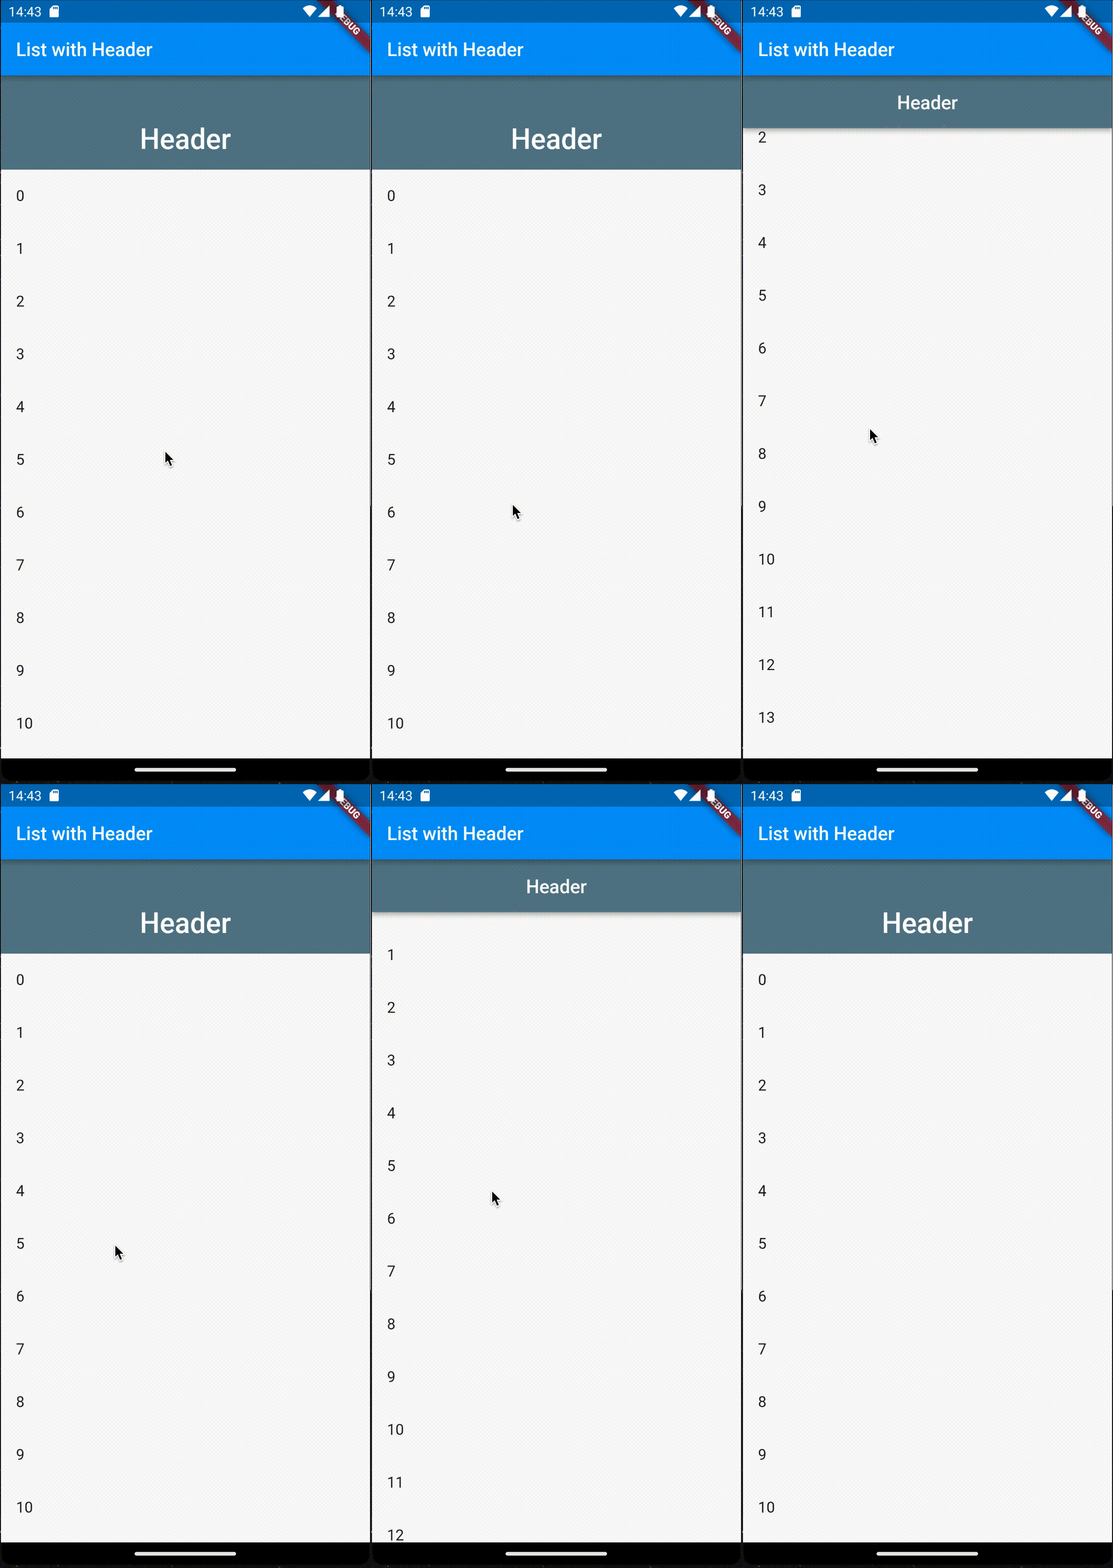
ヘッダー付きリストといっても、下図のようにリストのスクロールに合わせてヘッダーもスクロールするパターンとヘッダーは常に固定表示させておくパターンがあると思うのでそれぞれ紹介してみます。
| ヘッダーもスクロール | ヘッダー固定 |
|---|---|
 |
 |
実装
ヘッダー部分もスクロール
ヘッダー部分もスクロールするパターンについては以下3つの実装を紹介します。
- CustomScrollView + SliverToBoxAdapter
- CustomScrollView + SliverAppBar
- ListViewの先頭にヘッダーを配置
1. CustomScrollView + SliverToBoxAdapter
CustomScrollViewのsliversプロパティの先頭にSliverToBoxAdapterを配置してヘッダーとして扱う方法です。
リスト部分はSliverList等を使って実装します。
class HeaderBySliverToBoxAdapter extends StatelessWidget {
  const HeaderBySliverToBoxAdapter({Key? key}) : super(key: key);

  @override
  Widget build(BuildContext context) {
    return CustomScrollView(
      slivers: [
        const SliverToBoxAdapter(
          child: ColoredBox(
            color: Colors.blueGrey,
            child: SizedBox(
              height: 100,
              width: double.infinity,
              child: Center(
                child: Text('Header'),
              ),
            ),
          ),
        ),
        SliverList(
          delegate: SliverChildBuilderDelegate(
            childCount: 20,
                (BuildContext context, int index) {
              return ListTile(
                title: Text(index.toString()),
              );
            },
          ),
        ),
      ],
    );
  }
}

2. CustomScrollView + SliverAppBar
CustomScrollViewのsliversプロパティの先頭にSliverAppBarを配置してヘッダーとして扱う方法です。
1と同様に、リスト部分はSliverList等を使って実装します。
class HeaderBySliverAppBar extends StatelessWidget {
  const HeaderBySliverAppBar({Key? key}) : super(key: key);

  @override
  Widget build(BuildContext context) {
    return CustomScrollView(
      slivers: [
        const SliverAppBar(
          expandedHeight: 100,
          backgroundColor: Colors.blueGrey,
          flexibleSpace: FlexibleSpaceBar(
            title: Text('Header'),
            centerTitle: true,
          ),
        ),
        SliverList(
          delegate: SliverChildBuilderDelegate(
            childCount: 20,
            (BuildContext context, int index) {
              return ListTile(
                title: Text(index.toString()),
              );
            },
          ),
        ),
      ],
    );
  }
}
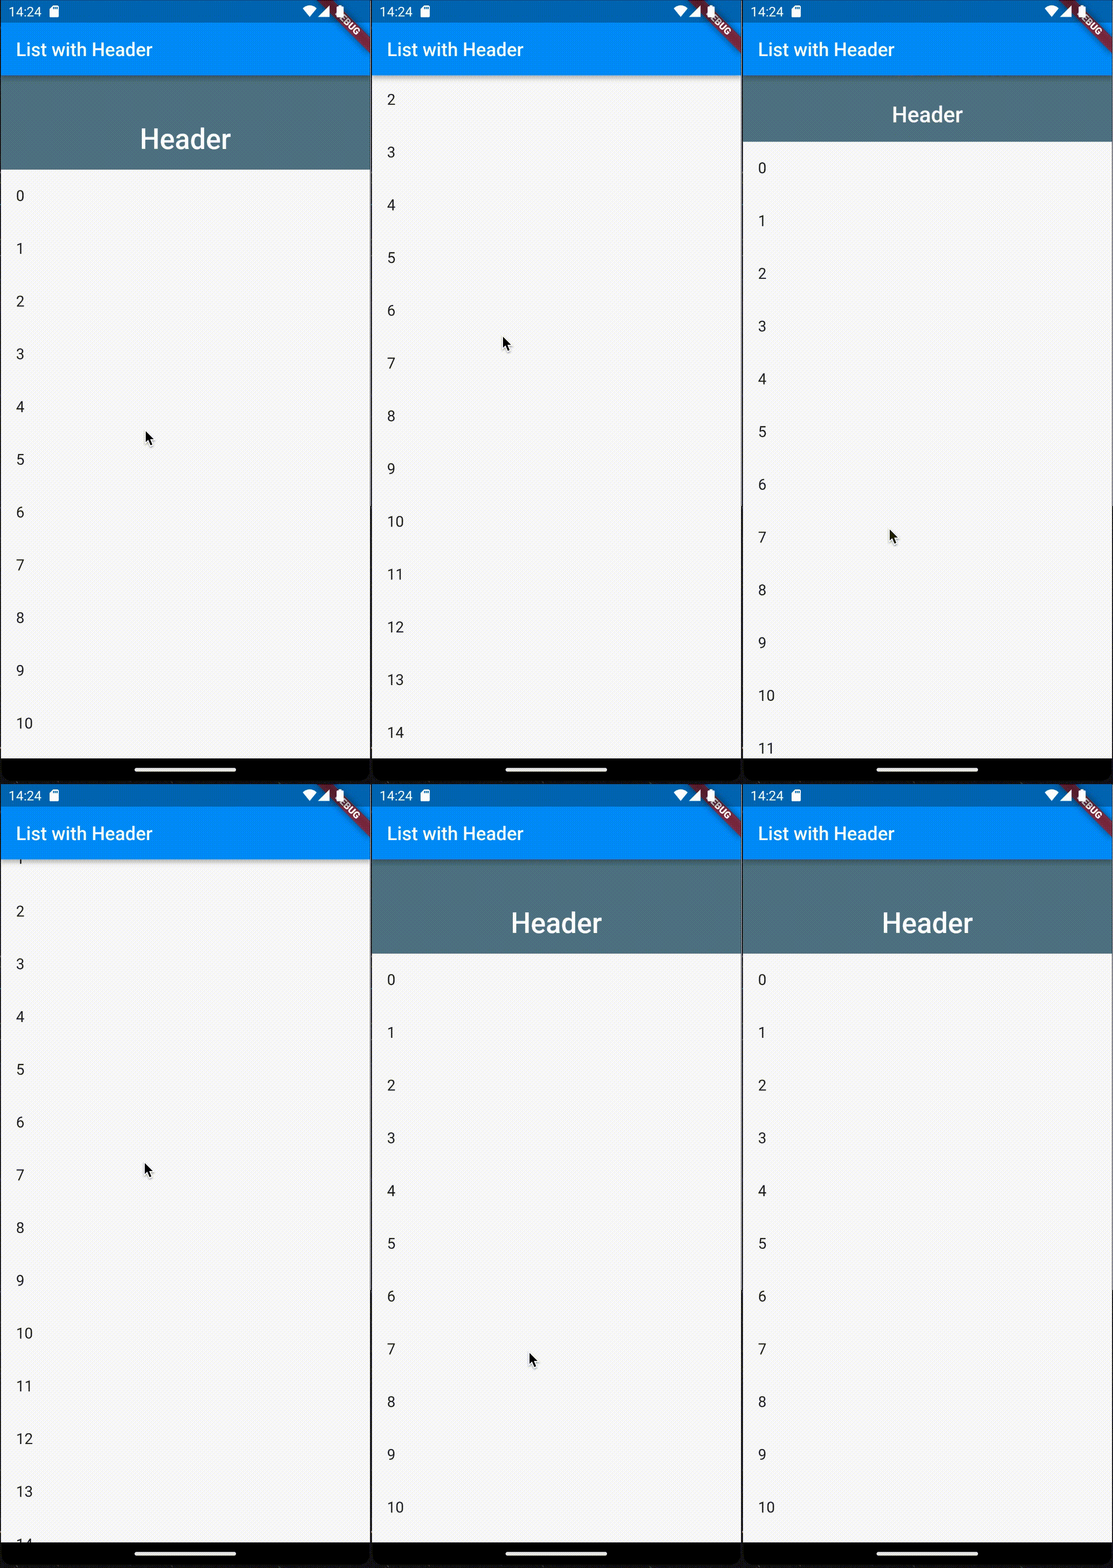
SliverAppBarを使用するため、ヘッダー部分もスクロールするというより、ヘッダー部分は縮小して消えるような挙動になります。
3. ListViewの先頭にヘッダーを配置
ListViewの先頭(indexが0)の時にヘッダーのWidgetを返すようにする方法です。
このような方法でも実現できますが、実際に実装する際はindex=0はヘッダー部分が使用していることを考慮して、リスト部分のindexを調整する必要が出てくるためコードが煩雑になり微妙かもです...
class HeaderByListView extends StatelessWidget {
  const HeaderByListView({Key? key}) : super(key: key);

  @override
  Widget build(BuildContext context) {
    return ListView.builder(
      itemCount: 20,
      itemBuilder: (BuildContext context, int index) {
        if (index == 0) {
          return const ColoredBox(
            color: Colors.blueGrey,
            child: SizedBox(
              height: 100,
              width: double.infinity,
              child: Center(
                child: Text('Header'),
              ),
            ),
          );
        } else {
          return ListTile(
            title: Text(index.toString()),
          );
        }
      },
    );
  }
}
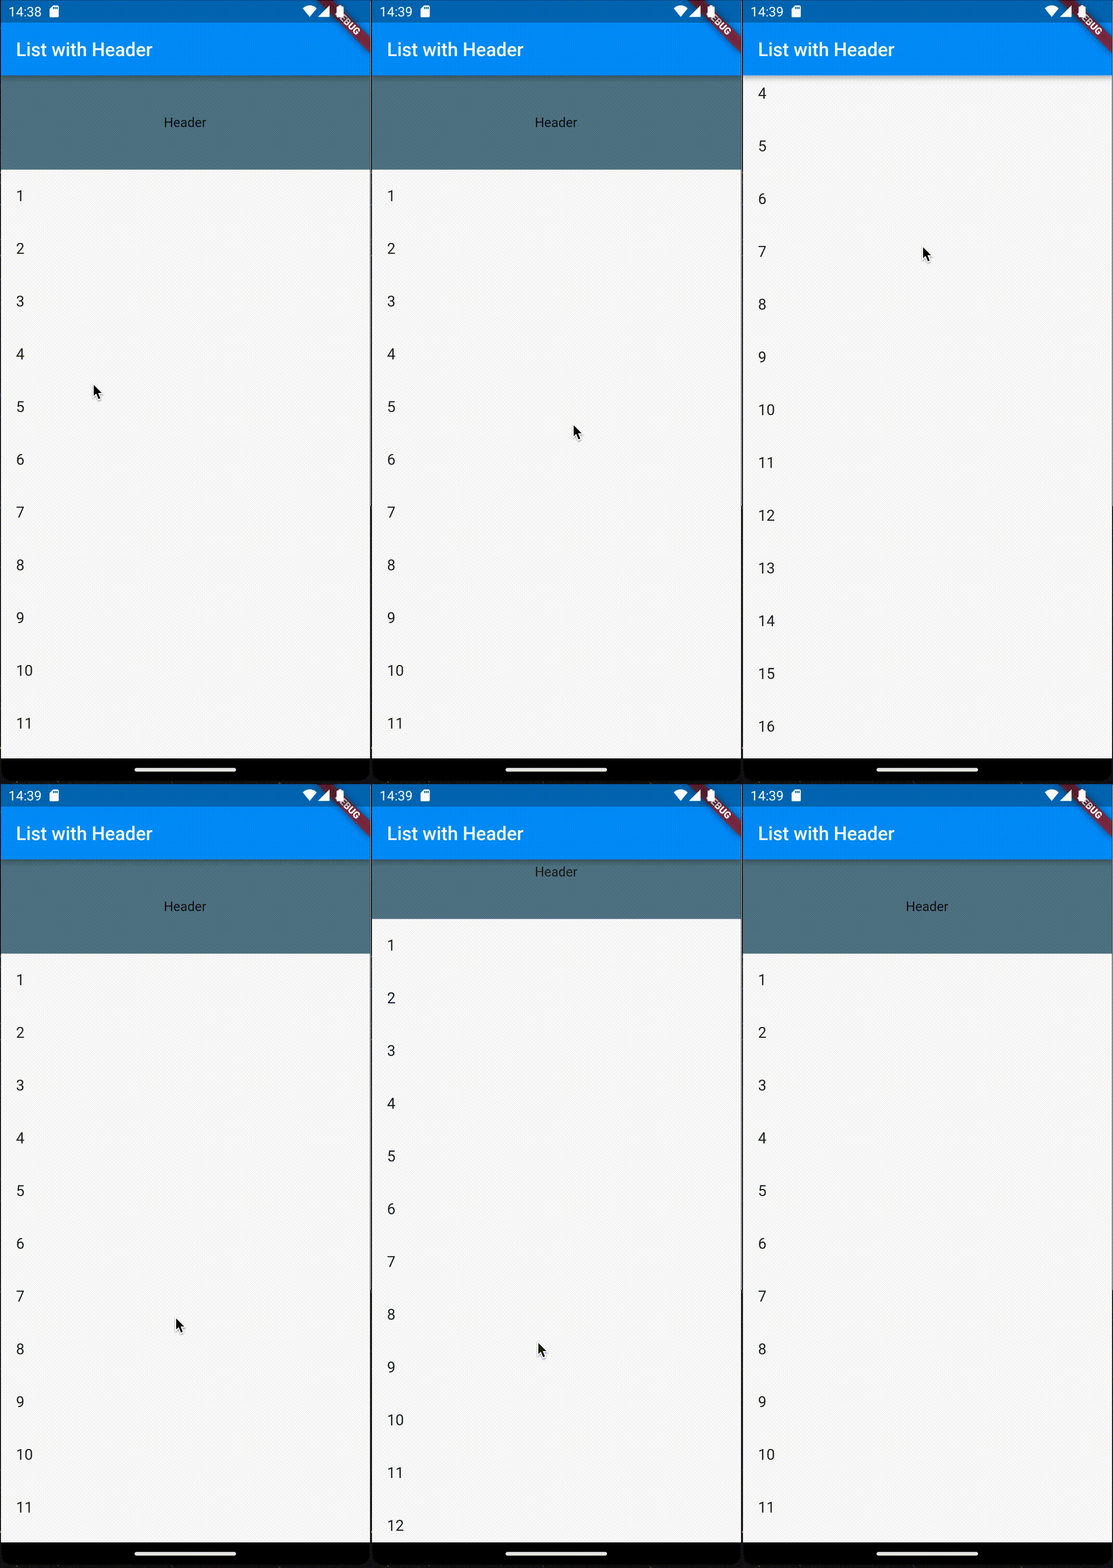
挙動は1の「CustomScrollView + SliverToBoxAdapter」 と同じです。
ヘッダー固定
ヘッダーを固定するパターンについては以下2つを紹介します。
- Columnで並べる
- CustomScrollView + SliverAppBar + pinnedプロパティ
1. Columnで並べる
単純にColumnでヘッダー部分とListViewを並べて実装する方法です。
Columnの中でListViewを配置するため、ListViewはExpanded等で囲っておく必要があることに注意。
class PinnedHeaderByColumn extends StatelessWidget {
  const PinnedHeaderByColumn({Key? key}) : super(key: key);

  @override
  Widget build(BuildContext context) {
    return Column(
      children: [
        const ColoredBox(
          color: Colors.blueGrey,
          child: SizedBox(
            height: 100,
            width: double.infinity,
            child: Center(
              child: Text('Header'),
            ),
          ),
        ),
        Expanded(
          child: ListView.builder(
            itemCount: 20,
            itemBuilder: (BuildContext context, int index) {
              return ListTile(
                title: Text(index.toString()),
              );
            },
          ),
        )
      ],
    );
  }
}

2. CustomScrollView + SliverAppBar + pinnedプロパティ
ヘッダー部分もスクロールする方法で紹介した 「CustomScrollView + SliverAppBar」 において、 SliverAppBarのpinnedプロパティにtrueにセットすることで、ヘッダー部分を固定表示させることが可能です。
class PinnedHeaderBySliverAppBar extends StatelessWidget {
  const PinnedHeaderBySliverAppBar({Key? key}) : super(key: key);

  @override
  Widget build(BuildContext context) {
    return CustomScrollView(
      slivers: [
        const SliverAppBar(
          pinned: true,
          expandedHeight: 100,
          backgroundColor: Colors.blueGrey,
          flexibleSpace: FlexibleSpaceBar(
            title: Text('Header'),
            centerTitle: true,
          ),
        ),
        SliverList(
          delegate: SliverChildBuilderDelegate(
            childCount: 20,
                (BuildContext context, int index) {
              return ListTile(
                title: Text(index.toString()),
              );
            },
          ),
        ),
      ],
    );
  }
}
SliverAppBarを使用している都合上縮小するような挙動をとります。
以上です。