真ん丸や角丸の画像を作る方法としてPiccasoなどのライブラリを使う方法1や、手軽な方法としてCardViewを用いたやり方2などがありますが、Material Components 1.2.0に追加されたShapeableImageViewを使ったやり方を紹介してみます。
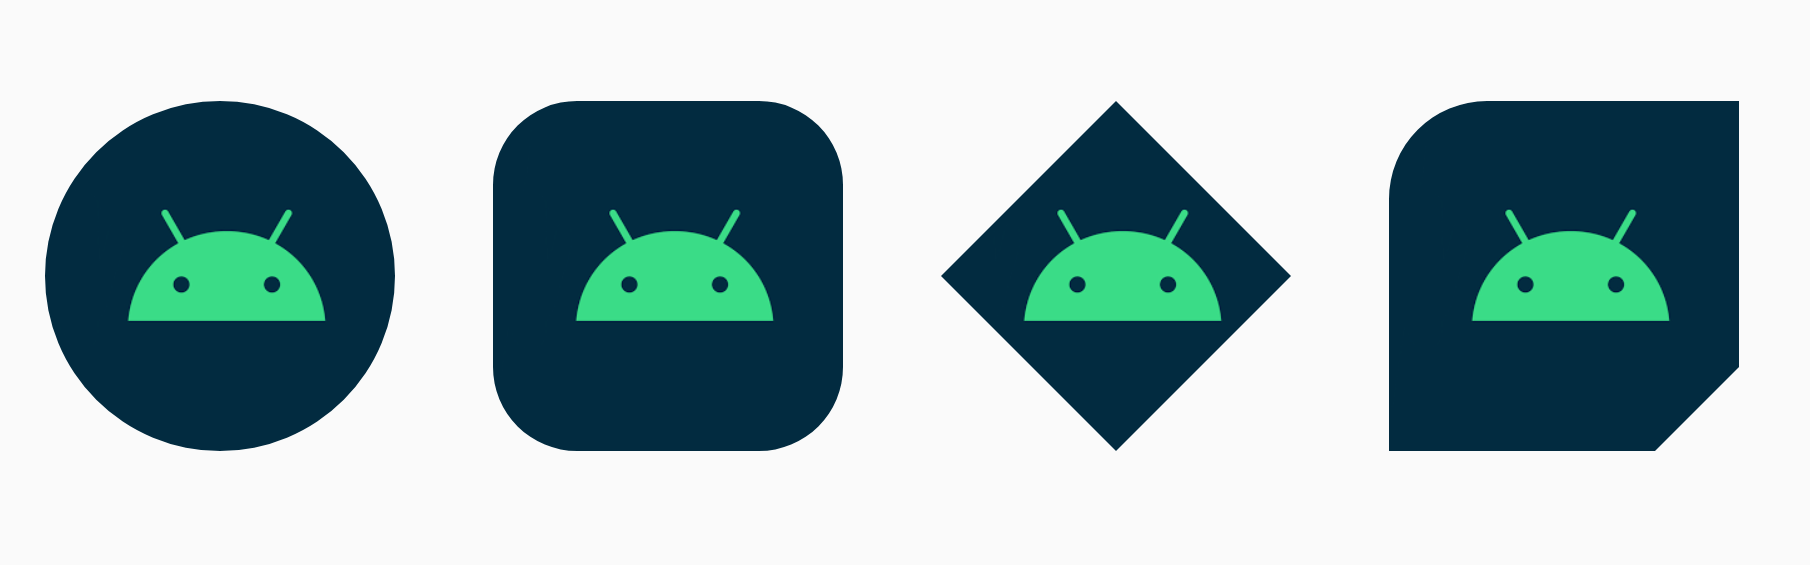
下のような画像を手軽に作成できます。
準備
Material Components 1.2.0を追加しておきます。
dependencies {
    implementation "com.google.android.material:material:1.2.0"
}
使い方
使い方としては、styleを定義してShapeableImageViewのapp:shapeAppearanceOverlay属性に指定してやるだけでOKです。以下で詳しく見ていきます。
真ん丸
styles.xmlに以下を追加。
cornerFamilyにrounded、cornerSizeに50%を指定してあります。
<style name="circleImageView" parent="">
    <item name="cornerFamily">rounded</item>
    <item name="cornerSize">50%</item>
</style>
あとはレイアウトファイルにShapeableImageViewを配置してapp:shapeAppearanceOverlay属性に上記のスタイルを指定してやります。
<com.google.android.material.imageview.ShapeableImageView
    android:layout_width="100dp"
    android:layout_height="100dp"
    android:adjustViewBounds="true"
    android:src="@drawable/ic_droid"
    app:shapeAppearanceOverlay="@style/circleImageView" />

角丸
cornerSizeを調整してやれば角丸にできます。
今回は24%にしてみました。
<style name="roundedCornersImageView" parent="">
    <item name="cornerFamily">rounded</item>
    <item name="cornerSize">24%</item>
</style>

ひし形
cornerFamilyにcutを指定し、cornerSizeを50%にすればひし形にできます。
<style name="diamondImageView" parent="">
    <item name="cornerFamily">cut</item>
    <item name="cornerSize">50%</item>
</style>

部分的に適応
四隅の一部のみを変えることも可能です。
例えば左上をround、右下をcutにするには以下のように指定してやります。
指定できる属性名についてはhttps://material.io/develop/android/theming/shapeに載ってます。
<style name="mixImageView" parent="">
    <item name="cornerFamilyTopLeft">rounded</item>
    <item name="cornerFamilyBottomRight">cut</item>
    <item name="cornerSizeTopLeft">28%</item>
    <item name="cornerSizeBottomRight">24%</item>
</style>

手軽に真ん丸や角丸などの画像を作成できました!
以上です。
参考にしたサイト
How to use the ShapeableImageView
Material Components: ShapeableImageViewで丸く切り抜かれた画像を表示する