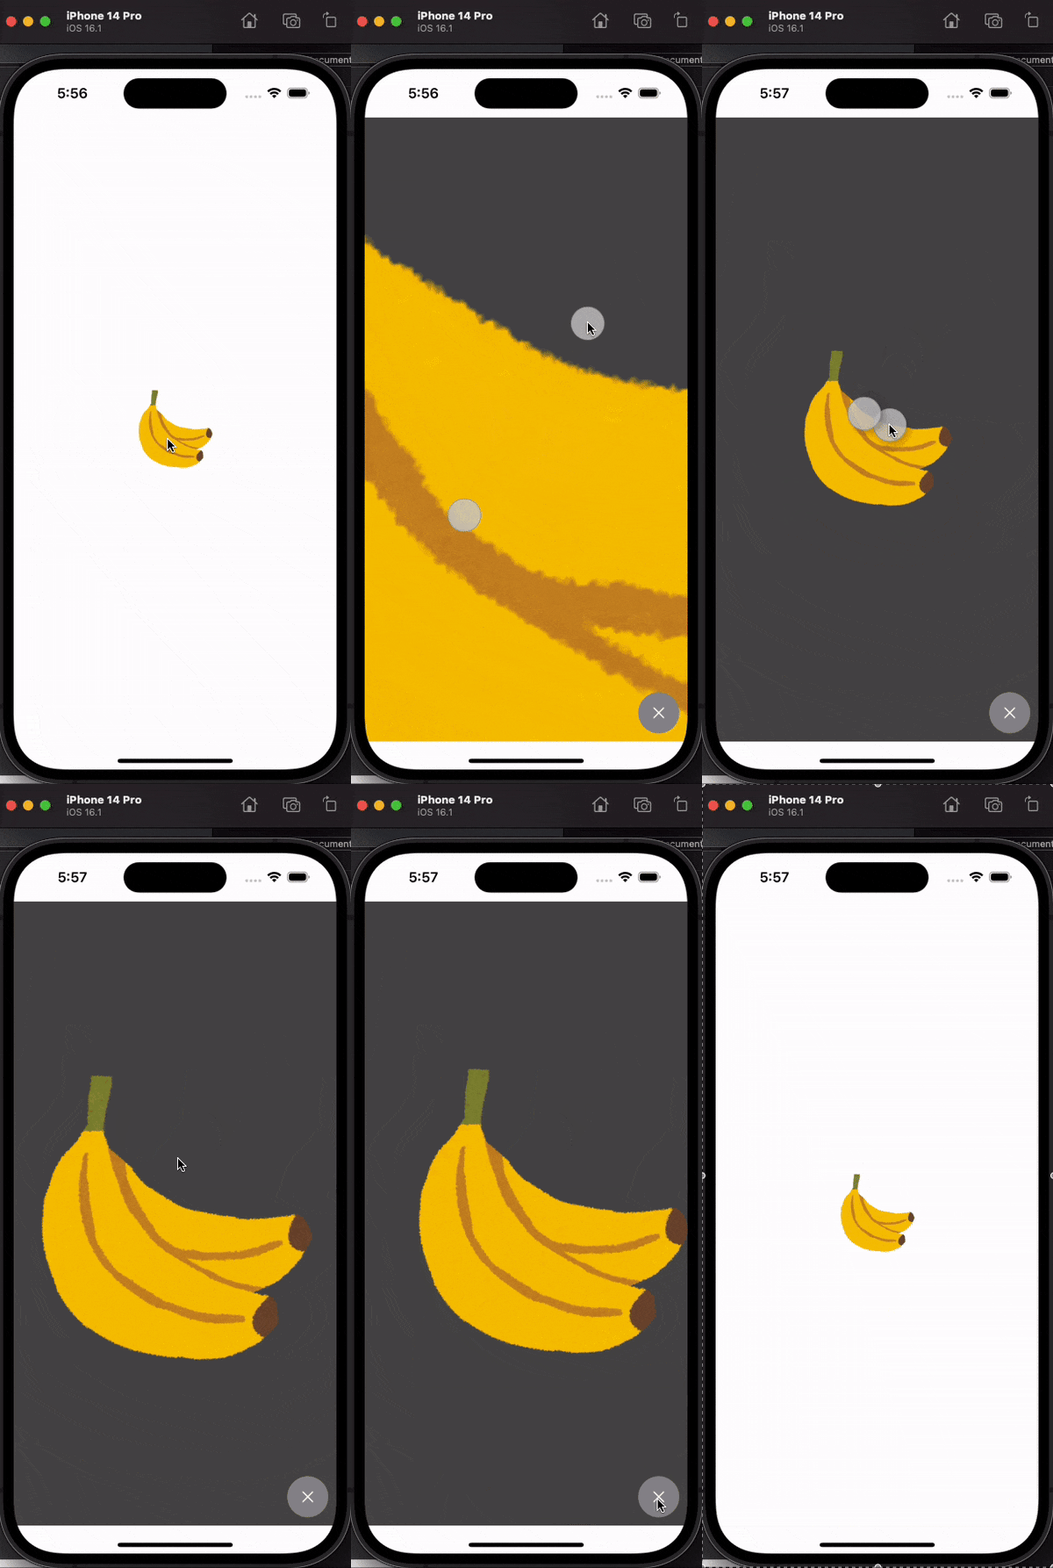
概要
simultaneousGestureを使う方法は他の記事に多いのでこの記事ではsimultaneouslyを使う。
機能
- 拡大縮小
- ドラッグして移動
- ダブルタップで元のサイズに戻す
- 拡大縮小の最小、最大制限
- ドラッグ時枠からハミでないようにする
環境
Xcode 14.0.1
iOS 15.5以上
実装した画像拡大画面のView
コード
import SwiftUI

struct ZoomImageView: View {

    @Binding var isPresented: Bool
    @State var image: Image

    @State private var magnifying = 1.0
    @State private var currentScale = 1.0

    @State private var position: CGPoint = .zero
    @State private var dragging: CGSize = .zero
    @State private var backgroundColor: Color = .black.opacity(0)

    private let minScale = 1.0
    private let maxScale = 3.5

    var body: some View {
        GeometryReader { geometryProxy in
            ZStack(alignment: .bottomTrailing) {
                image
                    .resizable()
                    .scaledToFit()
                    .frame(height: 200)
                    .position(
                        x: (position.x + dragging.width),
                        y: (position.y + dragging.height)
                    )
                    .scaleEffect(currentScale * magnifying)
                    .gesture(
                        MagnificationGesture()
                            .onChanged { value in
                                magnifying = value
                            }
                            .onEnded { _ in
                                let scale = currentScale * magnifying
                                if scale > maxScale {
                                    currentScale = maxScale
                                } else if scale < minScale {
                                    currentScale = minScale
                                } else {
                                    currentScale = scale
                                }
                                magnifying = 1.0
                            }
                            .simultaneously(with: DragGesture()
                                .onChanged { value in
                                    dragging = value.translation
                                    dragging.width /= currentScale
                                    dragging.height /= currentScale
                                }
                                .onEnded { value in

                                    withAnimation {
                                        let positionx = position.x + dragging.width
                                        let positiony = position.y + dragging.height

                                        // 枠外にハミ出ないように位置調整
                                        let centerX = geometryProxy.size.width / 2
                                        if abs(positionx - centerX) > centerX / currentScale {
                                            position.x = centerX
                                        } else {
                                            position.x = positionx
                                        }

                                        let centerY = geometryProxy.size.height / 2
                                        if abs(positiony - centerY) > centerY / currentScale {
                                            position.y = centerY
                                        } else {
                                            position.y = positiony
                                        }
                                        dragging = .zero
                                    }
                                }
                            )
                            .simultaneously(with: TapGesture(count: 2)
                                .onEnded { _ in
                                    withAnimation {
                                        currentScale = 1.0
                                    }
                                }
                            )
                    )
                    .background(backgroundColor)
                    .clipped()
                    .onAppear {
                        withAnimation {
                            backgroundColor = .black.opacity(0.7)
                        }
                        position.x = geometryProxy.size.width / 2
                        position.y = geometryProxy.size.height / 2
                    }
                    .onDisappear {
                        withAnimation {
                            backgroundColor = .black.opacity(0)
                        }
                    }

                Button {
                    withAnimation {
                        isPresented = false
                    }
                } label: {
                    Circle()
                        .fill(.gray)
                        .frame(width: 50, height: 50)
                        .overlay {
                            Image(systemName: "xmark")
                                .foregroundColor(.white)
                        }
                }
                .offset(x: -10, y: -10)
            }
        }
    }
}
使い方
import SwiftUI

struct ContentView: View {
    @State private var image = Image("fruit_banana")
    @State private var isZoomViewPresented = false

    var body: some View {

        if isZoomViewPresented {
            ZoomImageView(isPresented: $isZoomViewPresented, image: image)
        } else {
            image
                .resizable()
                .scaledToFit()
                .frame(height: 100)
                .onTapGesture {
                    isZoomViewPresented = true
                }
        }
    }
}
ポイント
拡大縮小
ピンチインピンチアウトでの拡大縮小はMagnificationGestureを使います。
.onChangedのmagnifyingで拡縮している間の倍率を画像に反映して.onEndedでcurrentScaleに現在の倍率を保持します。
最大最小は.onEndedで制御しています。しない場合は下記の方法でいいです。
MagnificationGesture()
    .onChanged { value in
        magnifying = value
    }
    .onEnded { _ in
        currentScale *= magnifying
        magnifying = 1.0
    }
ドラッグ
ドラッグはDragGestureを使います。
.onChangedでvalue.translationから移動した距離を画像に反映します。
ここが難しかったですが、拡大縮小している場合、移動距離に倍率がかかるため下記のように距離を調整しています。
dragging.width /= currentScale
dragging.height /= currentScale
.onEndedで画像の中心位置が枠外を超えた場合は画面中央に戻るようにしています。
ここでも拡大縮小の倍率が必要になります。(計算間違っていたらごめんなさい)
必要ない場合は下記のように。
.simultaneously(with: DragGesture()
    .onChanged { value in
        dragging = value.translation
        dragging.width /= currentScale
        dragging.height /= currentScale
    }
    .onEnded { value in
        position.x += dragging.width
        position.y += dragging.height
        dragging = .zero
    }
)
ダブルタップ
TapGestureだけであればシングルタップですがcount: 2をつければダブルタップになります。
拡大率を1にして元に戻しています。
.simultaneously(with: TapGesture(count: 2)
    .onEnded { _ in
        withAnimation {
            currentScale = 1.0
        }
    }
)
最後に
.simultaneouslyとsimultaneousGestureで実装する方法での違いが正直わからなかった。
他に.sequencedと.exclusivelyがあるが、simultaneously(=同時に)でドラッグとピンチが同時にできないので、そもそも排他的にgestureが動作しているようにみえる。
参考
