免責事項
3Dや数学の専門家ではないので、所々おかなしな記述があるかもしれません。
予め、ご承知おきください。
概要
今回学習した内容は下記2点です。
- ライティング
- テクスチャ
ライティング
ライティングの実装を行う場合、以下の基礎知識が必要になります。
- 法線
- 光源の種類
法線
法線は簡単に言えば、頂点や面の向きを表すものです。
WebGLではこの法線を、ベクトルを利用して表現します。
例を挙げると、
// 配列の左から順に、x, y, z3つの頂点からなるベクトルを表している
var normal = [ 1, 0, 0 ];
光源の種類
光源には大きく下記3つの種類があります。
- 拡散光( Diffuse Light )
- 光が物体に衝突して拡散していく様子を再現
- 反射光( Specular Light )
- 光が物体に衝突して反射した様子を再現
- 環境光( Ambient Light )
- モデルの周りにどのような光があるかを再現
拡散光
実際にコードを書いていきます。
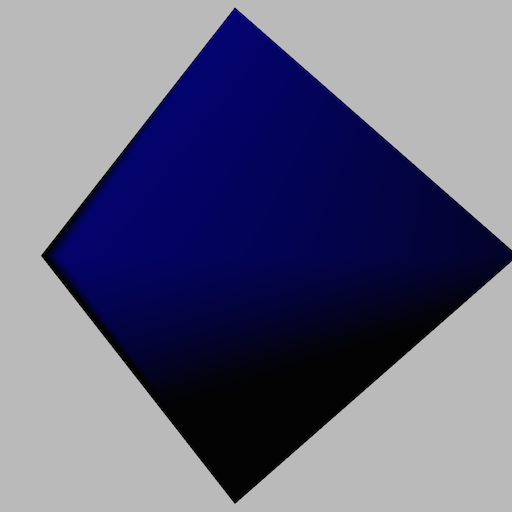
最初は拡散光から、ソースはこんな感じです。
// 中略
// 法線の定義
var normals = [
 -1.0, 0.0, 0.0,// 0
  0.0, 1.0, 0.0,// 1
  0.0, 0.0, 1.0,// 2
  0.0,-1.0, 0.0,// 3
  1.0, 0.0, 0.0,// 4

  1.0, 0.0, 0.0,// 5
  0.0, 1.0, 0.0,// 6
  0.0, 0.0,-1.0,// 7
  0.0,-1.0, 0.0,// 8
 -1.0, 0.0, 0.0,// 9
];

// 中略
// 法線の頂点情報をVBOにバインド
var normalVbo = createVbo( normals );
gl.bindBuffer( gl.ARRAY_BUFFER, normalVbo );
gl.enableVertexAttribArray( locations[2] );
gl.vertexAttribPointer( locations[2], strides[2], gl.FLOAT, false, 0, 0 );

// 中略
// モデルの逆行列をGLSLに渡す
var invMatrix = mat4.identity( mat4.create() );
mat4.invert( invMatrix, mMatrix );
JSの実装から見ていきましょう。
JS側では、下記3つの実装が必要です。
- 法線の定義
- 法線をVBOに登録
- モデルの逆行列をGLSLに登録
ここで唐突にでてきた逆行列ですが、これは簡単に言えば回転を打ち消す行列です。
では、なぜ逆行列が必要なのかというと光源のベクトルをモデルの回転に合わせて方向を変えるためです。
方向を変えるのは、光源と法線の向きによって光の当たり方が変化するためです。
文章だとイメージしずらいので、ちょっと計算をしてみましょう。
光の当たり方はベクトルの内積で計算することができます。
プログラムではよく、dotで表現されます。
var normal = [ 0, 1, 0 ];// 法線
var light  = [ 0, 1, 0 ];// 光源

dot(normal, light);// -> 1


// 光源の方向を真逆にしてみる
light[1] = -1;

dot(normal, light);// -> -1


// ベクトルの内積を計算
function dot( normal, light) {
  var x = normal[0] * light[0];
  var y = normal[1] * light[1];
  var z = normal[2] * light[2];
  return x + y + z;
}
上の例のように、光源の向きを法線と逆方向にしてやると結果がかわりますね。
光源と法線が同じ向きの場合は1、そうでない場合は-1になっています。
GLSLでは光の強さは0~1に丸めて使うので、前者は光が完全にあたっている状態、後者は光が全くあたっていない状態と言えます。
次にGLSLの実装を見てみましょう。
<script id="vs" type="x-shader/x-vertex">
  attribute vec3 positions;
  attribute vec4 colors;
  attribute vec3 normals;

  uniform   mat4 mvpMatrix;

  varying   vec4 vColor;
  varying   vec3 vNormal;

  void main( void ){
    vColor        = colors;
    vNormal       = normals;
    gl_Position   = mvpMatrix * vec4( positions, 1.0 );
  }
</script>
<script id="fs" type="x-shader/x-fragment">
  precision mediump float;
  uniform   mat4    invMatrix;
  varying   vec3    vNormal;
  varying   vec4    vColor;

  void main( void ){
    vec3 light    = vec3( 0.0, 0.5, 0.5 );
    vec3 invLight = normalize( invMatrix * vec4( light, 1.0 ) ).xyz;
    float diff    = clamp( dot( invLight, vNormal ), 0.0, 1.0 );
    gl_FragColor  = vec4( vec3( diff ), 1.0 ) * vColor;
  }
</script>
light変数で光源の位置を計算。
次に、モデルの逆行列で光源の位置をモデルとは逆方向に回転させます。
normalizeは光源を単位ベクトルに変換するために利用しています。
※単位ベクトルは、ベクトル世界の1のことだと思ってもらえればOKです。
vec3 invLight = normalize( invMatrix * vec4( light, 1.0 ) ).xyz;
計算した光源と法線の内積を計算して、その結果を0~1の範囲にまとめます。
float diff = clamp( dot( invLight, vNormal ), 0.0, 1.0 );
最後に計算した、拡散光をvColorに掛け合わせて全行程は完了です。
gl_FragColor = vec4( vec3( diff ), 1.0 ) * vColor;
反射光
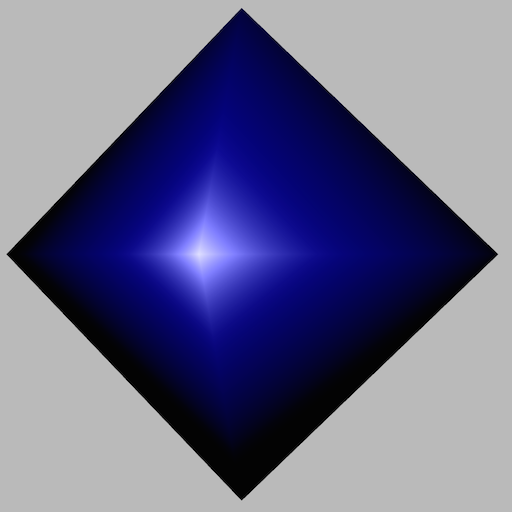
次は反射光のサンプルを作ってみましょう。
// 中略

var eyePosition    = [ cx, 0.0, cz ];
var centerPosition = [ 0.0, 0.0, 0.0 ];

// 中略

uLocations[3] = gl.getUniformLocation( program, 'eyePosition' );
uLocations[4] = gl.getUniformLocation( program, 'centerPoint' );
まずは、JS側から。
uniformに新しく、eyePositionとcenterPositionを追加しています。
これは反射光では、物体に衝突して反射した光をカメラが捉えたらどういう見え方をするかを再現する必要があるためです。
次に、GLSL側を見てみましょう。
<script id="vs" type="x-shader/x-vertex">
  attribute vec3 positions;
  attribute vec4 colors;
  attribute vec3 normals;

  uniform   mat4 mvpMatrix;

  varying   vec4 vColor;
  varying   vec3 vNormal;

  void main( void ){
    vColor        = colors;
    vNormal       = normals;
    gl_Position   = mvpMatrix * vec4( positions, 1.0 );
  }
</script>
<script id="fs" type="x-shader/x-fragment">
  precision mediump float;
  uniform   mat4    invMatrix;
  varying   vec3    vNormal;
  varying   vec4    vColor;
  uniform   vec3    lightDirection;
  uniform   vec3    eyePosition;
  uniform   vec3    centerPoint;

  void main( void ){
    vec3 invLight = normalize( invMatrix * vec4( lightDirection, 1.0 ) ).xyz;
    vec3 invEye   = normalize( invMatrix * vec4( eyePosition - centerPoint, 1.0 ) ).xyz;
    vec3 halfVec  = normalize( invLight + invEye );
    float diff    = clamp( dot( invLight, vNormal ), 0.0, 1.0 );
    float spec    = clamp( dot( halfVec, vNormal ), 0.0, 1.0 );
    spec          = pow( spec, 10.0 );
    gl_FragColor  = vec4( vec3( diff ), 1.0 ) * vColor + vec4( vec3( spec ), 0.0 );
  }
</script>
vec3 invEye = normalize( invMatrix * vec4( eyePosition - centerPoint, 1.0 ) ).xyz;
拡散光の時と同じで、モデルの逆行列を利用して光源の位置を調整していますね。
eyePosition - centerPointの部分では視線(ベクトル)を計算しています。
vec3 halfVec  = normalize( invLight + invEye );
float spec    = clamp( dot( halfVec, vNormal ), 0.0, 1.0 );
spec          = pow( spec, 10.0 );
ここで唐突にhalfVecなるものが出てきました。
これは光源の向きと、視線を足し合わせたものなのですが光源の反射角度と近い値になるため計算しています。
※なぜ反射の角度を計算せず、こちらを利用するのか分かっていないです。
拡散光と同じ要領で、ハーフベクトルと法線の内積を出せば無事反射光を計算できます。
ちなみに、計算した反射光を10乗しているのは明暗を自然にさせるためです。
これを忘れると極端な明暗になってしまうので気をつけましょう。
環境光
最後に環境光のサンプルを作ってみましょう。
環境光は厳密にやると、ものすごい演算量となるので今回は色味を足すだけとします。
まずはJS側から。
// 中略

var ambientColor = [ 0.5, 0.1, 0.1, 0.0 ];
uLocations[5] = gl.getUniformLocation( program, 'ambientColor' );

// 中略
足したい色味の定義し、uniformに値を渡すだけです。
次にGLSL側ですが、こんな感じです。
// 中略

gl_FragColor  = vec4( vec3( diff ), 1.0 ) * vColor + ambientColor + vec4( vec3( spec ), 0.0 );
はい、コレだけです。
vColorに足すだけですね。
ここでのポイントはかけ算ではなくたし算だということでしょうか。
掛けてしまうと、結果が全く異なってしまうので注意が必要です。
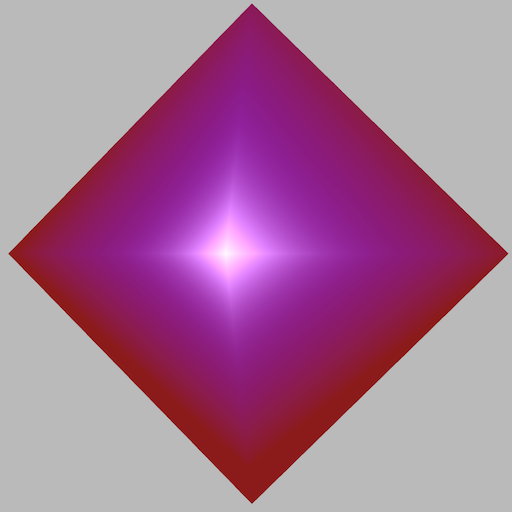
これで良い感じに夕焼けに染まった?ような感じになりますね!
テクスチャ
もう一つのテーマ、テクスチャについても見ていきます。
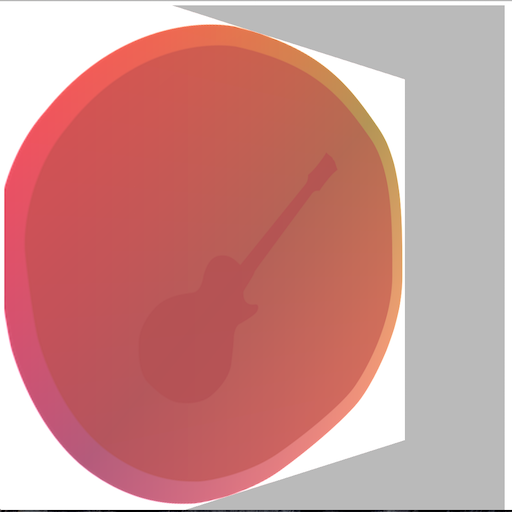
テクスチャというのは、ざっくり言うとモデルに貼り付ける画像のことです。
というわけで、書いてみましょう。
/* global mat4 */
( function() {
  function main() {
    var c  = document.getElementById( 'canvas' );
    var gl = c.getContext( 'webgl' ) || c.getContext( 'experimental-webgl' );

    var canvasSize = Math.min( this.innerWidth, this.innerHeight );

    c.width  = canvasSize;
    c.height = canvasSize;

    var tex = gl.createTexture();

    initTexture( '../img/dorayaki.png', tex, renderOctahedron );

    function initTexture( path, texture, fn ) {
      var img = new Image();
      img.onload = function(){
        gl.bindTexture( gl.TEXTURE_2D, texture );
        gl.texImage2D( gl.TEXTURE_2D, 0, gl.RGBA, gl.RGBA, gl.UNSIGNED_BYTE, img );
        gl.texParameteri( gl.TEXTURE_2D, gl.TEXTURE_MIN_FILTER, gl.LINEAR );
        gl.texParameteri( gl.TEXTURE_2D, gl.TEXTURE_WRAP_T, gl.REPEAT );
        gl.generateMipmap( gl.TEXTURE_2D );
        gl.bindTexture( gl.TEXTURE_2D, null );
        if( fn !== null ){
          fn( texture );
        }
      };
      img.src = path;
    }

    function renderOctahedron( texture ) {
      var vs = createShader( 'vs' );
      var fs = createShader( 'fs' );

      if ( !vs || !fs ) {
        return;
      }

      var program = createProgram( [ vs, fs ] );

      var locations = new Array( 4 );
      locations[0]  = gl.getAttribLocation( program, 'positions' );
      locations[1]  = gl.getAttribLocation( program, 'colors' );
      locations[2]  = gl.getAttribLocation( program, 'normals' );
      locations[3]  = gl.getAttribLocation( program, 'textureCoords' );

      var strides = [ 3, 4, 3, 2 ];

      var positions = [
        -0.5,  0.5,  0.0,// 0 left
         0.5,  0.5,  0.0,// 1 top
        -0.5, -0.5,  0.0,// 2 center
         0.5, -0.5,  0.0,// 3 bottom
      ];

      // 色情報、左から順にRGBA
      var colors = [
        1.0, 0.0, 0.0, 1.0,// 0
        0.0, 1.0, 0.0, 1.0,// 1
        0.0, 0.0, 1.0, 1.0,// 2
        1.0, 1.0, 1.0, 1.0,// 3
      ];

      var normals = [
        0.0, 0.0, 1.0,// 0
        0.0, 0.0, 1.0,// 1
        0.0, 0.0, 1.0,// 2
        0.0, 0.0, 1.0,// 3
      ];

      var textureCoords = [
        0.0, 0.0,
        1.0, 0.0,
        0.0, 1.0,
        1.0, 1.0
      ];

      // vboの作成
      var positionVbo  = createVbo( positions );
      gl.bindBuffer( gl.ARRAY_BUFFER, positionVbo );
      gl.enableVertexAttribArray( locations[0] );
      gl.vertexAttribPointer( locations[0], strides[0], gl.FLOAT, false, 0, 0 );

      var colorVbo = createVbo( colors );
      gl.bindBuffer( gl.ARRAY_BUFFER, colorVbo );
      gl.enableVertexAttribArray( locations[1] );
      gl.vertexAttribPointer( locations[1], strides[1], gl.FLOAT, false, 0, 0 );

      var normalVbo = createVbo( normals );
      gl.bindBuffer( gl.ARRAY_BUFFER, normalVbo );
      gl.enableVertexAttribArray( locations[2] );
      gl.vertexAttribPointer( locations[2], strides[2], gl.FLOAT, false, 0, 0 );

      var textureVbo = createVbo( textureCoords );
      gl.bindBuffer( gl.ARRAY_BUFFER, textureVbo );
      gl.enableVertexAttribArray( locations[3] );
      gl.vertexAttribPointer( locations[3], strides[3], gl.FLOAT, false, 0, 0 );

      // iboの作成
      var indexes = [
        0, 1, 2,
        3, 2, 1
      ];

      var ibo = gl.createBuffer();
      gl.bindBuffer( gl.ELEMENT_ARRAY_BUFFER, ibo );
      gl.bufferData( gl.ELEMENT_ARRAY_BUFFER, new Int16Array( indexes ), gl.STATIC_DRAW );
      gl.bindBuffer( gl.ELEMENT_ARRAY_BUFFER, null );
      gl.bindBuffer( gl.ELEMENT_ARRAY_BUFFER, ibo );

      gl.enable( gl.DEPTH_TEST );
      gl.depthFunc( gl.LEQUAL );

      var count = 0;
      render();

      function createShader( id ) {
        var shaderSrouce = document.getElementById( id );
        var shader;

        if ( !shaderSrouce ) {
          console.error( '指定された要素が存在しません' );
          return;
        }

        switch( shaderSrouce.type ){
        case 'x-shader/x-vertex':
          shader = gl.createShader( gl.VERTEX_SHADER );
          break;
        case 'x-shader/x-fragment':
          shader = gl.createShader( gl.FRAGMENT_SHADER );
          break;
        default :
          return;
        }

        gl.shaderSource( shader, shaderSrouce.text );
        gl.compileShader( shader );
        if ( gl.getShaderParameter( shader, gl.COMPILE_STATUS ) ){
          return shader;
        } else {
          console.error( gl.getShaderInfoLog( shader ) );
        }
      }

      function createProgram( shaders ) {
        var program = gl.createProgram();

        shaders.forEach( function( shader ){ gl.attachShader( program, shader ); });
        gl.linkProgram( program );
        if( gl.getProgramParameter( program, gl.LINK_STATUS ) ){
          gl.useProgram( program );
          return program;
        }else{
          console.error( gl.getProgramInfoLog( program ) );
        }
      }

      function createVbo( data ) {
        var vbo = gl.createBuffer();
        gl.bindBuffer( gl.ARRAY_BUFFER, vbo );
        gl.bufferData( gl.ARRAY_BUFFER, new Float32Array( data ), gl.STATIC_DRAW );
        gl.bindBuffer( gl.ARRAY_BUFFER, null );
        return vbo;
      }

      function render() {
        count++;

        var deg = count % 360;
        var rad = deg * Math.PI / 180;

        var mMatrix   = mat4.identity( mat4.create() );
        var vMatrix   = mat4.identity( mat4.create() );
        var pMatrix   = mat4.identity( mat4.create() );
        var vpMatrix  = mat4.identity( mat4.create() );
        var mvpMatrix = mat4.identity( mat4.create() );

        var fovy = 45;
        var cx   = 1 * Math.sin( 0 );
        var cz   = 1 * Math.cos( 0 );

        var lightDirection = [ 0.0, 0.25, 0.75 ];
        var eyePosition    = [ cx, 0.0, cz ];
        var centerPosition = [ 0.0, 0.0, 0.0 ];
        var ambientColor   = [ 0.5, 0.1, 0.1, 0.0 ];

        // ビュー座標変換
        mat4.lookAt( vMatrix, eyePosition, centerPosition, [ 0.0, 1.0, 0.0 ] );
        // 投影変換・クリッピング
        mat4.perspective( pMatrix, fovy, 1, 0.1, 100.0 );

        mat4.rotateY( mMatrix, mMatrix, rad );

        // かける順番に注意
        mat4.multiply( vpMatrix, pMatrix, vMatrix );
        mat4.multiply( mvpMatrix, vpMatrix, mMatrix );

        var uLocations = new Array( 7 );
        uLocations[0]  = gl.getUniformLocation( program, 'mvpMatrix' );
        uLocations[1]  = gl.getUniformLocation( program, 'invMatrix' );
        uLocations[2]  = gl.getUniformLocation( program, 'lightDirection' );
        uLocations[3]  = gl.getUniformLocation( program, 'eyePosition' );
        uLocations[4]  = gl.getUniformLocation( program, 'centerPoint' );
        uLocations[5]  = gl.getUniformLocation( program, 'ambientColors' );
        uLocations[6]  = gl.getUniformLocation( program, 'texture' );

        gl.uniformMatrix4fv( uLocations[0], false, mvpMatrix );

        var invMatrix = mat4.identity( mat4.create() );
        mat4.invert( invMatrix, mMatrix );

        gl.activeTexture( gl.TEXTURE0 );
        gl.bindTexture( gl.TEXTURE_2D, texture );
        gl.uniformMatrix4fv( uLocations[1], false, invMatrix );

        gl.uniform3fv( uLocations[2], lightDirection );
        gl.uniform3fv( uLocations[3], eyePosition );
        gl.uniform3fv( uLocations[4], centerPosition );
        gl.uniform4fv( uLocations[5], ambientColor );
        gl.uniform1i( uLocations[6], 0 );

        gl.clearColor( 0.7, 0.7, 0.7, 1.0 );
        gl.viewport( 0, 0, c.width, c.height );
        gl.clearDepth( 1.0 );
        gl.clear( gl.COLOR_BUFFER_BIT | gl.DEPTH_BUFFER_BIT );

        gl.drawElements( gl.TRIANGLES, indexes.length, gl.UNSIGNED_SHORT, 0 );
        gl.flush();

        requestAnimationFrame( render );
      }
    }
  }

  this.addEventListener( 'load', main );

} )();
まず、テクスチャ画像の読み込みですが、こんな感じで書きます。
// 中略

var tex = gl.createTexture();

// 中略

function initTexture( path, texture, fn ) {
  var img = new Image();
  img.onload = function(){
    gl.bindTexture( gl.TEXTURE_2D, texture );
    gl.texImage2D( gl.TEXTURE_2D, 0, gl.RGBA, gl.RGBA, gl.UNSIGNED_BYTE, img );
    gl.texParameteri( gl.TEXTURE_2D, gl.TEXTURE_MIN_FILTER, gl.LINEAR );
    gl.texParameteri( gl.TEXTURE_2D, gl.TEXTURE_WRAP_T, gl.REPEAT );
    gl.generateMipmap( gl.TEXTURE_2D );
    gl.bindTexture( gl.TEXTURE_2D, null );
    if( fn !== null ){
      fn( texture );
    }
  };
  img.src = path;
}
まず、gl.createTexture()でWebGLTextureインスタンスを生成します。
そのあと、gl.bindTexture()でテクスチャをWebGLコンテキストにバインドします。
gl.texImage2D()で画像のピクセル情報を取得し、gl.generateMipmap()でミップマップを作成します。
最後に、go.bindTexture()にnullを入れてお掃除します。
ここでのポイントは、画像の読み込みが終わった後に処理をすることです。
画像の読み込みが終わっていないと残念なことになります。
どんどん行きましょう。
var textureCoords = [
  0.0, 0.0,
  1.0, 0.0,
  0.0, 1.0,
  1.0, 1.0
];

// 中略

var textureVbo = createVbo( textureCoords );
gl.bindBuffer( gl.ARRAY_BUFFER, textureVbo );
gl.enableVertexAttribArray( locations[3] );
gl.vertexAttribPointer( locations[3], strides[3], gl.FLOAT, false, 0, 0 );
他の頂点情報と同じように、テクスチャの座標もVBOを作成してシェーダにわたします。
最後にテクスチャ情報を、シェーダに送りましょう。
こんな感じで書けます。
// 中略
uLocations[6]  = gl.getUniformLocation( program, 'texture' );

// 中略

gl.activeTexture( gl.TEXTURE0 );
gl.bindTexture( gl.TEXTURE_2D, texture );
gl.uniformMatrix4fv( uLocations[1], false, invMatrix );

// 中略
gl.uniform1i( uLocations[6], 0 );
テクスチャには、ユニットという概念があります。
配列のように、0〜その端末の上限値までテクスチャを格納することができます。
テクスチャを利用するには、このユニットを有効にしないといけないので、
gl.activeTexture();でテクスチャを有効にします。
ユニットを有効にしたら、gl.bindTexture()でテクスチャをバインドして、
最後に、gl.uniform1i()で利用するユニット番号をシェーダに教えてあげます。
以上で、JS側の実装は終了です。
最後に、シェーダ側を見ていきましょう。
<script id="vs" type="x-shader/x-vertex">
  attribute vec3 positions;
  attribute vec4 colors;
  attribute vec3 normals;
  attribute vec2 textureCoords;

  uniform   mat4 mvpMatrix;

  varying   vec4 vColors;
  varying   vec3 vNormals;
  varying   vec2 vTextureCoords;

  void main( void ){
    vColors        = colors;
    vNormals       = normals;
    vTextureCoords = textureCoords;
    gl_Position    = mvpMatrix * vec4( positions, 1.0 );
  }
</script>
<script id="fs" type="x-shader/x-fragment">
  precision mediump float;

  varying vec4 vColors;
  varying vec3 vNormals;
  varying vec2 vTextureCoords;

  uniform mat4      invMatrix;
  uniform vec4      ambientColors;
  uniform vec3      lightDirection;
  uniform vec3      eyePosition;
  uniform vec3      centerPoint;
  uniform sampler2D texture;

  void main( void ){
    vec3 invLight = normalize( invMatrix * vec4( lightDirection, 1.0 ) ).xyz;
    vec3 invEye   = normalize( invMatrix * vec4( eyePosition - centerPoint, 1.0 ) ).xyz;
    vec3 halfVec  = normalize( invLight + invEye );

    float diff = clamp( dot( invLight, vNormals ), 0.0, 1.0 );
    float spec = clamp( dot( halfVec, vNormals ), 0.0, 1.0 );
    spec       = pow( spec, 10.0 );

    vec4 sampleColors = texture2D( texture, vTextureCoords );

    gl_FragColor = vec4( vec3( diff ), 1.0 ) * vColors * sampleColors + ambientColors + vec4( vec3( spec ), 0.0 );
  }
</script>
シェーダ側の実装は、かなりシンプルです。
vec4 sampleColors = texture2D( texture, vTextureCoords );

gl_FragColor = vec4( vec3( diff ), 1.0 ) * vColors * sampleColors + ambientColors + vec4( vec3( spec ), 0.0 );
textureとvTextureCoordsでsampleColorを作成して、vColorsに掛けてあげれば、完成です。
ハマりポイント
テクスチャに使う画像のピクセルは必ず、2の累乗にしてください(256px, 512pxなど)
これを怠るとNon power-of-two texturesのようなエラーが発生します。
テクスチャの限界数
ちなみに、テクスチャの限界数は下記のような感じで取得ができます。
var maxUnits = gl.getParameter( gl.MAX_COMBINED_TEXTURE_IMAGE_UNITS );
最後に
今回の実装サンプルは下記にありますので良かったら見てください。
テクスチャのサンプルを見る場合は、http-serverなどをご利用ください。
6/27がまた講義なので、勉強してきます!!


