この記事について
JAWS-UG 初心者支部#9 × CLI専門支部 #85で実施するハンズオン用の手順書です。
静的Webサイトホスティングの設定を
- AWS CLI
- AWS CloudFormation(by AWS CLI)
の2つの方法で設定します。
同じ結果を異なる手段で得ることで、各ツールの特徴や使いどころを考えるきっかけになればと考えています。
0. 前提条件
- クライアントにaws-cliがインストールされていること
- この手順は、Amazon Linux上で動作確認を実施しています
- アクセスキーが発行済みであること
これらの準備が完了していない場合、以下のドキュメントを参考にして環境を準備してください。
aws-cliのインストール
以下のドキュメントに従ってaws-cliをインストールしてください。
Installing the AWS Command Line Interface
アクセスキーの発行
「Email and password (account root user)」でマネージメントコンソールにログイン後、以下のドキュメントに従ってaws-cliをインストールしてください。
本日のハンズオンでは、S3へのフルコントロール権限が必要です。(オプションを実施する場合は、CloudFormationのフルコントロール権限を付与してください。)
- ユーザーの作成
- ユーザーに権限を付与
- アクセスキーの発行
1. aws-cliの設定
aws-cliを実行する際に使用する認証情報を設定します。
本日のハンズオンでは、クライアントの設定ファイルに認証情報を保存します。
認証情報の使用/設定方法は複数存在します。また、複数の手段で設定済みの場合、仕様で定められた優先順位に基づいて認証情報が選択されます。
Configuration Settings and Precedence
Command Line Options – region, output format and profile can be specified as command options to override default settings.
Environment Variables – AWS_ACCESS_KEY_ID, AWS_SECRET_ACCESS_KEY, etc.
The AWS credentials file – located at ~/.aws/credentials on Linux, macOS, or Unix, or at C:\Users\USERNAME .aws\credentials on Windows. This file can contain multiple named profiles in addition to a default profile.
The CLI configuration file – typically located at ~/.aws/config on Linux, macOS, or Unix, or at C:\Users\USERNAME .aws\config on Windows. This file can contain a default profile, named profiles, and CLI specific configuration parameters for each.
Instance profile credentials – these credentials can be used on EC2 instances with an assigned instance role, and are delivered through the Amazon EC2 metadata service.
1.1. プロファイルの設定
設定の確認(設定前)
aws configure list
      Name                    Value             Type    Location
      ----                    -----             ----    --------
   profile                <not set>             None    None
access_key                <not set>             None    None
secret_key                <not set>             None    None
    region                <not set>             None    None
プロファイルの作成
認証情報(アクセスキー)およびリージョンを設定ファイルに保存します。
これにより、コマンド実行の度に認証情報を指定したり、作業の度に環境変数を指定する必要がありません。
今日のハンズオンでは、任意のプロファイル名を指定します。プロファイルを利用することで、利用する認証情報を使い分けることが可能です。
AWS_PROFILE="jawsug-beginner"
aws configure --profile ${AWS_PROFILE}
AWS Access Key ID [None]: XXXXXXXXXXXXXXXXXXXX
AWS Secret Access Key [None]: XXXXXXXXXXXXXXXXXXXXXXXXXXXXXXXXXXXXXXXX
Default region name [None]: ap-northeast-1
Default output format [None]:
デフォルトプロファイルの指定
デフォルトで利用するプロファイルを指定します。指定は、環境変数を使用します。
export AWS_DEFAULT_PROFILE=${AWS_PROFILE}
プロファイル以外にも環境変数を利用して認証情報やデフォルトで利用するリージョンの指定が可能です。詳細は以下のドキュメントを確認してください。
AWS_ACCESS_KEY_ID – AWS access key.
AWS_SECRET_ACCESS_KEY – AWS secret key. Access and secret key variables override credentials stored in credential and config files.
AWS_SESSION_TOKEN – session token. A session token is only required if you are using temporary security credentials.
AWS_DEFAULT_REGION – AWS region. This variable overrides the default region of the in-use profile, if set.
AWS_DEFAULT_PROFILE – name of the CLI profile to use. This can be the name of a profile stored in a credential or config file, or default to use the default profile.
AWS_CONFIG_FILE – path to a CLI config file.
設定の確認(設定後)
aws configure list
      Name                    Value             Type    Location
      ----                    -----             ----    --------
   profile          jawsug-beginner           manual    --profile
access_key     ****************CNCA shared-credentials-file
secret_key     ****************YTgO shared-credentials-file
    region           ap-northeast-1      config-file    ~/.aws/config
設定ファイルの確認
aws configureコマンドで設定した認証情報は、以下のファイルに保存されています。確認してみましょう。
cat ~/.aws/credentials
[jawsug-beginner]
aws_access_key_id = XXXXXXXXXXXXXXXXXXXX
aws_secret_access_key = XXXXXXXXXXXXXXXXXXXXXXXXXXXXXXXXXXXXXXXX
cat ~/.aws/config
[profile jawsug-beginner]
region = ap-northeast-1
2. Amazon S3で静的ウェブサイトホスティング
Amazon S3で静的ウェブサイトをホスティングします。
例: 独自ドメインを使用して静的ウェブサイトをセットアップする
2.1. バケットの作成
バケット名の指定
S3バケット名は、「グローバル」でユニークである必要があります。
また、バケット名は命名規則に則っている必要があります。
PJ_NAME="<Unique project name>"
BUCKET_NAME="${PJ_NAME}-handson-$(date +%Y%m%d%H%M)" && echo ${BUCKET_NAME}
nakayama-handson-201705270743
バケットの作成
コンテンツをホストするバケットを作成します。
aws s3 mb s3://${BUCKET_NAME}
make_bucket: nakayama-handson-201705270743
バケットの存在を確認
aws s3 ls | grep ${BUCKET_NAME}
2017-05-27 07:44:56 nakayama-handson-201705270743
2.2. バケットポリシーの設定
バケット上のコンテンツに誰でもアクセスできるようにアクセス権を設定します。
設定の確認(設定前)
aws s3api get-bucket-policy \
    --bucket ${BUCKET_NAME}
An error occurred (NoSuchBucketPolicy) when calling the GetBucketPolicy operation: The bucket policy does not exist
バケットポリシーの生成
バケットポリシーをJSONで定義します。
AWS CLIではインデントがくずれているとエラーになる場合があるのでご注意ください。
POLICY_FILE_NAME="bucket-policy.json"
cat << EOF > ${POLICY_FILE_NAME}
{
  "Version":"2012-10-17",
  "Statement":[{
    "Sid":"AddPerm",
    "Effect":"Allow",
    "Principal": "*",
    "Action":["s3:GetObject"],
    "Resource":["arn:aws:s3:::${BUCKET_NAME}/*"]
  }]
}
EOF

cat ${POLICY_FILE_NAME}
{
  "Version":"2012-10-17",
  "Statement":[{
    "Sid":"AddPerm",
    "Effect":"Allow",
    "Principal": "*",
    "Action":["s3:GetObject"],
    "Resource":["arn:aws:s3:::nakayama-handson-201705270743/*"]
  }]
}
バケットポリシーの設定
作成したポリシーをバケットに適用します。
aws s3api put-bucket-policy \
    --bucket ${BUCKET_NAME} \
    --policy file://${POLICY_FILE_NAME}
設定の確認(設定後)
aws s3api get-bucket-policy \
    --bucket ${BUCKET_NAME}
{
    "Policy": "{\"Version\":\"2012-10-17\",\"Statement\":[{\"Sid\":\"AddPerm\",\"Effect\":\"Allow\",\"Principal\":\"*\",\"Action\":\"s3:GetObject\",\"Resource\":\"arn:aws:s3:::nakayama-handson-201705270743/*\"}]}"
}
2.3. ウェブサイトホスティング設定
バケットのエンドポイント経由でコンテンツにアクセスできるように設定します。
設定の確認(設定前)
バケットにウェブサイトホスティングの設定がされていないことを確認します。
aws s3api get-bucket-website \
    --bucket ${BUCKET_NAME}
An error occurred (NoSuchWebsiteConfiguration) when calling the GetBucketWebsite operation: The specified bucket does not have a website configuration
ウェブサイトホスティング設定
バケットの/index.htmlがウェブサイトホスティングのインデックスページにする設定をします。
aws s3 website s3://${BUCKET_NAME}/ \
    --index-document index.html
設定の確認(設定後)
バケットのウェブサイトホスティング設定を確認します。
aws s3api get-bucket-website \
    --bucket ${BUCKET_NAME}
{
    "IndexDocument": {
        "Suffix": "index.html"
    }
}
2.4. コンテンツのアップロード
バケットにコンテンツをアップロードします。
コンテンツの生成
HTML_FILE_NAME="index.html"
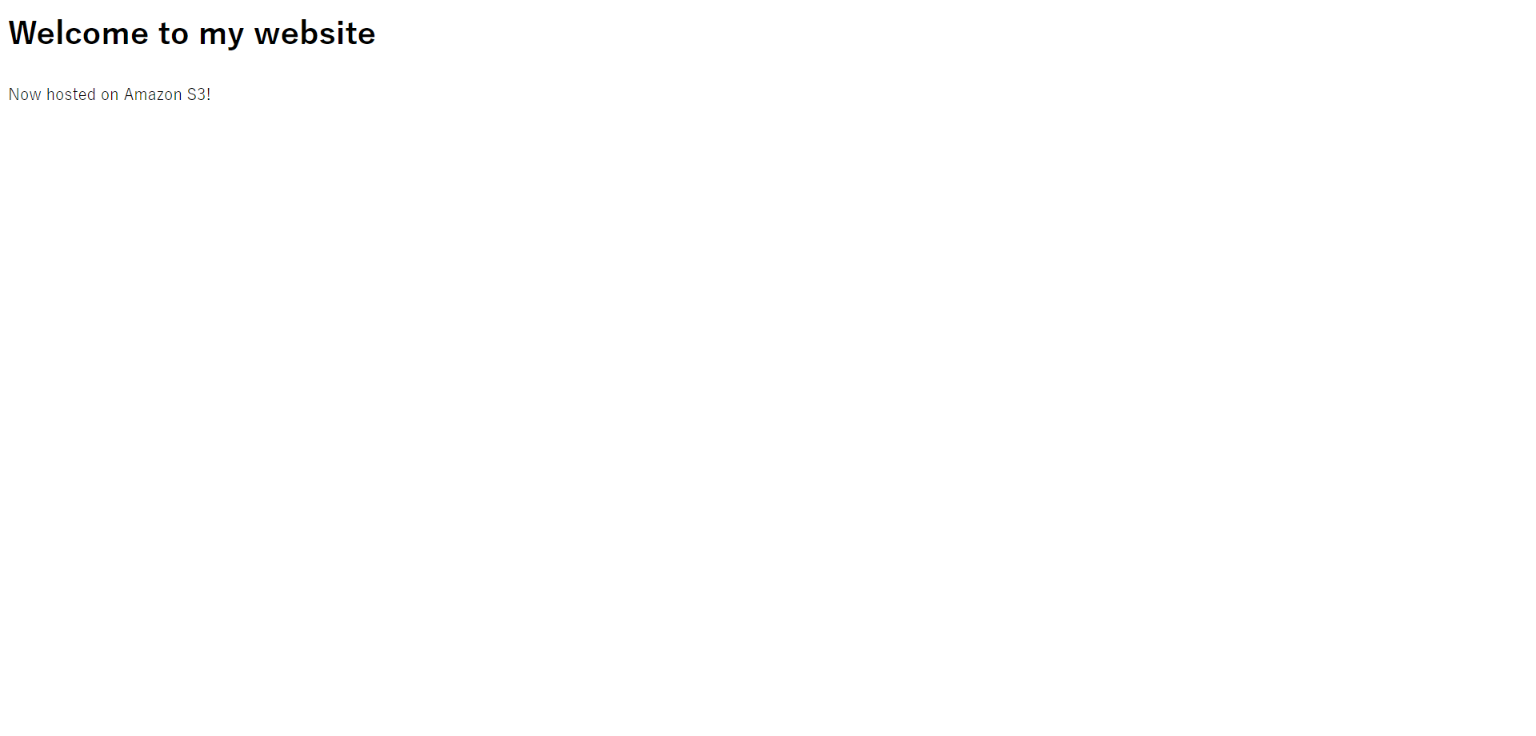
cat << EOF > ${HTML_FILE_NAME}
<html xmlns="http://www.w3.org/1999/xhtml" >
<head>
    <title>My Website Home Page</title>
</head>
<body>
  <h1>Welcome to my website</h1>
  <p>Now hosted on Amazon S3!</p>
</body>
</html>
EOF

cat ${HTML_FILE_NAME}
<html xmlns="http://www.w3.org/1999/xhtml" >
<head>
    <title>My Website Home Page</title>
</head>
<body>
  <h1>Welcome to my website</h1>
  <p>Now hosted on Amazon S3!</p>
</body>
</html>
バケットの内容を確認(アップロード前)
aws s3 ls s3://${BUCKET_NAME}/
コンテンツのアップロード
aws s3 cp ${HTML_FILE_NAME} s3://${BUCKET_NAME}/
upload: ./index.html to s3://nakayama-handson-201705270743/index.html
バケットの内容を確認(アップロード後)
aws s3 ls s3://${BUCKET_NAME}/
2017-05-27 08:22:07 190 index.html
2.5. 動作確認
エンドポイント名を生成、実際にアクセスできることを確認します。
BUCKET_ENDPOINT="http://${BUCKET_NAME}.s3-website-`aws s3api get-bucket-location --bucket ${BUCKET_NAME} --output text`.amazonaws.com" \
    && echo ${BUCKET_ENDPOINT}
http://nakayama-handson-201705270743.s3-website-ap-northeast-1.amazonaws.com
3. 【オプション】CloudFormationで静的ウェブサイトホスティング
前の章と同じことをCloudFormatonを使って実施します。
ウェブサイトホスティングの DeletionPolicy を持つ Amazon S3 バケットの作成
3.1. テンプレートの生成
バケット名の指定
PJ_NAME="<Unique project name>"
BUCKET_NAME="${PJ_NAME}-handson-$(date +%Y%m%d%H%M)"&& echo ${BUCKET_NAME}
テンプレートの生成
前の章で作成した環境を再現するCloudFormationテンプレートを生成します。
今回、YAMLでテンプレートを生成しています。インデントが意味を持つため、作成時には注意してください。
TEMPLATE_FILE_NAME="static-website-hosting.yml"
cat << EOF > ${TEMPLATE_FILE_NAME}
AWSTemplateFormatVersion: '2010-09-09'
Resources:
  S3Bucket:
    Type: AWS::S3::Bucket
    Properties:
      BucketName : ${BUCKET_NAME}
      WebsiteConfiguration:
        IndexDocument: index.html
  S3BucketPolicy:
    Type: "AWS::S3::BucketPolicy"
    Properties:
      Bucket:
        Ref: "S3Bucket"
      PolicyDocument:
        Statement:
          -
            Action:
              - "s3:GetObject"
            Effect: "Allow"
            Resource:
              Fn::Join:
                - ""
                -
                  - "arn:aws:s3:::"
                  -
                    Ref: "S3Bucket"
                  - "/*"
            Principal: "*"
Outputs:
  WebsiteURL:
    Value: !GetAtt S3Bucket.WebsiteURL
    Description: URL for the website hosted on S3
  S3BucketSecureURL:
    Value: !Sub
        - https://\${Domain}
        - Domain: !GetAtt S3Bucket.DomainName
    Description: Name of the S3 bucket to hold website content
EOF

cat ${TEMPLATE_FILE_NAME}
生成したテンプレートの検証
生成したテンプレートの構文等に不備がないか検証します。
aws cloudformation validate-template \
    --template-body file://${TEMPLATE_FILE_NAME}
3.2. テンプレートを使ったプロビジョニング
スタック名の指定
STACK_NAME="S3-WEBSITE-HOSTING-${BUCKET_NAME}" && echo ${STACK_NAME}
同名スタックの不存在を確認
aws cloudformation describe-stacks \
    --query Stacks[?StackName==\'${STACK_NAME}\']
[]
スタックの作成
aws cloudformation create-stack \
    --stack-name ${STACK_NAME} \
    --template-body file://${TEMPLATE_FILE_NAME}
{
    "StackId": "arn:aws:cloudformation:ap-northeast-1:XXXXXXXXXXXX:stack/S3-WEBSITE-HOSTING-nakayama-handson-201705270855/6b9824a0-42bb-11e7-af73-50a68a175ad2"
}
スタックの作成完了を待機
aws cloudformation wait stack-create-complete \
    --stack-name ${STACK_NAME}
スタックの状態を確認
"Outputs"にS3のエンドポイントが出力されていること、"StackStatus"がスタックの作成完了を示していることなどを確認します。
aws cloudformation describe-stacks \
    --stack-name ${STACK_NAME}
{
    "Stacks": [
        {
            "StackId": "arn:aws:cloudformation:ap-northeast-1:XXXXXXXXXXXX:stack/S3-WEBSITE-HOSTING-nakayama-handson-201705270855/6b9824a0-42bb-11e7-af73-50a68a175ad2",
            "Tags": [],
            "Outputs": [
                {
                    "Description": "Name of the S3 bucket to hold website content",
                    "OutputKey": "S3BucketSecureURL",
                    "OutputValue": "https://nakayama-handson-201705270855.s3.amazonaws.com"
                },
                {
                    "Description": "URL for the website hosted on S3",
                    "OutputKey": "WebsiteURL",
                    "OutputValue": "http://nakayama-handson-201705270855.s3-website-ap-northeast-1.amazonaws.com"
                }
            ],
            "CreationTime": "2017-05-27T09:03:58.965Z",
            "StackName": "S3-WEBSITE-HOSTING-nakayama-handson-201705270855",
            "NotificationARNs": [],
            "StackStatus": "CREATE_COMPLETE",
            "DisableRollback": false
        }
    ]
}
3.3. コンテンツのアップロード
バケットにコンテンツをアップロードします。
コンテンツの生成
アップロードするコンテンツを生成します。
DIR_NAME="temp-$(date +%Y%m%d%H%M)"
mkdir ${DIR_NAME}
cd ${DIR_NAME}
HTML_FILE_NAME="index.html"
cat << EOF > ${HTML_FILE_NAME}
<html xmlns="http://www.w3.org/1999/xhtml" >
<head>
    <title>My Website Home Page</title>
</head>
<body>
  <h1>Welcome to my website</h1>
  <p>Now hosted on Amazon S3!</p>
</body>
</html>
EOF

cat ${HTML_FILE_NAME}
<html xmlns="http://www.w3.org/1999/xhtml" >
<head>
    <title>My Website Home Page</title>
</head>
<body>
  <h1>Welcome to my website</h1>
  <p>Now hosted on Amazon S3!</p>
</body>
</html>
バケットの内容を確認(アップロード前)
現在バケットに存在するコンテンツを確認します。
aws s3 ls s3://${BUCKET_NAME}/
コンテンツのアップロード
生成したコンテンツをアップロードします。
aws s3 cp ${HTML_FILE_NAME} s3://${BUCKET_NAME}/
upload: ./index.html to s3://nakayama-handson-201705270855/index.html
バケットの内容を確認(アップロード後)
現在バケットに存在するコンテンツを確認します。
aws s3 ls s3://${BUCKET_NAME}/
2017-05-27 09:13:39 190 index.html
3.4. 動作確認
ブラウザでエンドポイントにアクセスしてコンテンツが正常に表示されることを確認します。
WEBSITE_URL=$(aws cloudformation describe-stacks \
    --stack-name ${STACK_NAME} \
    --query Stacks[].Outputs[?OutputKey==\`WebsiteURL\`].OutputValue[] \
    --output text) \
    && echo ${WEBSITE_URL}
http://nakayama-handson-201705270855.s3-website-ap-northeast-1.amazonaws.com
3.5. スタックの削除
aws s3 rm s3://${BUCKET_NAME}/index.html
delete: s3://XXXXXXXXXXXXX-handson-201705292018-cf/index.html
aws cloudformation delete-stack \
    --stack-name ${STACK_NAME}
本日のハンズオンは以上です。お疲れさまでした。