この記事について
XCodeにあるInterfaceBuilderに用意されてない部品を作ったり、グラフなど描画するためにUIBezierPathをよく使います。今回、久々Swiftコードで書く機会があったのでメモしておきます。
普段はContextを使いdraw(_ rect: CGRect)のCallbackメソッドにも書けますが、そうしてしまうとアニメーションの時に制御が難しくなるため、今回はレイヤーで描くようにしています。描画したレイヤーはview.layerにaddSublayerする必要があります。
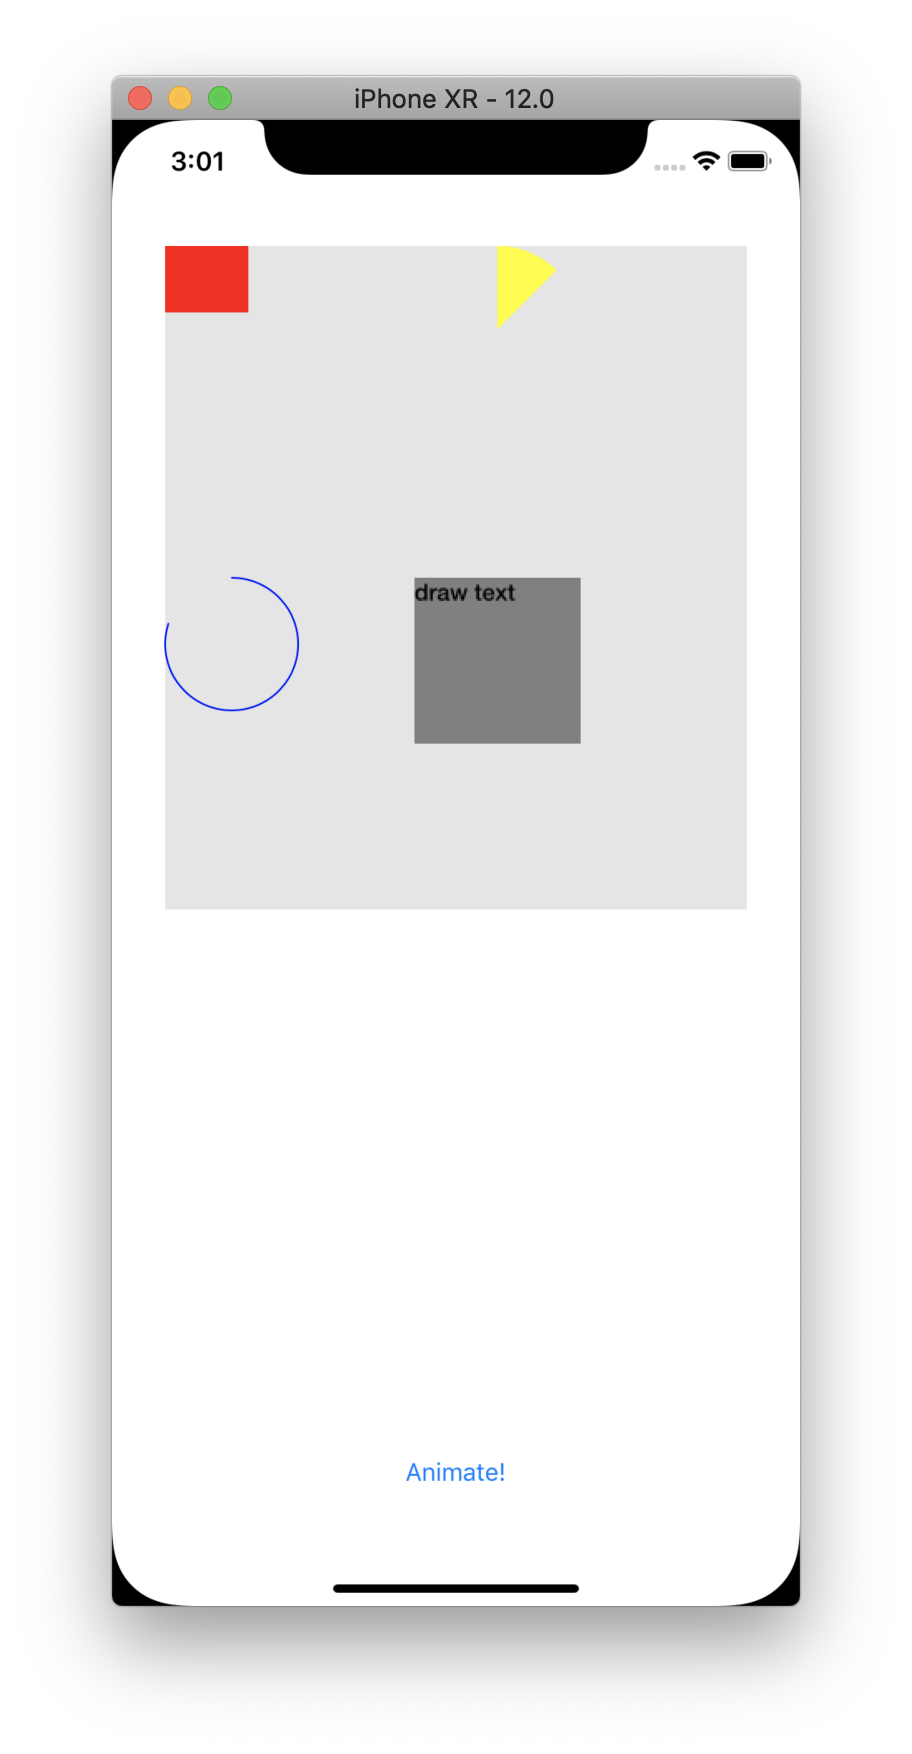
レイヤーで描画するコード
- 四角の線を描く場合、
private func drawFillSquare(rect: CGRect, color: UIColor, onLayer: CAShapeLayer) {

        let path: UIBezierPath = UIBezierPath()
        path.move(to: CGPoint(x:0, y:0))
        path.addLine(to: CGPoint(x:rect.size.width, y:0))
        path.addLine(to: CGPoint(x:rect.size.width, y:rect.size.height))
        path.addLine(to: CGPoint(x:0, y:rect.size.height))

        onLayer.fillColor = color.cgColor
        onLayer.strokeColor = UIColor.clear.cgColor;
        onLayer.path = path.cgPath
    }
- 色を塗った円を描く場合、(角度設定可能)
    private func drawFillCircle(rect: CGRect, angle: CGFloat, color: UIColor, onLayer: CAShapeLayer) {

        let angle = CGFloat(angle)
        let pi = CGFloat(Double.pi)
        let start:CGFloat = -1 * pi / 2.0
        let end :CGFloat = (angle/360) * pi * 2.0 - (pi / 2.0)

        let path: UIBezierPath = UIBezierPath()
        path.move(to: CGPoint(x:rect.width/2,y:rect.height/2))
        path.addArc(withCenter: CGPoint(x:rect.width/2,y:rect.height/2),
                              radius: rect.width/2,
                              startAngle: start,
                              endAngle: end,
                              clockwise: true)

        path.lineCapStyle = CGLineCap.square
        onLayer.fillColor = color.cgColor
        onLayer.path = path.cgPath
    }
- 色を塗った円を描く場合、(角度設定可能)
    private func drawStrokeCircle(rect: CGRect, color: UIColor, value: CGFloat, lineWidth: CGFloat, onLayer: CAShapeLayer) {

        let angle = 360 * value

        let pi = CGFloat(Double.pi)
        let centerPoint = CGPoint (x: rect.width / 2.0, y: rect.width / 2.0);
        let circleRadius = CGFloat(rect.width / 2.0)
        let start:CGFloat = -1 * pi / 2.0
        let end :CGFloat = (angle/360) * pi * 2.0 - (pi / 2.0) // 終了の角度

        let circlePath = UIBezierPath(arcCenter: centerPoint,
                                      radius: circleRadius,
                                      startAngle: start,
                                      endAngle: end,
                                      clockwise: true)

        onLayer.path = circlePath.cgPath;
        onLayer.strokeColor = color.cgColor;
        onLayer.fillColor = UIColor.clear.cgColor;
        onLayer.lineCap = kCALineCapRound
        onLayer.lineWidth = lineWidth;
        onLayer.strokeStart = 0;
        onLayer.strokeEnd = 1;
        onLayer.backgroundColor = UIColor.clear.cgColor

    }
- テキストを描く場合、
    private func drawText(rect: CGRect, fontSize: CGFloat, color: UIColor, content: String, onLayer: CATextLayer) {

        let myAttributes = [NSAttributedString.Key.font: UIFont(name: "HelveticaNeue-Medium", size: fontSize)!,
                            NSAttributedString.Key.foregroundColor: color]
        let myAttributedString = NSAttributedString(string: content, attributes: myAttributes)

        onLayer.string = myAttributedString
        onLayer.backgroundColor = UIColor.gray.cgColor
        onLayer.frame = rect
    }
レイヤーをアニメーションさせる
        //描くアニメーション
        let strokeAnimation = CABasicAnimation(keyPath: "strokeEnd")
        strokeAnimation.fromValue = 0.0
        strokeAnimation.toValue = 1.0
        strokeAnimation.timingFunction = CAMediaTimingFunction(name: kCAMediaTimingFunctionEaseOut)

        //透明アニメーション
        let opacityAnimation = CABasicAnimation(keyPath: "opacity")
        opacityAnimation.fromValue = 0.0
        opacityAnimation.toValue = 1.0

        //グループアニメーション(同時に実行)
        let animationGroup = CAAnimationGroup()
        animationGroup.setValue("group-animation", forKey: "animationName")
        animationGroup.animations = [strokeAnimation, opacityAnimation]
        animationGroup.duration = 0.7
        animationGroup.fillMode = kCAFillModeForwards
        animationGroup.delegate = self
        animationLayer1.add(animationGroup, forKey: "group-animation")

        //色を塗るアニメーション
        let fillAnimation = CABasicAnimation(keyPath: "fillColor")
        fillAnimation.fromValue = UIColor.clear.cgColor
        fillAnimation.toValue = tintColor.cgColor
        fillAnimation.timingFunction = CAMediaTimingFunction(name: kCAMediaTimingFunctionEaseOut)
        fillAnimation.duration = 0.3
        fillAnimation.beginTime = CACurrentMediaTime() + 0.7 //アニメーションを遅らせる
        fillAnimation.isRemovedOnCompletion = false
        fillAnimation.fillMode = kCAFillModeForwards
        animationLayer2.add(fillAnimation, forKey: "fillColor")
おまけ
- 数字のインクリメントアニメーション
private func incrementAnimation(value: Int, prefix: String, duration: Double) {

        DispatchQueue.global().async {
            let aValue = abs(value) + 1
            for i in 0 ..< aValue {
                let sleepTime = UInt32(duration/Double(aValue) * 1000000.0)
                usleep(sleepTime)
                DispatchQueue.main.async {
                    self.text = prefix + "\(i)"
                }
            }
        }
    }
サンプル
