はじめに
前回はmatlabからexcelファイルに出力する方法を完全に理解し,excelとの和解を成し遂げた.今回は同様にwordと和解したいと思う.
まずmatlabでのwordの簡単な使い方を解説し,その後でサンプルプログラムを作成する.
matlabでのword使い方
自分が使う機能のみ簡単に解説する.
他に解説して欲しい機能がありましたらコメントで質問していただければ頑張ってググります.
Word初期化
word = actxserver('Word.Application');
word.Visible = 1;
document = word.Documents.Open(filepath);% 既存のファイルを開く
% document = word.Documents.Add();% 新規作成
selection = word.Selection;
Documents.Openでは既存のファイルを開き,Documents.Addはファイルを新規に作成する.
どちらかを使用する.
word.Visible = 0とすると,wordが非表示となって裏で作業してくれるのだが,エラーで止まったりした時(画像ファイルのパスが間違っているなど)にどこで止まったのか分かりやすいので表示させている.
画像貼り付け
selection.InlineShapes.AddPicture(filepath);
AddPictureの引数には画像ファイルのフルパスを入れる.
文字挿入
selection.Font.Size = 11;
selection.Font.Name = 'MS 明朝'
selection.Paragraphs.Alignment = 'wdAlignParagraphCenter';  % センタリング
selection.TypeText(str);
selection.TypeText(str);で文字を挿入する.
selection.Fontで文字サイズ等を指定する.
改行
selection.TypeParagraph;
表
% 表枠の作成
% 3行2列の表
table = selection.Tables.Add(selection.Range , 3, 2, 1);
table.Rows.Alignment = 'wdAlignRowCenter';  % 表をセンタリング

% 表の列幅を設定
% 設定しなくても良い.設定しないと列幅は自動で設定される.
col1 = 42.4;% mm ここは自分で好きな値を入れる
col2 = 62.5;% mm
COL1WIDTH = col1 * 2.83465;% mm->ptに変換
COL2WIDTH = col2 * 2.83465;
table.Columns.Item(1).SetWidth(COL1WIDTH, 0);% 列幅をptで指定
table.Columns.Item(2).SetWidth(COL2WIDTH, 0);

% 表に値を入れていく
% 1行1列目
table.Cell(1,1).Select;
selection.TypeText("aaa");
% 1行2列目
table.Cell(1,2).Select;
selection.TypeText("bbb");

%...

% 表の選択解除
selection.MoveDown;
改ページ
selection.InsertBreak;
ファイル保存
saveFileName = fullfile(path, 'test.docx');
document.SaveAs2(saveFileName);
SaveAs2の引数にはフルパスを入れる.
ファイルクローズ
document.Close;
word.Quit();
サンプルプログラム作成
前節でmatlabのwordの使い方を説明したので,次は実際にプログラムを作成してみる.
業務においては分析結果のbitmapや分析パラメタの表をwordに貼り付けて報告書を作成することがある.この時,bitmap等の貼り付けは人力だったり,VBAマクロを使ったりしている.今回はmatlabでbitmapや表の貼り付けを自動化したいと思う.
準備
実装方法は色々あると思うが,ここではテンプレートとなるワードファイルを準備し,matlabでそれを開いてbitmap等を追加していって別名で保存するという方式を取る.
下図のようなテンプレートファイルを用意した.wordを開いて新規作成して,「挿入」から「ページ番号」を追加して,「word_template.docx」として保存した.
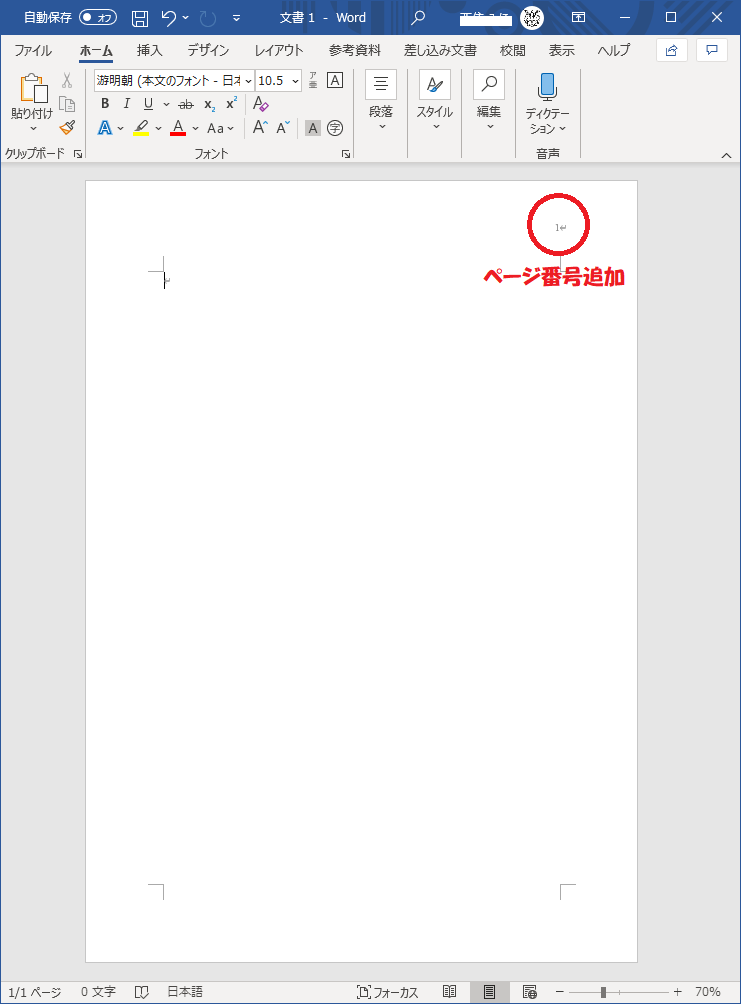
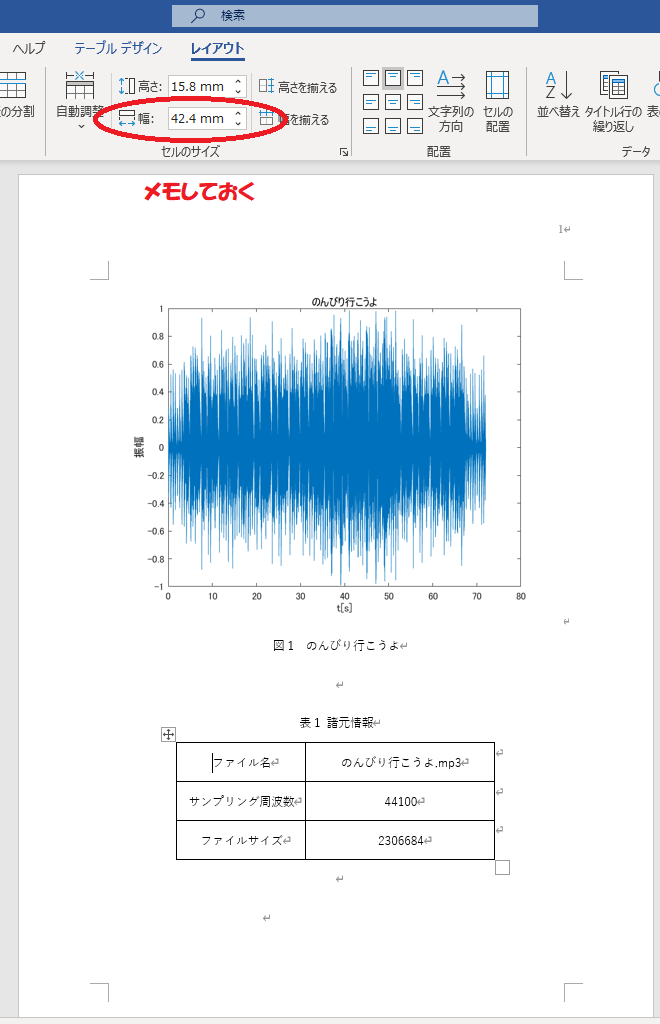
文字フォントや表の幅など詳しく指定したい場合は,完成形を1ページだけ手作業で作ってみて,フォントサイズだとか表の幅などの必要な情報をメモしておく.
貼り付ける画像を準備
カレントディレクトリとサブディレクトリ内のmp3ファイルを検索して,振幅グラフを描いて,結果をbitmapに貼り付ける処理を実装した.
【MATLAB】指定フォルダ内のファイルを検索して処理をする
を殆どそのまま持ってきただけなので解説は特にしない.
clc
clear all
close all

% カレントディレクトリとサブディレクトリを検索
fileList = dir('**/*.mp3');
for n = 1:length(fileList)
    % 音声ファイルを開く
    filepath = fullfile(fileList(n).folder, fileList(n).name);
    [y, Fs] = audioread(filepath);
    if(size(y, 2) ~= 1)
        % 1chのみ取り出す
        y = y(:,1);
    end
    % 振幅グラフを描く
    t = ((1:length(y))-1)/Fs;
    h = figure;
    plot(t, y);
    [~,name,~] = fileparts(fileList(n).name);
    xlabel('t[s]');
    ylabel('振幅');
    title(name);

    % bitmapとして保存する
    bitmapname = sprintf("%s.bmp", name);
    filepath = fullfile(fileList(n).folder, bitmapname);
    saveas(h, filepath);
    close(h);
end
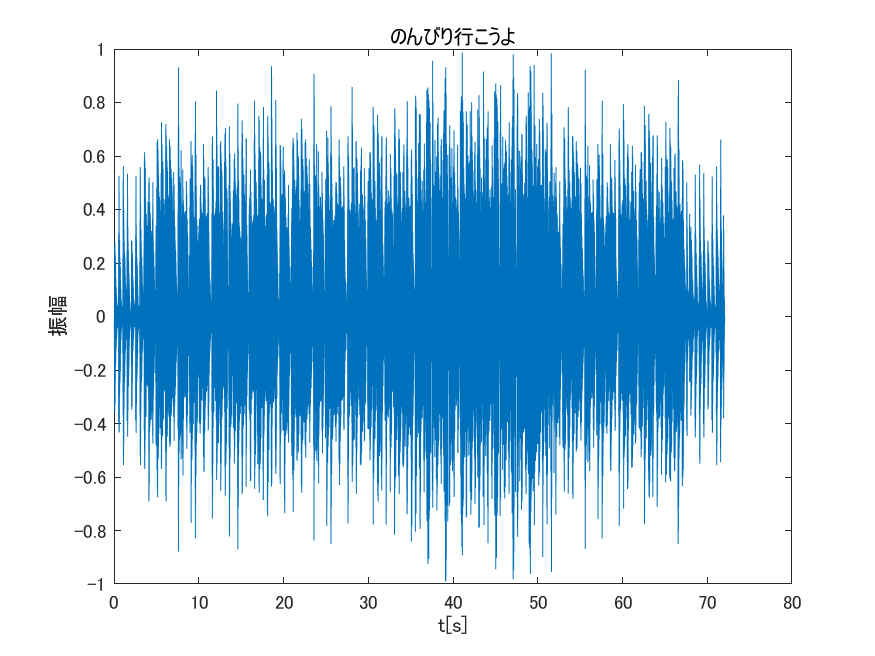
作成した画像
作成した画像は以下のようになった.レポートとして添付する場合はもう少しグラフの見栄えを調整すべきであるが,本記事の趣旨とは逸れるので触れないでおく.
word貼り付け処理の実装
clc
clear all
close all

% カレントディレクトリとサブディレクトリを検索
fileList = dir('**/*.mp3');
% Word貼り付けに使うデータを格納する
addWordFileList = cell(length(fileList), 3);
for n = 1:length(fileList)
    % 音声ファイルを開く
    filepath = fullfile(fileList(n).folder, fileList(n).name);
    [y, Fs] = audioread(filepath);
    if(size(y, 2) ~= 1)
        % 1chのみ取り出す
        y = y(:,1);
    end
    % 振幅グラフを描く
    t = ((1:length(y))-1)/Fs;
    h = figure;
    plot(t, y);
    [~,name,~] = fileparts(fileList(n).name);
    xlabel('t[s]');
    ylabel('振幅');
    title(name);

    % bitmapとして保存する
    bitmapname = sprintf("%s.bmp", name);
    filepath = fullfile(fileList(n).folder, bitmapname);
    saveas(h, filepath);
    close(h);

    % word貼り付けで使用する値を格納
    addWordFileList(n, 1) = {filepath};
    addWordFileList(n, 2) = {Fs};
    addWordFileList(n, 3) = {fileList(n).bytes};
end

% 各設定
% フォント
FONTSIZE = 11;
FONTNAME = 'MS 明朝';
% 列幅
col1 = 42.4;% mm
col2 = 62.5;


% word 初期化
word = actxserver('Word.Application');
word.Visible = 1;
path = pwd;
fp = fullfile(path, 'word_template.docx');
document = word.Documents.Open(fp);
% document = word.Documents.Add();
selection = word.Selection;

selection.Font.Size = FONTSIZE;
selection.Font.Name = FONTNAME;
COL1WIDTH = col1 * 2.83465;
COL2WIDTH = col2 * 2.83465;

% カレントディレクトリとサブディレクトリを検索
fileList = dir('**/*.bmp');

for n = 1:length(addWordFileList)
    bitmapFilePath = string(addWordFileList(n, 1));
    % 画像を貼り付け
    selection.InlineShapes.AddPicture(bitmapFilePath);

    % 改行
    selection.TypeParagraph;

    % 図タイトルを挿入
    selection.Paragraphs.Alignment = 'wdAlignParagraphCenter';  % センタリング
    [~,name,~] = fileparts(bitmapFilePath);
    str = sprintf("図%d %s 振幅グラフ", n, name);
    selection.TypeText(str);
    selection.TypeParagraph;
    selection.TypeParagraph;

    % 表を貼り付け
    str = sprintf("表%d %s 諸元一覧", n, name);
    selection.TypeText(str);
    selection.TypeParagraph;
    % 表枠の作成
    table = selection.Tables.Add(selection.Range , 3, 2, 1);
    table.Rows.Alignment = 'wdAlignRowCenter';  % センタリング
    % 表の列幅を設定
    table.Columns.Item(1).SetWidth(COL1WIDTH, 0);
    table.Columns.Item(2).SetWidth(COL2WIDTH, 0);
    % 表に値を入れていく
    table.Cell(1,1).Select;
    selection.TypeText("ファイル名");
    table.Cell(1,2).Select;
    [~,name,~] = fileparts(bitmapFilePath);
    selection.TypeText(name);
    table.Cell(2,1).Select;
    selection.TypeText("サンプリング周波数");
    table.Cell(2,2).Select;
    str = sprintf("%d", cell2mat(addWordFileList(n, 2)));
    selection.TypeText(str);
    table.Cell(3,1).Select;
    selection.TypeText("ファイルサイズ");
    table.Cell(3,2).Select;
    str = sprintf("%d", cell2mat(addWordFileList(n, 3)));
    selection.TypeText(str);
    % 表の選択解除
    selection.MoveDown;

    selection.TypeParagraph;

    % 最後のファイル以外ならば改ページする
    if(n < length(fileList))
        selection.InsertBreak;
    end
end

d = pwd;
saveFileName = fullfile(d, 'output.docx');
document.SaveAs2(saveFileName);
word.Quit();
音声ファイルを開いて振幅グラフを描いてbitmap保存するループと,bitmapをwordに貼り付けるループを別々に作ったが,もちろん一つのループで実装しても良い.というかそのほうが楽である.
別にループを作ったためにわざわざaddWordFileListというバッファを用意しなきゃならんかったからね.
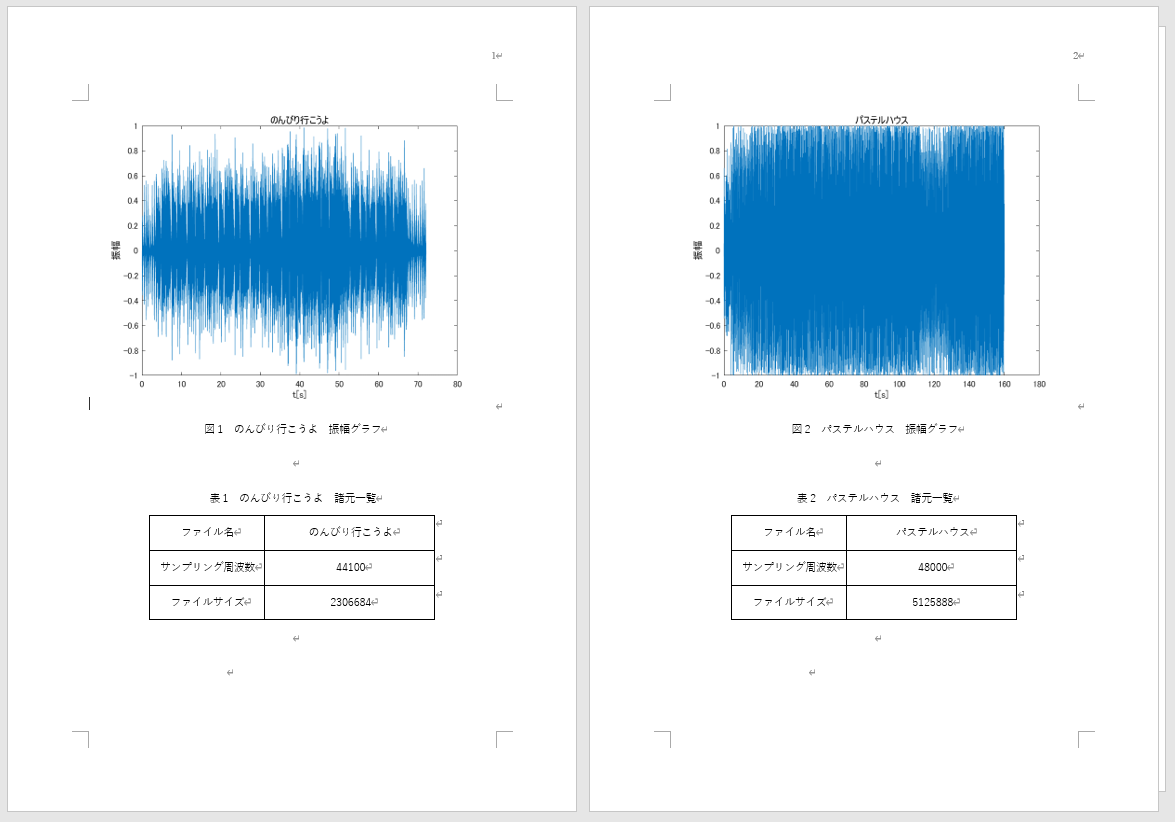
結果
結果は下図のようになった.画像や表が期待通りに挿入されており,右上のページ番号もしっかりと表示されている.
まとめ
今回はwordとの和解を成し遂げた.
これでmatlabによる業務の自動化が一段と進んだ.
しかしながら今回の和解は最低限度のレベルであり,章番号とかページ番号の割り振りとか,その辺の機能の理解がまだ出来ていない.
引き続き対話を続けていくものとする.