概要
プログラムの勉強を始めて5か月ほどの開業医です。
前回、Microsoft Custom Vision Service を使用して鼓膜画像認識を試し、極めて高い診断精度でした。
Microsoft Custom Vision Service を使用した鼓膜画像認識
前回は「正常鼓膜」か、「急性中耳炎」か、「滲出性中耳炎」かを分けるためのタグだけでしたが、今回は急性中耳炎の重症度を判定できるようにするため「鼓膜の発赤の程度」、「鼓膜の腫脹の程度」、「耳漏の有無」に関するタグに追加しました。
さらに、LINE Botと連携しNowでデプロイしました。
実装
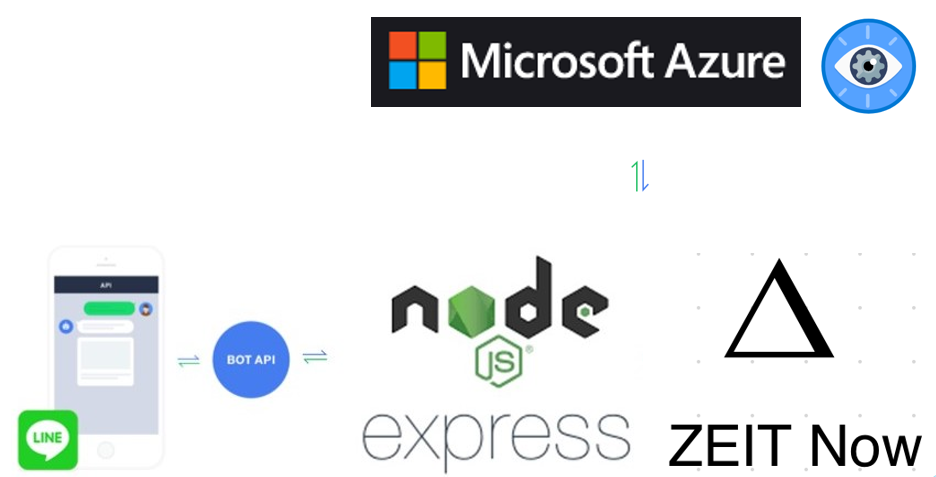
スマホから鼓膜の写真をLINE Bot宛てに送ると、中耳炎かどうか応えてくれるLINE Bot。
概念図
動作確認
## 作成方法中耳炎 AI診断Bot https://t.co/Rp7CU1ENos @YouTubeより
— 病気のセルフチェック (@Selfcheckhealt1) December 3, 2019
1.タグの付けなおし
以下のようにタグを付けなおしていきます。
正常鼓膜は「正常鼓膜」「発赤:なし」「腫脹:なし」「耳漏:なし」のタグを、
滲出性中耳炎は「滲出性中耳炎」「発赤:なし」「腫脹:なし」「耳漏:なし」のタグを、
急性中耳炎は「急性中耳炎」そして鼓膜発赤の程度により「発赤:なし」「発赤:一部」「発赤:全体」のタグを、鼓膜腫脹の程度により「腫脹:なし」「腫脹:一部」「腫脹:全体」のタグを、耳漏の有無により「耳漏:なし」「耳漏:あり」のタグを付けました。
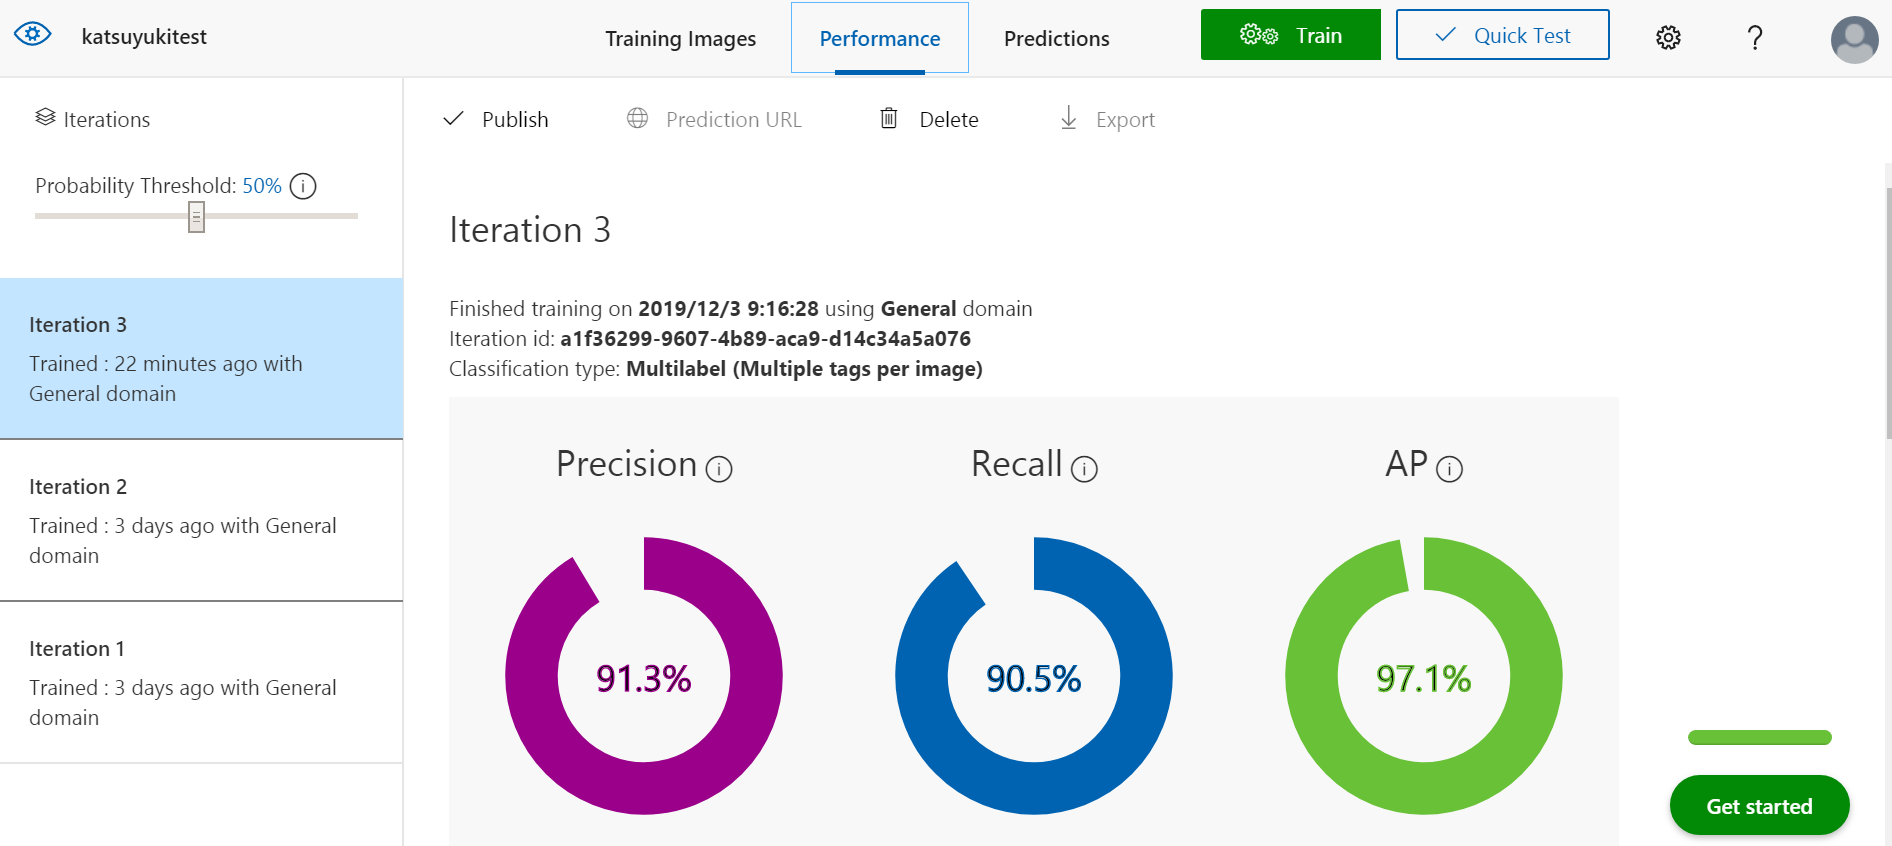
2.再トレーニング
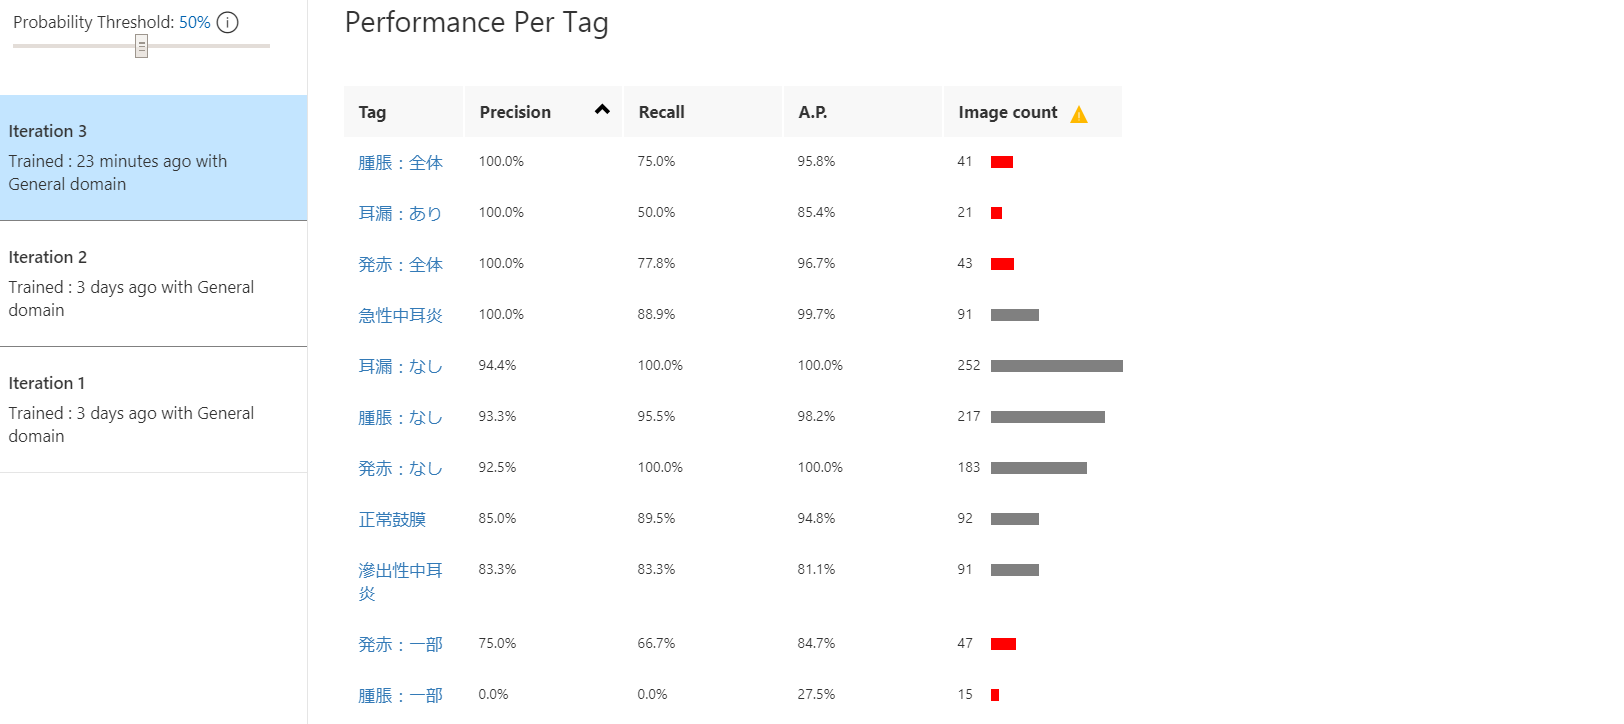
タグが多くなったためか全体の精度が落ちました。
正確な判定のためにはタグ毎に最低30枚の画像が必要なようですが、一部30枚未満のタグができてしまいました。
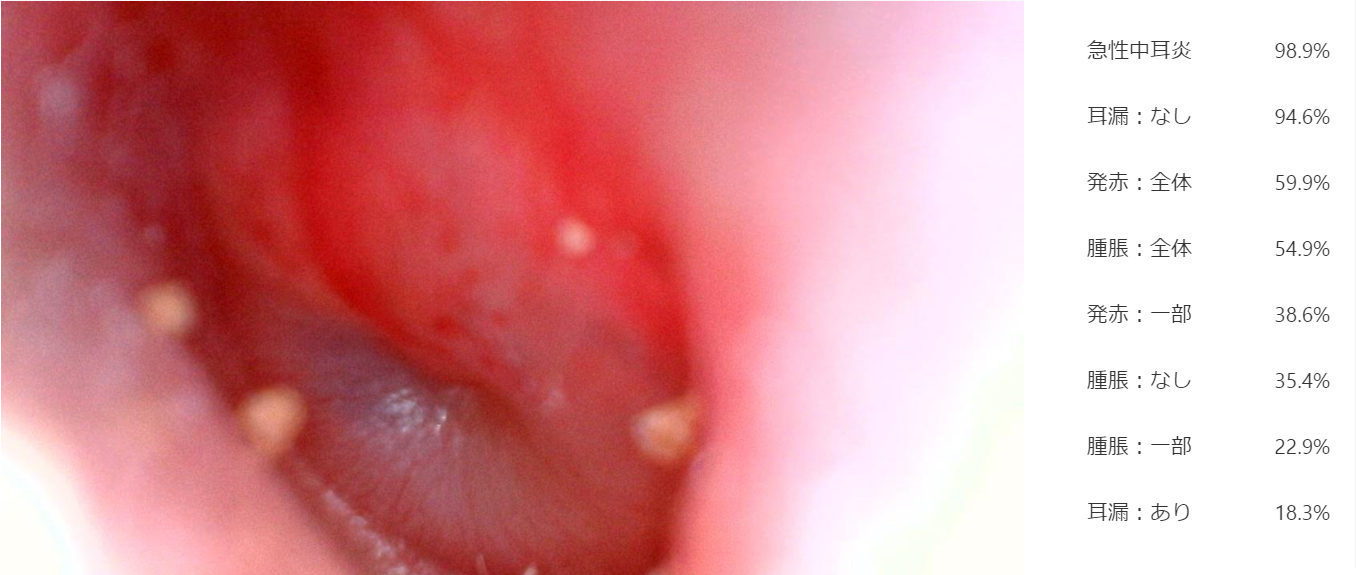
3.テスト
テストデータ30枚をテストします。
「正常鼓膜」か「急性中耳炎」か「滲出性中耳炎」かの診断は前回同様100%正解しました。
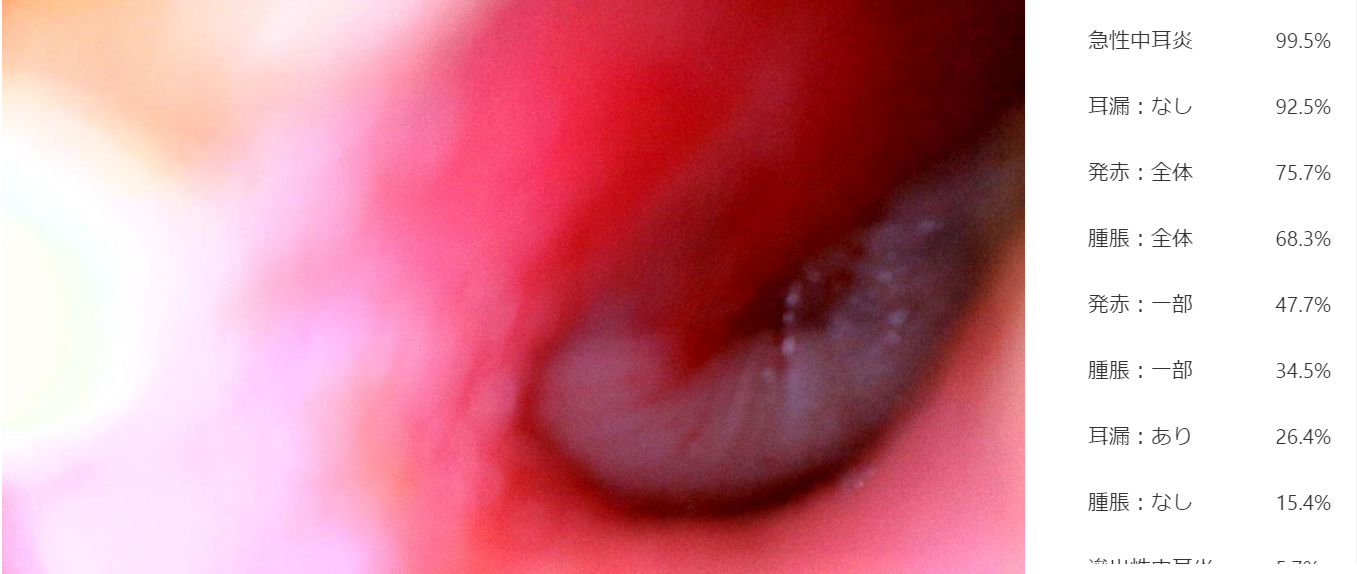
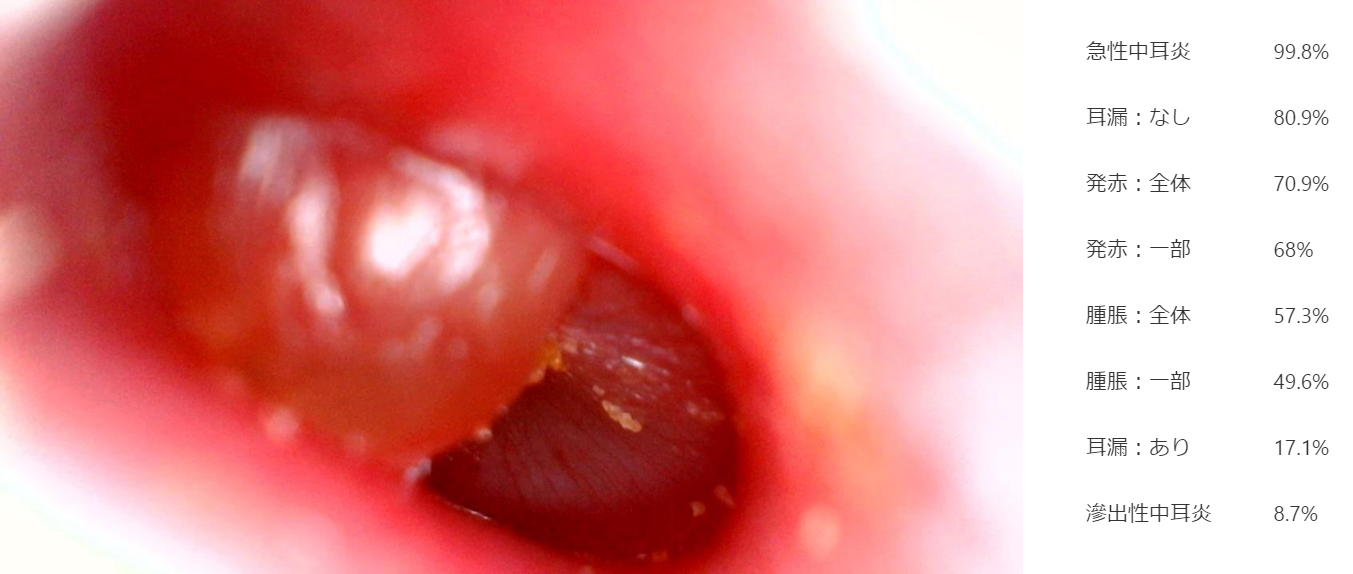
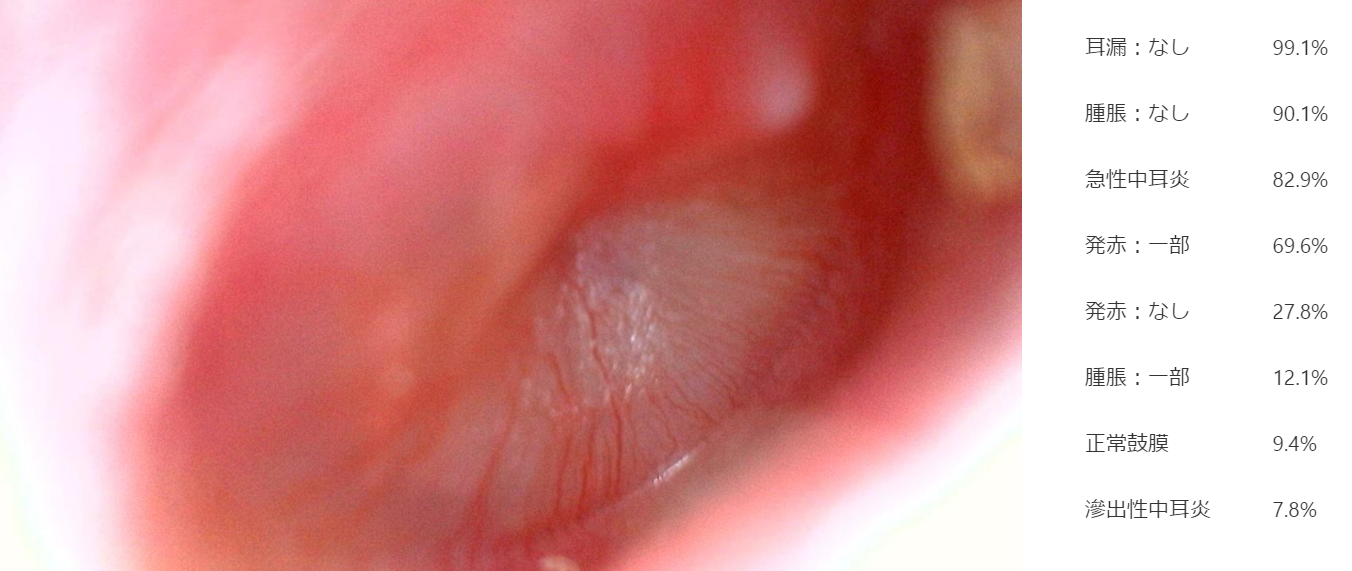
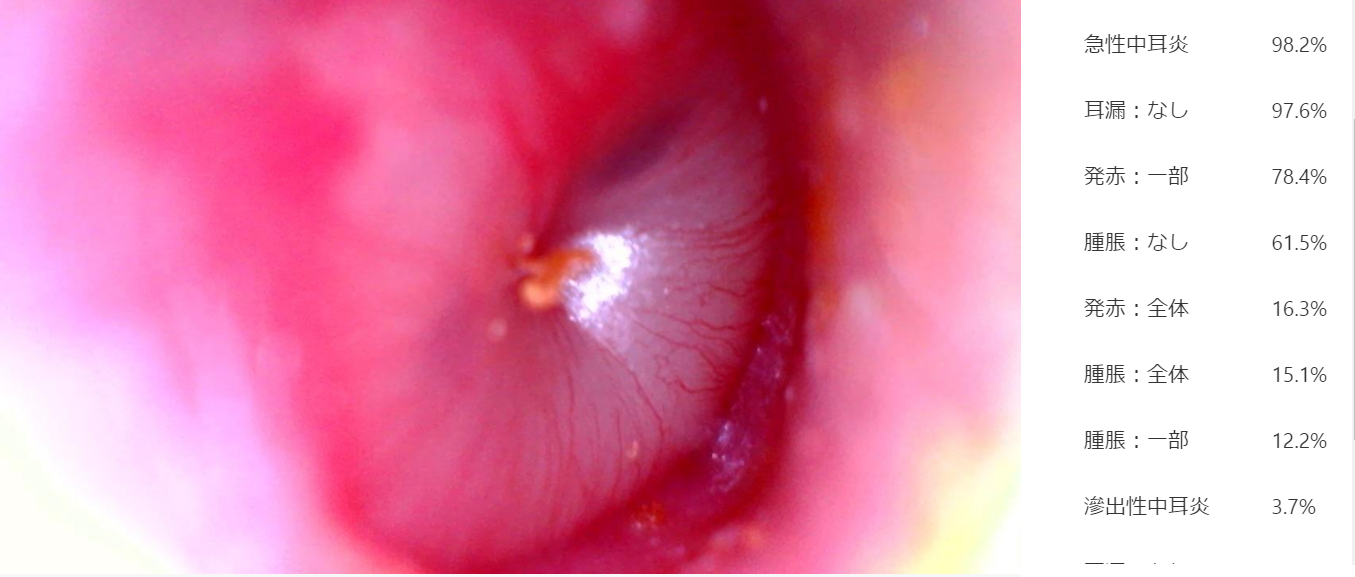
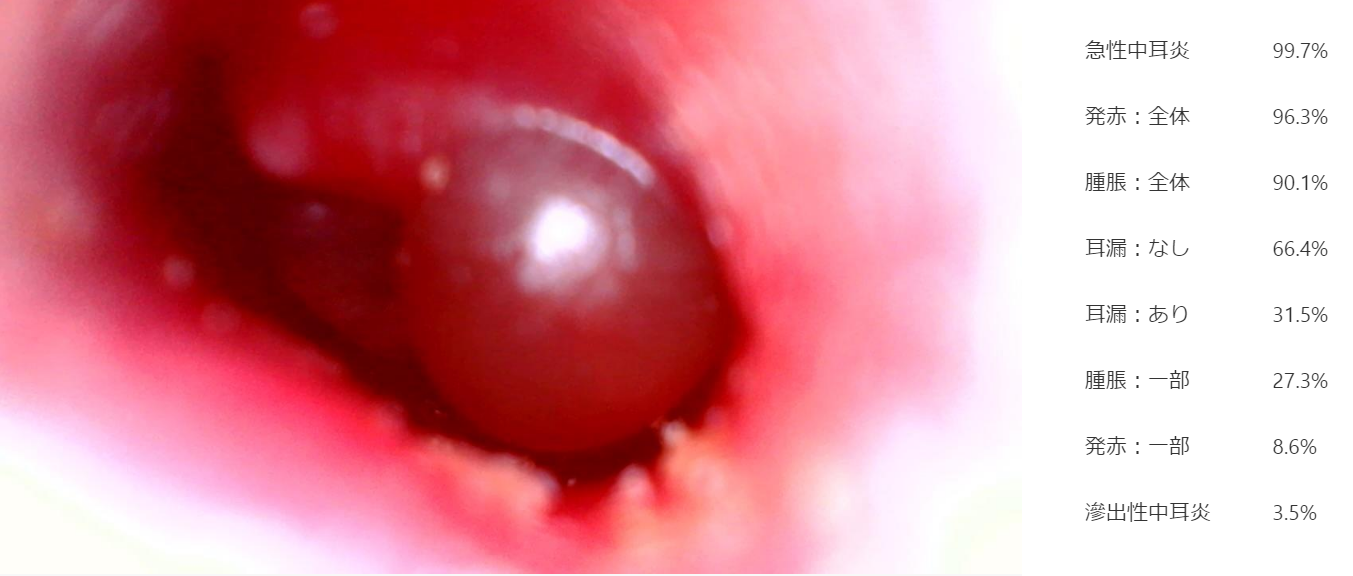
急性中耳炎の重症度判定に使用する「発赤の程度」「腫脹の程度」は間違っているところがありました。
発赤全体 ➡ 一部 が正解
発赤全体 ➡ 一部 が正解
正解
正解
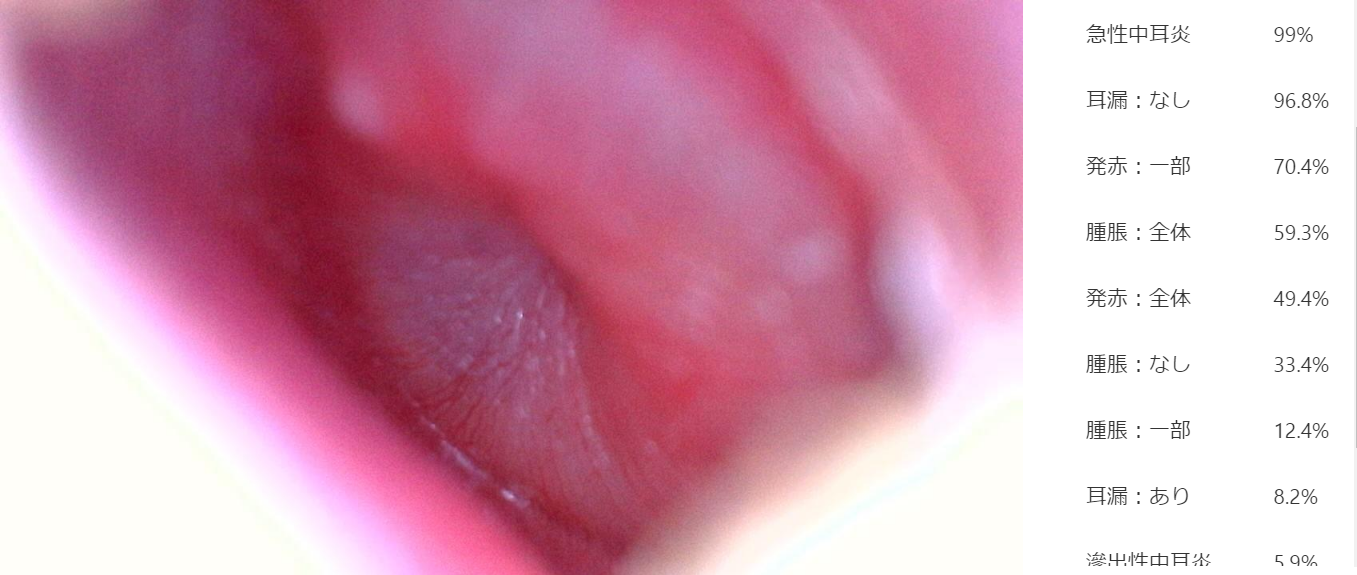
正解
正解
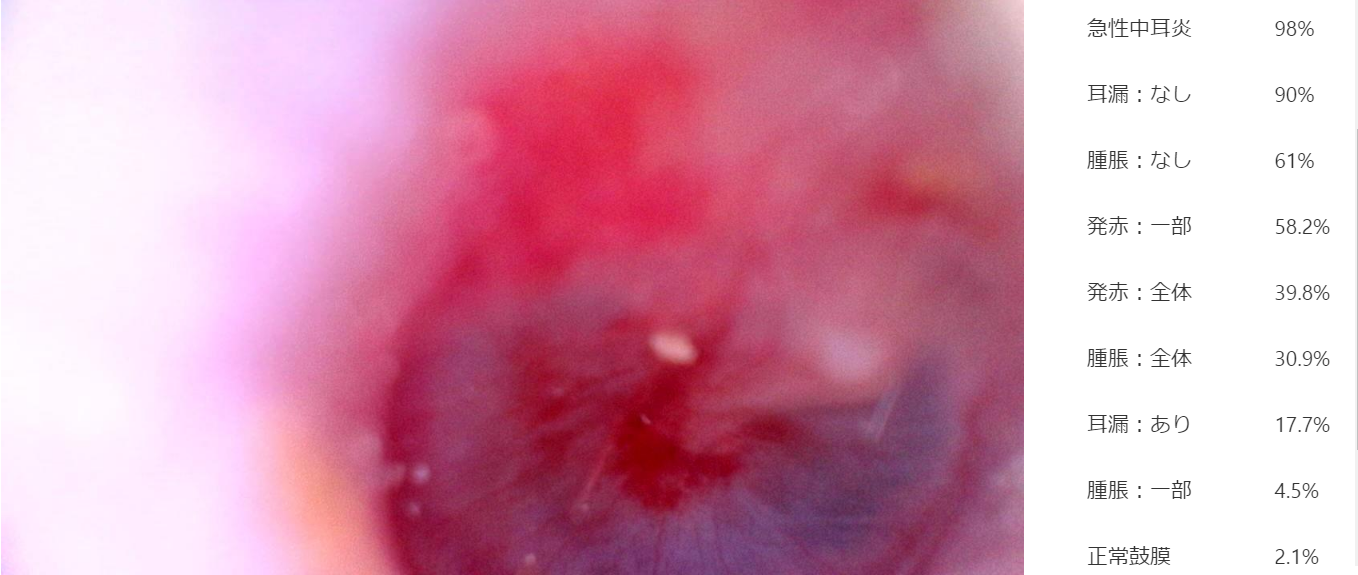
腫脹一部 ➡ 全体 が正解
正解
4.LINE Bot との連携
Azure Custom Vision ServicesのPerformanceからPublishをクリックし、Prediction APIを発行します。
「If you have an image file:」のURLと
「Set Prediction-Key Header to :」のKeyを後で使うのでひかえておきます。
5.LINE BoTの作成
こちらの記事を参考にしました。
はやい!やすい!うまい!Custom Vision と LINE bot でお寿司の判定をしてみた
LINE動物図鑑の作り方
このようなコードを書きました。
'use strict';

const express = require('express');
const line = require('@line/bot-sdk');
const PORT = process.env.PORT || 3000;
const fs = require('fs');
const bodyParser = require('body-parser');
const Request = require('request');
const cv = require('customvision-api');

const config = {
    channelSecret: '自分のchannelSecret',
    channelAccessToken: '自分のchannelAccessToken'
};


const app = express();
app.use(bodyParser.json());
let middle = line.middleware(config);
const client = new line.Client(config);

app.post('/webhook', (req, res) => {
            console.log(req.body.events);

            if(req.body.events[0].message.type !== 'image') return;

// ユーザーがLINE Bot宛てに送った写真のURLを取得する
    const options = {
        url: `https://api.line.me/v2/bot/message/${req.body.events[0].message.id}/content`,
        method: 'get',
        headers: {
            'Authorization': 'Bearer 自分のchannelAccessToken'  ,
        },
        encoding: null
    };

    Request(options, function(error, response, body) {

        if (!error && response.statusCode == 200) {
            //保存

            console.log(options.url + '/image.jpg');
            let strURL = options.url + '/image.jpg';

            //Nowでデプロイする場合は、/tmp/のパスが重要
            fs.writeFileSync(`/tmp/` + req.body.events[0].message.id + `.png`, new Buffer(body), 'binary');

            const filePath = `/tmp/` + req.body.events[0].message.id + `.png`;

//Azure Custom Vision APIの設定
            const config = {
            "predictionEndpoint": "ひかえておいたURL",
            "predictionKey": 'ひかえておいたKey'
            };

            cv.sendImage(
                filePath,
                config,
                (data) => {
                  console.log(data);
                  let Probability0 = data.predictions[0].probability * 100;
                  let Probability1 = data.predictions[1].probability * 100;
                  let Probability2 = data.predictions[2].probability * 100;
                  let Probability3 = data.predictions[3].probability * 100;
                  let Probability4 = data.predictions[4].probability * 100;

                    let strName0 = data.predictions[0].tagName;
                    let strProbability0 = Probability0.toFixed();
                    let strName1 = data.predictions[1].tagName;
                    let strProbability1 = Probability1.toFixed();
                    let strName2 = data.predictions[2].tagName;
                    let strProbability2 = Probability2.toFixed();
                    let strName3 = data.predictions[3].tagName;
                    let strProbability3 = Probability3.toFixed();
                    let strName4 = data.predictions[4].tagName;
                    let strProbability4 = Probability4.toFixed();

                    client.replyMessage(req.body.events[0].replyToken, {
                        type: 'text',
                      text:strName0 + ':'+strProbability0+'%,\n'+ strName1 + ':'+strProbability1+'%,\n'+ strName2 + ':'+strProbability2+'%,\n'+ strName3 + ':'+strProbability3+'%\n'+ strName4 + ':'+strProbability4+'%'  //実際に返信の言葉を入れる箇所
                      });

                      try {
                        fs.unlinkSync(filePath);
                        return true;
                      } catch(err) {
                        return false;
                      }


                    return;

                },
                (error) => { console.log(error) }
            );

        } else {
            console.log('imageget-err');
        }
    });
});

(process.env.NOW_REGION) ? module.exports = app : app.listen(PORT);
console.log(`Server running at ${PORT}`);
6.Nowでデプロイ
こちらの記事を参考にしました。
1時間でLINE BOTを作るハンズオン (資料+レポート) in Node学園祭2017 #nodefest
考察
結構簡単にAIによる画像認識モデルとLINE BoTを連携できました。
今後は重症度判定に必要なタグを含んだ急性中耳炎の画像を増やし、精度を上げていきたいと思います。
そして以前作った中耳炎診療ガイドラインに沿った診断や治療選択ができるBOT
急性中耳炎診断支援LINE Botを改良しHerokuにデプロイ
に組み込んで、質問に返答し鼓膜の画像を送れば、自動で診断や治療方針が決定させるBOTを作成したいと思います。