はじめに
公式ドキュメントを読んでも導入方法までは詳しく記載されていないようで、参考記事も多く漁ったのですが古かったり環境が違ったり動かなかったりと、導入するまでに時間がかかってしまったのでまとめてみたいと思います
※この記事の設定のままだとプロダクトコードのコンパイル時にNext.jsがbabelの設定を参照してしまい、コードが動作しない場合もあります。その際は以下の補足記事をご参考ください。
環境
- "next": "^13.4.2"
- "react": "^18.2.0"
- "jest": "^29.7.0"
- "@testing-library/react": "^14.2.1"
導入手順(プロジェクトが作成されている前提)
JestとReact Testing Library、その他テスト実行に必要なパッケージをインストールします
yarn add --dev jest @testing-library/react @babel/preset-env @babel/preset-react jest-environment-jsdom @testing-library/jest-dom
次にテストとテスト用コンポーネントをシンプルに作成します
import { render, screen } from '@testing-library/react';
import { Sample } from '../components/sample';
import '@testing-library/jest-dom'

describe('test', () => {
    it('testsimasu', () => {
        render(<Sample />);
        const paragraphElement = screen.getByTestId('test-paragraph');
        expect(paragraphElement).toBeInTheDocument();
        expect(paragraphElement).toHaveTextContent('Hello');
    });

});
import React from 'react'

export const Sample = () => {
    return (
    <div>
        <p data-testid='test-paragraph'>Hello</p>
    </div>
    )
}
Jestは実行時に__tests__を見に行ってくれるようなので、その配下にテストファイルを作成しています
package.jsonに以下を追加してyarn testでJestを実行するようにしています
  "scripts": {
    "dev": "next dev",
    "output": "next build && next export",
    "build": "next build",
    "start": "next start",
    "export": "next export",
    "lint": "next lint",
+   "test": "jest"
  }
また、Jestが.jsxファイルを読み込むには以下の設定ファイルを作成する必要がありました(後述)
module.exports = {
  "transform": {
    '^.+\\.(js|jsx)$': 'babel-jest',
  },
  "testEnvironment": "jsdom",
  "modulePaths": ['<rootDir>/../node_modules'],
  "moduleNameMapper": {
    '^@hoges/(.*)$': '<rootDir>/hogehoge/$1',
 },
};
module.exports = {
    presets: [
        ["@babel/preset-env", { targets: { node: "current" } }],
        ["@babel/preset-react", { "runtime": "automatic" }]
    ],
};
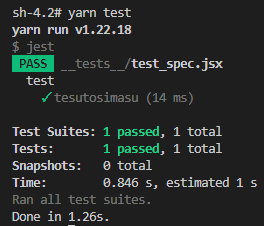
ここまでの状態でyarn testを実行すると通りました!
詰まったエラーたち
Jest encountered an unexpected token
Jest encountered an unexpected token

    Jest failed to parse a file. This happens e.g. when your code or its dependencies use non-standard JavaScript syntax, or when Jest is not configured to support such syntax.

    Out of the box Jest supports Babel, which will be used to transform your files into valid JS based on your Babel configuration.

中略

 SyntaxError: /project/frontend/components/sample.jsx: Support for the experimental syntax 'jsx' isn't currently enabled (5:5):
JestがJSX構文をサポートしていないため、ReactのようなESModules形式で記述されているファイルは読み込めないようでした
読み込むためにはts-jestやbabel-jestを使用してJSXをJavaScriptに変換する必要があります
今回はTypeScript環境ではないので後者を使用しています
このbabel-jestくんがESModules形式で記述されたファイルをCommonJS形式に変換してくれるようなのですが、Jestくんとbabel-jestくんにそれぞれ設定が必要になります
- Jestがbabel-jestを使用できるように(jest.config.js)
module.exports = {
  transform: {
    '^.+\\.(js|jsx)$': 'babel-jest',
  },
};
- babel-jestがESModules形式をCommonJS形式に変換できるように(babel.config.js)
module.exports = {
  presets: ['@babel/preset-react'],
};
設定ファイルを作成したらyarn add --dev @babel/preset-react
Cannot find module 'react'
Jestがreactモジュールを見つけられないというエラーです
プロジェクトのnode_modules配下を参照できるようにpathを通してあげました
<rootDir>はここではproject/frontendになります
node_modulesはfrontendと同じ階層になるので以下のようなpathを設定しています
"modulePaths": ['<rootDir>/../node_modules'],
Cannot find module '@hogehoge/use_hoge.js'
先ほどと同じようにそんなモジュールは知らないというエラーです
モジュールをnode_modules外に自作していたので新たにpathの設定をしました
例えばproject/frontend/hogehogeにあるuse_hoge.jsモジュールを
import Hoge from '@hoges/use_hoge.js';としてテスト用コンポーネントでインポートしているとき、
以下のようにマッパーすることで参照できました
  "moduleNameMapper": {
    '^@hoges/(.*)$': '<rootDir>/hogehoge/$1',
 }
プロダクトコードを変えたくない場合はこの設定が使えそうです
おわりに
想定より時間がかかってしまいましたが、なんとか導入できたので良かったです
必要なパッケージをインストールした後に自分で設定しないといけない部分が多かったので苦労しました