GitHubなどでPullRequestでコードレビューした後、LGTMとコメントする文化があります。
おもしろい画像なんかが貼ってあるとほっこりしますね!

LGTMとは?
「Looks good to me」の略で、「良いと思う」「問題ないと思う」という意味。
自分だけのLGTM
LGTM関連のツールやサービスは世の中に結構あります
どれもすごく良いのですが私が求めているものとなんか違う……。
アニメのgif画像をLGTMに使いたいんだ!!
Google画像検索で検索するのはめんどくさい……ということで自分だけのオリジナルのLGTMが作成できるツールを開発しました。
ブックマークレットを実行することで、LGTM用の文言をクリップボードにコピーしてくれます。
仕組み
LGTM用の文言をブックマークレットとGASを使用し自動生成してくれるツールになります。
Googleスプレッドシートに設定した画像からランダムでLGTM用の文言を自動生成しクリップボードにコピーします。 実行すると右下にクリップボードにコピーされた画像を表示してくれます。
他のツールとの違いは自分のお気に入りの画像を使用してLGTMが作成できるようになることです!!
画像自体はGoogleスプレッドシートで管理
クリップボードにコピーされる文言は下記のような感じになります。
# LGTM

使用方法
GoogleスプレッドシートにLGTMで使用する画像の設定
新規でGoogleスプレッドシートを作成します。
シート名はLGTMにしてください。
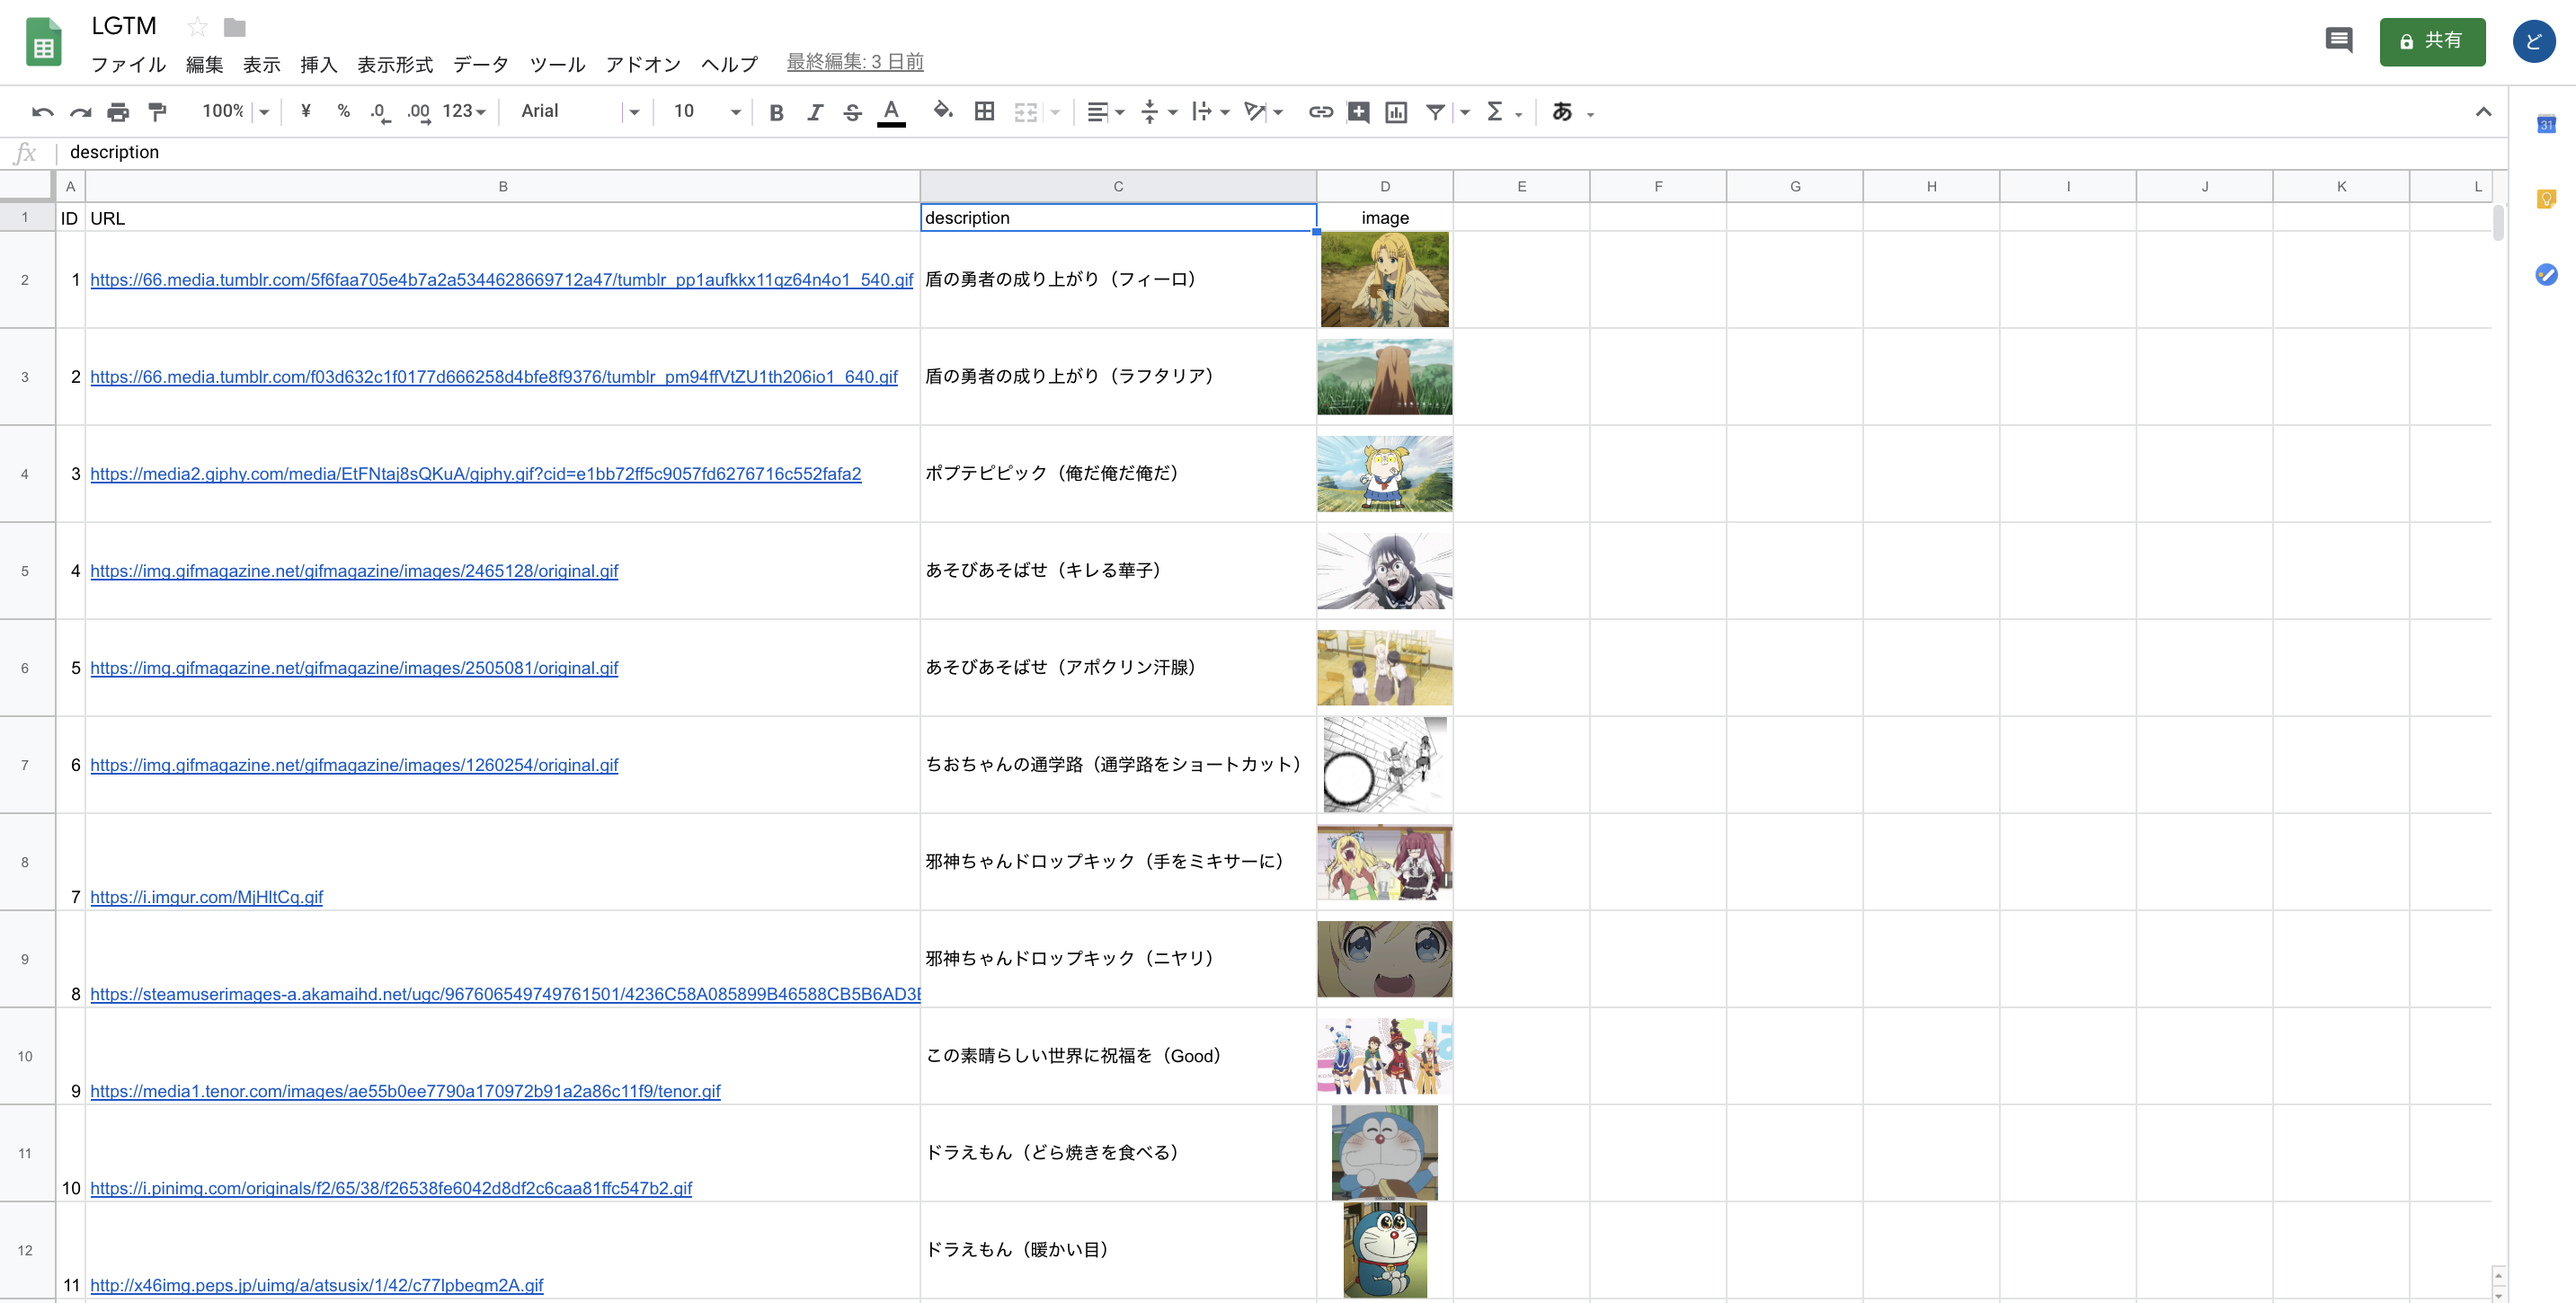
GoogleスプレッドシートにLGTMで使用したい画像のURLを設定します。
下記のような感じで設定します。
image列は別に設定しなくても良いです。必要なのはID〜description列までです。
| ID | URL | description | image |
|---|---|---|---|
| 1 | LGTM画像1のURL | LGTM画像1の説明 | =IMAGE(B2) |
| 2 | LGTM画像2のURL | LGTM画像2の説明 | =IMAGE(B3) |
| 3 | LGTM画像3のURL | LGTM画像3の説明 | =IMAGE(B4) |
| 4 | LGTM画像4のURL | LGTM画像4の説明 | =IMAGE(B5) |
Googleスプレッドシートの内容をJSONで取得できるようにする
Googleスプレッドシートからスクリプトエディタを開きます。

スクリプトエディタに下記のソースをコピーし貼り付け保存します。
https://github.com/dodonki1223/CreateLGTM/blob/master/LGTM.gs

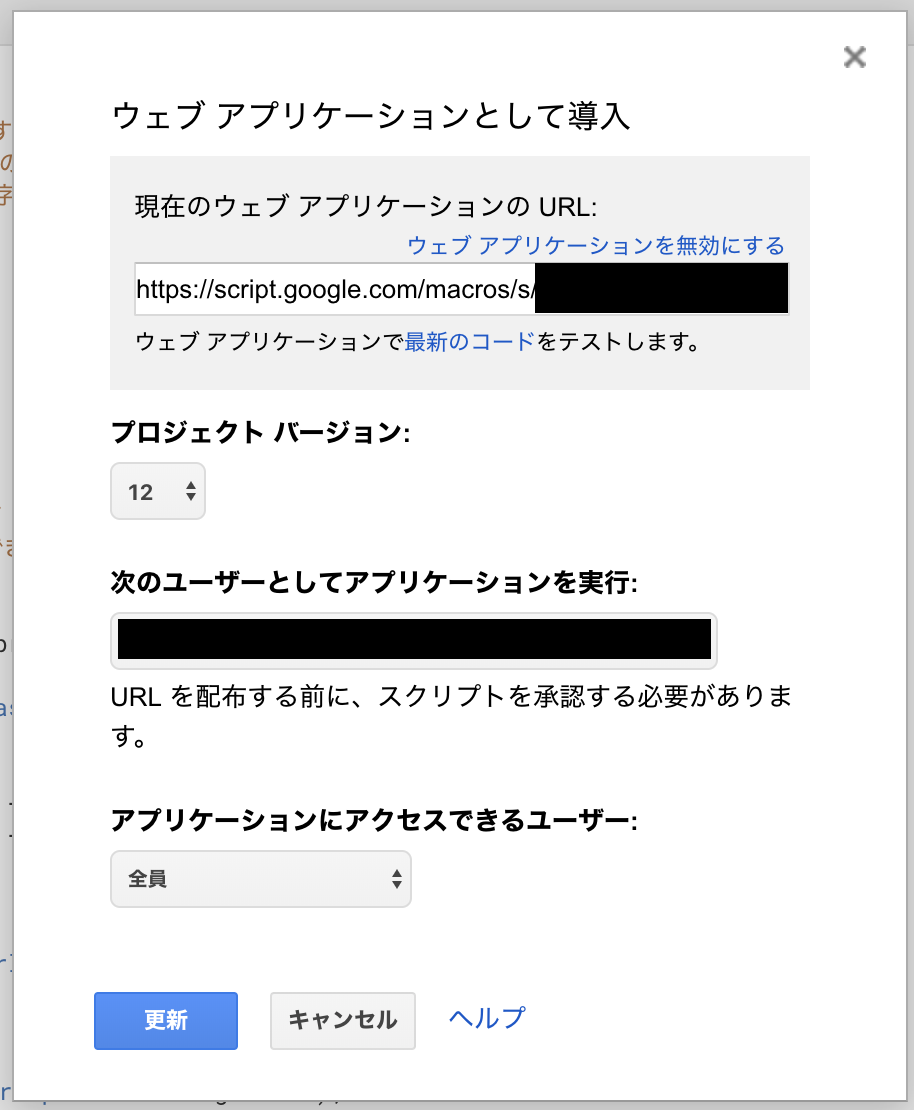
Webアプリケーションとして公開する

現在のウェブアプリケーションのURLに表示されているURLをコピーして下さい。
更新ボタンを押すことでWebアプリケーションとして公開されます。
現在のウェブアプリケーションのURLをブラウザで叩くと下記のようにJSONを取得できていれば大丈夫です。

自動生成用のブックマークレットを作成する
https://github.com/dodonki1223/CreateLGTM/blob/master/bookmarklet.jsのソースをコピーし2行目のURLの部分を先程コピーした現在のウェブアプリケーションのURLに書き換えたのちブックマークレットとして保存すれば設定完了です。
javascript:(function(){
  const GAS_API_URL = 'https://script.google.com/macros/s/xxxxxxxxxxxxxxxxxxxxxxxxxxxxxxxxxxxxxxx/exec';

  let script = document.createElement('script');
  script.src = GAS_API_URL + '?callback=copyLgtm';
  document.body.appendChild(script);
  document.body.removeChild(script);

  window.copyLgtm = function(data) {
    let json = JSON.stringify(data);
    let jsonParse = JSON.parse(json);

    execCopy(jsonParse.data.lgtm);
    displayCopyImg(jsonParse.data.lgtm_url, jsonParse.data.description);
  };

  window.execCopy = string => {
    let copyElement = document.createElement('div');
    copyElement.style.cssText = 'position: fixed; right: 200%;';

    let pre = document.createElement('pre');
    pre.style.cssText = '-webkit-user-select: auto; user-select: auto;';

    copyElement.appendChild(pre).textContent = string;

    document.body.appendChild(copyElement);
    document.getSelection().selectAllChildren(copyElement);
    document.execCommand('copy');

    document.body.removeChild(copyElement);
  };

  window.displayCopyImg = (lgtmImgUrl, description) => {
    let displayElement = document.createElement('div');
    displayElement.style.cssText = 'position: fixed; bottom: 1%; right: 1%; z-index: 9999;';

    let p = document.createElement('p');
    p.textContent = description;
    p.style.cssText = 'position: absolute; top: 0; left: 0.5em; margin: 0; color :white; font-weight: bold;';
    displayElement.appendChild(p);

    let img = document.createElement('img');
    img.src = lgtmImgUrl;
    img.style.width = (window.parent.screen.width * 0.2) + 'px';
    displayElement.appendChild(img);

    document.body.appendChild(displayElement);
    setTimeout(() => document.body.removeChild(displayElement), 3000);
  };
})();
特定の画像を指定する
URLパラメータにシート名やIDを指定することで特定の画像を指定してLGTMの文言を作成することができます。
https://github.com/dodonki1223/CreateLGTM/blob/bc64d09d7997d17117878362dfea4409336432d8/bookmarklet.js#L5の箇所にURLパラメータを追加することで特定の画像を指定することができます。
修正前
script.src = GAS_API_URL + '?callback=copyLgtm';
修正後
script.src = GAS_API_URL + '?callback=copyLgtm&sheet=interesting&id=2';
この場合ですと、interestingシートのidが2の画像でLGTMの文言を作成してくれます。
sheetの指定が無いとLGTMのシートが選択されます。またidの指定が無いとランダムに選択される仕様になっています。
GASについて
URLパラメータの取得
GASではURLパラメータはものすごく簡単に取得できます。
Web Apps | Apps Script | Google Developers こちらのドキュメントに書かれています。
下記のURLパラメータの場合は
https://script.google.com/macros/s/xxxxxxxxxx/exec?callback=copyLgtm&sheet=gorira&id=kirin
callbackを取得
e.parameter.callback
=> copyLgtm
sheetを取得
e.parameter.sheet
=> gorira
idを取得
e.parameter.id
=> kirin
本当に簡単ですね!
ランダム値の取得
ランダム値はMath.random()を使用し取得しています。
Googleスプレッドシートのヘッダー行を除く(2行目〜最終行まで)の間のランダム値を取得するようにしています。
最終行はSheetクラスを使用することで簡単に取得できます。
Class Sheet | Apps Script | Google Developers より
var ss = SpreadsheetApp.getActiveSpreadsheet();
var sheet = ss.getSheets()[0];

// This logs the value in the very last cell of this sheet
var lastRow = sheet.getLastRow();
var lastColumn = sheet.getLastColumn();
var lastCell = sheet.getRange(lastRow, lastColumn);
Logger.log(lastCell.getValue());
Math.random() - JavaScript | MDN を参考にメソッドを作成しました。最終行はメソッドの呼び出し側で取得するようにしています。
/**
 * ランダム値を作成する
 * 1行目はヘッダーのため、2行目から最終行までのランダムの値を作成し返す
 * @param {Integer} [lastRow] - 最終行
 * @return {Integer} 2行目から最終行までのランダム値
 */
function createRandomValue(lastRow) {
  // 1行目はヘッダー行のため2行目から開始する
  var min = 2,
      max = lastRow;

  // randomの値を作成
  var randomValue = Math.floor(Math.random() * (max + 1 - min)) + min;
  Logger.log(randomValue);

  return randomValue;
}
JSONP
ブックマークレットからJSONで取得しようとするとCross-Origin Read Blocking (CORB) blocked cross-origin responseのエラーがconsoleに吐かれてデータを取得できないのでJSONPを使用しています。
エラーの内容についてはこちらの記事がすごく参考になりました。
Cross-Origin Read Blocking (CORB) とは - ASnoKaze blog
JSONP (JSON with padding) とは、scriptタグを使用してクロスドメインな(異なるドメインに存在する)データを取得する仕組みのことである。
使用するには注意が必要です。
JSONPでは、クロスサイトリクエストフォージェリ(英: cross-site request forgery、CSRF)に対する脆弱性に注意が必要である。 このscriptタグを使う方法では同一生成元ポリシーが適用されず、またサーバのエンドポイントは外部に公開されているため、悪意のあるサイトがJSONデータを取得するといったことが可能であることから、機密情報や個人情報などのデータを取り扱うには不向きである。 また、scriptタグを埋め込む側においても、リモートサイトから任意の内容のデータをページに差し込むことが可能であるため、そのリモートサイトが悪意のあるサイトである場合やJavaScriptインジェクションに対する脆弱性がある場合は、その脆弱性を突かれることで、アカウント情報を盗まれたり、元のサイトも影響を受けたりする可能性がある。
今回はブックマークレットで使用するだけで取得するデータも機密情報では無いので気にしないことにします。
ブックマークレットについて
JSONデータを取得する
下記の記事を參考にJSONを取得する仕組みを作成しました。
面倒な手続き不要!「Web API」の超お手軽活用術をJavaScriptコード付きで一挙大公開! - paiza開発日誌
  const GAS_API_URL = 'https://script.google.com/macros/s/xxxxxxxxxxxxxxxxxxxxxxxxxxxxxxxxxxxxxxx/exec';

  let script = document.createElement('script');
  script.src = GAS_API_URL + '?callback=copyLgtm';
  document.body.appendChild(script);
  document.body.removeChild(script);

  window.copyLgtm = function(data) {
    let json = JSON.stringify(data);
    let jsonParse = JSON.parse(json);

    execCopy(jsonParse.data.lgtm);
    displayCopyImg(jsonParse.data.lgtm_url, jsonParse.data.description);
  };
クリップボードにコピーする
下記の記事を参考にクリップボードにコピーする仕組みを作成しました。
JavaScriptでクリップボードに文字をコピーする(ブラウザ) - Qiita
下記の手順でクリップボードに文字をコピーしています
- 画面外にpreタグを作成しコピーする文字列をセットする
- 選択してexecCommand('copy')を実行してクリップボードにコピーする
- 作成したpreタグを削除
  window.execCopy = string => {
    let copyElement = document.createElement('div');
    copyElement.style.cssText = 'position: fixed; right: 200%;';

    let pre = document.createElement('pre');
    pre.style.cssText = '-webkit-user-select: auto; user-select: auto;';

    copyElement.appendChild(pre).textContent = string;

    document.body.appendChild(copyElement);
    document.getSelection().selectAllChildren(copyElement);
    document.execCommand('copy');

    document.body.removeChild(copyElement);
  };
コピーされたLGTM用の画像を画面に表示する
下記の手順で画面にLGTM用の画像を表示しています
- imgタグを作成する
- imgタグにGoogleスプレッドシートから取得したimgのURLをセット
- imgタグを画面に表示し3秒後に削除する
  window.displayCopyImg = (lgtmImgUrl, description) => {
    let displayElement = document.createElement('div');
    displayElement.style.cssText = 'position: fixed; bottom: 1%; right: 1%; z-index: 9999;';

    let p = document.createElement('p');
    p.textContent = description;
    p.style.cssText = 'position: absolute; top: 0; left: 0.5em; margin: 0; color :white; font-weight: bold;';
    displayElement.appendChild(p);

    let img = document.createElement('img');
    img.src = lgtmImgUrl;
    img.style.width = (window.parent.screen.width * 0.2) + 'px';
    displayElement.appendChild(img);

    document.body.appendChild(displayElement);
    setTimeout(() => document.body.removeChild(displayElement), 3000);
  };
最後に
これで自分の好きな画像でLGTMができるようになりました。
素敵なLGTMライフを!!
GitHubではブックマークレットを実行できないので、別のサイトでブックマークレットを実行して下さい![]()
我が社のブログでも同じ内容の記事を投稿しております。
もしよかったらブログも見に来て下さい。
フクロウラボテックブログ