この記事を見る前に質問です。
次のコマンドを入力したときこのような結果は出ましたか?
ping www.google.com
ping: www.google.com: Name or service not known
→この結果が出た場合、名前解決ができていないのでこの記事は有用かもしれません
→このような結果が出てない場合、別の記事を探しましょう
環境
Amazon Linux 2 AMI
本記事で解決したい内容
以下のコマンドを入力したときに
yum install httpd
以下のエラー画面が出ないようにする
Loaded plugins: extras_suggestions, langpacks, priorities, update-motd
Could not retrieve mirrorlist https://amazonlinux-2-repos-ap-northeast-1.s3.ap-northeast-1.amazonaws.com/2/core/latest/x86_64/mirror.list error was
14: curl#6 - "Could not resolve host: amazonlinux-2-repos-ap-northeast-1.s3.ap-northeast-1.amazonaws.com"


 One of the configured repositories failed (Unknown),
 and yum doesn't have enough cached data to continue. At this point the only
 safe thing yum can do is fail. There are a few ways to work "fix" this:

     1. Contact the upstream for the repository and get them to fix the problem.

     2. Reconfigure the baseurl/etc. for the repository, to point to a working
        upstream. This is most often useful if you are using a newer
        distribution release than is supported by the repository (and the
        packages for the previous distribution release still work).

     3. Run the command with the repository temporarily disabled
            yum --disablerepo=<repoid> ...

     4. Disable the repository permanently, so yum won't use it by default. Yum
        will then just ignore the repository until you permanently enable it
        again or use --enablerepo for temporary usage:

            yum-config-manager --disable <repoid>
        or
            subscription-manager repos --disable=<repoid>

     5. Configure the failing repository to be skipped, if it is unavailable.
        Note that yum will try to contact the repo. when it runs most commands,
        so will have to try and fail each time (and thus. yum will be be much
        slower). If it is a very temporary problem though, this is often a nice
        compromise:
試してほしいこと
1.VPCのDNS名前解決・ホスト名有効化の確認
2.サーバーの/etc/resolv.confにDNSサーバーのIPアドレスが記載されているか確認
1.VPCのDNS名前解決・ホスト名有効化の確認
①VPCのダッシュボードから自分のVPCを選択
②「アクション」>「DNS ホスト名を編集」をクリック
DNS ホスト名の有効化のチェックボックスにチェック
「変更を保存」をクリック
③「アクション」>「DNS 解決を編集」をクリック
DNS 解決の有効化のチェックボックスにチェック
④「変更を保存」をクリック
2.サーバーの/etc/resolv.confにDNSサーバーのIPアドレスが記載されているか確認
①EC2にログインする
②コマンドを入力
cat /etc/resolv.conf
# Generated by NetworkManager
search local
nameserver 8.8.8.8
nameserver 8.8.4.4
③上記のような結果が表示がされていない場合、以下コマンドを入力して/etc/resolv.confを編集する
(※されていた場合これ以上この記事を見る必要はないでしょう)
vi /etc/resolv.conf
# Generated by NetworkManager
search local
nameserver 8.8.8.8
nameserver 8.8.4.4
テスト
以下コマンドを入力
ping 8.8.8.8
PING 8.8.8.8 (8.8.8.8) 56(84) bytes of data.
64 bytes from 8.8.8.8: icmp_seq=1 ttl=104 time=1.60 ms
64 bytes from 8.8.8.8: icmp_seq=2 ttl=104 time=1.70 ms
64 bytes from 8.8.8.8: icmp_seq=3 ttl=104 time=1.69 ms
以下コマンドを入力
ping www.google.com
PING www.google.com (172.217.175.100) 56(84) bytes of data.
64 bytes from nrt20s21-in-f4.1e100.net (172.217.175.100): icmp_seq=1 ttl=105 time=3.67 ms
64 bytes from nrt20s21-in-f4.1e100.net (172.217.175.100): icmp_seq=2 ttl=105 time=1.59 ms
64 bytes from nrt20s21-in-f4.1e100.net (172.217.175.100): icmp_seq=3 ttl=105 time=1.59 ms
64 bytes from nrt20s21-in-f4.1e100.net (172.217.175.100): icmp_seq=4 ttl=105 time=4.83 ms
64 bytes from nrt20s21-in-f4.1e100.net (172.217.175.100): icmp_seq=5 ttl=105 time=1.58 ms
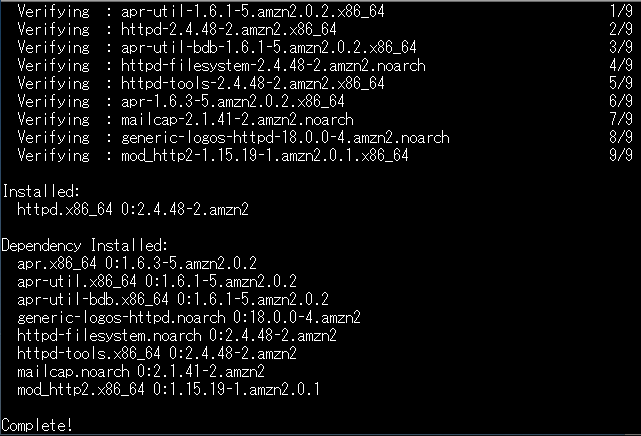
以下のコマンドを入力して画像のように最後にcomplete!と出るはず。。。
yum install httpd
補足
・ルートユーザーではないとデフォルトで一部操作権限が与えられていないコマンドがあります。
→適宜sudoコマンドを使って実行して下さい
(今回はviコマンド・yumコマンド)
・一度解決してもEC2を再度立ち上げた際に同様のエラーが発生してしまう場合があります。
→こちらの記事を参考にしてください。
https://aws.amazon.com/jp/premiumsupport/knowledge-center/ec2-static-dns-ubuntu-debian/
※上の記事を見るのが面倒な方は素直に以下のコマンドを順に実行していきましょう
①
sudo vi /etc/dhcp/dhclient.conf
②次の1行を追記
supersede domain-name-servers 8.8.8.8, 8.8.4.4;
③
sudo vi /etc/sysconfig/network-scripts/ifcfg-*
④PEERDNS=yesとなってることを確認
DEVICE=eth0
BOOTPROTO=dhcp
ONBOOT=yes
TYPE=Ethernet
USERCTL=yes
PEERDNS=yes
DHCPV6C=yes
DHCPV6C_OPTIONS=-nw
PERSISTENT_DHCLIENT=yes
RES_OPTIONS="timeout:2 attempts:5"
DHCP_ARP_CHECK=no
⑤
sudo reboot
