OpenEMMAは、Vision Language Model(VLM)を活用したマルチモーダルな経路計画のためのエンドツーエンドの自動運転モデルで、GitHubにソースコードが公開されているので(それほど膨大な実装行数ではないので)、GitHubに公開されたソースコードを、生成AI(ChatGPT)を利用して理解してみました。
OpenEMMAとは:
https://github.com/taco-group/OpenEMMA/tree/main
- OpenEMMAは、EMMAモデルのオープンソース実装であり、エンドツーエンドのモーションプランニングを実現するフレームワークである。
- Vision Language Model(GPT-4、LLaVAなど)を活用し、テキストとフロントカメラ画像を入力として処理できる。
- 自車の将来の走行経路(ウェイポイント)の予測と、判断の根拠となる自然言語による説明(decision rationale)を出力する。
結果
とても適切な分かりやすい回答内容となることが殆どで、かなり良好。
おおむね(だいぶ)、コードの全容が把握できました。
生成AIに聞いた全履歴
ソースコードを生成AIに聞く方法
OpenEMMAのGitHubトップページの内容について、生成AIに聞く
OpenEMMAのGitHubトップページの内容について、生成AIに聞いてみます。
https://github.com/taco-group/OpenEMMA/tree/main

▼質問(人間)
質問内容全体はここをクリック
OpenEMMA: Open-Source Multimodal Model for End-to-End Autonomous DrivingOpenEMMA is an open-source implementation of Waymo's End-to-End Multimodal Model for Autonomous Driving (EMMA), offering an end-to-end framework for motion planning in autonomous vehicles. OpenEMMA leverages the pretrained world knowledge of Vision Language Models (VLMs), such as GPT-4 and LLaVA, to integrate text and front-view camera inputs, enabling precise predictions of future ego waypoints and providing decision rationales. Our goal is to provide accessible tools for researchers and developers to advance autonomous driving research and applications.
EMMA diagram
Figure 1. EMMA: Waymo's End-to-End Multimodal Model for Autonomous Driving.
OpenEMMA diagram
Figure 2. OpenEMMA: Our Open-Source End-to-End Autonomous Driving Framework based on Pre-trained VLMs.
News
[2025/1/12] 🔥OpenEMMA is now available as a PyPI package! You can install it using pip install openemma.
[2024/12/19] 🔥We released OpenEMMA, an open-source project for end-to-end motion planning in autonomous driving tasks. Explore our paper for more details.
Table of Contents
Demos
Installation
Usage
Contact
Citation
Demos
Installation
To get started with OpenEMMA, follow these steps to set up your environment and dependencies.
Environment Setup
Set up a Conda environment for OpenEMMA with Python 3.8:

conda create -n openemma python=3.8
conda activate openemma
Install OpenEMMA
You can now install OpenEMMA with a single command using PyPI:
pip install openemma
Alternatively, follow these steps:
Clone OpenEMMA Repository
Clone the OpenEMMA repository and navigate to the root directory:

git clone git@github.com:taco-group/OpenEMMA.git
cd OpenEMMA
Install Dependencies
Ensure you have cudatoolkit installed. If not, use the following command:
conda install nvidia/label/cuda-12.4.0::cuda-toolkit
To install the core packages required for OpenEMMA, run the following command:
pip install -r requirements.txt
This will install all dependencies, including those for YOLO-3D, an external tool used for critical object detection. The weights needed to run YOLO-3D will be automatically downloaded during the first execution.
Set up GPT-4 API Access
To enable GPT-4’s reasoning capabilities, obtain an API key from OpenAI. You can add your API key directly in the code where prompted or set it up as an environment variable:
export OPENAI_API_KEY="your_openai_api_key"
This allows OpenEMMA to access GPT-4 for generating future waypoints and decision rationales.
Usage
After setting up the environment, you can start using OpenEMMA with the following instructions:
Prepare Input Data
Download and extract the nuScenes dataset

Run OpenEMMA
Use the following command to execute OpenEMMA's main script:
    PyPI:

openemma \
    --model-path qwen \
    --dataroot [dir-of-nuScenes-dataset] \
    --version [version-of-nuScenes-dataset] \
    --method openemma

Github Repo:
python main.py
--model-path qwen
--dataroot [dir-of-nuscnse-dataset]
--version [version-of-nuscnse-dataset]
--method openemma
Currently, we support the following models: GPT-4o, LLaVA-1.6-Mistral-7B, Llama-3.2-11B-Vision-Instruct, and Qwen2-VL-7B-Instruct. To use a specific model, simply pass gpt, llava, llama, and qwenas the argument to --model-path.

Output Interpretation
After running the model, OpenEMMA generates the following output in the ./qwen-results location:

    Waypoints: A list of future waypoints predicting the ego vehicle’s trajectory.

    Decision Rationales: Text explanations of the model’s reasoning, including scene context, critical objects, and behavior decisions.

    Annotated Images: Visualizations of the planned trajectory and detected critical objects overlaid on the original images.

    Compiled Video: A video (e.g., output_video.mp4) created from the annotated images, showing the predicted path over time.
Contact
For help or issues using this package, please submit a GitHub issue.
For personal communication related to this project, please contact Shuo Xing (shuoxing@tamu.edu).
Citation
We are more than happy if this code is helpful to your work. If you use our code or extend our work, please consider citing our paper:
@article{openemma,
author = {Xing, Shuo and Qian, Chengyuan and Wang, Yuping and Hua, Hongyuan and Tian, Kexin and Zhou, Yang and Tu, Zhengzhong},
title = {OpenEMMA: Open-Source Multimodal Model for End-to-End Autonomous Driving},
journal = {arXiv},
year = {2024},
month = dec,
eprint = {2412.15208},
doi = {10.48550/arXiv.2412.15208}
}
上記の内容に関して下記の質問に回答下さい: (である調で記載、元文の記載内容に基づいて忠実に回答)
▼生成AIの回答(ChatGPT-4o)
① 何についての記載か + 要旨
本資料は、Waymoが提案したエンドツーエンドの自動運転モデルであるEMMA(End-to-End Multimodal Model for Autonomous Driving)のオープンソース実装である OpenEMMA に関するものである。OpenEMMAは、Vision Language Model(VLM)を活用したマルチモーダルな経路計画のためのフレームワークであり、自動運転分野の研究および応用を促進することを目的としている。
要旨(箇条書き)
- OpenEMMAは、EMMAモデルのオープンソース実装であり、エンドツーエンドのモーションプランニングを実現するフレームワークである。
- Vision Language Model(GPT-4、LLaVAなど)を活用し、テキストとフロントカメラ画像を入力として処理できる。
- 自車の将来の走行経路(ウェイポイント)の予測と、判断の根拠となる自然言語による説明(decision rationale)を出力する。
- nuScenesデータセットを使用し、さまざまなVLMモデルとの組み合わせで利用可能。
- ソースコード、インストール方法、実行手順、出力解釈に関する詳細情報が含まれている。
- PyPIパッケージとして提供されており、簡単に導入可能。
- YOLO-3Dによる重要物体検出と、画像への注釈、ビデオ生成機能も備える。
② ソースコードを理解するには、どこから見れば良いか
ソースコードを理解するためには、以下の順でリポジトリ内の構造や実行手順を追うのが適切である:
-
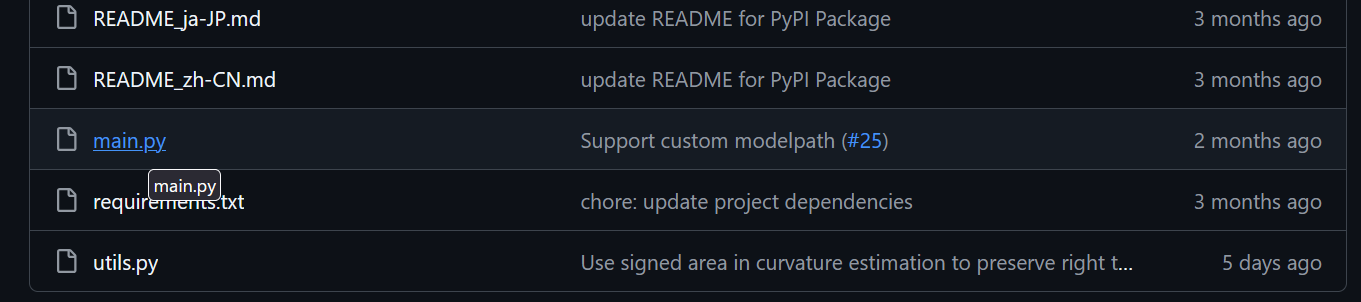
GitHubリポジトリのルートディレクトリ:まず
git cloneでクローンし、トップレベル構成を確認することで全体の構成(main.py、requirements.txtなど)を把握できる。 -
main.py:OpenEMMAの中心的なスクリプトであり、実行エントリーポイントである。このファイルにはモデル読み込み、データ読み込み、推論処理の流れが記述されていると推察される。 -
requirements.txt:必要な依存ライブラリが記載されており、OpenEMMAが外部ツール(例:YOLO-3D)をどのように利用しているかを把握するのに有用である。 -
--model-pathや--method等の引数:使用可能なモデル(GPT-4o、LLaVA、Qwenなど)を指定する方法が明記されており、引数処理部分を確認することでモデル呼び出しやVLMとのインターフェース部分のコードを把握できる。 -
出力フォルダ(例:
./qwen-results)の生成処理:生成されるウェイポイント、説明文、画像、ビデオの保存処理を追うことで、モデルの出力構造や評価指標の設計思想を理解できる。 - YOLO-3D関連のコード:物体検出処理に関係する箇所であり、どのように検出結果を統合しているか確認することで、マルチモーダルな処理の詳細が把握できる。
- GPT-4のAPIキーの使用箇所:自然言語出力(decision rationale)に関わる部分を把握するためには、APIキーがどのように用いられているかを確認するのが有効である。
したがって、まずはmain.pyを出発点とし、引数の処理、モデルの呼び出し、データ入出力の流れを辿ることで、OpenEMMAのコード全体の構造と実装方針を効率よく理解できる構成となっている。
まずはmain.pyを出発点とすればよいようです。main.pyを見ていきます。
main.pyの内容について、生成AIに聞く
https://github.com/taco-group/OpenEMMA/blob/main/main.py
main.pyのソースコード全てを貼り付けて質問すると、入力が長すぎてChatGPTがエラーとなる。
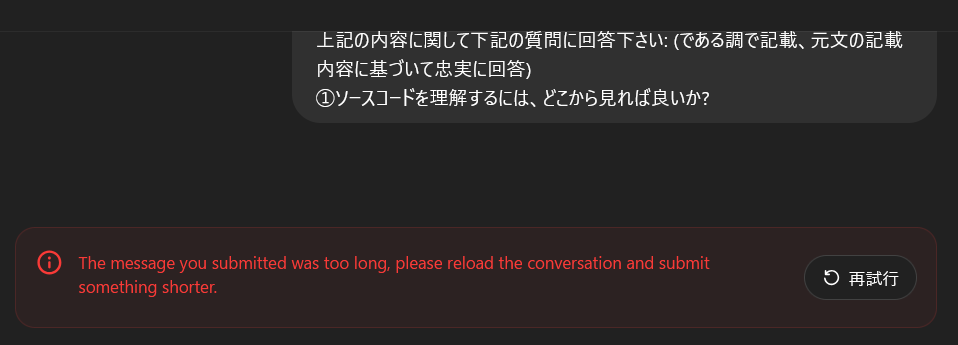
処理の開始点(if __name__ == '__main__':)の部分のソースコードを貼り付けて、生成AIに聞いてみます。
▼質問(人間)
質問内容全体はここをクリック
if __name__ == '__main__': parser = argparse.ArgumentParser() parser.add_argument("--model-path", type=str, default="gpt") parser.add_argument("--plot", type=bool, default=True) parser.add_argument("--dataroot", type=str, default='datasets/NuScenes') parser.add_argument("--version", type=str, default='v1.0-mini') parser.add_argument("--method", type=str, default='openemma') args = parser.parse_args()print(f"{args.model_path}")
if "llama" in args.model_path:
model_id = "meta-llama/Llama-3.2-11B-Vision-Instruct"
model = MllamaForConditionalGeneration.from_pretrained(
model_id,
torch_dtype=torch.bfloat16,
device_map="auto",
)
processor = AutoProcessor.from_pretrained(model_id)
tokenizer=None
elif "Llama" in args.model_path:
model = MllamaForConditionalGeneration.from_pretrained(
args.model_path,
torch_dtype=torch.bfloat16,
device_map="auto",
)
processor = AutoProcessor.from_pretrained(args.model_path)
tokenizer=None
elif "qwen" in args.model_path:
model = Qwen2VLForConditionalGeneration.from_pretrained("Qwen/Qwen2-VL-7B-Instruct", torch_dtype=torch.bfloat16, device_map="auto")
processor = AutoProcessor.from_pretrained("Qwen/Qwen2-VL-7B-Instruct")
tokenizer=None
elif "Qwen" in args.model_path:
model = Qwen2VLForConditionalGeneration.from_pretrained(args.model_path, torch_dtype=torch.bfloat16, device_map="auto")
processor = AutoProcessor.from_pretrained(args.model_path)
tokenizer=None
elif 'llava' == args.model_path:
disable_torch_init()
tokenizer, model, processor, context_len = load_pretrained_model("liuhaotian/llava-v1.6-mistral-7b", None, "llava-v1.6-mistral-7b")
image_token_se = DEFAULT_IM_START_TOKEN + DEFAULT_IMAGE_TOKEN + DEFAULT_IM_END_TOKEN
elif "llava" in args.model_path:
disable_torch_init()
tokenizer, model, processor, context_len = load_pretrained_model(args.model_path, None, "llava-v1.6-mistral-7b")
image_token_se = DEFAULT_IM_START_TOKEN + DEFAULT_IMAGE_TOKEN + DEFAULT_IM_END_TOKEN
else:
model = None
processor = None
tokenizer=None
timestamp = datetime.now().strftime("%Y%m%d-%H%M%S")
timestamp = args.model_path + f"_results/{args.method}/" + timestamp
os.makedirs(timestamp, exist_ok=True)
# Load the dataset
nusc = NuScenes(version=args.version, dataroot=args.dataroot)
# Iterate the scenes
scenes = nusc.scene
print(f"Number of scenes: {len(scenes)}")
for scene in scenes:
token = scene['token']
first_sample_token = scene['first_sample_token']
last_sample_token = scene['last_sample_token']
name = scene['name']
description = scene['description']
if not name in ["scene-0103", "scene-1077"]:
continue
# Get all image and pose in this scene
front_camera_images = []
ego_poses = []
camera_params = []
curr_sample_token = first_sample_token
while True:
sample = nusc.get('sample', curr_sample_token)
# Get the front camera image of the sample.
cam_front_data = nusc.get('sample_data', sample['data']['CAM_FRONT'])
# nusc.render_sample_data(cam_front_data['token'])
if "gpt" in args.model_path:
with open(os.path.join(nusc.dataroot, cam_front_data['filename']), "rb") as image_file:
front_camera_images.append(base64.b64encode(image_file.read()).decode('utf-8'))
else:
front_camera_images.append(os.path.join(nusc.dataroot, cam_front_data['filename']))
# Get the ego pose of the sample.
pose = nusc.get('ego_pose', cam_front_data['ego_pose_token'])
ego_poses.append(pose)
# Get the camera parameters of the sample.
camera_params.append(nusc.get('calibrated_sensor', cam_front_data['calibrated_sensor_token']))
# Advance the pointer.
if curr_sample_token == last_sample_token:
break
curr_sample_token = sample['next']
scene_length = len(front_camera_images)
print(f"Scene {name} has {scene_length} frames")
if scene_length < TTL_LEN:
print(f"Scene {name} has less than {TTL_LEN} frames, skipping...")
continue
## Compute interpolated trajectory.
# Get the velocities of the ego vehicle.
ego_poses_world = [ego_poses[t]['translation'][:3] for t in range(scene_length)]
ego_poses_world = np.array(ego_poses_world)
plt.plot(ego_poses_world[:, 0], ego_poses_world[:, 1], 'r-', label='GT')
ego_velocities = np.zeros_like(ego_poses_world)
ego_velocities[1:] = ego_poses_world[1:] - ego_poses_world[:-1]
ego_velocities[0] = ego_velocities[1]
# Get the curvature of the ego vehicle.
ego_curvatures = EstimateCurvatureFromTrajectory(ego_poses_world)
ego_velocities_norm = np.linalg.norm(ego_velocities, axis=1)
estimated_points = IntegrateCurvatureForPoints(ego_curvatures, ego_velocities_norm, ego_poses_world[0],
atan2(ego_velocities[0][1], ego_velocities[0][0]), scene_length)
# Debug
if args.plot:
plt.quiver(ego_poses_world[:, 0], ego_poses_world[:, 1], ego_velocities[:, 0], ego_velocities[:, 1],
color='b')
plt.plot(estimated_points[:, 0], estimated_points[:, 1], 'g-', label='Reconstruction')
plt.legend()
plt.savefig(f"{timestamp}/{name}_interpolation.jpg")
plt.close()
# Get the waypoints of the ego vehicle.
ego_traj_world = [ego_poses[t]['translation'][:3] for t in range(scene_length)]
prev_intent = None
cam_images_sequence = []
ade1s_list = []
ade2s_list = []
ade3s_list = []
for i in range(scene_length - TTL_LEN):
# Get the raw image data.
# utils.PlotBase64Image(front_camera_images[0])
obs_images = front_camera_images[i:i+OBS_LEN]
obs_ego_poses = ego_poses[i:i+OBS_LEN]
obs_camera_params = camera_params[i:i+OBS_LEN]
obs_ego_traj_world = ego_traj_world[i:i+OBS_LEN]
fut_ego_traj_world = ego_traj_world[i+OBS_LEN:i+TTL_LEN]
obs_ego_velocities = ego_velocities[i:i+OBS_LEN]
obs_ego_curvatures = ego_curvatures[i:i+OBS_LEN]
# Get positions of the vehicle.
obs_start_world = obs_ego_traj_world[0]
fut_start_world = obs_ego_traj_world[-1]
curr_image = obs_images[-1]
# obs_images = [curr_image]
# Allocate the images.
if "gpt" in args.model_path:
img = cv2.imdecode(np.frombuffer(base64.b64decode(curr_image), dtype=np.uint8), cv2.IMREAD_COLOR)
img = yolo3d_nuScenes(img, calib=obs_camera_params[-1])[0]
else:
with open(os.path.join(curr_image), "rb") as image_file:
img = cv2.imdecode(np.frombuffer(image_file.read(), dtype=np.uint8), cv2.IMREAD_COLOR)
for rho in range(3):
# Assemble the prompt.
if not "gpt" in args.model_path:
obs_images = curr_image
(prediction,
scene_description,
object_description,
updated_intent) = GenerateMotion(obs_images, obs_ego_traj_world, obs_ego_velocities,
obs_ego_curvatures, prev_intent, processor=processor, model=model, tokenizer=tokenizer, args=args)
# Process the output.
prev_intent = updated_intent # Stateful intent
pred_waypoints = prediction.replace("Future speeds and curvatures:", "").strip()
coordinates = re.findall(r"\[([-+]?\d*\.?\d+),\s*([-+]?\d*\.?\d+)\]", pred_waypoints)
if not coordinates == []:
break
if coordinates == []:
continue
speed_curvature_pred = [[float(v), float(k)] for v, k in coordinates]
speed_curvature_pred = speed_curvature_pred[:10]
print(f"Got {len(speed_curvature_pred)} future actions: {speed_curvature_pred}")
# GT
# OverlayTrajectory(img, fut_ego_traj_world, obs_camera_params[-1], obs_ego_poses[-1], color=(255, 0, 0))
# Pred
pred_len = min(FUT_LEN, len(speed_curvature_pred))
pred_curvatures = np.array(speed_curvature_pred)[:, 1] / 100
pred_speeds = np.array(speed_curvature_pred)[:, 0]
pred_traj = np.zeros((pred_len, 3))
pred_traj[:pred_len, :2] = IntegrateCurvatureForPoints(pred_curvatures,
pred_speeds,
fut_start_world,
atan2(obs_ego_velocities[-1][1],
obs_ego_velocities[-1][0]), pred_len)
# Overlay the trajectory.
check_flag = OverlayTrajectory(img, pred_traj.tolist(), obs_camera_params[-1], obs_ego_poses[-1], color=(255, 0, 0), args=args)
# Compute ADE.
fut_ego_traj_world = np.array(fut_ego_traj_world)
ade = np.mean(np.linalg.norm(fut_ego_traj_world[:pred_len] - pred_traj, axis=1))
pred1_len = min(pred_len, 2)
ade1s = np.mean(np.linalg.norm(fut_ego_traj_world[:pred1_len] - pred_traj[1:pred1_len+1] , axis=1))
ade1s_list.append(ade1s)
pred2_len = min(pred_len, 4)
ade2s = np.mean(np.linalg.norm(fut_ego_traj_world[:pred2_len] - pred_traj[:pred2_len] , axis=1))
ade2s_list.append(ade2s)
pred3_len = min(pred_len, 6)
ade3s = np.mean(np.linalg.norm(fut_ego_traj_world[:pred3_len] - pred_traj[:pred3_len] , axis=1))
ade3s_list.append(ade3s)
# Write to image.
if args.plot == True:
cam_images_sequence.append(img.copy())
cv2.imwrite(f"{timestamp}/{name}_{i}_front_cam.jpg", img)
# Plot the trajectory.
plt.plot(fut_ego_traj_world[:, 0], fut_ego_traj_world[:, 1], 'r-', label='GT')
plt.plot(pred_traj[:, 0], pred_traj[:, 1], 'b-', label='Pred')
plt.legend()
plt.title(f"Scene: {name}, Frame: {i}, ADE: {ade}")
plt.savefig(f"{timestamp}/{name}_{i}_traj.jpg")
plt.close()
# Save the trajectory
np.save(f"{timestamp}/{name}_{i}_pred_traj.npy", pred_traj)
np.save(f"{timestamp}/{name}_{i}_pred_curvatures.npy", pred_curvatures)
np.save(f"{timestamp}/{name}_{i}_pred_speeds.npy", pred_speeds)
# Save the descriptions
with open(f"{timestamp}/{name}_{i}_logs.txt", 'w') as f:
f.write(f"Scene Description: {scene_description}\n")
f.write(f"Object Description: {object_description}\n")
f.write(f"Intent Description: {updated_intent}\n")
f.write(f"Average Displacement Error: {ade}\n")
# break # Timestep
mean_ade1s = np.mean(ade1s_list)
mean_ade2s = np.mean(ade2s_list)
mean_ade3s = np.mean(ade3s_list)
aveg_ade = np.mean([mean_ade1s, mean_ade2s, mean_ade3s])
result = {
"name": name,
"token": token,
"ade1s": mean_ade1s,
"ade2s": mean_ade2s,
"ade3s": mean_ade3s,
"avgade": aveg_ade
}
with open(f"{timestamp}/ade_results.jsonl", "a") as f:
f.write(json.dumps(result))
f.write("\n")
if args.plot:
WriteImageSequenceToVideo(cam_images_sequence, f"{timestamp}/{name}")
# break # Scenes
上記の内容に関して下記の質問に回答下さい: (である調で記載、元文の記載内容に基づいて忠実に回答)
▼生成AIの回答(ChatGPT-4o)
① 上記のコードの要旨とその処理内容
本コードは、自動運転向けデータセット NuScenes を用いて、シーンにおける車両の将来の軌跡(trajectory)を予測し、その予測精度を評価・可視化する一連の処理を行っている。特に、画像と過去の軌道情報から将来の速度および曲率を推定し、それに基づいて将来軌跡を生成する。さらに、Ground Truth(実際の軌跡)との誤差(ADE)を算出し、可視化および保存を行う構成である。
処理の流れは以下の通りである。
1. モデルとパーサの設定
- コマンドライン引数
--model-path、--plot、--dataroot、--version、--methodを受け取る。 - 指定された
model-pathに応じて、LLaMA系、Qwen系、または LLaVA モデルをロードする。これにより、画像とテキストを統合的に扱えるマルチモーダルな生成モデルが用いられる。 - モデルに応じて
processorおよびtokenizerも適宜初期化される。
2. NuScenes データセットの読み込みとシーンの抽出
-
NuScenesクラスを使ってデータセットを読み込み、すべてのシーンを取得する。 - ただし、処理対象は
scene-0103とscene-1077の2つのシーンに限定されている。
3. 各シーン内でのフレーム単位の画像・ポーズ情報の抽出
- 各シーンの
first_sample_tokenからlast_sample_tokenまでイテレーションし、CAM_FRONTの画像パス、Ego Pose、カメラパラメータを取得する。 - モデルが "gpt" を含む場合、画像は Base64 形式にエンコードされ、それ以外はファイルパスで保持される。
4. Ego 車両の将来軌道の補間
- Ego Pose の位置情報を元に、速度ベクトルおよび曲率を算出する。
-
EstimateCurvatureFromTrajectory関数により軌道の曲率を求め、速度と曲率から将来位置をIntegrateCurvatureForPointsにより推定する。 - 実際の軌跡と補間軌跡は Matplotlib を使って描画され、保存される。
5. フレーム単位での予測実行と精度評価
- 各フレーム時点で、過去一定長の観測ウィンドウ(画像列、Ego Pose、速度、曲率など)から、将来の速度・曲率を予測する。
-
GenerateMotion関数を呼び出し、自然言語ベースで生成された出力(速度・曲率列)から将来軌道を再構成する。 -
OverlayTrajectory関数により、画像上に予測軌道を描画する。 - Ground Truth の将来軌道と比較し、平均変位誤差(ADE)を3つのスパン(1, 2, 3秒程度)で算出する(
ade1s,ade2s,ade3s)。 - 結果を画像として保存し、予測軌道、速度・曲率、自然言語出力をログファイルに記録する。
6. 結果の集計と保存
- 各シーンごとに ADE の平均値を算出し、JSON Lines 形式で
ade_results.jsonlに追記保存される。 - 画像列は動画として書き出される(
WriteImageSequenceToVideo)。
全体として、本コードはマルチモーダルな大規模言語モデルを活用して、観測画像から将来の走行軌道を自然言語的に予測・解析し、Ego 車両の動作理解や軌道予測精度を定量的に評価する実験フレームワークである。実験処理、可視化、記録までが一貫して行われる実用的な検証スクリプトである。
非常にざっくりと、全体の処理の流れは分かった。
次に何を見れば良いか?
▼質問(人間)
ソースコードを理解するには、次に何を見れば良いか?
▼生成AIの回答(ChatGPT-4o)
このソースコードをさらに深く理解するためには、以下の要素を順に確認していくのが効果的である。
1. GenerateMotion() 関数の中身
この関数は将来の速度と曲率の予測(および文生成)を担っている。本コードの中心的処理であり、モデルの動作と出力フォーマットの理解に不可欠である。
→ どのようなプロンプトが生成され、モデルに与えられ、どう処理されているのかを確認すべきである。
2. EstimateCurvatureFromTrajectory() および IntegrateCurvatureForPoints()
これらの関数は軌道の再構成および推定に関わる数値計算の要である。速度・曲率から将来位置を積分して予測する流れを担っている。
→ 曲率推定方法、積分の方式(例えばオイラー法か?)などを確認することで、予測精度の特性や制約が理解できる。
3. モデルとプロセッサ (processor, tokenizer) の定義・挙動
モデルとして llama, qwen, llava など複数の選択肢があり、使用するトークナイザやプロセッサが異なる。
→ モデルごとの from_pretrained() の扱いと、プロセッサがどのように画像・テキストを処理しているかを追うことで、マルチモーダル入力の流れが明らかになる。
4. NuScenes データの構造と取得方法 (nusc.get())
各 sample, ego_pose, calibrated_sensor などの意味をNuScenes公式ドキュメントで確認すると、データの取得・処理の全体像が整理できる。
→ 特に ego_pose_token, calibrated_sensor_token など、pose やキャリブレーション情報の紐付き構造を理解することが重要である。
5. 可視化処理と OverlayTrajectory() の定義
可視化に関する関数がいくつか使われており、予測結果の表示や描画に寄与している。OverlayTrajectory() の内部実装を見れば、画像上への投影の方法が明確になる。
→ 画像空間とワールド座標系の変換(キャリブレーションパラメータの利用方法)なども併せて確認したい。
6. args.method, args.model_path に依存した動作分岐
モデルやメソッドによって動作が変わる部分が多いため、argparse で渡される args にどんな値が入るか、使用例や想定ユースケースを確認する必要がある。
7. yolo3d_nuScenes() 関数の詳細
これはオプション的な処理だが、画像から物体情報を抽出する処理がある可能性がある。画像入力に前処理が必要な場合、その前処理の影響も把握すべきである。
以上の項目を順に確認していくことで、コード全体の処理の流れ、用いているアルゴリズム、またどこに精度向上の余地があるのかを把握することができる。全体を理解するためには、まず GenerateMotion() を起点に、そこから上下にコードをたどっていくのが効果的である。
GenerateMotion() 関数の中身から見ていくという優先順位は、とても適切。本コードの中心的処理がどこなのかが適切に分かっていて、良好。
GenerateMotion()関数を呼び出すために必要な周辺のコードを押さえておく
GenerateMotion() 関数の中身を見る前に、GenerateMotion() 関数を呼び出すために必要な周辺のコードを押さえておくことにする。
▼質問(人間)
GenerateMotion() 関数を呼び出すために必要な、主要なコード部分を説明下さい。(コードを抜き出して、主要な処理の流れをまとめて)
▼生成AIの回答(ChatGPT-4o)
以下に、GenerateMotion() 関数を呼び出すために必要な主要なコード部分を抜き出しつつ、どのような処理の流れで呼び出されているかを整理して説明します。該当箇所は main() 関数とその直下の繰り返し処理(ループ)に含まれています。
① モデル・プロセッサの準備
if args.method in ["llava"]:
    processor = LlavaProcessor.from_pretrained(args.model_path)
    model = LlavaForConditionalGeneration.from_pretrained(args.model_path).to(device)
elif args.method in ["llama", "qwen"]:
    tokenizer = AutoTokenizer.from_pretrained(args.model_path, use_fast=False)
    model = AutoModelForCausalLM.from_pretrained(args.model_path).to(device)
    processor = None
- モデル種別に応じて
processor,tokenizer,modelを用意します。 -
model_pathは引数で指定され、ローカルまたはHuggingFace Hubから読み込みます。
② NuScenes データローダ初期化とシーン選定
nusc = NuScenes(version=args.version, dataroot=args.data_path, verbose=True)
scene = nusc.scene[args.scene_index]
- NuScenesのデータベースから対象シーン(例:シーン番号5など)を選びます。
③ 各サンプル(フレーム)ごとのループ処理
current_sample_token = scene["first_sample_token"]
while current_sample_token:
    current_sample = nusc.get("sample", current_sample_token)
    ...
- シーン内の各時刻(sample)に対して処理を行うループです。
④ カメラ画像の取得と読み込み
camera_data = nusc.get("sample_data", current_sample["data"]["CAM_FRONT"])
camera_path = os.path.join(args.data_path, camera_data["filename"])
image = Image.open(camera_path).convert("RGB")
- 前方カメラ画像(CAM_FRONT)のパスを取得し、PILで画像として読み込みます。
⑤ GenerateMotion() 関数の呼び出し
velocities, curvatures, text = GenerateMotion(
    image=image,
    args=args,
    model=model,
    processor=processor,
    tokenizer=tokenizer,
    device=device,
)
- この関数が、実際に予測の中心処理を行う部分です。
- 画像とともに、モデル・プロセッサ・トークナイザなどの全情報を引数として渡します。
- 返り値は将来の速度
velocities、曲率curvatures、および生成されたテキストtextです。
⑥ 予測結果の位置再構成
trajectory_points = IntegrateCurvatureForPoints(velocities, curvatures)
- 予測された速度と曲率をもとに、将来の軌道を位置ベースで再構成しています。
⑦ 結果の可視化・表示
result_image = OverlayTrajectory(image, trajectory_points)
result_image.save("output.png")
- 軌道を元画像に重ねて出力用画像を生成します。
まとめ:主要な処理の流れ
- モデルとプロセッサのロード(事前準備)
- NuScenesデータベースから対象シーンと各サンプルを取得
- 各時刻においてカメラ画像をロード
-
GenerateMotion()でマルチモーダルモデルによる将来予測を実行 - 曲率・速度から将来位置を再構成
- 可視化して結果を出力
このように、GenerateMotion() はループ内で1サンプルごとに呼び出され、カメラ画像から将来の運動軌跡を生成する中心処理として機能しています。その周辺の処理は、データ取得と可視化に関する前後処理となっています。
GenerateMotion() 関数を呼び出すために必要なコード部分だけをうまく抜き出して説明してあり、とても分かりやすい。
必要な変数は全て説明されており良好。
この質問の仕方は、とても良い。
GenerateMotion()関数の内容について、生成AIに聞く
▼質問(人間)
質問内容全体はここをクリック
def GenerateMotion(obs_images, obs_waypoints, obs_velocities, obs_curvatures, given_intent, processor=None, model=None, tokenizer=None, args=None): # assert len(obs_images) == len(obs_waypoints)scene_description, object_description, intent_description = None, None, None
if args.method == "openemma":
    scene_description = SceneDescription(obs_images, processor=processor, model=model, tokenizer=tokenizer, args=args)
    object_description = DescribeObjects(obs_images, processor=processor, model=model, tokenizer=tokenizer, args=args)
    intent_description = DescribeOrUpdateIntent(obs_images, prev_intent=given_intent, processor=processor, model=model, tokenizer=tokenizer, args=args)
print(f'Scene Description: {scene_description}')
print(f'Object Description: {object_description}')
print(f'Intent Description: {intent_description}')
# Convert array waypoints to string.
obs_waypoints_str = [f"[{x[0]:.2f},{x[1]:.2f}]" for x in obs_waypoints]
obs_waypoints_str = ", ".join(obs_waypoints_str)
obs_velocities_norm = np.linalg.norm(obs_velocities, axis=1)
obs_curvatures = obs_curvatures * 100
obs_speed_curvature_str = [f"[{x[0]:.1f},{x[1]:.1f}]" for x in zip(obs_velocities_norm, obs_curvatures)]
obs_speed_curvature_str = ", ".join(obs_speed_curvature_str)
print(f'Observed Speed and Curvature: {obs_speed_curvature_str}')
sys_message = ("You are a autonomous driving labeller. You have access to a front-view camera image of a vehicle, a sequence of past speeds, a sequence of past curvatures, and a driving rationale. Each speed, curvature is represented as [v, k], where v corresponds to the speed, and k corresponds to the curvature. A positive k means the vehicle is turning left. A negative k means the vehicle is turning right. The larger the absolute value of k, the sharper the turn. A close to zero k means the vehicle is driving straight. As a driver on the road, you should follow any common sense traffic rules. You should try to stay in the middle of your lane. You should maintain necessary distance from the leading vehicle. You should observe lane markings and follow them. Your task is to do your best to predict future speeds and curvatures for the vehicle over the next 10 timesteps given vehicle intent inferred from the image. Make a best guess if the problem is too difficult for you. If you cannot provide a response people will get injured.\n")
if args.method == "openemma":
prompt = f"""These are frames from a video taken by a camera mounted in the front of a car. The images are taken at a 0.5 second interval.
The scene is described as follows: {scene_description}.
The identified critical objects are {object_description}.
The car's intent is {intent_description}.
The 5 second historical velocities and curvatures of the ego car are {obs_speed_curvature_str}.
Infer the association between these numbers and the image sequence. Generate the predicted future speeds and curvatures in the format [speed_1, curvature_1], [speed_2, curvature_2],..., [speed_10, curvature_10]. Write the raw text not markdown or latex. Future speeds and curvatures:"""
else:
prompt = f"""These are frames from a video taken by a camera mounted in the front of a car. The images are taken at a 0.5 second interval.
The 5 second historical velocities and curvatures of the ego car are {obs_speed_curvature_str}.
Infer the association between these numbers and the image sequence. Generate the predicted future speeds and curvatures in the format [speed_1, curvature_1], [speed_2, curvature_2],..., [speed_10, curvature_10]. Write the raw text not markdown or latex. Future speeds and curvatures:"""
for rho in range(3):
result = vlm_inference(text=prompt, images=obs_images, sys_message=sys_message, processor=processor, model=model, tokenizer=tokenizer, args=args)
if not "unable" in result and not "sorry" in result and "[" in result:
break
return result, scene_description, object_description, intent_description
上記の内容に関して下記の質問に回答下さい: (である調で記載、元文の記載内容に基づいて忠実に回答)
▼生成AIの回答(ChatGPT-4o)
以下に GenerateMotion() 関数の主要なコード部分を抜き出し、処理の流れに沿って説明する。
① 説明生成用の初期化処理
scene_description, object_description, intent_description = None, None, None
- 生成する各種自然言語記述(シーン説明、物体説明、意図記述)の初期化を行う。
② 自然言語記述の生成(methodが "openemma" の場合)
if args.method == "openemma":
scene_description = SceneDescription(obs_images, processor=processor, model=model, tokenizer=tokenizer, args=args)
object_description = DescribeObjects(obs_images, processor=processor, model=model, tokenizer=tokenizer, args=args)
intent_description = DescribeOrUpdateIntent(obs_images, prev_intent=given_intent, processor=processor, model=model, tokenizer=tokenizer, args=args)
- 画像列
obs_imagesをもとに以下を推定・生成する。- シーンの概要 (
SceneDescription) - 重要物体の存在や特徴 (
DescribeObjects) - 自車の意図(進行方向や行動) (
DescribeOrUpdateIntent)
- シーンの概要 (
- 各生成には指定された VLM モデルとプロセッサが用いられる。
③ 入力系列の速度と曲率の前処理
obs_velocities_norm = np.linalg.norm(obs_velocities, axis=1)
obs_curvatures = obs_curvatures * 100
obs_speed_curvature_str = [f"[{x[0]:.1f},{x[1]:.1f}]" for x in zip(obs_velocities_norm, obs_curvatures)]
obs_speed_curvature_str = ", ".join(obs_speed_curvature_str)
- 過去の速度ベクトルのノルムを取りスカラー化。
- 曲率は100倍して桁を整えたうえで、速度とともに
[v, k]形式に整形。 - 推論プロンプトに使う文字列形式の系列へと変換する。
④ システムメッセージの定義
sys_message = ("You are a autonomous driving labeller. You have access to a front-view camera image of a vehicle, ...")
- モデルに与える役割定義(system prompt)として、自律運転におけるラベリングタスクの設定を提示する。
- カーブの定義や安全運転に関するルールなど、モデルの推論指針となる情報を含む。
⑤ プロンプトの構築
if args.method == "openemma":
    prompt = f"""These are frames from a video ...
        The scene is described as follows: {scene_description}.
        The identified critical objects are {object_description}.
        The car's intent is {intent_description}.
        The 5 second historical velocities and curvatures ... {obs_speed_curvature_str}.
        ..."""
else:
    prompt = f"""These are frames from a video ...
        The 5 second historical velocities and curvatures ... {obs_speed_curvature_str}.
        ..."""
- 推論に用いるプロンプトを構成。画像系列と速度・曲率履歴をベースとし、openemma モードでは追加の自然言語記述も組み込まれる。
- 出力形式の明示([speed, curvature] のペアを10個)も含む。
⑥ 推論の実行(最大3回までリトライ)
for rho in range(3):
    result = vlm_inference(text=prompt, images=obs_images, sys_message=sys_message, processor=processor, model=model, tokenizer=tokenizer, args=args)
    if not "unable" in result and not "sorry" in result and "[" in result:
        break
-
vlm_inference()によって、モデルに対して推論を実行。 - 出力に
"unable"や"sorry"といった拒否応答が含まれる場合は再実行。 - 条件を満たす出力が得られるまで最大3回試行する。
⑦ 結果の返却
return result, scene_description, object_description, intent_description
- 最終的なモデル出力(未来10ステップの速度・曲率ペア)と、生成した自然言語記述3種を返す。
処理全体の要約
- 観測画像からシーン・物体・意図の自然言語記述を生成(openemma モード時)
- 過去の運動系列を文字列形式に整形
- モデルへのプロンプトとシステムメッセージを構築
- 推論を最大3回まで試行して結果を取得
- 結果(未来予測)および記述情報を返却
この関数は、観測画像列と運動履歴に基づき、将来の速度と曲率を推論する中心的なモジュールである。自然言語による状況理解と行動予測を統合的に扱う点が特徴的である。
分からない点について追加でピンポイントで質問
▼質問(人間)
①obs_speed_curvature_strには、どんな形式のデータが入るのか? (具体値の例を示して)
②promptには、どんな形式のデータが入るのか? (具体値の例を示して、英語は日本語で説明して)
▼生成AIの回答(ChatGPT-4o)
以下にそれぞれの質問に対して具体的な例を交えて説明します。
① obs_speed_curvature_str には、どんな形式のデータが入るのか?(具体値の例)
obs_speed_curvature_str には、速度と曲率の過去時系列データが [速度, 曲率] というペアで構成され、カンマ区切りで連結された文字列が入ります。
これはプロンプト中でモデルに過去の運転挙動を説明するためのものです。
例えば、次のような入力が与えられた場合:
obs_velocities = np.array([[2.0, 0.0], [2.1, 0.0], [2.0, 0.0], [1.9, 0.0], [2.0, 0.0], [2.0, 0.1], [2.0, 0.2], [2.0, 0.3], [2.0, 0.2], [2.0, 0.1]])
obs_curvatures = np.array([0.0, 0.0, 0.0, 0.0, 0.0, 0.001, 0.002, 0.003, 0.002, 0.001])
このとき:
- 速度のノルムはほぼ一定(例えば 2.0)
- 曲率は
0.0から徐々に0.003まで増加し、その後また減少
曲率は100倍されてから記述されるため、obs_speed_curvature_str は以下のような文字列になります:
[2.0,0.0], [2.1,0.0], [2.0,0.0], [1.9,0.0], [2.0,0.0], [2.0,0.1], [2.0,0.2], [2.0,0.3], [2.0,0.2], [2.0,0.1]
このように、10時点(=5秒間)の [速度, 曲率] のリストが並びます。速度は小数点第1位、曲率も100倍されて小数点第1位で表記されます。
② prompt には、どんな形式のデータが入るのか?(具体値の例と日本語での説明)
prompt は、画像列と過去の運転履歴、(場合によっては)自然言語による状況記述をもとに、「将来の速度と曲率を予測してください」とモデルに指示する文です。
openemmaモードが有効な場合の例(日本語訳付き):
These are frames from a video taken by a camera mounted in the front of a car. The images are taken at a 0.5 second interval.
The scene is described as follows: A residential street with parked cars on both sides, and a traffic light ahead.
The identified critical objects are A pedestrian waiting at the crosswalk, and a slow-moving bicycle in the same lane.
The car's intent is Slowing down in preparation to stop at the crosswalk.
The 5 second historical velocities and curvatures of the ego car are [2.0,0.0], [2.1,0.0], [2.0,0.0], [1.9,0.0], [2.0,0.0], [2.0,0.1], [2.0,0.2], [2.0,0.3], [2.0,0.2], [2.0,0.1].
Infer the association between these numbers and the image sequence. Generate the predicted future speeds and curvatures in the format [speed_1, curvature_1], [speed_2, curvature_2],..., [speed_10, curvature_10]. Write the raw text not markdown or latex. Future speeds and curvatures:
(日本語訳)
これは車両前方に搭載されたカメラによって撮影されたビデオのフレームであり、0.5秒ごとに撮影された画像です。
- シーンの説明:両側に駐車車両のある住宅街、前方に信号機が見える
- 重要物体の説明:横断歩道で待っている歩行者、同一車線内を走る低速の自転車
- 車の意図:横断歩道で停止するために減速中
- 過去の速度と曲率:[2.0,0.0], [2.1,0.0], ..., [2.0,0.1](例として10ステップ分)
この情報をもとに、次の10ステップの速度と曲率([速度, 曲率])を予測するようにモデルへ指示している。
つまり、prompt は「入力画像列+過去の運動履歴+必要に応じて状況説明」に基づいて、「将来の運動(速度と曲率)を予測してください」という命令文として構成される。自然言語で詳細な背景文脈が含まれる点が特徴である。
次に何を見れば良いか?
▼質問(人間)
ソースコードを理解するには、次に何を見れば良いか?
▼生成AIの回答(ChatGPT-4o)
GenerateMotion() 関数の動作をより深く理解するために、次に注目すべきポイントは以下の通りです。それぞれが関数の入出力や挙動に直接関わっています。
① SceneDescription, DescribeObjects, DescribeOrUpdateIntent の定義
これらの関数(またはクラス)は GenerateMotion() の最上部で呼び出されており、観測画像に基づいて以下の3つの自然言語記述を生成します。
-
scene_description: シーン全体の構成(例:信号、天候、道路状況など) -
object_description: 重要物体の検出(例:歩行者、他車両、障害物) -
intent_description: 推定された運転意図(例:減速して停止、左折など)
➡ これらの関数がどう画像から記述を生成しているかを見ることで、プロンプト生成の根幹を理解できます。
② vlm_inference() 関数の定義
これはプロンプトと画像を使って、将来の速度・曲率の予測を行うコア関数です。
- 実際にどのモデル(例:GPT系、VLMなど)を使っているのか
-
imagesとtextをどう処理しているのか - 出力の形式や正規化の有無
➡ この関数がブラックボックスのままだと、予測結果の妥当性を評価するのが難しくなります。
③ args.method の取り扱い("openemma" か否か)
args.method によって処理内容が大きく変わります。
-
"openemma"の場合は自然言語記述あり(scene/object/intent) - それ以外は速度・曲率のみをプロンプトに使用
➡ args がどこで設定されているか、どのような値を取りうるかを把握しておく必要があります。
④ 入力引数の生成元(obs_images, obs_waypoints, obs_velocities など)
これらの引数は関数の外部から与えられています。
- どのタイミング・どの関数でこれらのデータが準備されているか?
-
obs_imagesはどんな前処理を経ているか?サイズやフォーマットは? -
obs_velocitiesやobs_curvaturesの単位や範囲は?
➡ モデルがどのような情報をベースに推論しているのかを理解するために重要です。
⑤ 出力結果(result, scene_description, object_description, intent_description)の使用先
この関数の出力が、どこで・どのように利用されているかを見ることで、全体フローにおける GenerateMotion() の役割を明確にできます。
➡ main() 関数や推論パイプラインの中で GenerateMotion() を呼び出している部分を確認すべきです。
まとめ
次に注目すべきコードは以下です:
-
SceneDescription,DescribeObjects,DescribeOrUpdateIntentの定義(自然言語記述生成) -
vlm_inference()の定義(VLM 推論ロジック) -
argsの生成元(設定ファイル、コマンドライン引数など) -
GenerateMotion()の呼び出し元(推論フローのどこで使われるか)
これらを順に追っていくことで、全体の設計意図や処理の流れをより深く理解できます。必要であれば、コードの該当箇所を抜き出して一緒に確認できますのでお申し付けください。
回答内容はとても適切。優先順位も的確。
回答内容の通り、下記の項目を見ていくことにする。
-
SceneDescription,DescribeObjects,DescribeOrUpdateIntentの定義(自然言語記述生成) -
vlm_inference()の定義(VLM 推論ロジック)
SceneDescription, DescribeObjects, DescribeOrUpdateIntentの内容について、生成AIに聞く
▼質問(人間)
質問内容全体はここをクリック
def SceneDescription(obs_images, processor=None, model=None, tokenizer=None, args=None): prompt = f"""You are a autonomous driving labeller. You have access to these front-view camera images of a car taken at a 0.5 second interval over the past 5 seconds. Imagine you are driving the car. Describe the driving scene according to traffic lights, movements of other cars or pedestrians and lane markings."""if "llava" in args.model_path:
prompt = f"""You are an autonomous driving labeller. You have access to these front-view camera images of a car taken at a 0.5 second interval over the past 5 seconds. Imagine you are driving the car. Provide a concise description of the driving scene according to traffic lights, movements of other cars or pedestrians and lane markings."""
result = vlm_inference(text=prompt, images=obs_images, processor=processor, model=model, tokenizer=tokenizer, args=args)
return result
def DescribeObjects(obs_images, processor=None, model=None, tokenizer=None, args=None):
prompt = f"""You are a autonomous driving labeller. You have access to a front-view camera images of a vehicle taken at a 0.5 second interval over the past 5 seconds. Imagine you are driving the car. What other road users should you pay attention to in the driving scene? List two or three of them, specifying its location within the image of the driving scene and provide a short description of the that road user on what it is doing, and why it is important to you."""

result = vlm_inference(text=prompt, images=obs_images, processor=processor, model=model, tokenizer=tokenizer, args=args)

return result
def DescribeOrUpdateIntent(obs_images, prev_intent=None, processor=None, model=None, tokenizer=None, args=None):
if prev_intent is None:
    prompt = f"""You are a autonomous driving labeller. You have access to a front-view camera images of a vehicle taken at a 0.5 second interval over the past 5 seconds. Imagine you are driving the car. Based on the lane markings and the movement of other cars and pedestrians, describe the desired intent of the ego car. Is it going to follow the lane to turn left, turn right, or go straight? Should it maintain the current speed or slow down or speed up?"""

    if "llava" in args.model_path:
        prompt = f"""You are a autonomous driving labeller. You have access to a front-view camera images of a vehicle taken at a 0.5 second interval over the past 5 seconds. Imagine you are driving the car. Based on the lane markings and the movement of other cars and pedestrians, provide a concise description of the desired intent of  the ego car. Is it going to follow the lane to turn left, turn right, or go straight? Should it maintain the current speed or slow down or speed up?"""

else:
    prompt = f"""You are a autonomous driving labeller. You have access to a front-view camera images of a vehicle taken at a 0.5 second interval over the past 5 seconds. Imagine you are driving the car. Half a second ago your intent was to {prev_intent}. Based on the updated lane markings and the updated movement of other cars and pedestrians, do you keep your intent or do you change it? Explain your current intent: """

    if "llava" in args.model_path:
        prompt = f"""You are a autonomous driving labeller. You have access to a front-view camera images of a vehicle taken at a 0.5 second interval over the past 5 seconds. Imagine you are driving the car. Half a second ago your intent was to {prev_intent}. Based on the updated lane markings and the updated movement of other cars and pedestrians, do you keep your intent or do you change it? Provide a concise description explanation of your current intent: """

result = vlm_inference(text=prompt, images=obs_images, processor=processor, model=model, tokenizer=tokenizer, args=args)

return result
上記の内容に関して下記の質問に回答下さい: (である調で記載、元文の記載内容に基づいて忠実に回答)
▼生成AIの回答(ChatGPT-4o)
①このコードは、自動運転車の視点に基づいて、観測された画像群から自然言語によるシーン記述・物体認識・意図推定を行う関数群の定義についての記載である。
これらの関数はすべて vlm_inference() 関数を介して視覚言語モデル(VLM)を使用し、観測画像からテキスト情報を生成する処理を担っている。
要旨(箇条書き)
-
SceneDescription(obs_images, ...)
→ 自動運転車が直近5秒間で観測した前方カメラ画像に基づいて、交通信号、他車や歩行者の動き、車線情報を含む全体の運転シーンの記述を生成する。 -
DescribeObjects(obs_images, ...)
→ 観測画像から注意を払うべき重要な道路利用者(他車・歩行者など)を2〜3つ抽出し、それぞれの位置と行動、およびそれが重要な理由を簡潔に記述する。 -
DescribeOrUpdateIntent(obs_images, prev_intent, ...)
→ 観測画像に基づいて、自車の運転意図(直進・左折・右折・加減速など)を記述または更新する。
→prev_intentが指定されている場合は、直前の意図を踏まえて現在の意図を説明する。 -
各関数では、プロンプト内の文章が
"llava"を含むモデルを使用しているかどうか(args.model_path)によって、詳細な説明か簡潔な説明かが切り替えられている。 -
最終的な自然言語出力はすべて
vlm_inference()を介して生成される形式であり、これらはGenerateMotion()関数内でプロンプト構築に利用されている。
かなり簡潔な回答内容となる。再度、詳しく聞いてみる。
主要なコード部分を説明下さい。
▼質問(人間)
主要なコード部分を説明下さい。(コードを抜き出して、主要な処理の流れをまとめて)
▼生成AIの回答(ChatGPT-4o)
以下は、提示された3つの関数(SceneDescription、DescribeObjects、DescribeOrUpdateIntent)の主要なコード部分の抜粋と処理の流れの要約である。いずれも視覚と言語を統合的に処理するモデル(VLM: Vision-Language Model)を使い、観測画像に対するテキスト記述を生成する役割を担っている。
1. SceneDescription
prompt = f"""You are a autonomous driving labeller. You have access to these front-view camera images of a car taken at a 0.5 second interval over the past 5 seconds. Imagine you are driving the car. Describe the driving scene according to traffic lights, movements of other cars or pedestrians and lane markings."""
...
result = vlm_inference(text=prompt, images=obs_images, processor=processor, model=model, tokenizer=tokenizer, args=args)
return result
処理の流れ:
- 前方カメラ画像をもとに、交通信号、車や歩行者の動き、車線情報に関する全体的な運転シーンの説明を自然言語で生成する。
- モデル名に
"llava"が含まれている場合は、より簡潔な説明を促すプロンプトに差し替える。 -
vlm_inference()によって実際の説明文が生成される。
2. DescribeObjects
prompt = f"""You are a autonomous driving labeller. ... What other road users should you pay attention to in the driving scene? List two or three of them, specifying its location within the image of the driving scene and provide a short description of the that road user on what it is doing, and why it is important to you."""
...
result = vlm_inference(text=prompt, images=obs_images, processor=processor, model=model, tokenizer=tokenizer, args=args)
return result
処理の流れ:
- 観測画像内で注目すべき2〜3体の道路利用者(他車や歩行者など)を特定し、それぞれについて:
- 画像内での位置
- 行動の簡潔な説明
- その存在が重要な理由 を記述させる。
-
vlm_inference()によってテキストを生成する。
3. DescribeOrUpdateIntent
if prev_intent is None:
    prompt = f"""... Based on the lane markings and the movement of other cars and pedestrians, describe the desired intent of the ego car. Is it going to follow the lane to turn left, turn right, or go straight? Should it maintain the current speed or slow down or speed up?"""
else:
    prompt = f"""... Half a second ago your intent was to {prev_intent}. Based on the updated lane markings ... Explain your current intent: """
...
result = vlm_inference(text=prompt, images=obs_images, processor=processor, model=model, tokenizer=tokenizer, args=args)
return result
処理の流れ:
-
prev_intentが 存在しない場合:観測画像の情報から、現在の運転意図(例:直進・左折・加速など)を初めて記述する。 -
prev_intentが 存在する場合:前回の意図を踏まえ、意図を維持するか変更するかを判断・記述する。 -
llavaモデルが指定された場合は、簡潔な出力を促すプロンプトに差し替え。 -
vlm_inference()によりテキストを生成する。
共通点
いずれの関数も、以下の共通構造を持つ:
-
promptの内容は自動運転ラベラーとしての視点を想定した自然言語指示で構成される。 - 画像群 (
obs_images) を入力として受け取り、視覚と言語の統合モデル(VLM)で説明文を生成する。 - 出力結果は
GenerateMotion()関数で統合的に使用され、運転意図や状況把握に利用される。
このように、3関数はそれぞれ「全体の状況記述」「注目物体記述」「運転意図の記述・更新」という異なる観点から、画像情報をテキスト形式に変換する役割を担っている。
promptの内容を日本語に訳して下さい。
▼質問(人間)
prompt の内容を日本語に訳して下さい。
▼生成AIの回答(ChatGPT-4o)
以下に、SceneDescription、DescribeObjects、DescribeOrUpdateIntent 関数内で使用されている prompt の内容を日本語訳として示します。英語プロンプトの内容に忠実に訳出しています。
1. SceneDescription
通常のモデル向けプロンプト:
あなたは自動運転のラベラーです。あなたは、過去5秒間に0.5秒間隔で撮影された車両の前方カメラ画像にアクセスできます。自分がその車を運転していると想像してください。交通信号、他の車や歩行者の動き、車線のマークに基づいて運転シーンを説明してください。
llava モデル向けプロンプト:
あなたは自動運転のラベラーです。あなたは、過去5秒間に0.5秒間隔で撮影された車両の前方カメラ画像にアクセスできます。自分がその車を運転していると想像してください。交通信号、他の車や歩行者の動き、車線のマークに基づいて、運転シーンを簡潔に説明してください。
2. DescribeObjects
あなたは自動運転のラベラーです。あなたは、過去5秒間に0.5秒間隔で撮影された車両の前方カメラ画像にアクセスできます。自分がその車を運転していると想像してください。この運転シーンで、どのような他の道路利用者に注意を払うべきでしょうか?その中から2〜3体を挙げて、それぞれの画像内での位置を指定し、その道路利用者が何をしているのか、そしてなぜそれが重要なのかを簡潔に説明してください。
3. DescribeOrUpdateIntent
初回の意図生成(prev_intent is None):
あなたは自動運転のラベラーです。あなたは、過去5秒間に0.5秒間隔で撮影された車両の前方カメラ画像にアクセスできます。自分がその車を運転していると想像してください。車線のマークや他の車・歩行者の動きに基づいて、自車の望ましい運転意図を説明してください。自車は車線に従って左折するのか、右折するのか、それとも直進するのか?現在の速度を維持すべきか、減速すべきか、加速すべきか?
llava モデル向け(初回):
あなたは自動運転のラベラーです。あなたは、過去5秒間に0.5秒間隔で撮影された車両の前方カメラ画像にアクセスできます。自分がその車を運転していると想像してください。車線のマークや他の車・歩行者の動きに基づいて、自車の望ましい運転意図について簡潔に説明してください。自車は車線に従って左折するのか、右折するのか、それとも直進するのか?現在の速度を維持すべきか、減速すべきか、加速すべきか?
意図の更新(prev_intent がある場合):
あなたは自動運転のラベラーです。あなたは、過去5秒間に0.5秒間隔で撮影された車両の前方カメラ画像にアクセスできます。自分がその車を運転していると想像してください。0.5秒前のあなたの意図は「{prev_intent}」でした。更新された車線のマークと他の車・歩行者の動きに基づいて、その意図を維持するのか、それとも変更するのか?現在の意図を説明してください。
llava モデル向け(意図更新):
あなたは自動運転のラベラーです。あなたは、過去5秒間に0.5秒間隔で撮影された車両の前方カメラ画像にアクセスできます。自分がその車を運転していると想像してください。0.5秒前のあなたの意図は「{prev_intent}」でした。更新された車線のマークと他の車・歩行者の動きに基づいて、その意図を維持するのか、それとも変更するのか?現在の意図について簡潔に説明してください。
以上が、各関数における prompt の日本語訳である。それぞれ、運転者の視点で状況を説明させるよう設計されており、VLM にとって意味のある情報抽出を促す構成になっている。
vlm_inference()の内容について、生成AIに聞く
▼質問(人間)
質問内容全体はここをクリック
def vlm_inference(text=None, images=None, sys_message=None, processor=None, model=None, tokenizer=None, args=None): if "llama" in args.model_path or "Llama" in args.model_path: image = Image.open(images).convert('RGB') message = getMessage(text, args=args) input_text = processor.apply_chat_template(message, add_generation_prompt=True) inputs = processor( image, input_text, add_special_tokens=False, return_tensors="pt" ).to(model.device) output = model.generate(**inputs, max_new_tokens=2048)
output_text = processor.decode(output[0])
if "llama" in args.model_path or "Llama" in args.model_path:
output_text = re.findall(r'<\|start_header_id\|>assistant<\|end_header_id\|>(.*?)<\|eot_id\|>', output_text, re.DOTALL)[0].strip()
return output_text
elif "qwen" in args.model_path or "Qwen" in args.model_path:
message = getMessage(text, image=images, args=args)
text = processor.apply_chat_template(
message, tokenize=False, add_generation_prompt=True
)
image_inputs, video_inputs = process_vision_info(message)
inputs = processor(
text=[text],
images=image_inputs,
videos=video_inputs,
padding=True,
return_tensors="pt",
).to(model.device)
generated_ids = model.generate(**inputs, max_new_tokens=128)
generated_ids_trimmed = [
out_ids[len(in_ids) :] for in_ids, out_ids in zip(inputs.input_ids, generated_ids)
]
output_text = processor.batch_decode(
generated_ids_trimmed, skip_special_tokens=True, clean_up_tokenization_spaces=False
)
return output_text[0]
elif "llava" in args.model_path:
conv_mode = "mistral_instruct"
image_token_se = DEFAULT_IM_START_TOKEN + DEFAULT_IMAGE_TOKEN + DEFAULT_IM_END_TOKEN
if IMAGE_PLACEHOLDER in text:
if model.config.mm_use_im_start_end:
text = re.sub(IMAGE_PLACEHOLDER, image_token_se, text)
else:
text = re.sub(IMAGE_PLACEHOLDER, DEFAULT_IMAGE_TOKEN, text)
else:
if model.config.mm_use_im_start_end:
text = image_token_se + "\n" + text
else:
text = DEFAULT_IMAGE_TOKEN + "\n" + text
conv = conv_templates[conv_mode].copy()
conv.append_message(conv.roles[0], text)
conv.append_message(conv.roles[1], None)
prompt = conv.get_prompt()
input_ids = tokenizer_image_token(prompt, tokenizer, IMAGE_TOKEN_INDEX, return_tensors='pt').unsqueeze(0).cuda()
image = Image.open(images).convert('RGB')
image_tensor = process_images([image], processor, model.config)[0]
with torch.inference_mode():
output_ids = model.generate(
input_ids,
images=image_tensor.unsqueeze(0).half().cuda(),
image_sizes=[image.size],
do_sample=True,
temperature=0.2,
top_p=None,
num_beams=1,
max_new_tokens=2048,
use_cache=True,
pad_token_id = tokenizer.eos_token_id,
)
outputs = tokenizer.batch_decode(output_ids, skip_special_tokens=True)[0].strip()
return outputs
elif "gpt" in args.model_path:
PROMPT_MESSAGES = [
{
"role": "user",
"content": [
*map(lambda x: {"image": x, "resize": 768}, images),
text,
],
},
]
if sys_message is not None:
sys_message_dict = {
"role": "system",
"content": sys_message
}
PROMPT_MESSAGES.append(sys_message_dict)
params = {
"model": "gpt-4o-2024-11-20",
"messages": PROMPT_MESSAGES,
"max_tokens": 400,
}
result = client.chat.completions.create(**params)
return result.choices[0].message.content
上記の内容に関して下記の質問に回答下さい: (である調で記載、元文の記載内容に基づいて忠実に回答)
▼生成AIの回答(ChatGPT-4o)
①何についての記載か?
このコードは、画像と言語の統合推論を行う関数 vlm_inference() の実装である。本関数は、与えられたテキストと画像を用いて、指定されたマルチモーダル大規模言語モデル(VLM)による推論を実行し、その応答テキストを返す処理を担っている。モデルの種類(例:LLaMA、Qwen、LLaVA、GPT)に応じて処理を分岐させ、それぞれに最適化された推論処理が実装されている。
要旨
- モデルの種類に応じて異なる推論処理を行う関数
vlm_inference()を定義している。 - 入力には
text(プロンプト文)、images(画像)、sys_message(システムメッセージ)などを受け取り、処理対象のモデルに応じた前処理と推論を行う。 -
"llama"系の場合:- 画像を
Image.open()で読み込み、processorにより入力を整形。 -
model.generate()により応答を生成し、正規表現で必要な部分を抽出して返す。
- 画像を
-
"qwen"系の場合:-
apply_chat_templateによってテキストをテンプレート化し、image_inputsとvideo_inputsを組み合わせて入力を生成。 -
model.generate()により出力を得て、生成された部分のみをデコードして返す。
-
-
"llava"系の場合:- プロンプト内に画像トークンを埋め込み、特定のテンプレートに従って対話形式でプロンプトを構築。
- トークナイズ後に画像を処理してモデルに入力し、出力をデコードして返す。
-
"gpt"系の場合:- Chat形式のプロンプトを構築し、画像とテキストを同時に入力として与える。
-
client.chat.completions.create()を用いて応答を取得し、その内容を返す。
このように、本関数は入力の内容と使用するモデルに応じて、適切な推論処理を選択的に実行するよう設計されている。
主要なコード部分を説明下さい。
▼質問(人間)
主要なコード部分を説明下さい。(コードを抜き出して、主要な処理の流れをまとめて)
▼生成AIの回答(ChatGPT-4o)
主要なコード部分の説明
以下は、vlm_inference() 関数における主要な処理の流れと該当コードの抜粋である。本関数は、マルチモーダル大規模言語モデル(VLM)を用いて、テキストと画像に基づいた推論を行う統一的なインタフェースとして機能している。
1. モデル名に基づく分岐処理
if "llama" in args.model_path or "Llama" in args.model_path:
    ...
elif "qwen" in args.model_path or "Qwen" in args.model_path:
    ...
elif "llava" in args.model_path:
    ...
elif "gpt" in args.model_path:
    ...
モデルの名前(args.model_path)に基づいて、使用するモデルの種類を判別し、それぞれに適した処理を行う。これにより、異なるモデルごとの前処理・推論方法を統一的に扱えるようにしている。
2. LLaMA 系モデルの処理
image = Image.open(images).convert('RGB')
message = getMessage(text, args=args)
input_text = processor.apply_chat_template(message, add_generation_prompt=True)
inputs = processor(image, input_text, add_special_tokens=False, return_tensors="pt").to(model.device)
output = model.generate(**inputs, max_new_tokens=2048)
output_text = processor.decode(output[0])
output_text = re.findall(r'<\|start_header_id\|>assistant<\|end_header_id\|>(.*?)<\|eot_id\|>', output_text, re.DOTALL)[0].strip()
画像とプロンプトテキストを加工し、トークン化してモデルへ入力する。出力結果から正規表現を用いてアシスタントの応答部分を抽出して返す。
3. Qwen 系モデルの処理
message = getMessage(text, image=images, args=args)
text = processor.apply_chat_template(message, tokenize=False, add_generation_prompt=True)
image_inputs, video_inputs = process_vision_info(message)
inputs = processor(text=[text], images=image_inputs, videos=video_inputs, padding=True, return_tensors="pt").to(model.device)
generated_ids = model.generate(**inputs, max_new_tokens=128)
generated_ids_trimmed = [out_ids[len(in_ids):] for in_ids, out_ids in zip(inputs.input_ids, generated_ids)]
output_text = processor.batch_decode(generated_ids_trimmed, skip_special_tokens=True, clean_up_tokenization_spaces=False)
チャットテンプレートを用いて入力形式を整え、画像・動画情報を統合した形でモデルに入力。生成されたトークン列から応答部分のみを抽出・デコードして返す。
4. LLaVA 系モデルの処理
if model.config.mm_use_im_start_end:
    text = image_token_se + "\n" + text
else:
    text = DEFAULT_IMAGE_TOKEN + "\n" + text

conv = conv_templates[conv_mode].copy()
conv.append_message(conv.roles[0], text)
conv.append_message(conv.roles[1], None)
prompt = conv.get_prompt()

input_ids = tokenizer_image_token(prompt, tokenizer, IMAGE_TOKEN_INDEX, return_tensors='pt').unsqueeze(0).cuda()
image = Image.open(images).convert('RGB')
image_tensor = process_images([image], processor, model.config)[0]

with torch.inference_mode():
    output_ids = model.generate(
        input_ids,
        images=image_tensor.unsqueeze(0).half().cuda(),
        image_sizes=[image.size],
        do_sample=True,
        temperature=0.2,
        top_p=None,
        num_beams=1,
        max_new_tokens=2048,
        use_cache=True,
        pad_token_id = tokenizer.eos_token_id,
    )
outputs = tokenizer.batch_decode(output_ids, skip_special_tokens=True)[0].strip()
LLaVA専用のプロンプト構造を構築し、画像トークンを挿入した状態で入力を整形。生成処理はGPU上で行われ、デコードした応答を返す。
5. GPT 系モデルの処理
PROMPT_MESSAGES = [{
    "role": "user",
    "content": [*map(lambda x: {"image": x, "resize": 768}, images), text],
}]
if sys_message is not None:
    sys_message_dict = {"role": "system", "content": sys_message}
    PROMPT_MESSAGES.append(sys_message_dict)

params = {
    "model": "gpt-4o-2024-11-20",
    "messages": PROMPT_MESSAGES,
    "max_tokens": 400,
}

result = client.chat.completions.create(**params)
return result.choices[0].message.content
OpenAIのAPIを使用して、画像とテキストを含むチャットメッセージを構築し、GPTモデルによる応答を取得して返す。system ロールの導入により、モデルの振る舞いを制御可能にしている。
全体の流れまとめ
- モデルタイプを判別。
- 各モデルに応じて、画像・テキストを前処理。
- モデルに入力して応答を生成。
- 応答結果を抽出・整形して出力。
このようにして、vlm_inference() は異なる種類の視覚言語モデルに対して、共通インターフェースで柔軟な推論処理を実現している。
分かりやすくまとめられていて、良好。
ソースコードを理解するには、次に何を見れば良いか?
▼質問(人間)
ソースコードを理解するには、次に何を見れば良いか?
▼生成AIの回答(ChatGPT-4o)
この vlm_inference() 関数を含むソースコードの全体構造を深く理解するためには、以下のような関連箇所を順に確認するのが有効です。それぞれの役割と接続関係を明確にすることで、どのように画像と言語を扱う推論パイプラインが構成されているのかが把握できます。
1. getMessage() の実装
→ 目的:テキストプロンプトの生成や構造化されたメッセージ形式への変換処理を確認する。
-
getMessage(text, args=args)やgetMessage(text, image=images, args=args)という呼び出しが複数のモデルタイプで使われている。 - 実際にどのようなプロンプト形式のメッセージが構築され、
processorに渡されるのかを知ることで、モデルへの入力の構造が明確になる。
2. processor の型と役割
→ 目的:どのように画像やテキストがモデル入力に変換されるかを理解する。
-
processor.apply_chat_template()の動作や、processor(...)によるトークナイズ・テンソル化の仕様を確認する。 - 特に
llamaやqwenでのprocessorは HuggingFace のProcessorクラスや独自実装の可能性があるので、その中身を調べる。
3. conv_templates の定義と構造(特に LLaVA 部分)
→ 目的:LLaVA 系のプロンプト生成におけるテンプレートの詳細を理解する。
-
conv_templates[conv_mode]で取得されるテンプレートは、どのような会話構造を作るかを規定している。 -
append_message()やget_prompt()がどのようにプロンプト文字列を構成しているかを確認する。
4. process_images() や tokenizer_image_token() の定義
→ 目的:LLaVA 系の画像前処理や画像トークンの挿入方法を理解する。
- 画像がモデルに与えられる前にどのように加工されているのか(サイズ、形式、型など)を確認する。
-
tokenizer_image_token()がどのようにトークン列へ画像表現を挿入しているかも重要。
5. client.chat.completions.create() のラッパー部分(GPT系)
→ 目的:GPT API の呼び出し形式と、画像の扱い方を理解する。
-
clientがどのように定義されているか(OpenAI SDKなのか独自のラッパーか)を確認。 -
imagesが{"image": x, "resize": 768}の形式で渡されるが、この形式に変換して扱えるかどうかの確認も必要。
6. 呼び出し元関数の流れ(例:SceneDescriptionなど)
→ 目的:この vlm_inference() 関数が、実際の推論プロセスの中でどのように利用されているかを理解する。
- 例:
SceneDescription()やDescribeObjects()など、VLMを使った各関数がvlm_inference()をどのように呼び出しているかを確認。 - 各関数がどのような目的(シーンの記述、物体の注目、意図の判断など)でこの関数を使っているのかを理解することで、モデル出力の意図が明確になる。
補足:設定ファイルや引数 (args) の内容
-
args.model_pathに何が渡されているかによってモデル分岐が起きているため、実行時のargsに含まれる内容も確認する。
このように、プロンプト生成 → 入力加工 → モデル推論 → 出力抽出 の全体フローを、それぞれの構成要素(getMessage, processor, conv_templates, process_images, args, 呼び出し元関数)から順に確認していくことで、コード全体の意図と挙動が明確になります。次に見るべき対象としては、getMessage() と processor の中身が特に重要です。
getMessage() と processor の中身が確かに重要そう。getMessage() と processor を見ていく。
getMessage()の内容について、生成AIに聞く
▼質問(人間)
質問内容全体はここをクリック
def getMessage(prompt, image=None, args=None): if "llama" in args.model_path or "Llama" in args.model_path: message = [ {"role": "user", "content": [ {"type": "image"}, {"type": "text", "text": prompt} ]} ] elif "qwen" in args.model_path or "Qwen" in args.model_path: message = [ {"role": "user", "content": [ {"type": "image", "image": image}, {"type": "text", "text": prompt} ]} ] return message上記の内容に関して下記の質問に回答下さい: (である調で記載、元文の記載内容に基づいて忠実に回答)
▼生成AIの回答(ChatGPT-4o)
①主要なコード部分を説明する
以下は、関数 getMessage(prompt, image=None, args=None) の主要な処理内容である。目的は、画像と言語モデル(VLM)に入力するための「message」形式を、モデルの種類に応じて構築することである。
【主要なコード部分の抜粋と説明】
if "llama" in args.model_path or "Llama" in args.model_path:
    message = [
        {"role": "user", "content": [
            {"type": "image"},
            {"type": "text", "text": prompt}
        ]}
    ]
- モデル名に
"llama"または"Llama"が含まれる場合の処理である。 -
imageは明示的に指定されず、{"type": "image"}のみで表現される。 - その後に
{"type": "text", "text": prompt}によってプロンプト文が添えられている。 - 結果として、「画像→テキスト」の順番で構成された user メッセージが作成される。
elif "qwen" in args.model_path or "Qwen" in args.model_path:
    message = [
        {"role": "user", "content": [
            {"type": "image", "image": image},
            {"type": "text", "text": prompt}
        ]}
    ]
- モデル名に
"qwen"または"Qwen"が含まれる場合の処理である。 -
image引数で渡された画像オブジェクトが、{"type": "image", "image": image}という形式で明示的に message に含まれる。 - 続いてプロンプト文を
{"type": "text", "text": prompt}として追加している。 - Qwen 系のモデルでは、画像データを直接 message に埋め込む仕様であることが分かる。
【全体の処理の流れのまとめ】
-
args.model_pathの文字列に応じて、分岐処理が行われる。 - LLaMA 系モデルの場合は、画像の具体データを含まずに
{"type": "image"}と記述される簡易表現を使う。 - Qwen 系モデルの場合は、
imageの実体が直接messageに埋め込まれる。 - どちらも
promptに指定された文章を{"type": "text"}として含め、画像+テキスト形式の user メッセージを生成する。
このように、getMessage() 関数はモデル依存のメッセージ形式を統一的に構築し、後続の処理(processor.apply_chat_template() など)に渡すための前処理として機能している。
processorの内容について、生成AIに聞く
▼質問(人間)
これまで前述の記載の中で、変数processorの情報を取得するまでに必要な、主要なコード部分を説明下さい。(コードを抜き出して、主要な処理の流れをまとめて)
▼生成AIの回答(ChatGPT-4o)
以下では、これまでの記載内容の中で「変数 processor の情報を取得するまでに必要な主要なコード部分」を抜き出し、コードの流れと役割に基づいて整理して説明する。
前提
processor は、視覚言語モデル(VLM)において、画像とテキストを前処理し、トークン化やテンプレートの適用を担う役割を持つ重要な変数である。processor の中身はモデルによって異なり、主に以下のような形で使用される:
processor.apply_chat_template(...)processor(...)tokenizer_image_token(..., processor, ...)process_images(..., processor, ...)
【1】SceneDescription などの関数での呼び出し
def SceneDescription(obs_images, processor=None, model=None, tokenizer=None, args=None):
    ...
    result = vlm_inference(text=prompt, images=obs_images, processor=processor, model=model, tokenizer=tokenizer, args=args)
    return result
- 関数
SceneDescriptionでは、外部からprocessorを引数として受け取り、そのままvlm_inference()に渡している。 - 同様の引数の受け渡しは
DescribeObjects()やDescribeOrUpdateIntent()でも行われる。
【2】vlm_inference() 内での処理
inputs = processor(
    image,
    input_text,
    add_special_tokens=False,
    return_tensors="pt"
).to(model.device)
- LLaMA 系モデルでの例。画像とテキストを
processorによってテンソル化してモデルへ渡している。
text = processor.apply_chat_template(
    message, tokenize=False, add_generation_prompt=True
)
- Qwen 系モデルでの例。メッセージにテンプレートを適用することで、モデル入力に適した形式に整えている。
image_tensor = process_images([image], processor, model.config)[0]
- LLaVA 系モデルでは、画像の前処理関数
process_images()にprocessorが渡されることで、画像をモデル入力用テンソルに変換している。
【3】getMessage() 内での補助的利用
message = [
    {"role": "user", "content": [
        {"type": "image"},
        {"type": "text", "text": prompt}
    ]}
]
-
getMessage()自体ではprocessorを直接利用していないが、ここで構成されたmessageは後のprocessor.apply_chat_template()に使われる。
【主要な処理の流れのまとめ】
-
SceneDescription等の関数がprocessorを引数として受け取る
外部から渡されたprocessorをそのままvlm_inferenceに引き継ぐ。 -
vlm_inference()内部での利用-
apply_chat_template()により、プロンプトやメッセージの整形。 - 画像やテキストをテンソル化(モデル入力用形式に変換)。
- モデルに応じて
process_images()やtokenizer_image_token()にも渡され、画像処理やトークン処理に使われる。
-
-
processorの定義・初期化箇所はまだ不明- これまでのコードには、
processor = ...のような初期化部分の記述は見当たらない。 - 今後ソースを読み進める際には、
processorをどのタイミング・モジュールで構築しているか(例:AutoProcessor.from_pretrained(...))を追跡する必要がある。
- これまでのコードには、
以上のように、processor はVLMへの前処理に不可欠であり、その受け渡しと使用箇所は明確にコード内に記述されているが、そのインスタンス生成部分はまだ明らかになっていない。次に確認すべきは、main 関数や初期設定ファイル等における processor の初期化部分である。
「そのインスタンス生成部分はまだ明らかになっていない」との回答内容であるが、最も始めの質問文に記載があるので、以前の事すぎて、とても参照できない模様。
再度コードを提示して、質問してみる。
再度コードを提示して、質問してみる
▼質問(人間)
質問内容全体はここをクリック
if __name__ == '__main__': parser = argparse.ArgumentParser() parser.add_argument("--model-path", type=str, default="gpt") parser.add_argument("--plot", type=bool, default=True) parser.add_argument("--dataroot", type=str, default='datasets/NuScenes') parser.add_argument("--version", type=str, default='v1.0-mini') parser.add_argument("--method", type=str, default='openemma') args = parser.parse_args()print(f"{args.model_path}")
if "llama" in args.model_path:
model_id = "meta-llama/Llama-3.2-11B-Vision-Instruct"
model = MllamaForConditionalGeneration.from_pretrained(
model_id,
torch_dtype=torch.bfloat16,
device_map="auto",
)
processor = AutoProcessor.from_pretrained(model_id)
tokenizer=None
elif "Llama" in args.model_path:
model = MllamaForConditionalGeneration.from_pretrained(
args.model_path,
torch_dtype=torch.bfloat16,
device_map="auto",
)
processor = AutoProcessor.from_pretrained(args.model_path)
tokenizer=None
elif "qwen" in args.model_path:
model = Qwen2VLForConditionalGeneration.from_pretrained("Qwen/Qwen2-VL-7B-Instruct", torch_dtype=torch.bfloat16, device_map="auto")
processor = AutoProcessor.from_pretrained("Qwen/Qwen2-VL-7B-Instruct")
tokenizer=None
elif "Qwen" in args.model_path:
model = Qwen2VLForConditionalGeneration.from_pretrained(args.model_path, torch_dtype=torch.bfloat16, device_map="auto")
processor = AutoProcessor.from_pretrained(args.model_path)
tokenizer=None
elif 'llava' == args.model_path:
disable_torch_init()
tokenizer, model, processor, context_len = load_pretrained_model("liuhaotian/llava-v1.6-mistral-7b", None, "llava-v1.6-mistral-7b")
image_token_se = DEFAULT_IM_START_TOKEN + DEFAULT_IMAGE_TOKEN + DEFAULT_IM_END_TOKEN
elif "llava" in args.model_path:
disable_torch_init()
tokenizer, model, processor, context_len = load_pretrained_model(args.model_path, None, "llava-v1.6-mistral-7b")
image_token_se = DEFAULT_IM_START_TOKEN + DEFAULT_IMAGE_TOKEN + DEFAULT_IM_END_TOKEN
else:
model = None
processor = None
tokenizer=None
timestamp = datetime.now().strftime("%Y%m%d-%H%M%S")
timestamp = args.model_path + f"_results/{args.method}/" + timestamp
os.makedirs(timestamp, exist_ok=True)
# Load the dataset
nusc = NuScenes(version=args.version, dataroot=args.dataroot)
# Iterate the scenes
scenes = nusc.scene
print(f"Number of scenes: {len(scenes)}")
for scene in scenes:
token = scene['token']
first_sample_token = scene['first_sample_token']
last_sample_token = scene['last_sample_token']
name = scene['name']
description = scene['description']
if not name in ["scene-0103", "scene-1077"]:
continue
# Get all image and pose in this scene
front_camera_images = []
ego_poses = []
camera_params = []
curr_sample_token = first_sample_token
while True:
sample = nusc.get('sample', curr_sample_token)
# Get the front camera image of the sample.
cam_front_data = nusc.get('sample_data', sample['data']['CAM_FRONT'])
# nusc.render_sample_data(cam_front_data['token'])
if "gpt" in args.model_path:
with open(os.path.join(nusc.dataroot, cam_front_data['filename']), "rb") as image_file:
front_camera_images.append(base64.b64encode(image_file.read()).decode('utf-8'))
else:
front_camera_images.append(os.path.join(nusc.dataroot, cam_front_data['filename']))
# Get the ego pose of the sample.
pose = nusc.get('ego_pose', cam_front_data['ego_pose_token'])
ego_poses.append(pose)
# Get the camera parameters of the sample.
camera_params.append(nusc.get('calibrated_sensor', cam_front_data['calibrated_sensor_token']))
# Advance the pointer.
if curr_sample_token == last_sample_token:
break
curr_sample_token = sample['next']
scene_length = len(front_camera_images)
print(f"Scene {name} has {scene_length} frames")
if scene_length < TTL_LEN:
print(f"Scene {name} has less than {TTL_LEN} frames, skipping...")
continue
## Compute interpolated trajectory.
# Get the velocities of the ego vehicle.
ego_poses_world = [ego_poses[t]['translation'][:3] for t in range(scene_length)]
ego_poses_world = np.array(ego_poses_world)
plt.plot(ego_poses_world[:, 0], ego_poses_world[:, 1], 'r-', label='GT')
ego_velocities = np.zeros_like(ego_poses_world)
ego_velocities[1:] = ego_poses_world[1:] - ego_poses_world[:-1]
ego_velocities[0] = ego_velocities[1]
# Get the curvature of the ego vehicle.
ego_curvatures = EstimateCurvatureFromTrajectory(ego_poses_world)
ego_velocities_norm = np.linalg.norm(ego_velocities, axis=1)
estimated_points = IntegrateCurvatureForPoints(ego_curvatures, ego_velocities_norm, ego_poses_world[0],
atan2(ego_velocities[0][1], ego_velocities[0][0]), scene_length)
# Debug
if args.plot:
plt.quiver(ego_poses_world[:, 0], ego_poses_world[:, 1], ego_velocities[:, 0], ego_velocities[:, 1],
color='b')
plt.plot(estimated_points[:, 0], estimated_points[:, 1], 'g-', label='Reconstruction')
plt.legend()
plt.savefig(f"{timestamp}/{name}_interpolation.jpg")
plt.close()
# Get the waypoints of the ego vehicle.
ego_traj_world = [ego_poses[t]['translation'][:3] for t in range(scene_length)]
prev_intent = None
cam_images_sequence = []
ade1s_list = []
ade2s_list = []
ade3s_list = []
for i in range(scene_length - TTL_LEN):
# Get the raw image data.
# utils.PlotBase64Image(front_camera_images[0])
obs_images = front_camera_images[i:i+OBS_LEN]
obs_ego_poses = ego_poses[i:i+OBS_LEN]
obs_camera_params = camera_params[i:i+OBS_LEN]
obs_ego_traj_world = ego_traj_world[i:i+OBS_LEN]
fut_ego_traj_world = ego_traj_world[i+OBS_LEN:i+TTL_LEN]
obs_ego_velocities = ego_velocities[i:i+OBS_LEN]
obs_ego_curvatures = ego_curvatures[i:i+OBS_LEN]
# Get positions of the vehicle.
obs_start_world = obs_ego_traj_world[0]
fut_start_world = obs_ego_traj_world[-1]
curr_image = obs_images[-1]
# obs_images = [curr_image]
# Allocate the images.
if "gpt" in args.model_path:
img = cv2.imdecode(np.frombuffer(base64.b64decode(curr_image), dtype=np.uint8), cv2.IMREAD_COLOR)
img = yolo3d_nuScenes(img, calib=obs_camera_params[-1])[0]
else:
with open(os.path.join(curr_image), "rb") as image_file:
img = cv2.imdecode(np.frombuffer(image_file.read(), dtype=np.uint8), cv2.IMREAD_COLOR)
for rho in range(3):
# Assemble the prompt.
if not "gpt" in args.model_path:
obs_images = curr_image
(prediction,
scene_description,
object_description,
updated_intent) = GenerateMotion(obs_images, obs_ego_traj_world, obs_ego_velocities,
obs_ego_curvatures, prev_intent, processor=processor, model=model, tokenizer=tokenizer, args=args)
# Process the output.
prev_intent = updated_intent # Stateful intent
pred_waypoints = prediction.replace("Future speeds and curvatures:", "").strip()
coordinates = re.findall(r"\[([-+]?\d*\.?\d+),\s*([-+]?\d*\.?\d+)\]", pred_waypoints)
if not coordinates == []:
break
if coordinates == []:
continue
speed_curvature_pred = [[float(v), float(k)] for v, k in coordinates]
speed_curvature_pred = speed_curvature_pred[:10]
print(f"Got {len(speed_curvature_pred)} future actions: {speed_curvature_pred}")
# GT
# OverlayTrajectory(img, fut_ego_traj_world, obs_camera_params[-1], obs_ego_poses[-1], color=(255, 0, 0))
# Pred
pred_len = min(FUT_LEN, len(speed_curvature_pred))
pred_curvatures = np.array(speed_curvature_pred)[:, 1] / 100
pred_speeds = np.array(speed_curvature_pred)[:, 0]
pred_traj = np.zeros((pred_len, 3))
pred_traj[:pred_len, :2] = IntegrateCurvatureForPoints(pred_curvatures,
pred_speeds,
fut_start_world,
atan2(obs_ego_velocities[-1][1],
obs_ego_velocities[-1][0]), pred_len)
# Overlay the trajectory.
check_flag = OverlayTrajectory(img, pred_traj.tolist(), obs_camera_params[-1], obs_ego_poses[-1], color=(255, 0, 0), args=args)
# Compute ADE.
fut_ego_traj_world = np.array(fut_ego_traj_world)
ade = np.mean(np.linalg.norm(fut_ego_traj_world[:pred_len] - pred_traj, axis=1))
pred1_len = min(pred_len, 2)
ade1s = np.mean(np.linalg.norm(fut_ego_traj_world[:pred1_len] - pred_traj[1:pred1_len+1] , axis=1))
ade1s_list.append(ade1s)
pred2_len = min(pred_len, 4)
ade2s = np.mean(np.linalg.norm(fut_ego_traj_world[:pred2_len] - pred_traj[:pred2_len] , axis=1))
ade2s_list.append(ade2s)
pred3_len = min(pred_len, 6)
ade3s = np.mean(np.linalg.norm(fut_ego_traj_world[:pred3_len] - pred_traj[:pred3_len] , axis=1))
ade3s_list.append(ade3s)
# Write to image.
if args.plot == True:
cam_images_sequence.append(img.copy())
cv2.imwrite(f"{timestamp}/{name}_{i}_front_cam.jpg", img)
# Plot the trajectory.
plt.plot(fut_ego_traj_world[:, 0], fut_ego_traj_world[:, 1], 'r-', label='GT')
plt.plot(pred_traj[:, 0], pred_traj[:, 1], 'b-', label='Pred')
plt.legend()
plt.title(f"Scene: {name}, Frame: {i}, ADE: {ade}")
plt.savefig(f"{timestamp}/{name}_{i}_traj.jpg")
plt.close()
# Save the trajectory
np.save(f"{timestamp}/{name}_{i}_pred_traj.npy", pred_traj)
np.save(f"{timestamp}/{name}_{i}_pred_curvatures.npy", pred_curvatures)
np.save(f"{timestamp}/{name}_{i}_pred_speeds.npy", pred_speeds)
# Save the descriptions
with open(f"{timestamp}/{name}_{i}_logs.txt", 'w') as f:
f.write(f"Scene Description: {scene_description}\n")
f.write(f"Object Description: {object_description}\n")
f.write(f"Intent Description: {updated_intent}\n")
f.write(f"Average Displacement Error: {ade}\n")
# break # Timestep
mean_ade1s = np.mean(ade1s_list)
mean_ade2s = np.mean(ade2s_list)
mean_ade3s = np.mean(ade3s_list)
aveg_ade = np.mean([mean_ade1s, mean_ade2s, mean_ade3s])
result = {
"name": name,
"token": token,
"ade1s": mean_ade1s,
"ade2s": mean_ade2s,
"ade3s": mean_ade3s,
"avgade": aveg_ade
}
with open(f"{timestamp}/ade_results.jsonl", "a") as f:
f.write(json.dumps(result))
f.write("\n")
if args.plot:
WriteImageSequenceToVideo(cam_images_sequence, f"{timestamp}/{name}")
上記の内容に関して下記の質問に回答下さい: (である調で記載、元文の記載内容に基づいて忠実に回答)
▼生成AIの回答(ChatGPT-4o)
以下に、変数processorの情報を取得するまでに必要な主要なコード部分を抜き出し、処理の流れを忠実に説明する。
① 引数の解析と取得
parser = argparse.ArgumentParser()
parser.add_argument("--model-path", type=str, default="gpt")
# 他の引数略
args = parser.parse_args()
ここでは、外部から与えられるコマンドライン引数を処理し、args.model_pathとして取得している。この値によって後続のprocessorのロード方法が分岐する。
② args.model_pathの値に応じた条件分岐
以下のように複数の条件分岐が設けられ、それぞれの分岐内で適切なモデルとprocessorが読み込まれる。
if "llama" in args.model_path:
    model_id = "meta-llama/Llama-3.2-11B-Vision-Instruct"
    model = MllamaForConditionalGeneration.from_pretrained(
        model_id,
        torch_dtype=torch.bfloat16,
        device_map="auto",
    )
    processor = AutoProcessor.from_pretrained(model_id)
    tokenizer=None
この分岐では、model_pathに"llama"が含まれる場合、固定のmodel_idに基づいてprocessorを読み込む。
elif "Llama" in args.model_path:
    model = MllamaForConditionalGeneration.from_pretrained(
        args.model_path,
        torch_dtype=torch.bfloat16,
        device_map="auto",
    )
    processor = AutoProcessor.from_pretrained(args.model_path)
    tokenizer=None
こちらでは、大文字の"Llama"が含まれる場合に、引数で与えられたargs.model_pathをそのまま指定して読み込んでいる。
elif "qwen" in args.model_path:
    model = Qwen2VLForConditionalGeneration.from_pretrained("Qwen/Qwen2-VL-7B-Instruct", torch_dtype=torch.bfloat16, device_map="auto")
    processor = AutoProcessor.from_pretrained("Qwen/Qwen2-VL-7B-Instruct")
    tokenizer=None
この分岐は"qwen"(小文字)の場合であり、モデルとprocessorを固定パスから読み込んでいる。
elif "Qwen" in args.model_path:
    model = Qwen2VLForConditionalGeneration.from_pretrained(args.model_path, torch_dtype=torch.bfloat16, device_map="auto")
    processor = AutoProcessor.from_pretrained(args.model_path)
    tokenizer=None
こちらは大文字の"Qwen"が含まれる場合で、ユーザー指定のパスからロードしている。
elif 'llava' == args.model_path:
    disable_torch_init()
    tokenizer, model, processor, context_len = load_pretrained_model("liuhaotian/llava-v1.6-mistral-7b", None, "llava-v1.6-mistral-7b")
このケースでは、model_pathが完全一致で"llava"となると、load_pretrained_model関数を使ってprocessorを含む複数のオブジェクトを取得している。
elif "llava" in args.model_path:
    disable_torch_init()
    tokenizer, model, processor, context_len = load_pretrained_model(args.model_path, None, "llava-v1.6-mistral-7b")
こちらも"llava"を含む場合で、同様にload_pretrained_modelを用いているが、モデルの読み込み先が引数由来となっている。
③ どの条件にも該当しない場合のデフォルト処理
else:
    model = None
    processor = None
    tokenizer=None
このブロックはすべての条件に該当しなかった場合であり、processorにはNoneが代入される。
まとめ
processorの情報取得は、主に以下のステップにより実行されている:
- コマンドライン引数
--model-pathを受け取る。 - その値に応じて、
if-elif構造の条件分岐を通じて適切な事前学習済みモデルと対応するAutoProcessorをロードする。 - モデル種別(LLaMA、Qwen、LLaVAなど)ごとにロード方法が異なる。
- 特定条件では
load_pretrained_model関数を使って、processorを含む複数の要素をまとめて読み込む。
このようにして、推論時に必要な前処理を担うprocessorが適切に構築される仕組みとなっている。
いずれも、モデルのロードに関連するライブラリの関数によって、processorが提供されることが分かりました。
おわり
おおむね(だいぶ)、コードの全容が把握できました。