注意事項
- 自分用の簡単なまとめであり,説明はほとんどありません.
- 内容は時間があるときに補充します.
心の声
- いまどき私のように Python&Tkinter で GUI を作成する人はいるのか...
ポイント
-
Frame を
packで配置する場合は,expand,fillに注意する.-
expand:親フレームの余ったスペースに対して,その分配を決定する.- 分配は,
expand=Trueを持つフレームのみに行われる.
- 分配は,
-
fill:該当フレームの利用可能なスペースに対して,指定された方向に拡大する.- fill=tk.Y では,縦方向にのみ拡張する.
- fill=tk.X では,横方向にのみ拡張する.
- fill=tk.BOTH では,縦方向と横方向の両方に拡張する.
-
-
Frame を
gridで配置する場合は,rowconfigure,columnconfigure,stickyに注意する.-
rowconfigure:行の重みを指定する.対象の行は縦方向に引き伸ばされる.- 複数行に設定された場合は,それぞれの重みで引き伸ばされる.
- rowconfigure(0, weight=1)と rowconfigure(1, weight=1)なら,0 行目と 1 行目は同じ量だけ引き伸ばされる.
- rowconfigure(0, weight=3)と rowconfigure(1, weight=1)なら,0 行目は 1 行目の 3 倍 引き伸ばされる.
- 複数行に設定された場合は,それぞれの重みで引き伸ばされる.
-
columnconfigure:列の重みを指定する.対象の列は横方向に引き伸ばされる.- 複数列に設定された場合は,それぞれの重みで引き伸ばされる.
- (rowconfigure と同様)
- 複数列に設定された場合は,それぞれの重みで引き伸ばされる.
-
sticky:該当フレームの利用可能なスペースに対して,指定された方向に拡大する.また,配置位置も指定する.- sticky=tk.N+tk.S では,縦方向にのみ拡張する.
- sticky=tk.W+tk.E では,横方向にのみ拡張する.
- sticky=tk.N+tk.S+tk.W+tk.E では,縦方向と横方向の両方に拡張する.
-
使用コード
import tkinter as tk

class MyGui(tk.Frame):
    # コンストラクタの定義
    def __init__(self, master):

        # 継承元クラス(tk.Frame)のコンストラクタを呼び出し
        tk.Frame.__init__(self, master)

        # このクラスで使用するメインフレームを定義
        self.frame = tk.Frame(self)
        self.frame.pack(expand=True, fill=tk.BOTH)
        self.frame.rowconfigure(0, weight=1) # 0行目を縦方向に引き伸ばす
        self.frame.columnconfigure(1, weight=1) # 1列目を横方向に引き伸ばす

        # メインフレームを2つに分割(左はサイド,右はヘッダー・ボディ・フッター)
        self.leftFrame = tk.Frame(self.frame, bg="#3182bd")
        self.leftFrame.grid(row=0, column=0, ipadx=5, ipady=5, sticky=tk.N+tk.S)
        self.rightFrame = tk.Frame(self.frame, bg="#9ecae1")
        self.rightFrame.grid(row=0, column=1, ipadx=5, ipady=5, sticky=tk.W+tk.E+tk.N+tk.S) # 縦横に引き伸ばす
        self.rightFrame.rowconfigure(1, weight=1) # 1行目を縦方向に引き伸ばす設定
        self.rightFrame.columnconfigure(0, weight=1) # 0列目を横方向に引き伸ばす設定

        # self.rightFrame内にヘッダー・ボディ・フッター用のフレームを定義
        self.headerFrame = tk.Frame(self.rightFrame,  bg="#31a354")
        self.headerFrame.grid(row=0, column=0, ipadx=5, ipady=5, sticky=tk.W+tk.E)
        self.bodyFrame = tk.Frame(self.rightFrame, bg="#a1d99b")
        self.bodyFrame.grid(row=1, column=0, ipadx=5, ipady=5, sticky=tk.W+tk.E+tk.N+tk.S)
        self.footerFrame = tk.Frame(self.rightFrame,  bg="#e5f5e0")
        self.footerFrame.grid(row=2, column=0, ipadx=5, ipady=5, sticky=tk.W+tk.E)

        # サイド・ヘッダー・ボディ・フッターを描画
        self.createSide()
        self.createHeader()
        self.createBody()
        self.createFooter()

    def createSide(self):
        widgetSide = tk.Label(self.leftFrame, text="Side", font=("", 14))
        widgetSide.pack(expand=True)
        return

    def createHeader(self):
        widgetHeader = tk.Label(self.headerFrame, text="Header", font=("", 14))
        widgetHeader.pack(expand=True)
        return

    def createBody(self):
        widgetBody = tk.Label(self.bodyFrame, text="Body", font=("", 14))
        widgetBody.pack(expand=True)
        return

    def createFooter(self):
        widgetFooter = tk.Label(self.footerFrame, text="Footer", font=("", 14))
        widgetFooter.pack(expand=True)
        return
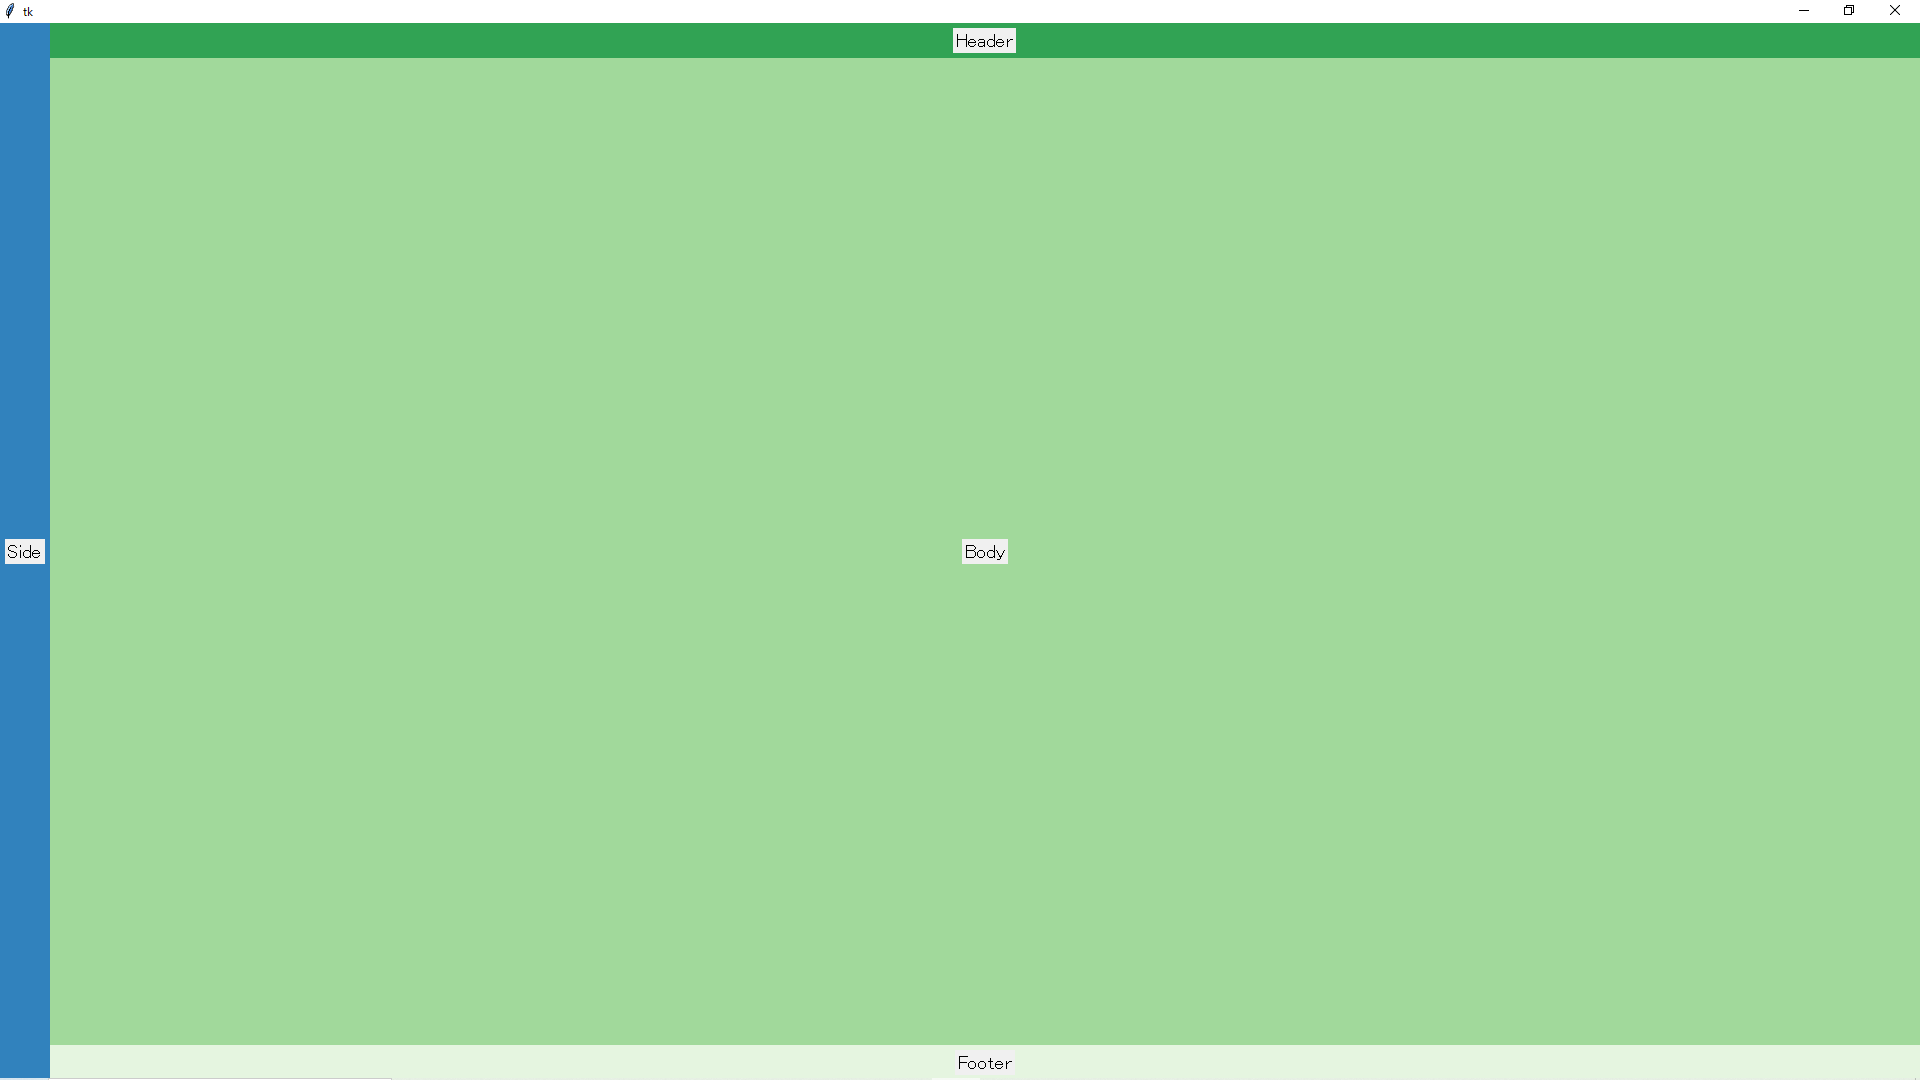
使用例
# rootインスタンスを生成
root = tk.Tk()

# 最大化
root.state("zoomed") # For Windows
# root.attribute("-zoom", "1") # For Linux

# root下にフレームを追加
frame = tk.Frame(root)
frame.pack(expand=True, fill=tk.BOTH)

# frame下に自作フレームを追加
myGui = MyGui(frame)
myGui.pack(expand=True, fill=tk.BOTH)

root.mainloop()