はじめに
こちらはANGEL Calendar27日目の記事になります!
Amplifyで作ったアプリに3Dモデルを表示させてみたのですが、楽しいですねこれ。
本記事では3Dモデルを動かすところをご紹介します。
今回作成する完成イメージはこちら

Amplify Gen2の環境が既にある状態から始めていきます。
Amplifyを詳しく紹介している記事があるのでまずはそちらをご覧ください!
Three.jsとは
Three.jsは3Dコンテンツを作成できるJavaScriptライブラリです。
canvas要素を作成して図形を描画することができます。
Reactと組み合わせてThree.jsを利用する場合、react-three-fiberというライブラリが便利です。
このライブラリを使用するメリットは、Reactのコンポーネントを利用して宣言的に記述できるため、コードの量を減らすことができます。
今回はReactでreact-three-fiberを使用して作成していきます。
試してみた
react-three-fiberのドキュメントを参考に作成していきます
まずはパッケージをインストールします。
npm install three @types/three @react-three/fiber
※以下Quickstartから持ってきたApp.tsxをごっそり書き換えています。
import { createRoot } from 'react-dom/client';
import { Canvas } from '@react-three/fiber';

function Box(props) {

  return (
    <mesh
      {...props}>
      <boxGeometry args={[1, 1, 1]} />
      <meshStandardMaterial color={'orange'} />
    </mesh>
  );
}

const App: React.FC = () => {
  return (
    <Canvas>
      <ambientLight intensity={Math.PI / 2} />
      <spotLight position={[10, 10, 10]} angle={0.15} penumbra={1} decay={0} intensity={Math.PI} />
      <pointLight position={[-10, -10, -10]} decay={0} intensity={Math.PI} />
      <Box position={[-1.2, 0, 0]} />
      <Box position={[1.2, 0, 0]} />
    </Canvas>
  );
}

createRoot(document.getElementById('root')!).render(<App />);

export default App;


createRoot(document.getElementById('root')!).render(<App />);

export default App;
ローカルでサーバーを起動して画面を確認します。
npm run dev
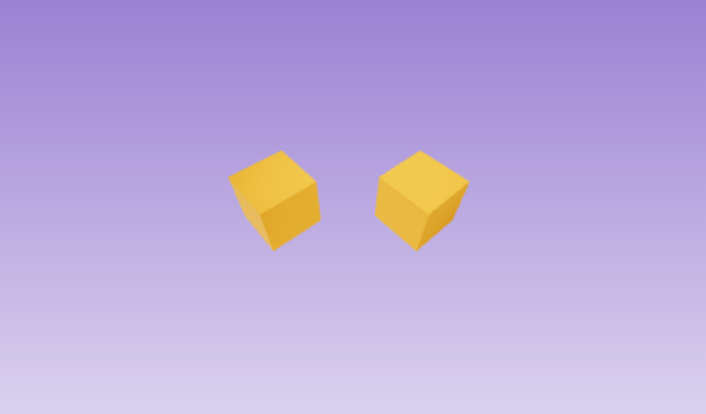
このような箱が2つできていれば成功です。

コードの解説
<boxGeometry args={[1, 1, 1]} />
BoxGeometryで箱の形を決めています。幅と高さ、奥行きを設定します。今回は全て1にしているので立方体が作成されています。
<Canvas>
  <ambientLight intensity={Math.PI / 2} />
  <spotLight position={[10, 10, 10]} angle={0.15} penumbra={1} decay={0} intensity={Math.PI} />
  <pointLight position={[-10, -10, -10]} decay={0} intensity={Math.PI} />
  <Box position={[-1.2, 0, 0]} />
  <Box position={[1.2, 0, 0]} />
</Canvas>
メインとなるCanvas要素です。
AmbientLight、SpotLight、PointLightはその名の通り3Dモデルの光の当たり具合を調整します。これらが設定されていない場合は真っ黒な箱のできあがりです。
ちなみにrotationを追加するとx,y,z軸でモデルを回転させることができます。
<mesh
  {...props}
  rotation={[4, 4, 0]}>
完成イメージに近づける
箱にカーソルが当たった時ピンク色に変更し、クリックしたら箱が大きくなるように以下を追加します。
import React, { useRef, useState } from 'react';
const [hovered, setHover] = useState(false);
const [active, setActive] = useState(false);
hoveredはカーソルが箱の上にあるか判定し、activeは箱がクリックされているかを判定します。
3Dオブジェクトを定義するmesh要素は以下のように変更してください。
<mesh
  {...props}
  scale={active ? 1.5 : 1}
  onClick={() => setActive(!active)}
  onPointerOver={() => setHover(true)}
  onPointerOut={() => setHover(false)}>
  <boxGeometry args={[1, 1, 1]} />
  <meshStandardMaterial color={hovered ? 'hotpink' : 'orange'} />
</mesh>
MeshStandardMaterialでカーソルが箱の上にある場合、ピンク色に変更します。
クリックしてカーソルを当てると以下のようになります。

最後に箱を回転させます。以下を追加してmesh要素を変更してください。
const meshRef = useRef();

useFrame((state, delta) => (meshRef.current.rotation.x += delta));
<mesh
  {...props}
  ref={meshRef}
  scale={active ? 1.5 : 1}
  onClick={() => setActive(!active)}
  onPointerOver={() => setHover(true)}
  onPointerOut={() => setHover(false)}>
  <boxGeometry args={[1, 1, 1]} />
  <meshStandardMaterial color={hovered ? 'hotpink' : 'orange'} />
</mesh>
毎フレーム少しずつx軸方向に少しずつ回転させています。deltaは前フレームからの経過時間を設定します。
2を掛けてあげると回転の速度が2倍になります。
useFrame((state, delta) => (meshRef.current.rotation.x += delta * 2));
完成しました!

最終的なコードは以下
import { createRoot } from 'react-dom/client';
import React, { useRef, useState } from 'react';
import { Canvas, useFrame } from '@react-three/fiber';

function Box(props) {
  const meshRef = useRef();
  const [hovered, setHover] = useState(false);
  const [active, setActive] = useState(false);

  useFrame((state, delta) => (meshRef.current.rotation.x += delta));

  return (
    <mesh
      {...props}
      ref={meshRef}
      scale={active ? 1.5 : 1}
      onClick={() => setActive(!active)}
      onPointerOver={() => setHover(true)}
      onPointerOut={() => setHover(false)}>
      <boxGeometry args={[1, 1, 1]} />
      <meshStandardMaterial color={hovered ? 'hotpink' : 'orange'} />
    </mesh>
  );
}

const App: React.FC = () => {
  return (
    <Canvas>
      <ambientLight intensity={Math.PI / 2} />
      <spotLight position={[10, 10, 10]} angle={0.15} penumbra={1} decay={0} intensity={Math.PI} />
      <pointLight position={[-10, -10, -10]} decay={0} intensity={Math.PI} />
      <Box position={[-1.2, 0, 0]} />
      <Box position={[1.2, 0, 0]} />
    </Canvas>
  );
}

createRoot(document.getElementById('root')!).render(<App />);

export default App;
おわりに
この記事ではAmplifyの良さはお伝えできませんでしたが、簡単に開発できるところに感動しました。
ReactやThree.js、react-three-fiberも初めて使いましたが、触っていくうちにあれもこれもできるのでは?とわくわくしながら作成できました。
他にも学びや人との繋がりができて、ANGEL Dojo参加してよかった~