Nextremer Advent Calendar 2016の第18日目の記事です。
Node.js Festival 2016でBarakChamoさんのポケモンGraphQLのセッションを聞いて興味を持ちました。
ポケモンGraphQL
http://graph.pokeql.win/
https://github.com/BarakChamo/PokeQL
GraphQLとは
公式より引用
GraphQLはAPI用のクエリ言語であり、既存のデータでこれらのクエリを実行するためのランタイムです。
GraphQLは、APIのデータを完全かつ理解できるように記述し、クライアントに必要なものを何でも尋ねる能力を与え、時間の経過とともにAPIを進化させやすくし、強力な開発ツールを可能にします。
Why GraphQL
- GraphQLスキーマを用意するだけでドキュメントが用意される。
- Swggerほどインタラクティブなことはできないが・・・
- クライアントからQueryをなげて、高度な検索などができるらしい?追ってない。
(GraphQLの実態はPOST/GETリクエストにqueryや、variableというJSON文字列を渡すことで動作している)
Hello World
ひとまずnode.js+express実装のHello Worldを試してみる。
http://graphql.org/graphql-js/running-an-express-graphql-server/ から
var express = require('express');
var graphqlHTTP = require('express-graphql');
var { buildSchema } = require('graphql');

// Construct a schema, using GraphQL schema language
var schema = buildSchema(`
  type Query {
    hello: String
  }
`);

// The root provides a resolver function for each API endpoint
var root = {
  hello: () => {
    return 'Hello world!';
  },
};

var app = express();
app.use('/graphql', graphqlHTTP({
  schema: schema,
  rootValue: root,
  graphiql: true,
}));
app.listen(4000);
console.log('Running a GraphQL API server at localhost:4000/graphql');
詳細は公式を見ててらうとして、理解する必要があるのは
schema の hello が呼ばれると root の hello が呼ばれるということです。
また付け加えると、この書き方は GraphQLスキーマ を利用した書き方です。
GraphQLスキーマを使わない場合の書き方は以下のようになります。
Githubとかでよく見るのはこっちかもしれないです。
var express = require('express');
var graphqlHTTP = require('express-graphql');
var {
  GraphQLSchema,
  GraphQLString,
} = require('graphql');

var schema = new GraphQLSchema({
  query: new GraphQLObjectType({
    name: 'Query',
    fields: {
      hello: {
        type: GraphQLString,
        resolve: function(source, args) {
          return 'Hello world!';
        }
      }
    }
  })
});

var app = express();
app.use('/graphql', graphqlHTTP({
  schema: schema,
  graphiql: true,
}));
app.listen(4000);
console.log('Running a GraphQL API server at localhost:4000/graphql');
以前はGraphQLスキーマでは対応していないもの(descriptionとか)がありましたが、最近は対応されているようです。
ちなみにdescriptionの書き方は
# Query description here
type Query {
  # hello endpoint description here
  hello: String
}
です。
ここではGraphQLスキーマを利用して実装していきます。
GraphQLでCRUD
今回実装したソースはこちらです。
試して見たい方はmake startで動かしてみてください。
make logsで起動を確認したら、以下のGraphiQLにアクセスに出来るようになると思います。
自分の開発環境
- Macbook pro
docker-compose
- node.js (v6.5.0)/ express + express-graphql + sequelize / babel (ES2015)
- MySQL
- elm ... orz(後述)
Userスキーマを作成する
sequelizeでこんなモデルがあるとして、
sequelize.define('user', {
    id  : {type: dataType.BIGINT(11), primaryKey: true, autoIncrement: true},
    name: {type: dataType.STRING},
    email: {type: dataType.STRING},
  },{
    underscored: true,
    charset: 'utf8',
    timestamps: true,
    paranoid: false,
  })
このモデルをまずGraphQLスキーマで書きます
type User {
  id: Int!
  name: String!
  email: String!
}
User取得
idでUserを取得するQueryを追加します。
type Query {
  user(id: Int) : User
}
IDでUserを取得する処理を追加します。
const rootValue = {
  user: ({id}) => {
    return models.User.findOne({where:{id: id}});
  }
};
これで取得は出来ますが、データがないのでユーザを作成するmutationを作成します。
Mutation
Mutationはデータの作成、更新などの時に利用するものです。
Userを作成するMutationを追加する
input UserData {
  name: String!
  email: String!
}
type Mutation {
  createUser(data: UserData) : User
}
作成時に利用するUserDataを追加しました。(引数ではtypeじゃなくinput)
createUserはUserDataを受け取ってUserを作成後にUserを返します。
作成する処理はrootValueに追加します。
const rootValue = {
  user: ({id}) => {
    return models.User.findOne({where:{id}});
  },
  createUser: ({data}) => {
    return models.User.create(data);
  }
};
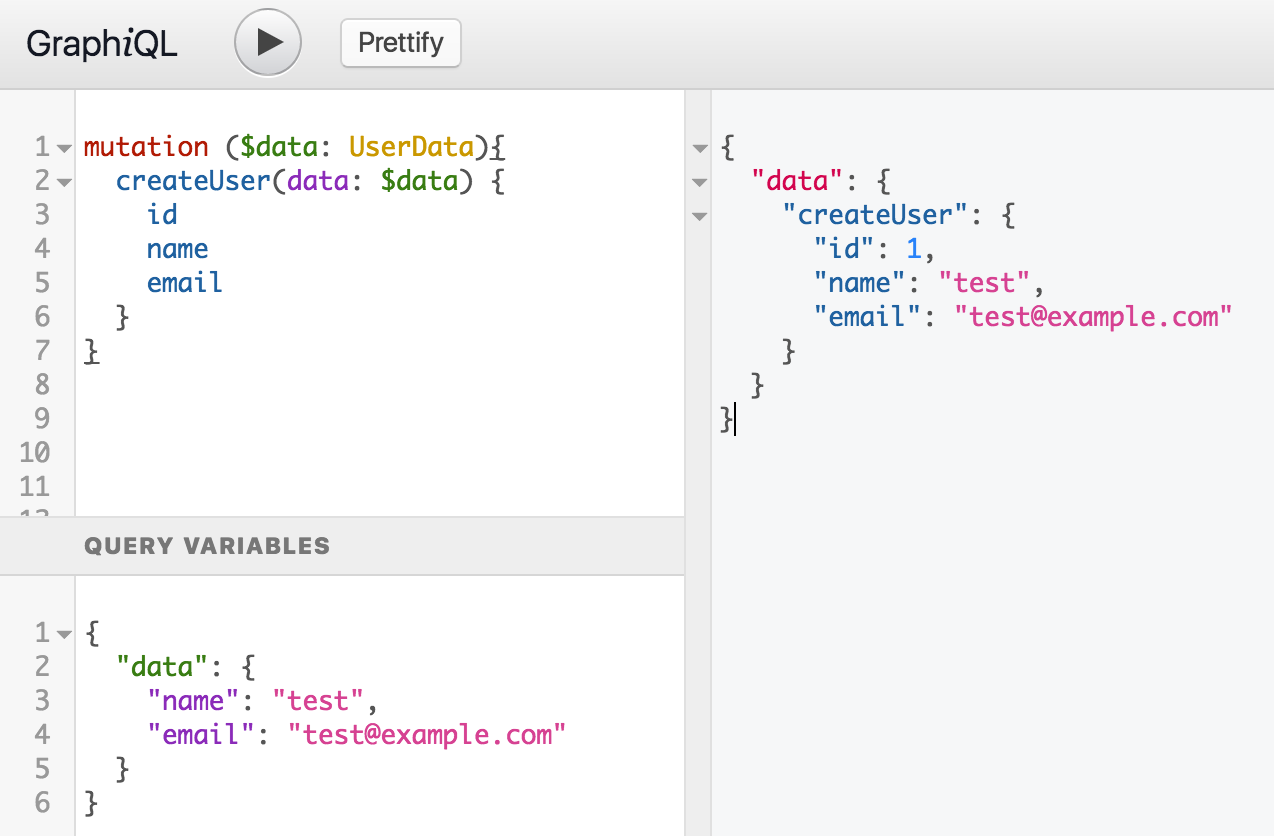
確認してみる
http://localhost:3000/graphql で確認してみます。
以下のように入力します。
左上のQUERY
mutation ($data: UserData){
  createUser(data: $data) {
    id
    name
    email
  }
}
左下の QUERY VARIABLES
{
  "data": {
    "name": "test",
    "email": "test@example.com"
  }
}
で実行してみると、こんなデータが返ってきたと思います。
{
  "data": {
    "createUser": {
      "id": 1,
      "name": "test",
      "email": "test@example.com"
    }
  }
}
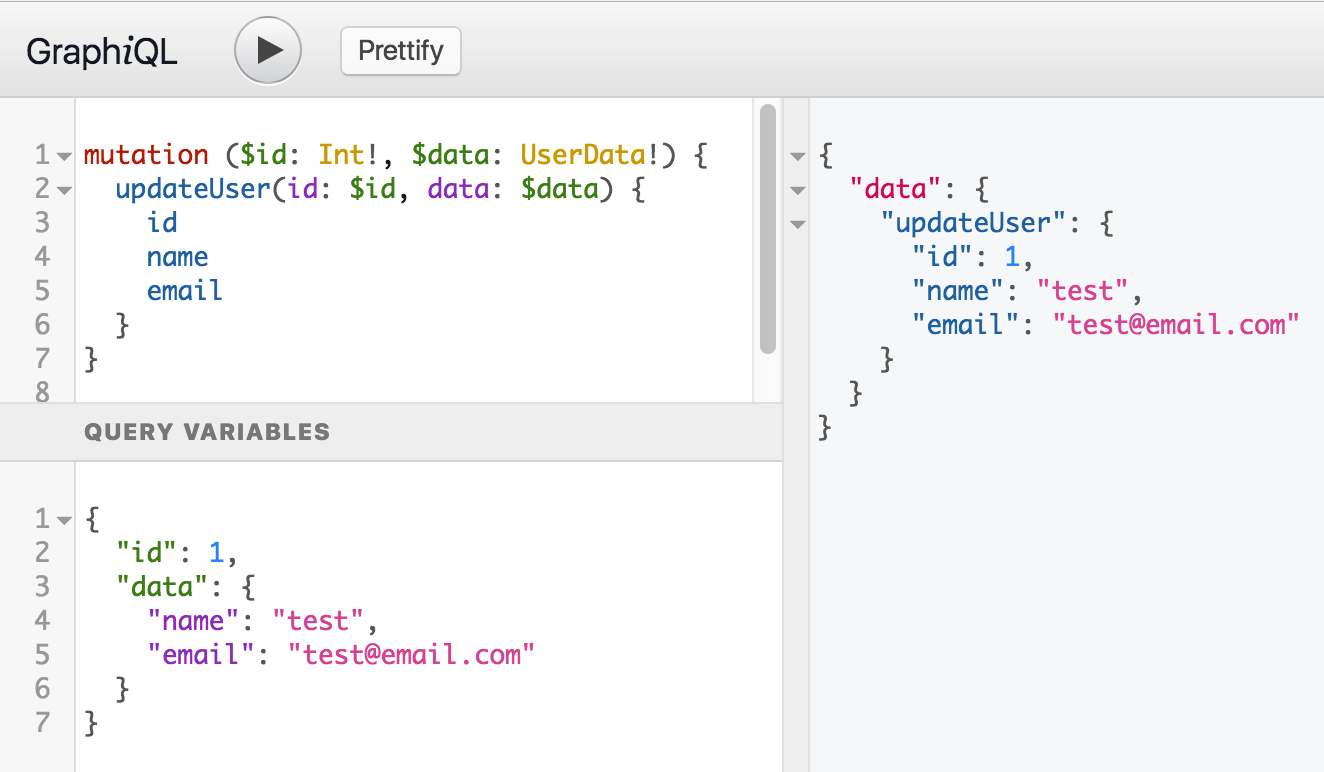
そのままですが、Updata/Deleteはこういう感じ。
  updateUser: ({id, data}) => {
    return models
      .User
      .findOne({where: {id}})
      .then((user) => {
        if (user) {
          return user.update(data).then((updated) => updated);
        } else {
          return null;
        }
      }
    );
  },
  deleteUser: ({id}) => {
    return models.User.destroy({where: {id}});
  }
これでとりあえずGraphQLでCRUDの機構は作れました。
ちなみにGraphQLスキーマを利用しない書き方だとこんな感じになります。
以上です。
追記
本当はフロントエンドをElmでUserを操作する画面を作りたかったんですが、時間が足らず・・・orz
すこしだけElmのことを・・・
ElmはAltJSの一種で、Haskellベースの静的型関数型言語です。
Elm htmlレンダリングエンジンはReactやAngularより早いらしいです。
http://elm-lang.org/blog/blazing-fast-html-round-two
実は環境だけは用意してあります。
https://github.com/ichiwa/elm-graphql-docker-demo
make startして、make logsで起動を確認したら、以下にアクセスに出来るようになると思います。
elmはwebpack-dev-serverが動いてるので、hot-deploy可能です。
また、/server/publicにelm-makeの成果物が入るようになってるので、http://localhost:3000でelmが確認できます。
今はelmのサンプルが書いてありますが、いつか・・・完成させたいところです・・・ ![]()
参考
https://learngraphql.com/
http://qiita.com/Jxck_/items/545e67c556e815620692


