はじめに
こんにちは、もちもちMAXです。
今回はAPI Gatewayでプロキシ統合したLambdaを呼び出す時にCORS対応する方法を説明します。作成するのはREST APIで適当なパラメータをbodyに格納してPOSTできるところまでをやっています。
手順
ざっくりとした手順は下記の通りです。
1.API GatewayでLambda関数を紐づけたREST APIを構築
2.Lambda関数にCORS対応を追加
3.CORS対応確認
Lambda関数の作成
各手順の説明の前に、今回呼び出すAPIの実体であるLambda関数を作成します。
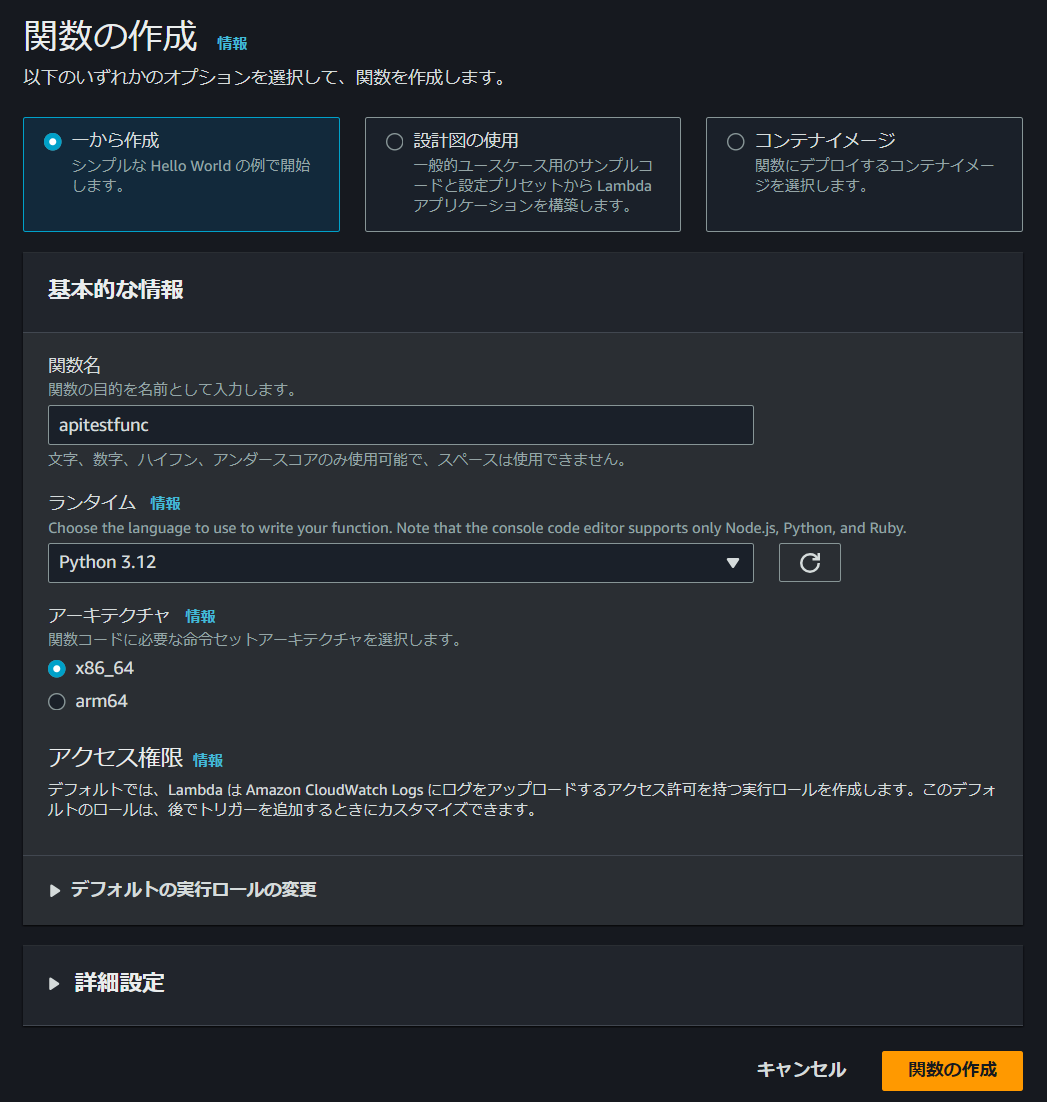
Lambda関数のコードは下記の通りです。
import json

def lambda_handler(event, context):
    # OPTIONSメソッドを通すための設定
    name = "default"
    if (event['body']) and (event['body'] is not None):
        body = json.loads(event['body'])
        try:
            if (body['name']) and (body['name'] is not None):
                name = body['name']
        except KeyError:
            print('No Name')

    return {
        "statusCode": 200,
        "headers": {
            "Content-Type": "application/json"
        },
        "body": json.dumps("hello" + name)
    }
bodyとして渡された文字列にhelloを付け加えて返すだけのシンプルなLambda関数です。今回はPOSTメソッドを使うのでOPTIONSメソッド用の例外処理を入れています。以降の説明ではこのLambda関数を使っていきます。
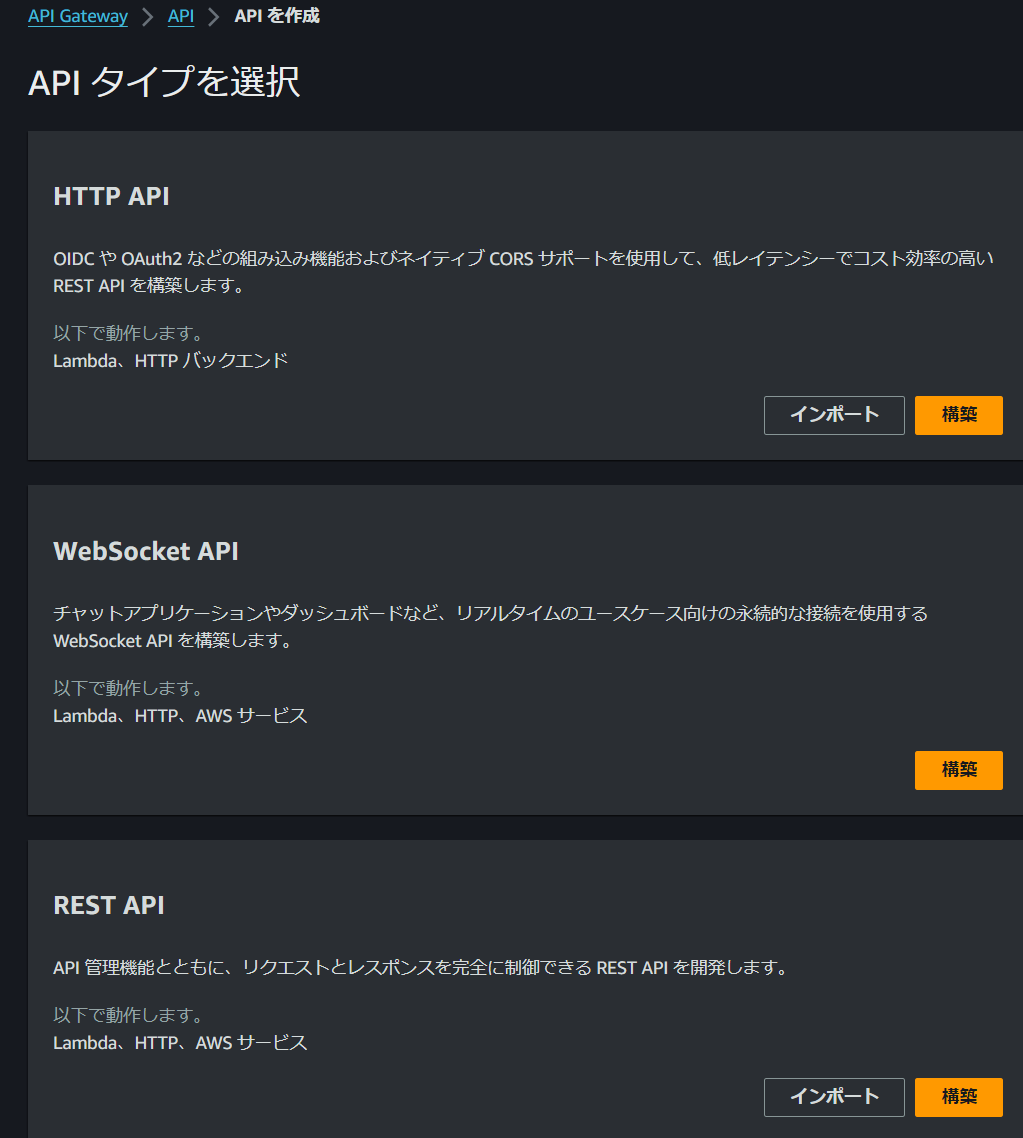
API GatewayでREST APIを構築
AWSのマネジメントコンソールを開きAPI GatewayからREST APIを選択します。
API名と説明を入力してAPIを作成をクリックします。

次に、作成したAPIを選択しリソースを作成します。リソース名を適宜入力し、CORSにチェックを入れて作成します。ちなみに、プロキシ統合したLambda関数を呼び出す場合はここのCORS設定だけでは上手く機能しません。(未検証ですが、ここのCORS設定は要らないかも)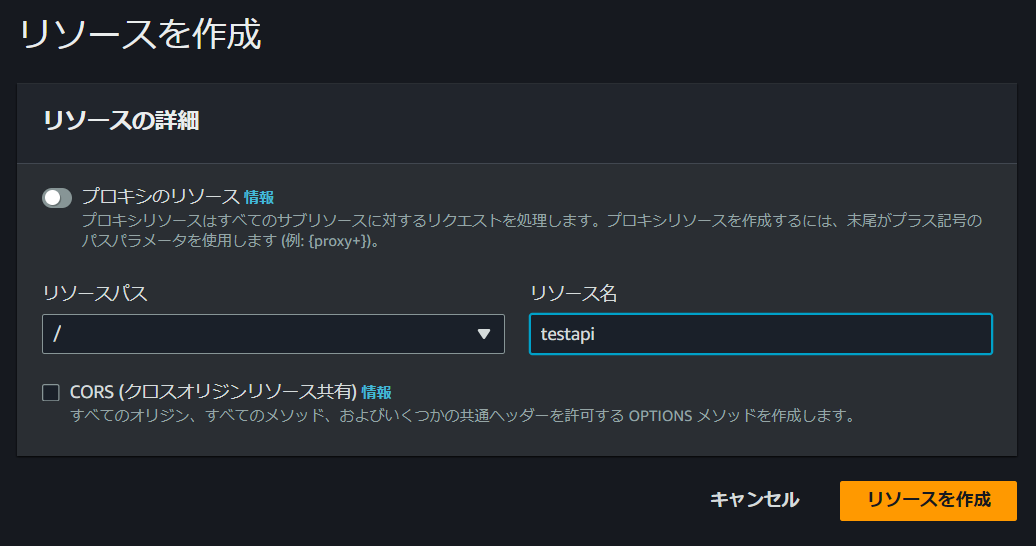
リソースを作成したら次はメソッドを作成します。ここではANYメソッドを作成します。統合タイプはLambda関数でLambdaプロキシ統合をONにして先ほど作成したLambda関数と紐づけます。プロキシ統合をONにすることで、lambda関数側でリクエストパラメータをeventとして取得できるようになります。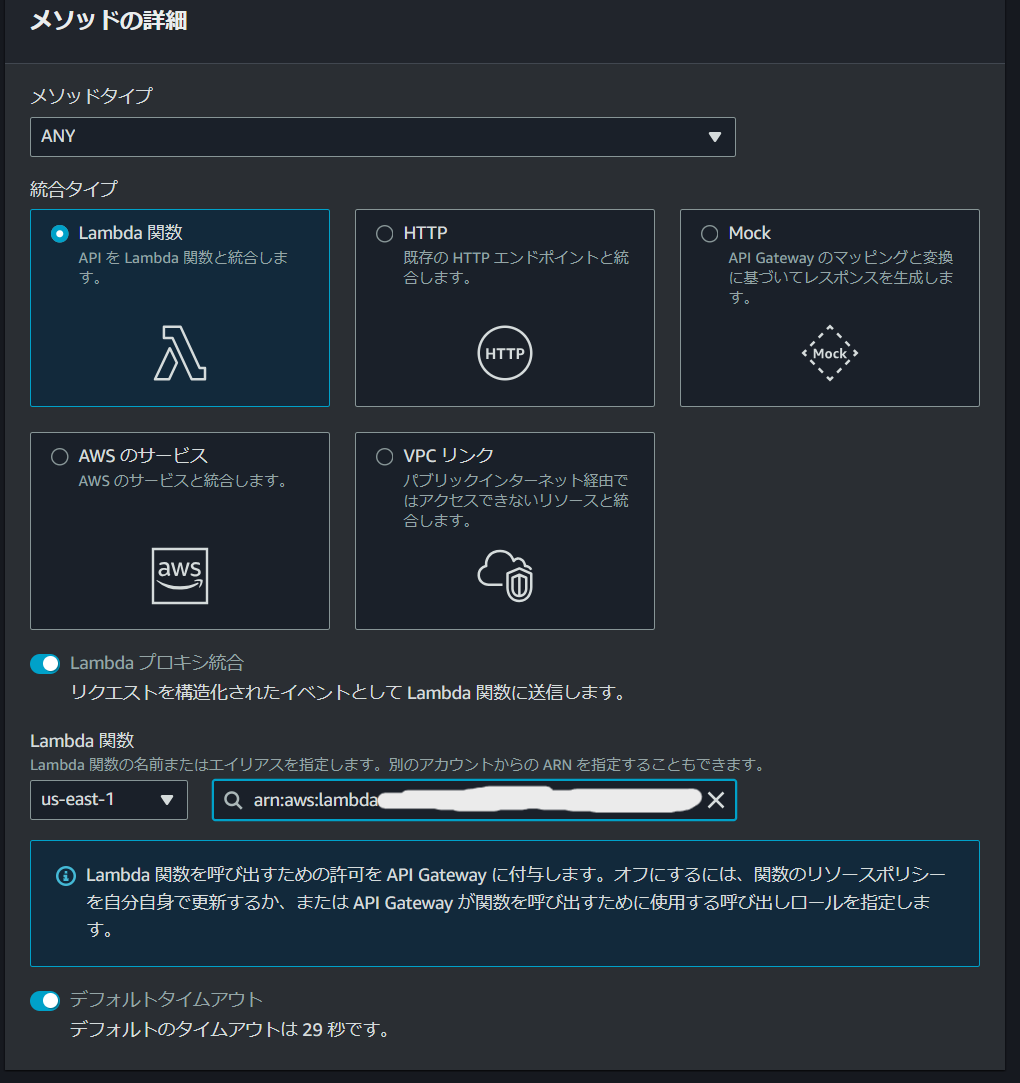
いよいよAPIのデプロイに移ります。APIの画面に移り右上のAPIをデプロイをクリックします。初めてデプロイする際にはステージを作成する必要がありますので、新しいステージを選択し適当なステージ名を入力してデプロイします。

以上でAPIの構築は完了です。構築したAPIはステージ画面のURLを呼び出すにあるURLで呼び出すことができます。

Lambda関数にCORS対応を追加
API GatewayでCORSに対応させるにはLambda関数にコードを追加する必要があります。最初に作成したLambda関数をベースに変更したコードは下記の通りです。
import json

def lambda_handler(event, context):
    # OPTIONSメソッドを通すための設定
    name = "default"
    if (event['body']) and (event['body'] is not None):
        body = json.loads(event['body'])
        try:
            if (body['name']) and (body['name'] is not None):
                name = body['name']
        except KeyError:
            print('No Name')

    return {
        "statusCode": 200,
        "headers": {
            # CORS対応のためにAccessで始まる行を追加
            "Access-Control-Allow-Headers": "Content-Type",
            "Access-Control-Allow-Origin": "*",
            "Access-Control-Allow-Methods": "OPTIONS,POST,GET",
            "Content-Type": "application/json"
        },
        "body": json.dumps("hello" + name)
    }
CORS対応のためにheadersを3行追加しています。Lambda関数側の対応はここだけです。
CORS対応確認
CORS対応ができているかどうか確認するために簡単なWebアプリを作成しました。Vue(3系)とTailwind CSSで作成しています。URLを作成したAPIのものに変更して実行すれば、入力フォームの文字列+helloが返ってきます。
<!-- App.vue -->
<template>
  <div class="container mx-auto p-4">
    <h1 class="text-3xl font-bold mb-4">Chat App</h1>
    <div class="bg-white shadow-md rounded px-8 pt-6 pb-8 mb-4">
      <div class="mb-4">
        <label class="block text-gray-700 text-sm font-bold mb-2" for="prompt">
          Prompt
        </label>
        <input
          class="shadow appearance-none border rounded w-full py-2 px-3 text-gray-700 leading-tight focus:outline-none focus:shadow-outline"
          id="prompt"
          v-model="prompt"
          type="text"
          placeholder="Enter your prompt"
        />
      </div>
      <div class="flex items-center justify-between">
        <button
          class="bg-blue-500 hover:bg-blue-700 text-white font-bold py-2 px-4 rounded focus:outline-none focus:shadow-outline"
          type="button"
          @click="sendPrompt"
        >
          Send
        </button>
      </div>
    </div>
    <div class="bg-white shadow-md rounded px-8 pt-6 pb-8">
      <h2 class="text-xl font-bold mb-4">Chat History</h2>
      <div v-if="loading" class="text-center">
        <p class="text-gray-600">Loading...</p>
      </div>
      <div v-else>
        <div v-for="(message, index) in chatHistory" :key="index" class="mb-4">
          <p class="font-bold" :class="{ 'text-blue-600': message.isUser, 'text-green-600': !message.isUser }">
            {{ message.isUser ? 'You' : 'AI' }}:
          </p>
          <p class="text-gray-700">{{ message.text }}</p>
        </div>
      </div>
    </div>
  </div>
</template>

<script setup>
import { ref } from 'vue';
const prompt = ref('');
const chatHistory = ref([]);
const loading = ref(false);
async function sendPrompt() {
  if (!prompt.value.trim()) return;
  chatHistory.value.push({ text: prompt.value, isUser: true });
  loading.value = true;
  try {
    // fetch先のURLを作成したAPI Gatewayの値に変える
    const response = await fetch('https://your_api', {
      method: 'POST',
      headers: {
        'Content-Type': 'application/json',
      },
      body: JSON.stringify({ name: prompt.value })
    });
    if (!response.ok) {
      throw new Error('API request failed');
    }
    const data = await response.json();
    chatHistory.value.push({ text: data.result, isUser: false });
  } catch (error) {
    chatHistory.value.push({ text: 'Error occurred while fetching response.', isUser: false });
  } finally {
    loading.value = false;
    prompt.value = '';
  }
}
</script>
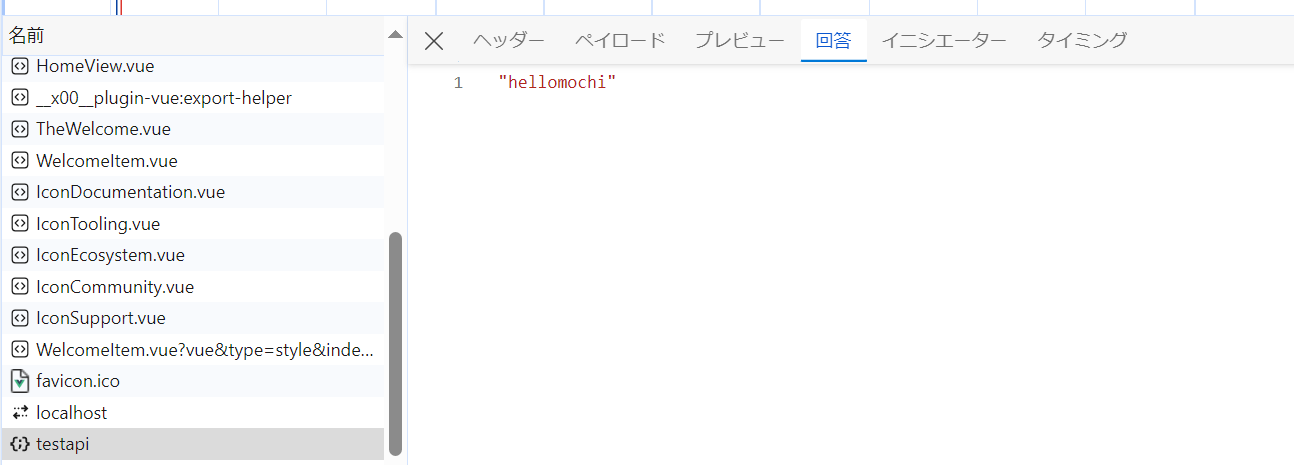
それでは早速APIをコールしてみましょう。mochiをbodyに入力してコールするとhellowmochiと返ってきてますね。想定通りCORSエラーも発生せず動いています。
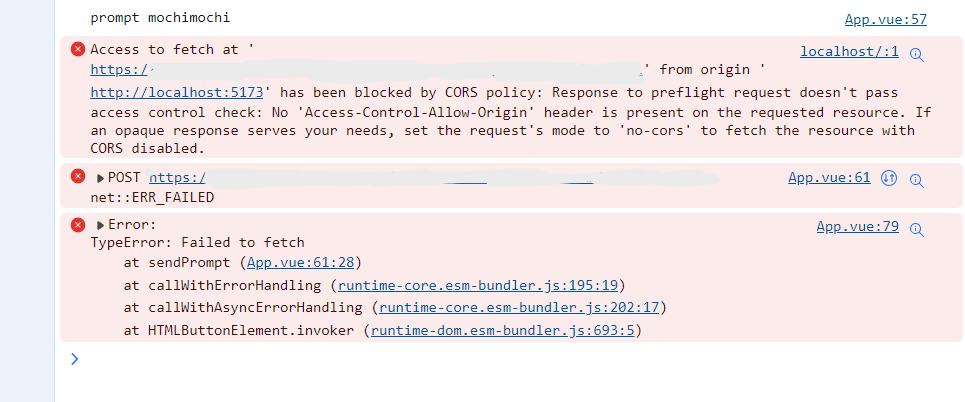
ちなみに、CORS対応を入れる前にAPIをコールすると添付の通りエラーをはいてしまいます。
さいごに
本記事では、API GatewayでLambda関数を呼び出してCORS対応する方法を説明しました。基本的にはLambdaのresponseにheadersを追加するだけなので難しくないですね。それではまた!
最近、ブログと自作アプリのLPを立ち上げたので是非見てってください!
ブログ↓
https://mochinochikimchi.com
アプリLP↓
https://mochinochikimchi.com/applications/mealmotion/index.html