vimspectorとは
Vimでも、ブレークポイント張って、デバッガーのように使えるよ!っていう便利なプラグイン。
Debug Adapter Protocol (DAP)によって実現してる感じっぽいです
導入方法、使い方を軽く紹介していきます!
※node依存してる部分あるので、node動作する環境にしときましょう!
導入方法
vimspectorのGitHubページにもろもろ書いてますが、いつも使っている、ダークパワーのdein.vimで導入してみます。
dein_lazy.toml
buildに、デバッガーしたい言語用オプションを書き込みます。
参考→Language dependencies
今回は、PythonとNodeでデバッグしてみようかと思います。
※遅延読み込み不要な方は、lazyじゃなくておkです。
[[plugins]]
repo = "puremourning/vimspector"
on_ft = ["python", "javascript"]
build = "./install_gadget.py --enable-python --force-enable-node"
設定
インストールは、完了したのですが、利用するまでに少し設定が必要です。
様々な設定値は、.vimspector.jsonで表現します。
adapters
実行時に利用するadapterを設定します。
インストール時に選択した言語のadapterは自動的に設定されています。
※vimspectorフォルダーのgadgets/linux/.gadgets.jsonに記入されてます。
自分で設定することも可能です。
${gadgetDir}は、<vimspector home>/gadgets/<OS>となってます。
つまり、adapter設定するときは、基本この変数使います。
※他の変数はこちら
configurations
デバッガー起動する際の、設定値を記入します。
起動時、どういうコマンドを実行するか設定しておかないといけません。。。
ここは、利用パターンによって変わってくると思うので、各自調整しちゃってください。
python_file
-
programに、実行対象ファイルパスを指定。
python_test
-
gitRootPathを作業ディレクトリに設定し - 引数に、
-m pytestを指定して、テスト動作するように。
breakpoints
初回起動時に、例外発生時止める?どうする?が毎回聞かれるので、デフォ値を設定してます。
.vimspector.json
{
  "adapters": {
    "vscode-node": {
      "command": [
        "node",
        "${gadgetDir}/vscode-node-debug2/out/src/nodeDebug.js"
      ],
      "name": "node2",
      "type": "node2"
    },
    "vscode-python": {
      "command": [
        "node",
        "${gadgetDir}/vscode-python/out/client/debugger/debugAdapter/main.js"
      ],
      "name": "vscode-python"
    }
  },
  "configurations": {
    "python_file": {
      "adapter": "vscode-python",
      "configuration": {
        "name": "Python: Current File",
        "type": "python",
        "request": "launch",
        "cwd": "${fileDirname}",
        "program": "${file}",
        "args": [],
        "stopOnEntry": true,
        "externalConsole": false,
        "debugOptions": []
      },
      "breakpoints": {
        "exception": {
          "raised": "N",
          "uncaught": "Y"
        }
      }
    },
    "python_test": {
      "adapter": "vscode-python",
      "variables": {
        "gitRootPath": {
          "shell" : [ "git", "rev-parse", "--show-toplevel" ]
        }
      },
      "configuration": {
        "name": "Python: Test",
        "type": "python",
        "request": "launch",
        "cwd": "${gitRootPath}",
        "args": [
          "-m",
          "pytest"
        ],
        "stopOnEntry": true,
        "externalConsole": true,
        "debugOptions": []
      },
      "breakpoints": {
        "exception": {
          "raised": "N",
          "uncaught": "Y"
        }
      }
    },
    "javascript_file": {
      "adapter": "vscode-node",
      "configuration": {
        "name": "JavaScript: Current File",
        "request": "launch",
        "cwd": "${fileDirname}",
        "program": "${file}",
        "args": [],
        "protocol": "auto",
        "stopOnEntry": true,
        "externalConsole": false
      },
      "breakpoints": {
        "exception": {
          "all": "N",
          "uncaught": "Y"
        }
      }
    }
  }
}
使い方
準備は整ったので、実行する!
サンプルソースで実行してみます。
def test():
    for i in range(10):
        test_var = i
    return test_var


if __name__ == "__main__":
    test_var = 123
    result = test()
    print(result)
    raise Exception(123)  # わざと例外だす
    test_var = 123
実行
ファイルを開いた状態で、下記コマンド実行します。
call vimspector#LaunchWithSettings({'configuration': 'python_file'})
※call vimspector#Launch()で、選択して実行することもできます。
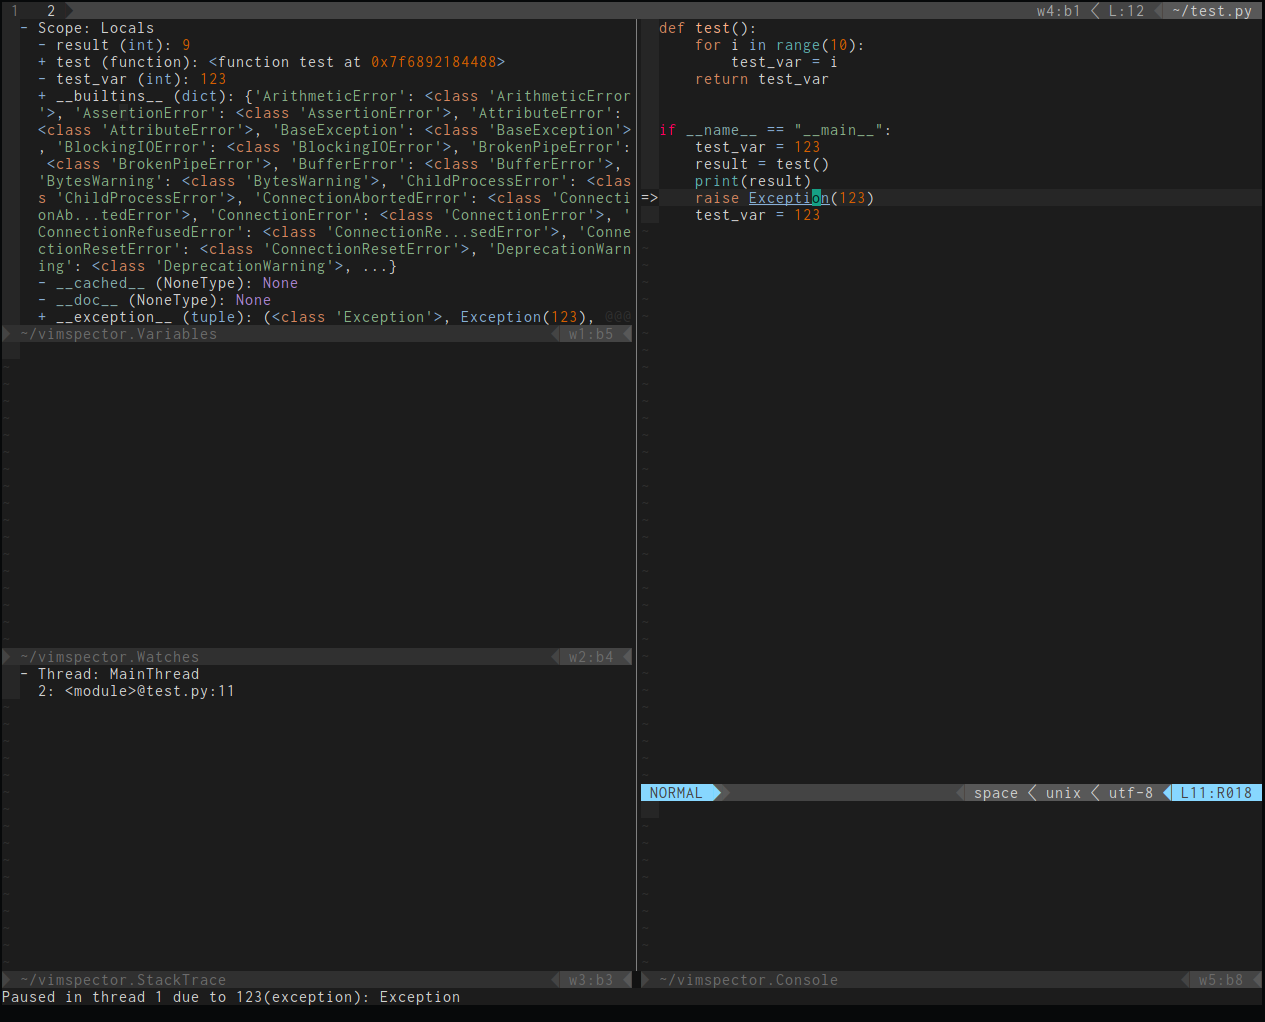
例外のところで自動的に止まるかと思います!
左上パネルで、止まった時点の変数内容丸見えですね!
使いやすくする!
どのファイルタイプでも同じコマンドで実行したいので、
filetypeで動的に値変更するようにして、.vimspector.jsonの設定値に規則性をもたせるようにしました。(python_file, javascript_file, sh_fileのように。)
  function! LaunchFileDebug()
    call vimspector#LaunchWithSettings({'configuration': &filetype.'_file'})
  endfunction
VimspectorWatch
指定した変数を監視します。
:VimspectorWatch test_var
test_varを常に監視しちゃいます!
目印変更
自分好みに変えちゃいましょう!
sign define vimspectorBP text=🔴 texthl=Normal
sign define vimspectorBPDisabled text=🔵 texthl=Normal
sign define vimspectorPC text=🔶 texthl=SpellBad
API一覧
vimspector#Continue()
<Plug>VimspectorContinue
デバッグ中であれば、続きを実行。
デバッグ中でなければ、デバッグを開始。
vimspector#Stop()
<Plug>VimspectorStop
デバッグを停止!
vimspector#Restart()
<Plug>VimspectorRestart
同じ設定で再実行!
vimspector#Pause()
<Plug>VimspectorPause
デバッグを一時停止!
vimspector#ToggleBreakpoint()
<Plug>VimspectorToggleBreakpoint
ブレークポイントを設定!
vimspector#StepOver()
<Plug>VimspectorStepOver
次のステップ実行。(関数内部入らない)
vimspector#StepInto()
<Plug>VimspectorStepInto
次のステップ実行。(関数内部にも入る)
vimspector#StepOut()
<Plug>VimspectorStepOut
現在実行している、関数から抜けるまで実行。
vimspector#Reset()
:VimspectorReset
デバッガーを完全に止める。


