はじめに
こんにちは。debiru です。
今日は GitHub Pages を使って Astro を用いた Web サイトをデプロイする手順を紹介します。
自動デプロイスクリプトを用意したので、以下の 1. 〜 6. のセクションの手順を実施するだけで Astro サイトが爆誕します。
なお、今回は BeautifulCode を実現します。BeautifulCode とは、出力される HTML, CSS, JS のソースコードの可読性を担保することを指します。出力ソースコードの圧縮などをせず、インデントの整った美しいソースコードを提供することを目指します。
1. GitHub にリポジトリを作成する
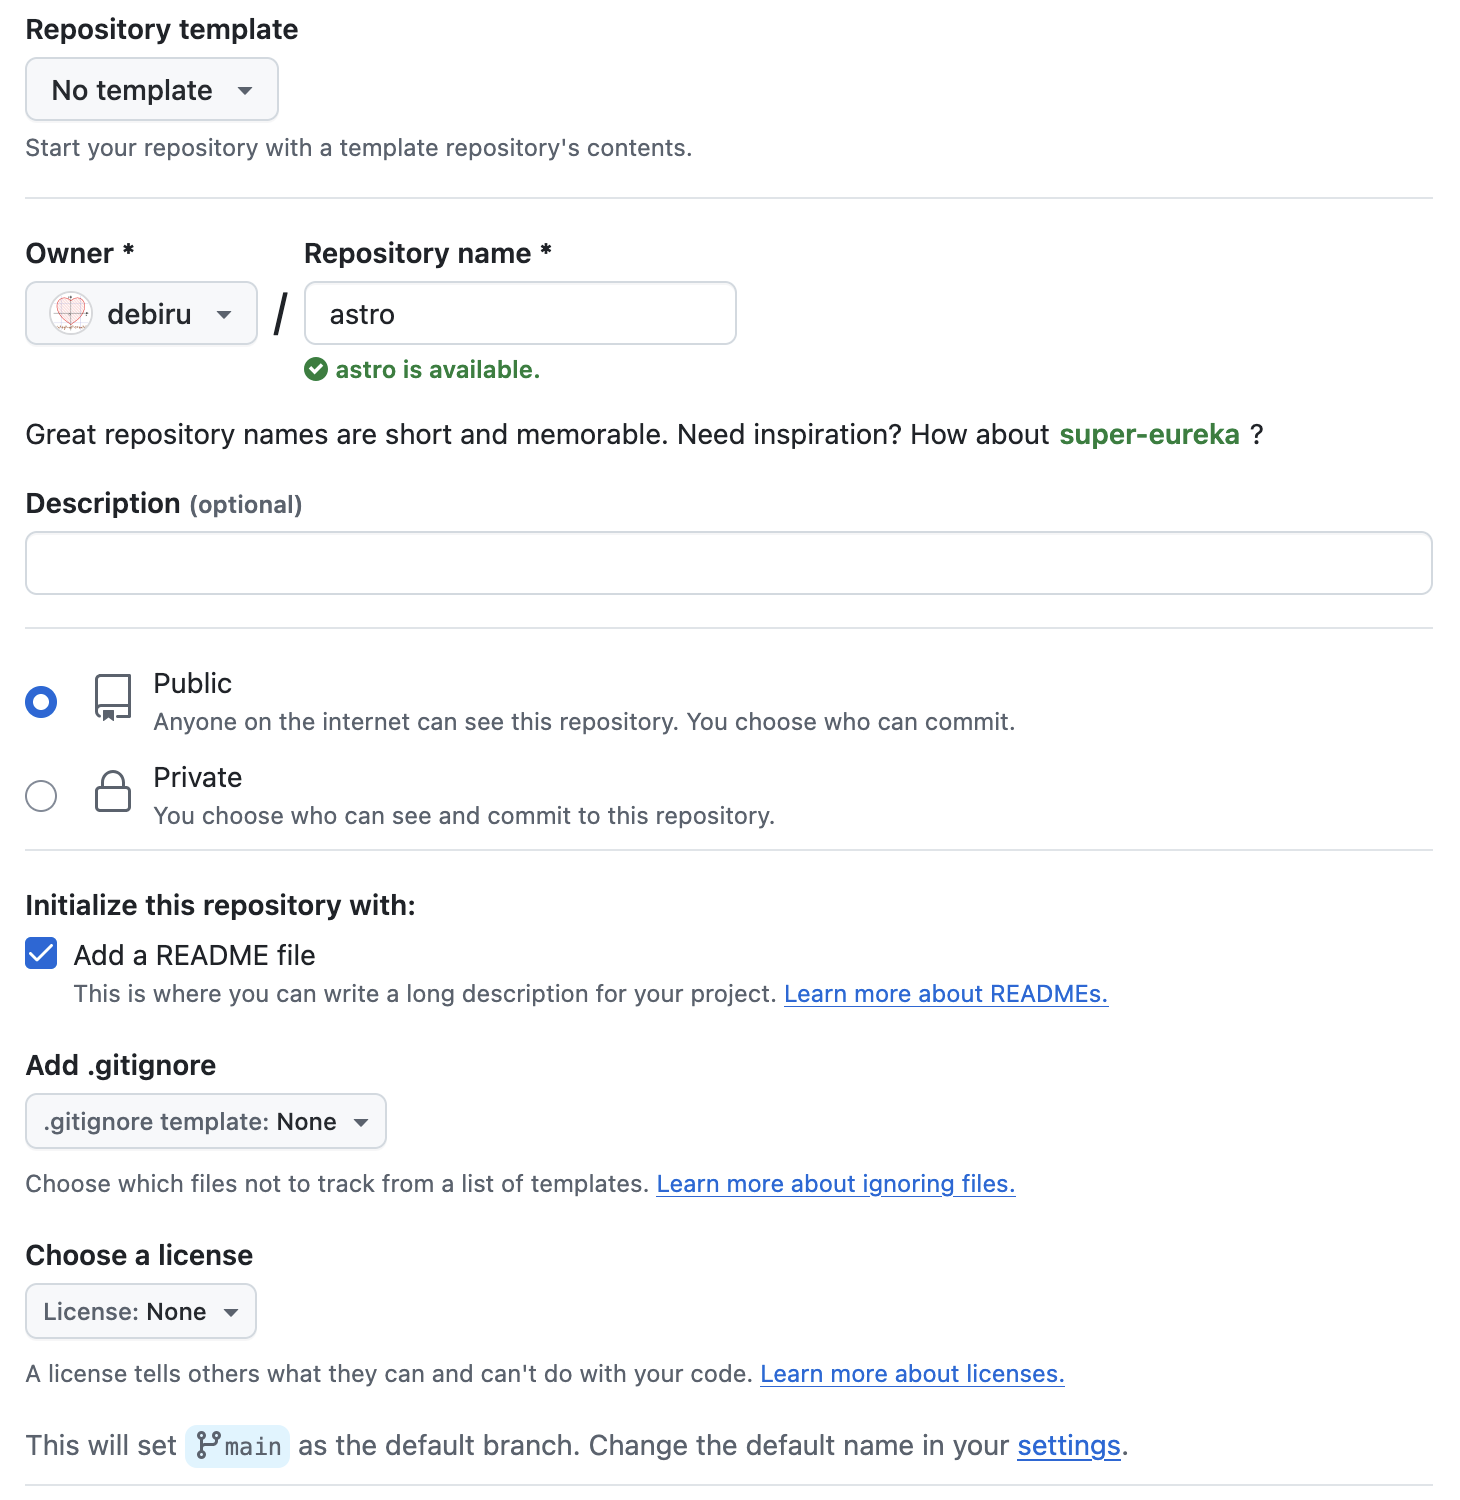
- お好きなリポジトリ名を入力します
- リポジトリの公開範囲は Public にします
- Add a README file にチェックを入れます
そして Create Repository ボタンを押します。
2. GitHub Pages で使うドメイン名の DNS 設定を行う
例えば https://astro.debiru.net という URL でサイトを公開したい場合、astro.debiru.net のドメイン名に対する DNS 設定を行います。
このマニュアルを参考に、頂点ドメイン名(debiru.net など)の場合は A レコードを、サブドメイン(astro.debiru.net など)の場合は CNAME レコードを設定します。ただしサブドメインであっても、他のレコード(MX や TXT など)を設定している場合は、頂点ドメイン名と同様に A レコードを用いて設定してください。
3. GitHub Pages の設定を行う
作成したリポジトリの GitHub 上のページで、上部のグローバルメニューから Settings を選び、左サイドバーにある Pages を選びます。
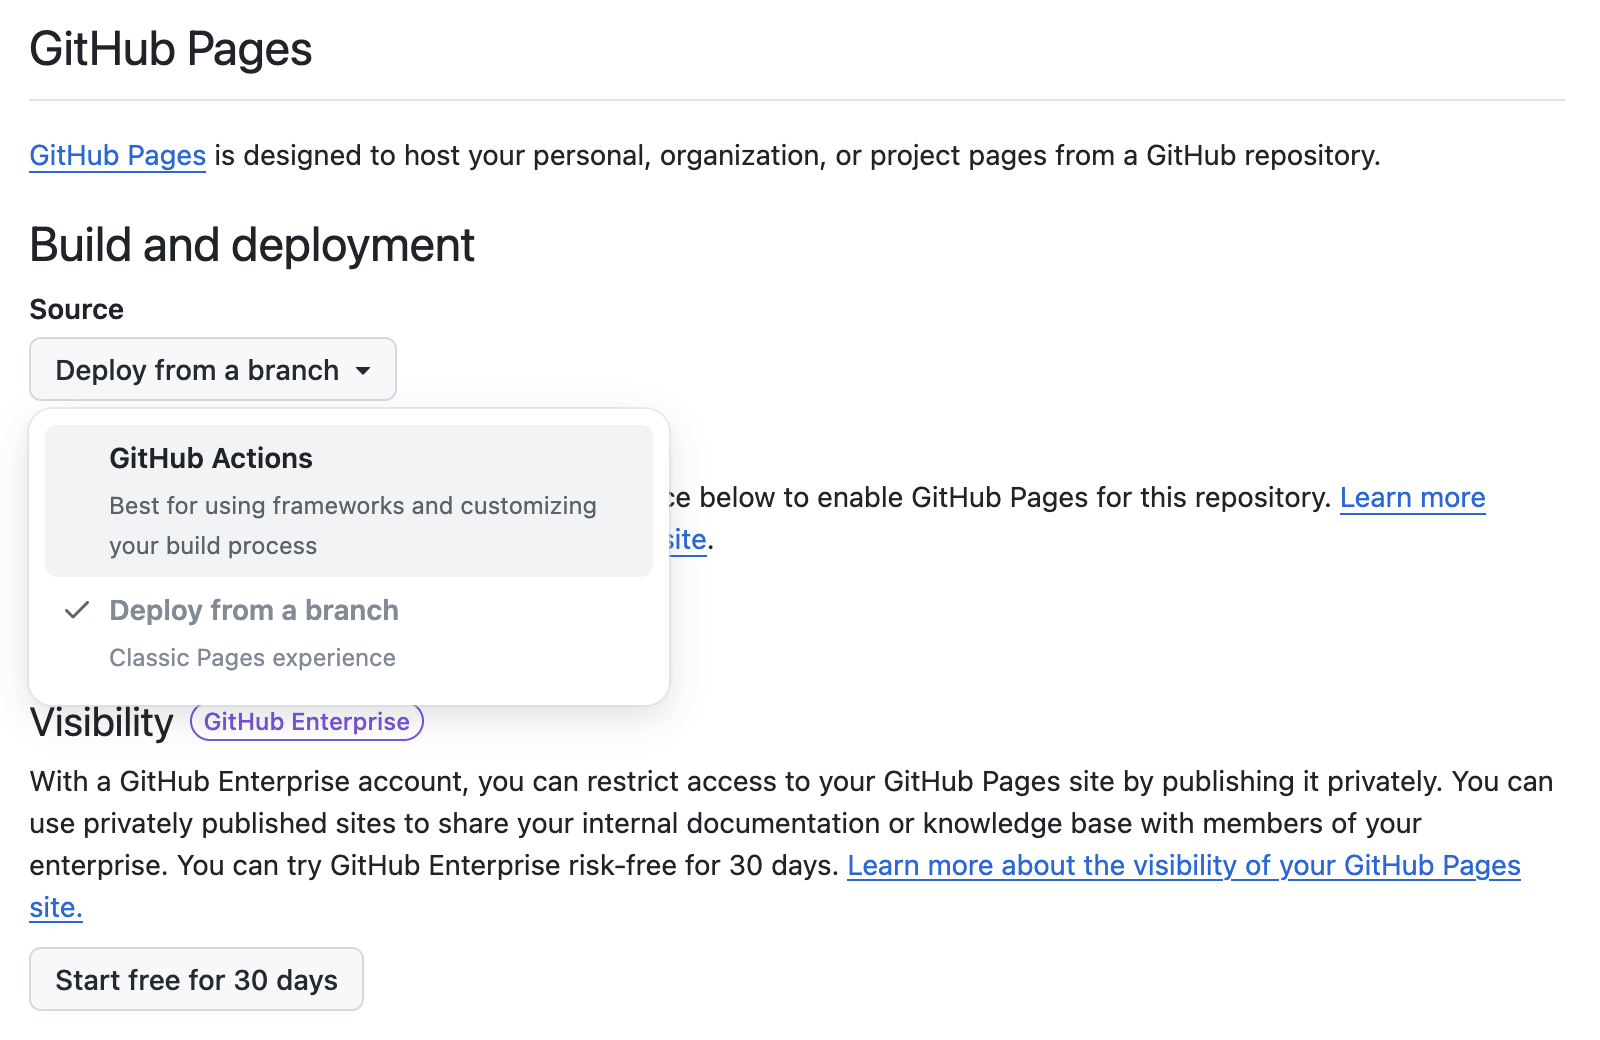
- Source から
GitHub Actionsを選んでおきます

- Custom domain に、使いたいドメイン名を入力します
- Enforce HTTPS にチェックを入れます(チェックが入れられない場合は、ページをリロードしてみてください)
4. リポジトリを clone する
作成したリポジトリを手元の作業 PC 上に clone します。
astro というリポジトリ名の場合は次のような感じのコマンドになるはずです。
git clone git@github.com:YOURNAME/astro.git

# clone したリポジトリに移動する
cd astro
5. Node と npm のインストール
もし手元の PC 上で node がインストールされていなければ、node をインストールします。
node -v

npm -v
それぞれ、バージョン情報が表示されれば OK です。最新安定版(2025年1月時点で node 22.x, npm 11.x)を使っていればなお良いです。
node のインストール手順が分からない方は @debiru_R までお尋ねください。mise などのパッケージ管理ソフトを使うとよいでしょう。
6. Astro 環境を自動で構築する
注意:以下のように外部シェルスクリプトを実行する際は、スクリプトの中身が安全かどうかを確かめてから実行するようにしてください。
スクリプトの中身は https://astro.debiru.net でも紹介しています。
curl -fsSLO https://astro.debiru.net/build/astro-starter-kit.sh
chmod +x astro-starter-kit.sh

# スクリプトの中身を確認する
cat astro-starter-kit.sh

# Astro Starter Kit をインストールする
# astro.debiru.net の部分は、実際に利用したいドメイン名を指定してください
# ./astro-starter-kit.sh astro.debiru.net
./astro-starter-kit.sh

git push
これでデプロイ処理が実行されます。デプロイには30秒ほどかかるかもしれません。
作成したリポジトリの GitHub 上のページにアクセスして、画面上部の最終コミットログにチェックマークが付いているかを確認してください。
チェックマークが付いていれば、指定したドメイン名の URL(https://astro.debiru.net のような URL)にアクセスすることで Astro のサイトが閲覧できるはずです。
内部処理について読まなくてもよいという方は「#おわりに」へお進みください。
次のセクションでは、このスターターキット自動スクリプトが内部的に何を行っているかについて説明します。
Astro 環境を手動で構築する
以下は手動での Astro 環境構築手順ですが、これはスターターキット自動スクリプトで実行している処理内容です。
1. Astro プロジェクトを作成する
npm create astro@latest project -- --template minimal --no-install --no-git
mv project/{*,.*} . && rm -r project
git commit しておく(1回目)
git add .
git commit -m "npm create astro@latest"
2. .gitignore を編集する
デフォルトでは dist/ と書かれていますが、これを /dist/ に変更します。後々、public の中で dist ディレクトリを使いたいケースに対応できなくなるため、この変更を行っておきます。
diff --git a/.gitignore b/.gitignore
index 016b59e..a34f621 100644
--- a/.gitignore
+++ b/.gitignore
@@ -1,5 +1,5 @@
 # build output
-dist/
+/dist/

 # generated types
 .astro
git commit しておく(2回目)
git add .
git commit -m "update .gitignore"
3. .github/workflows/deploy.yml を作成する
mkdir -p .github/workflows
touch .github/workflows/deploy.yml
.github/workflows/deploy.yml を編集して、以下の内容にします。
もし、Git のブランチ名が main でなければ、5行目のブランチ名の部分は変更してください。
name: Deploy to GitHub Pages

on:
  push:
    branches: [ main ]
  workflow_dispatch:

permissions:
  contents: read
  pages: write
  id-token: write

jobs:
  build:
    runs-on: ubuntu-latest
    steps:
      - name: Checkout your repository using git
        uses: actions/checkout@v4
      - name: Install, build, and upload your site
        uses: withastro/action@v3
        with:
          node-version: 22
          package-manager: npm@latest

  deploy:
    needs: build
    runs-on: ubuntu-latest
    environment:
      name: github-pages
      url: ${{ steps.deployment.outputs.page_url }}
    steps:
      - name: Deploy to GitHub Pages
        id: deployment
        uses: actions/deploy-pages@v4
git commit しておく(3回目)
git add .
git commit -m "add .github/workflows/deploy.yml"
4. src ディレクトリの中身を空にする
デフォルトで作成される src ファイルの中身を削除しておきます。
rm -r src && mkdir src
git commit しておく(4回目)
git add .
git commit -m "remove default src files"
5. package.json を更新する
diff --git a/package.json b/package.json
index 65e3364..9962f52 100644
--- a/package.json
+++ b/package.json
@@ -4,11 +4,13 @@
   "version": "0.0.1",
   "scripts": {
     "dev": "astro dev",
-    "build": "astro build",
+    "build": "build/pre-build.sh && astro build && build/post-build.sh",
+    "watch": "build/watch.sh",
+    "stylelint": "build/stylelint.sh",
     "preview": "astro preview",
     "astro": "astro"
   },
   "dependencies": {
     "astro": "^5.1.10"
   }
-}
\ No newline at end of file
+}
git commit しておく(5回目)
git add .
git commit -m "update package.json"
6. スターターキットを用意する
- sass, stylelint の実行を可能にする
- css, js, scss, img のアセットファイルを用意する
-
build/*.shにビルド用スクリプトを設置する -
src/config/myExtIntegration.mjsで Astro のビルド結果を加工する -
src/config/view.mjsでページ共通の初期設定をする -
src/pagesでサンプルページを用意する
new file:    .editorconfig
new file:    .stylelintrc.json
modified:    astro.config.mjs
new file:    build/post-build.sh
new file:    build/pre-build.sh
new file:    build/sass-compile.sh
new file:    build/sass-watch.sh
new file:    build/stylelint.sh
new file:    build/watch.sh
new file:    public/assets/img/global/logo.png
new file:    public/assets/img/global/og.png
new file:    public/assets/js/components/Link.js
new file:    public/assets/js/global/base.js
new file:    public/assets/js/pages/subpage.js
new file:    public/assets/js/pages/top.js
new file:    public/assets/scss/components/Link.scss
new file:    public/assets/scss/global/reset.scss
new file:    public/assets/scss/global/style.scss
new file:    public/assets/scss/pages/subpage.scss
new file:    public/assets/scss/pages/top.scss
new file:    public/favicon.ico
new file:    src/components/Link.astro
new file:    src/components/index.tsx
new file:    src/config/Util.mjs
new file:    src/config/myExtIntegration.mjs
new file:    src/config/view.mjs
new file:    src/layouts/Footer.astro
new file:    src/layouts/Header.astro
new file:    src/layouts/Layout.astro
new file:    src/pages/index.astro
new file:    src/pages/subpage/index.astro
スターターキットの差分
git commit しておく(6回目)
git add .
git commit -m "generate starter kit"
7. package-lock.json を生成する
npm install -D glob js-beautify sass stylelint stylelint-config-standard
git commit しておく(7回目)
git add .
git commit -m "npm install"
8. ビルドで生成される dist/ 以外のファイルをコミットする
npm run build
git commit しておく(8回目)
git add .
git commit -m "npm run build"
git push する
git push
おわりに
この手順書で完成するサイトは https://astro.debiru.net/ のようなものです。ソースコードは https://github.com/debiru/astro です。
冒頭でも述べましたが、このスターターキットでは BeautifulCode を実現します。
BeautifulCode とは、出力される HTML, CSS, JS のソースコードの可読性を担保することを指します。出力ソースコードの圧縮などをせず、インデントの整った美しいソースコードを提供することを目指します。従来の MPA としての開発アプローチである静的な HTML, CSS, JS の読み込みによりサイトを構築しています。
Astro は SSG (Static Site Generator) として利用できるツールであり、PHP 等のサーバーサイドスクリプトが実行できない GitHub Pages のようなホスティング環境でも、デプロイ時の GitHub Actions を用いて動的に HTML を生成することで各ページで Header や Footer を共通化するなど、プログラマブルな Web サイトの開発を可能にします。
Astro に触れたことのない人でも、このスターターキットを用いて Astro で GitHub Pages を開設し、Astro の魅力を知ってもらえたら嬉しいです。
不明点や疑問、困ったことなどがあれば @debiru_R までお気軽にご連絡ください。