これは何
Effective Java 2nd Edition と 3rd Editionで変化したところについて - Qiitaを読んでいたら、google の Autovalue が紹介されていたので試してみたメモ。
チュートリアル通りにやれば一通り試せるのだけど、Intellijの環境設定が必要だったのでそちらがメイン。
pom.xml
<project xmlns="http://maven.apache.org/POM/4.0.0" xmlns:xsi="http://www.w3.org/2001/XMLSchema-instance"
  xsi:schemaLocation="http://maven.apache.org/POM/4.0.0 http://maven.apache.org/maven-v4_0_0.xsd">
  <modelVersion>4.0.0</modelVersion>
  <groupId>tada.suzu</groupId>
  <artifactId>autoValueTest</artifactId>
  <packaging>jar</packaging>
  <version>1.0-SNAPSHOT</version>
  <name>autoValueTest</name>
  <url>http://maven.apache.org</url>

    <properties>
        <project.build.sourceEncoding>UTF-8</project.build.sourceEncoding>
        <maven.compiler.source>1.8</maven.compiler.source>
        <maven.compiler.target>1.8</maven.compiler.target>
       <java.version>1.8</java.version>
    </properties>

  <dependencies>
    <dependency>
      <groupId>junit</groupId>
      <artifactId>junit</artifactId>
      <version>3.8.1</version>
      <scope>test</scope>
    </dependency>
    <dependency>
      <groupId>com.google.auto.value</groupId>
      <artifactId>auto-value-annotations</artifactId>
      <version>1.6</version>
    </dependency>
    <dependency>
      <groupId>com.google.auto.value</groupId>
      <artifactId>auto-value</artifactId>
      <version>1.6</version>
      <scope>provided</scope>
    </dependency>

  </dependencies>
</project>
JUnitのバージョンはmavenプロジェクトを新規作成したときの初期値から変えていないだけなので気にしない。
Intellijの環境設定
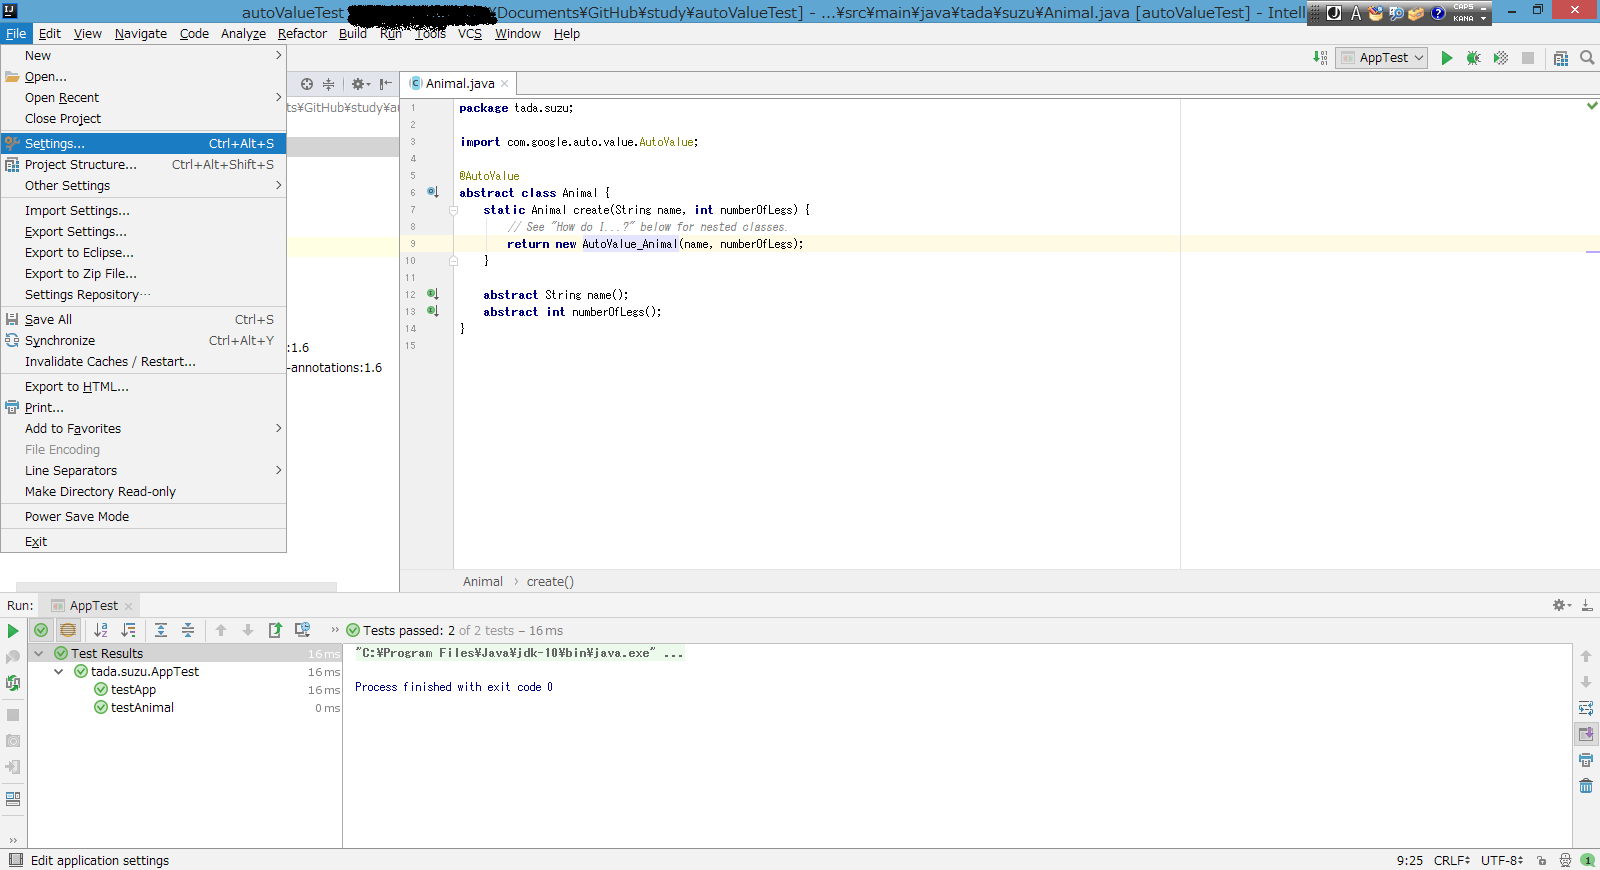
デフォルトのままだとコンパイルエラーが出てしまうので設定する。
package tada.suzu;

import com.google.auto.value.AutoValue;

@AutoValue
abstract class Animal {
    static Animal create(String name, int numberOfLegs) {
        //ここで、AutoValue_Animalというクラスが無いよとエラーになる
        return new AutoValue_Animal(name, numberOfLegs);
    }

    abstract String name();
    abstract int numberOfLegs();
}
-
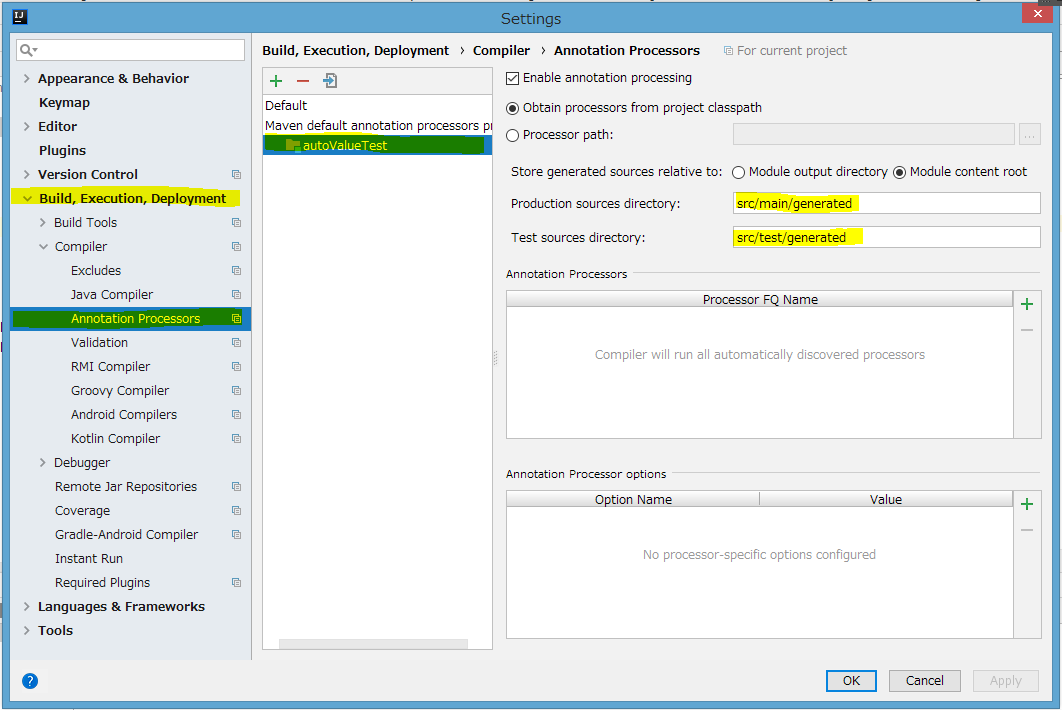
File → Settings をクリック
-
Build, Execution, Depeloyment → Compiler → Annotation Processors を選択
-
プロジェクトを選び、Production sources directoryとTest source directoryを編集する。
-
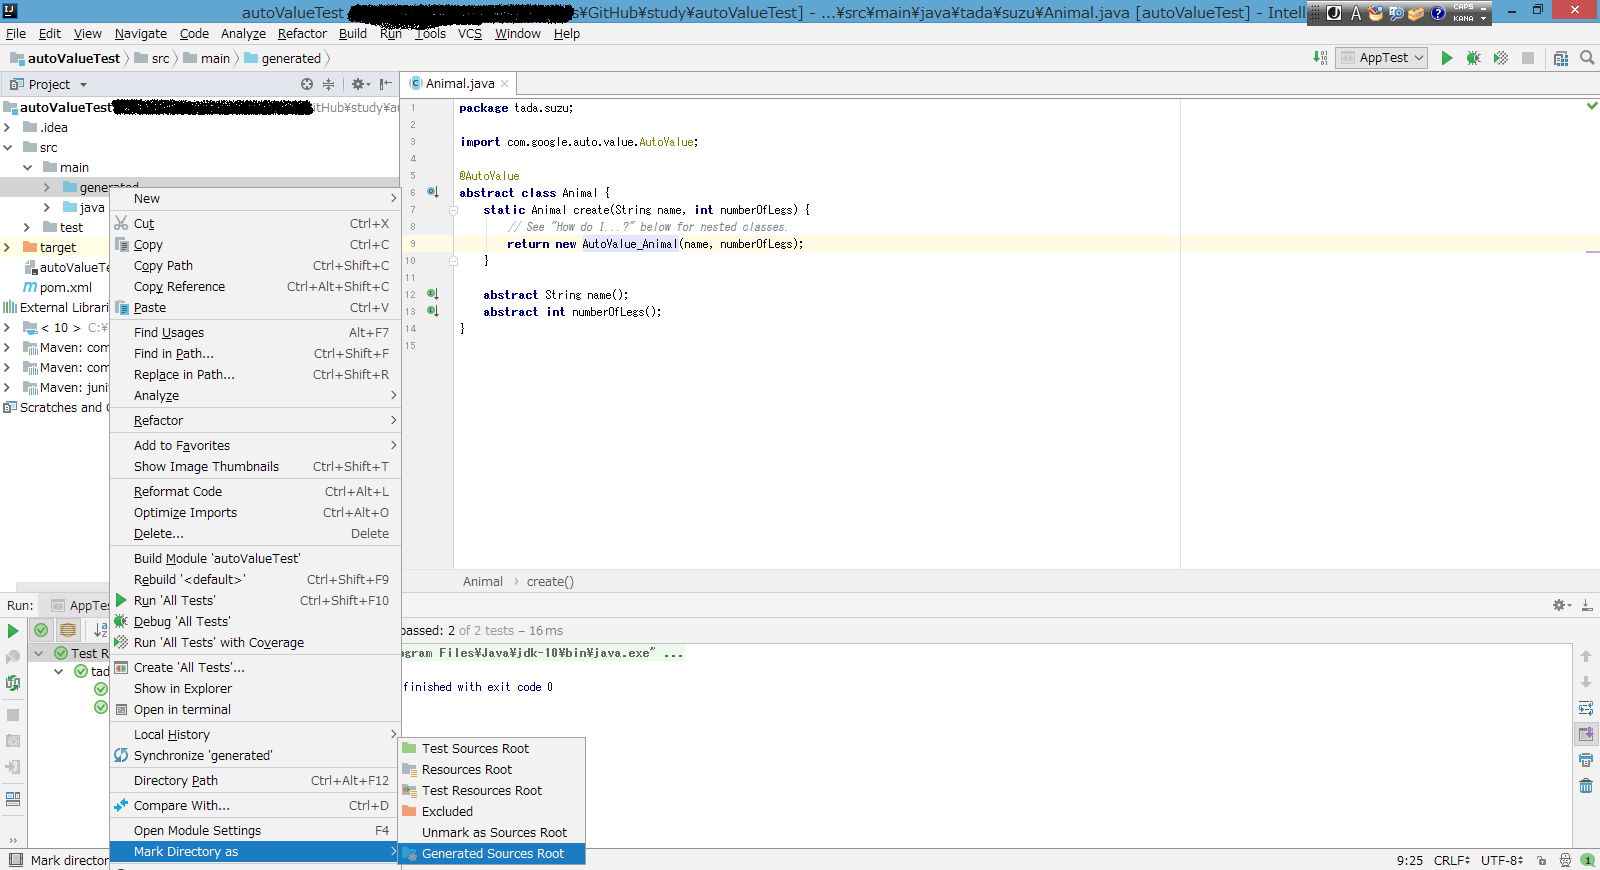
Settingsを閉じたら、Buildメニューからコンパイルすることで、src/main/generated の下にAutoValue_Animal.java が生成される。
-
generated フォルダを右クリックし、Mark Directory as メニューから Generated Source Root を選び、ビルドパスに追加する。
以上でコンパイルエラーが出なくなり、動かせる状態になる。
まぁほぼstackoverflowに書いてあったことなので個人的に使い方をメモしておくだけ。
動かしてみる
ドキュメントに書いてあった内容をそのまま貼り付けただけ
    public void testAnimal() {
        Animal dog = Animal.create("dog", 4);
        assertEquals("dog", dog.name());
        assertEquals(4, dog.numberOfLegs());

        // You probably don't need to write assertions like these; just illustrating.
        assertTrue(Animal.create("dog", 4).equals(dog));
        assertFalse(Animal.create("cat", 4).equals(dog));
        assertFalse(Animal.create("dog", 2).equals(dog));

        assertEquals("Animal{name=dog, numberOfLegs=4}", dog.toString());
    }
個人的な見解
AutoValue_Animal.java というアノテーションから自動生成されるクラスを意識しないといけないのはどうなんだろうか、と最初は思ったけど、変数が増えた時にアノテーションが自動でequals()、hashcode() 、toString() メソッドを生成し直してくれるのは有り難いかもしれない。
equals()、hashcode() 、toString() だけを目的にするならLombokやKotlinを使うのと大差なさそう。
引数有コンストラクタやsetter/getterは生成してくれないようなので、それらの用途に合わせて使い分けるのがよさそう。
さてお仕事で使用有無を検討する機会はあるのかなぁ。