はじめに
概要
この記事は、トラハック氏(@torahack_)が運営するYoutubeチャンネル『トラハックのエンジニア学習ゼミ【とらゼミ】』の『日本一わかりやすいReact-Redux講座 実践編』の学習備忘録です。
前回の講座で、注文履歴画面を作成しました。
今回は、クエリを利用した商品の条件検索を実装します。
今回で無料公開講座は最後になります!
※ 前回記事: 【備忘録】日本一わかりやすいReact-Redux講座 実践編 #13 「注文履歴を確認しよう〜コンポーネントの再利用〜」
動画URL
Firestoreの複合クエリで商品を条件検索しよう【日本一わかりやすいReact-Redux講座 実践編#14】
要点
- Firebase Indexesで、複合クエリの条件検索を実装する。
完成系イメージ
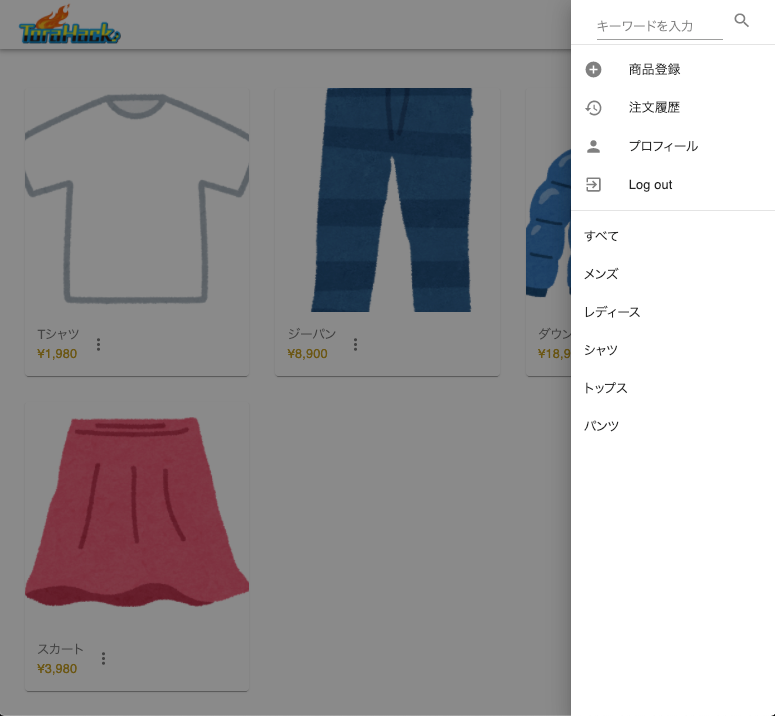
http://localhost:3000
Drawerメニューを開くと、商品カテゴリーがメニューアイテムとして追加されています。
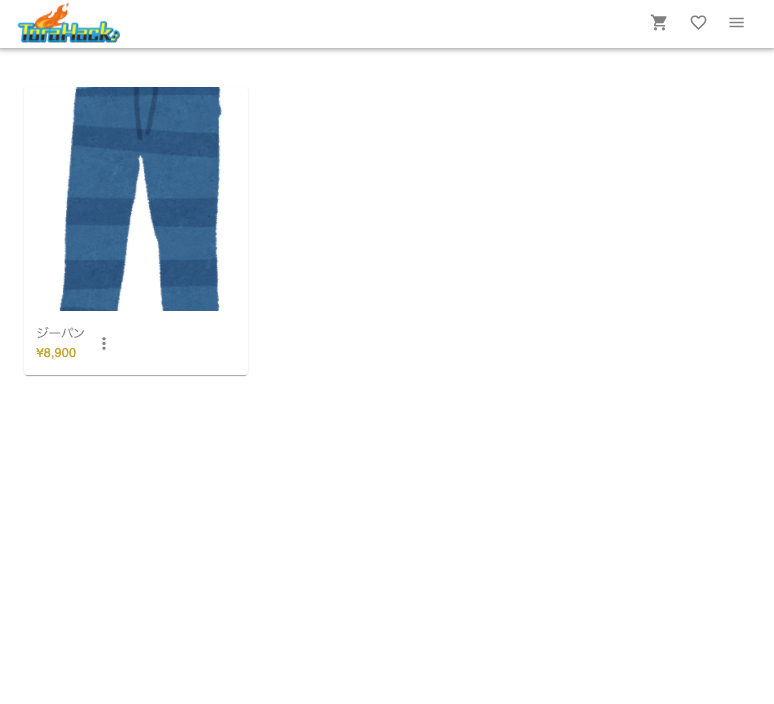
例えば「メンズ」をクリックすると、
http://localhost:3000/?gender=male
メンズカテゴリーの商品のみがリスト表示されます。
メイン
categoriesコレクションの追加
ProductEdit.jsx内にコードで直接記述していたcategoriesをCloud Firestore上に定義し、都度データを受信して使うことにします。
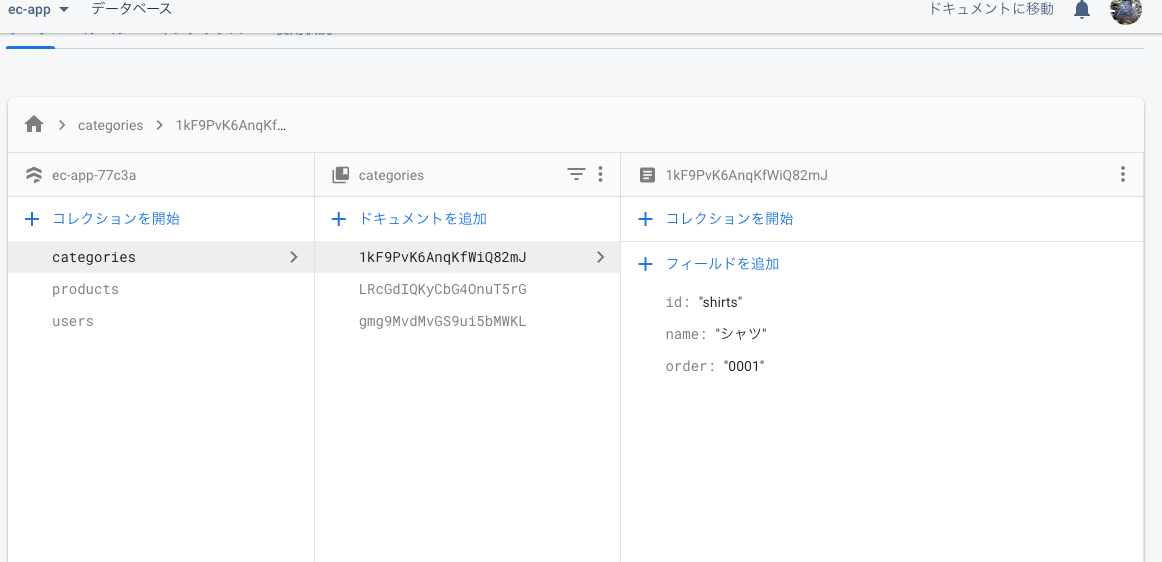
Firebaseコンソールから、categoriesコレクションを追加します。
id, nameに加え、orderというフィールドも追加し、ドキュメントごとに連続した数字を与えます。
ProductEdit.jsxに変更を加えます。
.
.
.
const ProductEdit = () => {
  .
  .
  .
  const [name, setName] = useState(""),
        [description, setDescription] = useState(""),
        [category, setCategory] = useState(""),
        [categories, setCategories] = useState([]), //追記
        [gender, setGender] = useState(""),
        [images, setImages] = useState([]),
        [price, setPrice] = useState(""),
        [sizes, setSizes] = useState([]);
  .
  .
  .
  // 削除
  // const categories = [
  //   {id:"tops", name:"トップス"},
  //   {id:"shirt", name:"シャツ"},
  //   {id:"pants", name:"パンツ"}
  // ]
  // 削除ここまで
  .
  .
  .
  //追記
  useEffect(() => {
    db.collection("categories").orderBy("order","asc").get()
    .then(snapshots => {
      const list = [];
      snapshots.forEach(snapshot => {
        const data = snapshot.data();
        list.push({
          id: data.id,
          name: data.name
        })
      })
      setCategories(list)
    },[])
    //追記ここまで

  return (
    .
    .
    .
  )
}

export default ProductEdit
DBにcategoriesの情報を移動させ、useEffect()内で取得しています。
このとき、orderBy("order","asc)により、先ほど定義した order の順番にしたがって昇順でドキュメントを並べています。
rules_version = '2';
service cloud.firestore {
  match /databases/{database}/documents {
    match /users/{userId} {
      allow read: if request.auth.uid != null;
      allow create;
      allow update: if request.auth.uid == userId;
      allow delete: if request.auth.uid == userId;

      match /cart/{cartId} {
        allow read,write: if request.auth.uid == userId;
      }

      match /orders/{orderId} {
        allow read,write: if request.auth.uid == userId;
      }
    }

    match /products/{productId} {
      allow read: if request.auth.uid != null;
      allow write: if request.auth.uid != null;
    }

    //追記
    match /categories/{categoryId} {
      allow read: if request.auth.uid != null;
      allow write: if request.auth.uid != null;
    }
    //追記ここまで
  }
}
読み書きルールを変更し、デプロイします。
$ firebase deploy --only firestore:rules
以上で、カテゴリーの実装は完了です。
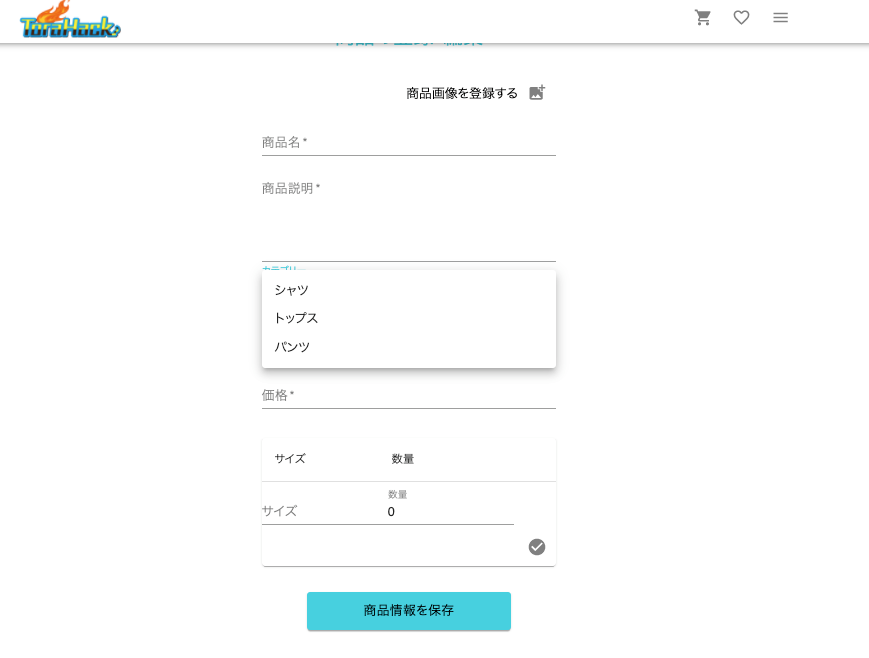
「商品登録ページ」から、これまで通りカテゴリーを選択、登録できていれば、成功です。
ファイル実装
ClosableDroawer.jsxに、商品カテゴリーのメニューアイテムを追加し、各アイテムをクリックしたときに、
1.src/components/Header/ClosableDrawer.jsx
2.src/templates/ProductList.jsx
3.src/reducks/products/operations.js
import React, {useCallback, useState,useEffect} from "react"; // useEffectを追加
.
.
.
const ClosableDrawer = (props) => {
  .
  .
  .
  const selectMenu = (event, path) => {
    dispatch(push(path));
    props.onClose(event)
  }
  .
  .
  .
  const [filters, setFilters] = useState([
    {func: selectMenu, label:"すべて", id:"all", value:"/"},
    {func: selectMenu, label:"メンズ", id:"male", value:"/?gender=male"},
    {func: selectMenu, label:"レディース", id:"female", value:"/?gender=female"}
  ]);
  .
  .
  .
  useEffect(()=>{
    db.collection("categories").orderBy("order","asc").get()
    .then(snapshots => {
      const list = [];
      snapshots.forEach(snapshot => {
        const category = snapshot.data();
        list.push({func: selectMenu, label: category.name, id: category.id, value: `/?category=${category.id}`})
      })
      setFilters(prevState => [...prevState, ...list])
    })
  },[])

  return (
    <nav className={classes.drawer}>
      <Drawer
        container={container}
        variant="temporary"
        anchor="right"
        open={props.open}
        onClose={(e) => props.onClose(e)}
        classes={{paper: classes.drawerPaper}}
        ModalProps={{keepMounted: true}}
      >
        <div
          onClose={(e) => props.onClose(e)}
          onKeyDown={(e) => props.onClose(e)}
        />
        <div>
          <div className={classes.searchField}>
            <TextInput
              fullWidth={false} label={"キーワードを入力"} multiline={false}
              onChange={inputKeyword} required={false} rows={1} value={keyword} type={"text"}
            />
            <IconButton>
              <SearchIcon/>
            </IconButton>
          </div>
          <Divider />
          <List>
            {menus.map(menu => (
              <ListItem button key={menu.id} onClick={(e)=>menu.func(e, menu.value)}>
                <ListItemIcon>
                  {menu.icon}
                </ListItemIcon>
                <ListItemText primary={menu.label}/>
              </ListItem>
            ))}
            <ListItem button key="logout" onClick={(e) => handleSignOut(e)}>
              <ListItemIcon>
                <ExitToAppIcon/>
              </ListItemIcon>
              <ListItemText primary={"Log out"} />
            </ListItem>
          </List>
          <Divider/>

          {*追記*}
          <List>
            {filters.map(filter => (
              <ListItem
                button
                key={filter.id}
                onClick={(e) => filter.func(e, filter.value)}
              >
                <ListItemText primary={filter.label} />
              </ListItem>
            ))}
          </List>
          {*追記ここまで*}

        </div>
      </Drawer>
    </nav>
  )
}

export default ClosableDrawer
カテゴリーをクリックすることで、URLに対してクエリーパラメータが付与されます。
import React,{useEffect} from "react";
import {ProductCard} from "../components/Products";
import {useDispatch, useSelector} from "react-redux";
import {fetchProducts} from "../reducks/products/operations"
import {getProducts} from "../reducks/products/selectors"

const ProductList = () => {
  const dispatch = useDispatch();
  const selector = useSelector((state) => state);
  const products = getProducts(selector);

  const query = selector.router.location.search;
  const gender = /^\?gender=/.test(query) ? query.split('?gender=')[1] : "";
  const category = /^\?category=/.test(query) ? query.split('?category=')[1] : "";

  useEffect (() => {
    dispatch(fetchProducts(gender,category))
  },[query]);

  return (
    .
    .
    .
  )
}

export default ProductList
selector.router.location.searchにより、現在のURLを取得します。
正規表現を用いて、?gender=, ?category=の値を取得し、商品情報をDBから取得する operations であるfetchProducts()へ渡しています。
.
.
.
export const fetchProducts = (gender,category) => {
  return async (dispatch) => {
    let query = productsRef.orderBy("updated_at","desc");
    query = (gender !== "") ? query.where("gender","==",gender) : query;
    query = (category !== "") ? query.where("category","==",category) : query;

    query.get()
      .then(snapshots => {
      const productList = []
      snapshots.forEach(snapshot => {
        const product = snapshot.data();
        productList.push(product)
      })

      dispatch(fetchProductsAction(productList));
      })
  }
}
.
.
.
whereを用いて、クエリパラメーターと一致するドキュメントのみを取得しています。
Firebase indexes(複合インデックス)の追加
さて、ここまででReact側の実装は終了していますが、試しに Drawerメニューから「メンズ」をクリックすると、以下のようなエラ-メッセージが、Chrome developer tool から確認されます。
「indexがありません。このURLから作れるよ」と書いてあります。
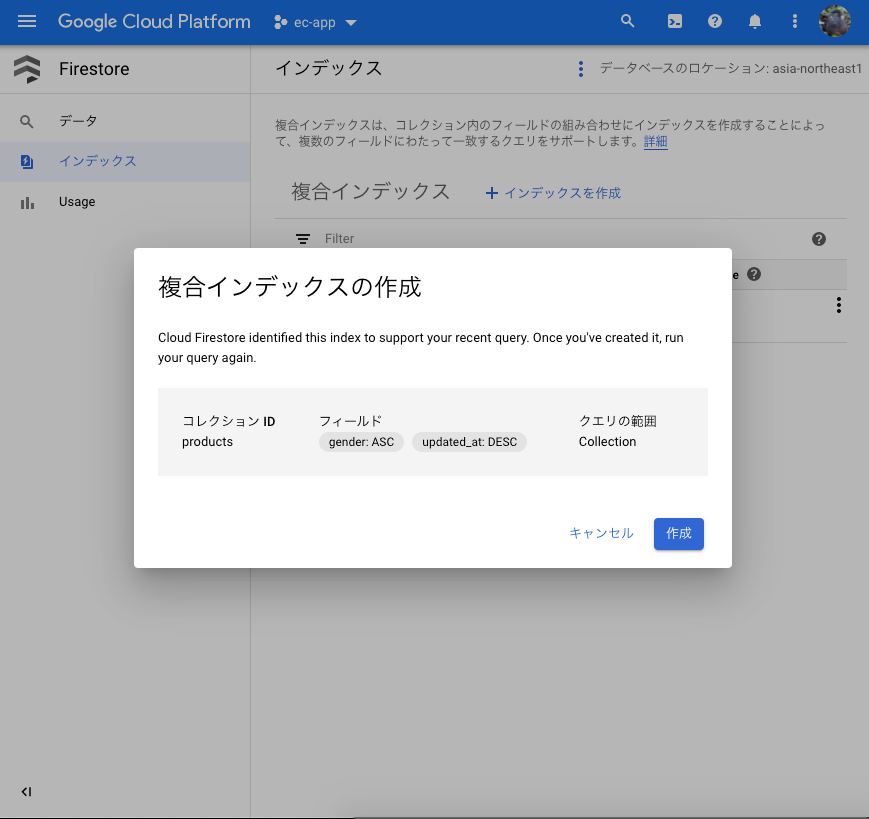
Firebase indexes(複合インデックス)とは、2つ以上の条件、ソートのクエリのパフォーマンスを向上されるための設定です。
今回の例で言うと、
- orderBy("updated_at","desc");
- query.where("gender","==",gender)
のところで、複数条件のソートクエリが発行されています(categoriesの方も同様です)。
さて、URLをクリックすると、Google Cloud Platformが開きます。
モーダルが開くので、そのまま「作成」をクリックすることで、複合インデックスを作成してくれます。作成が完了するまで、5~10分程度時間がかかります。
複合インデックスができた状態で、再度、「メンズ」で検索をすると、
無事、条件によるソートが実装できています!
さいごに
今回の要点をおさらいすると、
- Firebase Indexesで、複合クエリの条件検索を実装する。
以上で、本動画講座は全て完了です!お疲れ様でした!
これ以降は、運営者の有料コミュニティ『とらゼミ』(https://www.youtube.com/watch?v=tIzE7hUDbBM&t=1s)で公開とのことですので、興味のある方は覗いてみてください(私は関係者でもなんでも無いので、ステマではないですよ笑)。
このような学習内容を日々呟いていますので、よろしければTwitter(@ddpmntcpbr)のフォローもよろしくお願いします。
