はじめに
この記事は、Youtubeチャンネル『トラハックのエンジニア学習ゼミ【とらゼミ】』の『日本一わかりやすいReact-Redux講座 実践編』の学習備忘録です。
ここから、いよいよ本格的にアプリを開発していきます。
前回記事はこちら。
要点
- 商品登録ページを作成(CRUDのC)
- 商品登録用関数
saveProduct()を定義 - Cloud Firestoreへのデータ保存では、
doc/set/addメソッドを使用する。
#4 Firestoreにデータをadd/setしよう
おさらいですが、今回の開発アプリのデータ設計は以下の通りでした。
1. categoriesコレクション
2. productsコレクション
3. usersコレクション
  ├── 3-1. cartサブコレクション
  └── 3-2. ordersサブコレクション
これらのうち、2. productsコレクションについては、以下の通りのCRUD機能を実装します。
- Create: 商品情報の追加
- Read: 商品情報の読み込み
- Update: 商品情報の更新
- Delete: 商品情報の削除
本講座では、Create: 商品情報の追加に対応するページを作っていきます。
商品登録ページのテンプレートを作成
まず、Viewから作成します。
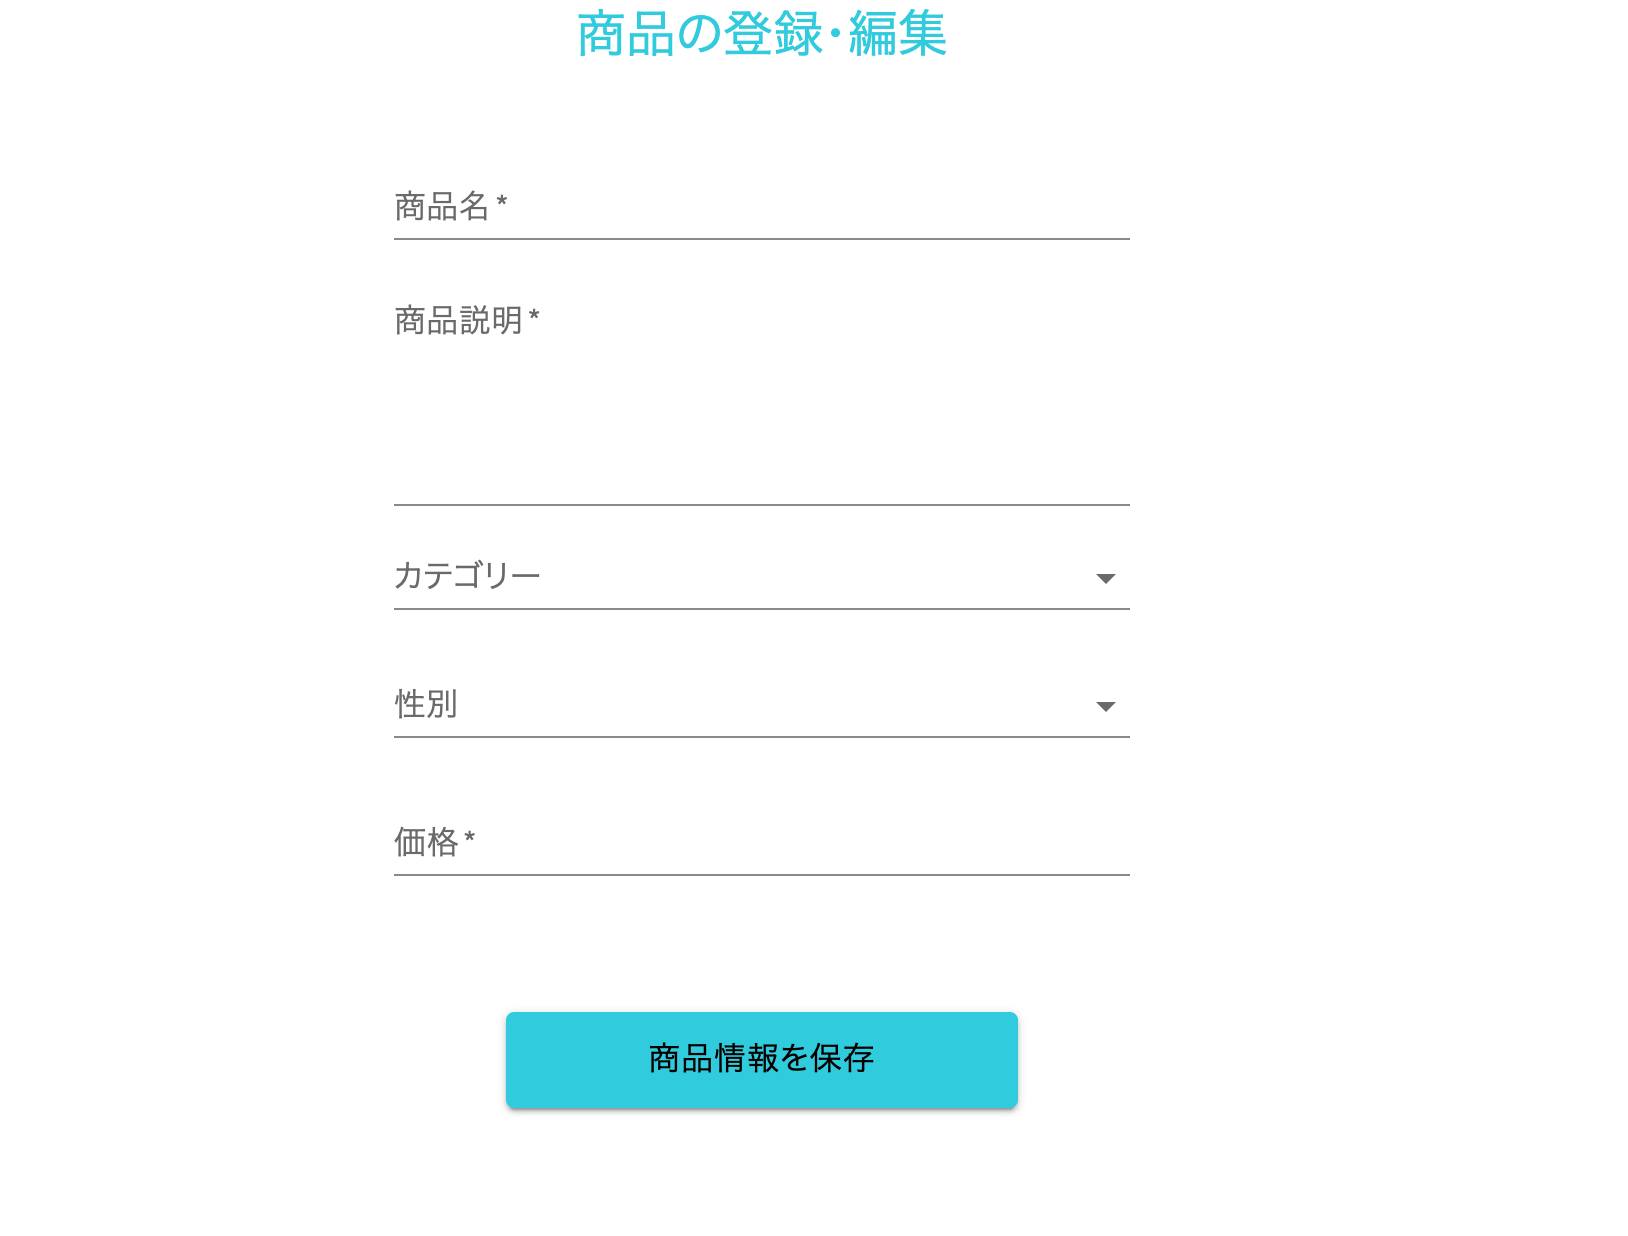
先に実装画面を見せると、こんな感じになります。
店舗商品として登録する商品の情報をフォームに入力し、「商品情報を保存」をクリックすることで、DBに商品情報をが登録(CRUDのC)される流れです。
入力フォームの内、「商品名」「商品説明」「価格」に関しては、すでに定義済みのUIコンポーネントであるTextInput.jsxで実装できそうです。
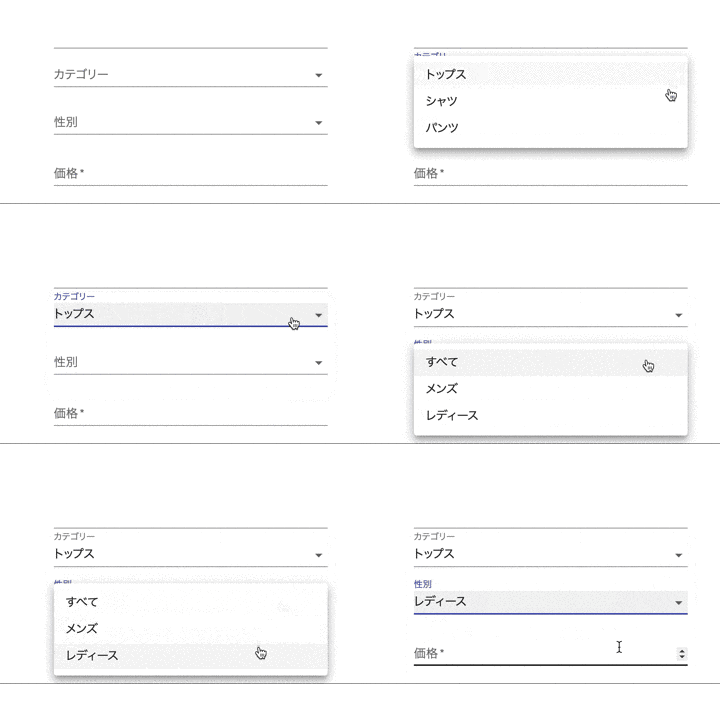
対して、「カテゴリー」「性別」については、いくつかの選択肢から入力値を決めるセレクトボックス形式の入力フォームとして実装すべきです。
こちらに関してはTextInput.jsxでは実装できなさそうなので、新たにSelectBox.jsxというコンポーネントを定義することにします。
1. src/components/UIkit/SelectBox.jsx
2. src/components/UIkit/index.js
import React from "react";
import InputLabel from "@material-ui/core/InputLabel";
import MenuItem from "@material-ui/core/MenuItem";
import FormControl from "@material-ui/core/FormControl";
import Select from "@material-ui/core/Select";
import {makeStyles} from "@material-ui/styles"

const useStyles = makeStyles({
  formControl:{
    marginBottom: 16,
    minWidth: 128,
    width: "100%"
  }
})

const SelectBox = (props) => {
  const classes = useStyles();

  return (
    <FormControl className={classes.formControl}>
      <InputLabel>{props.label}</InputLabel>
      <Select
        required={props.required} value={props.value}
        onChange={(event) => props.select(event.target.value)}
      >
        {props.options.map((option) => (
          <MenuItem key={option.id} value={option.id}>{option.name}</MenuItem>
        ))}
      </Select>
    </FormControl>
  )
}

export default SelectBox
- Material UI の
FormControl,InputLabel,MenuItem,Selectを組み合わせて実装。 -
props.optionsとして親コンポーンネントから渡されたものをmapメソッドで展開することで、リストを実現している。
export {default as PrimaryButton} from "./PrimaryButton"
export {default as SelectBox} from "./SelectBox" //追記
export {default as TextInput} from "./TextInput"
これでSelectBoxコンポーネントが完成しました。
これを踏まえて、商品登録ページのViewを作成します。
1. src/templates/ProductEdit.jsx //テンプレートファイル
2. src/components/src/templates/index.js //エントリーポイント
3. src/components/src/Router.jsx //ProductEditテンプレートのルーティングを定義
import React,{useState,useCallback} from "react";
import {PrimaryButton,SelectBox,TextInput} from "../components/UIkit";

const ProductEdit = () => {

  const [name, setName] = useState(""),
        [description, setDescription] = useState(""),
        [category, setCategory] = useState(""),
        [gender, setGender] = useState(""),
        [price, setPrice] = useState("");

  const inputName = useCallback((event) => {
    setName(event.target.value)
  },[setName])

  const inputDescription = useCallback((event) => {
    setDescription(event.target.value)
  },[setDescription])

  const inputPrice = useCallback((event) => {
    setPrice(event.target.value)
  },[setPrice])

  const categories = [
    {id:"tops", name:"トップス"},
    {id:"shirt", name:"シャツ"},
    {id:"pants", name:"パンツ"}

  ]
  const genders = [
    {id:"all", name:"すべて"},
    {id:"male", name:"メンズ"},
    {id:"female", name:"レディース"}
  ]

  return (
    <section>
      <h2 className="u-text__headline u-text-center">商品の登録・編集</h2>
      <div className="c-section-container">
        <TextInput
          fullWidth={true} label={"商品名"} multiline={false} required={true}
          onChange={inputName} rows={1} value={name} type={"text"}
          />
        <TextInput
          fullWidth={true} label={"商品説明"} multiline={true} required={true}
          onChange={inputDescription} rows={5} value={description} type={"text"}
          />
        <SelectBox
          label={"カテゴリー"} required={true} options={categories} select={setCategory}
        />
        <SelectBox
          label={"性別"} required={true} options={genders} select={setGender}
        />
        <TextInput
          fullWidth={true} label={"価格"} multiline={false} required={true}
          onChange={inputPrice} rows={1} value={price} type={"number"}
          />
      </div>
      <div className="module-spacer--medium" />
      <div className="center">
        <PrimaryButton
          label={"商品情報を保存"}
          onClick={() => {console.log('Clicked!')}}
        />
      </div>
    </section>
  )
}

export default ProductEdit
- name, description, price に関してはこれまで通り、
<TextInput>を利用して実装 - category, gender については、
<SelectBox>で実装。選択肢は定数として定義。 - 「商品情報を登録」ボタンの onClick イベントには、ダミーとして
console.log('Clicked!')を設置
export {default as Home} from './Home'
export {default as ProductEdit} from './ProductEdit' //追記
export {default as Reset} from './Reset'
export {default as SignIn} from './SignIn'
export {default as SignUp} from './SignUp'
import React from 'react';
import {Route, Switch} from "react-router";
import {Home,ProductEdit,Reset,SignIn,SignUp} from "./templates";
import Auth from "./Auth"

const Router = () => {
  return (
    <Switch>
      <Route exact path={"/signup"} component={SignUp} />
      <Route exact path={"/signin"} component={SignIn} />
      <Route exact path={"/signin/reset"} component={Reset} />

      <Auth>
        <Route exact path={"(/)?"} component={Home} />
        <Route exact path={"/product/edit"} component={ProductEdit} /> //追記
      </Auth>
    </Switch>
  );
};

export default Router
-
(/product/edit)をルーティング。 - 認証ユーザー(特に店舗側のユーザー)しか利用できないようにしたいので、
<Auth>でラッピングする。
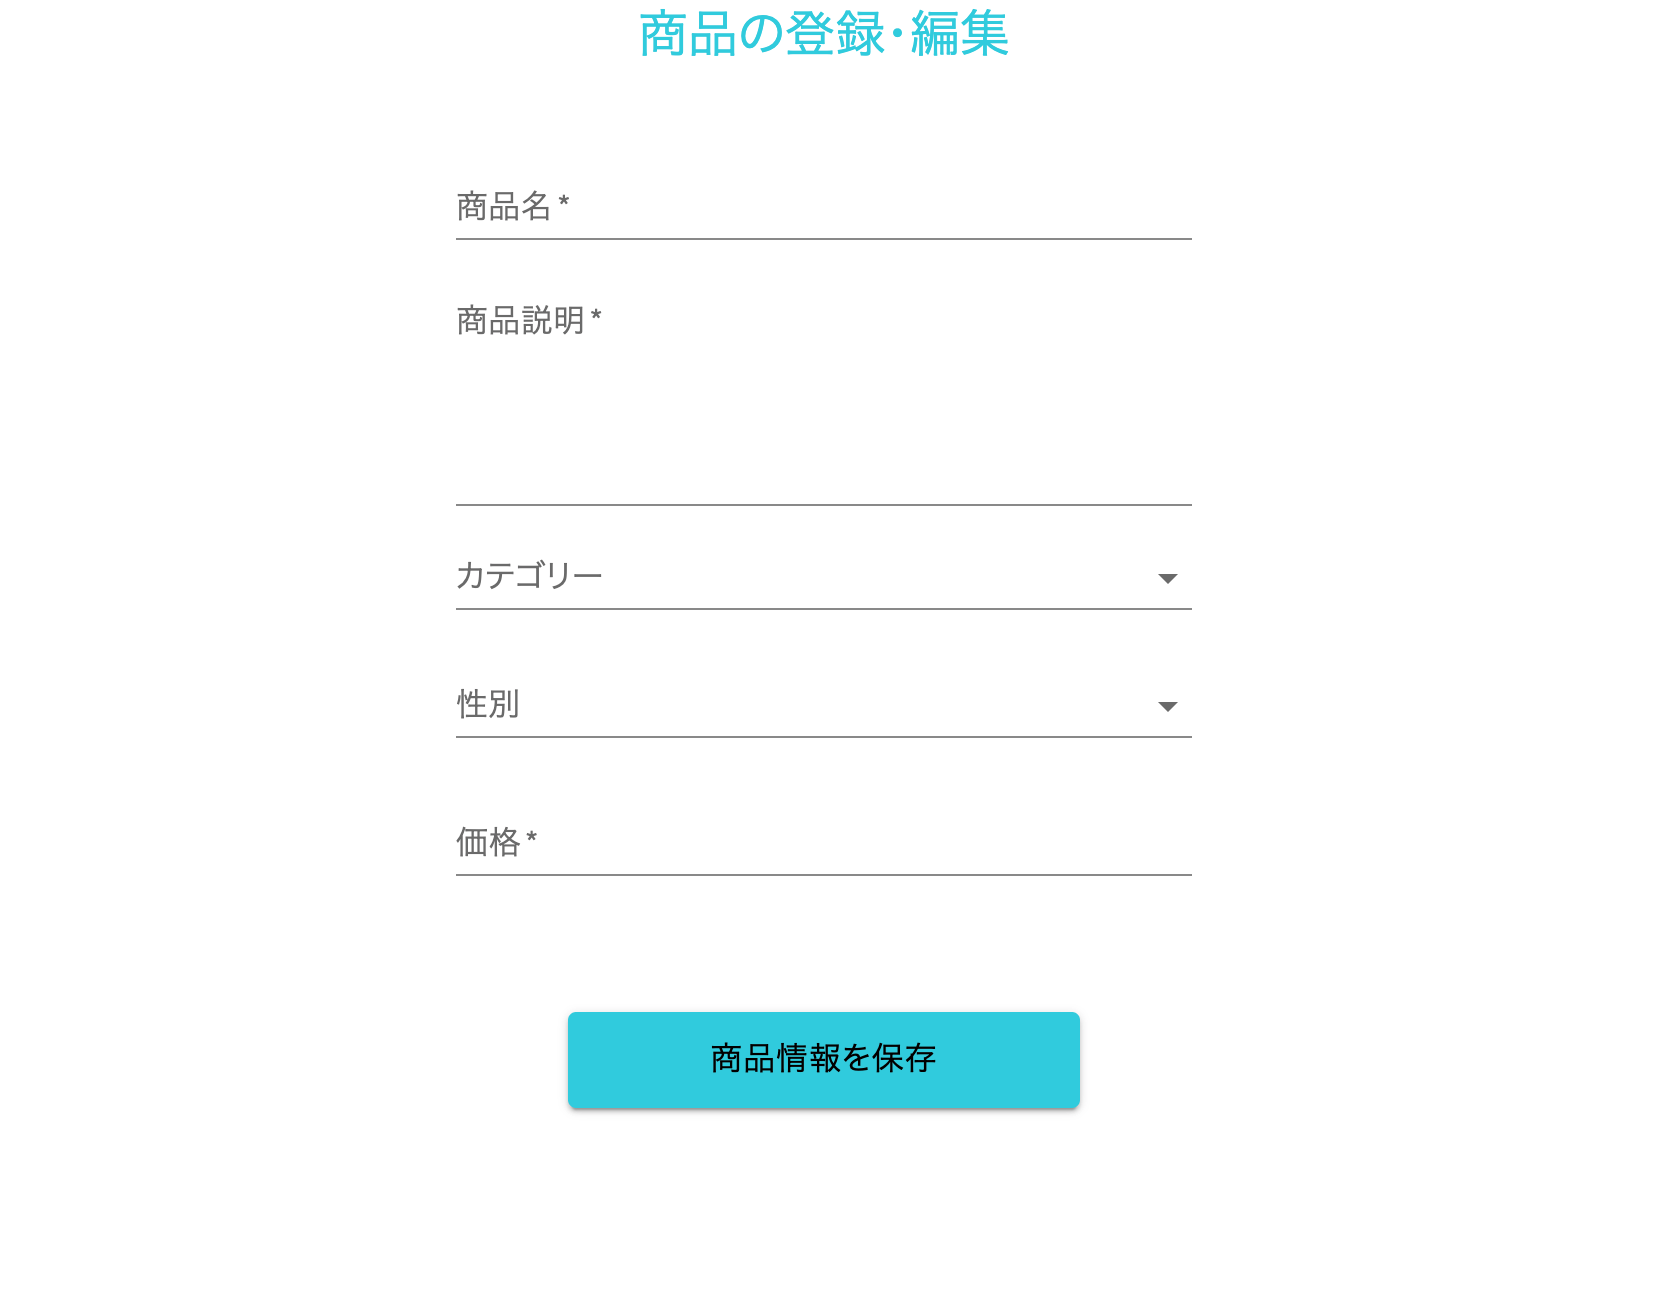
以上でViewの実装は完了です。動作確認します。
http://localhost:3000/product/edit
いい感じにできています!また、「商品情報を保存」をクリックすると、デベロッパーツールにコンソールにClicked!が表示されます。
saveProduct関数の実装
products state の追加
「商品情報を保存」ボタンの中身を作っていきます。
入力したフォームを受け取り、DBに保存する関数を定義すればよさそうです。
reducksパターンに則って考えると、この関数はproductsカテゴリーに関するものになるため、src/reducks/products/operations.jsに記述するべき、と分かります。
しかし、現時点のreducksパターンにおいて、productsという state を管理するファイルは未定義です。
というわけで、 products という新しい state を管理するためのReduxファイルを、reducksパターンに則って作りましょう。
必要な初期設定は以下の通りです。
1. src/reducks 直下に products ディレクトリを作成
2. src/reducks/products 直下に actions.js, operations.js, reducers.js, selectors.js, (type.js) を作成
3. src/reducks/store/initialState.js で、products の初期値を定義
4. src/reducks/products/reducers.js で ProductsReducers を定義
5. src/reducks/store/store.js で ProductsReducers を読み込む
const initialState = {
  products: {
    list: []
  },
.
.
.
};

export default initialState
import initialState from '../store/initialState'

export const ProductsReducer = (state = initialState.products, action) => {
  switch (action.type) {
    default:
      return state
  }
}
.
.
.
import {ProductsReducer} from "../products/reducers"; //追記
.
.
.

export default function createStore(history) {
  return reduxCreateStore(
    combineReducers({
      router: connectRouter(history),
      users: UsersReducer,
      products:ProductsReducer //追記
    }),
.
.
.
  )
}
これで、 products state が Redux の Store と接続されました。
actions.js, operations.js, selectors.jsは、ひとまず空白ファイルとして保存しておきます。
saveProduct()関数の実装
reducksパターンによる関数実装をおさらいすると、
1. コンポーネントファイル
2. operations.js
3. actions.js
4. reducers.js
でした。
ただし、今回は「入力テキストを state として受け取って画面描画」などはしませんので、3. actions.js, 4. reducers.jsはいったんノータッチです。
.
.
.
      <div className="center">
        <PrimaryButton
          label={"商品情報を保存"}
          // onClick={() => {console.log('Clicked!')}}
          onClick={() => dispatch(saveProduct(name, description, category, gender, price))}
        />
      </div>
.
.
.
PrimaryButtonのonClickイベントに、saveProduct関数を設定します。
saveProductはoperationsで定義するものなので、dispatchを噛ませる必要があります。
import {db, FirebaseTimestamp} from "../../firebase";
import { push } from "connected-react-router";

const productsRef = db.collection("products")

export const saveProduct = (name,description,category,gender,price) => {
  return async (dispatch) => {
    const timestamp = FirebaseTimestamp.now()

    const data = {
      category: category,
      description: description,
      gender: gender,
      name: name,
      price: parseInt(price, 10),
      updated_at: timestamp
    }

    const ref = productsRef.doc();
    const id = ref.id;
    data.id = id
    data.created_at = timestamp

    return productsRef.doc(id).set(data)
      .then(() => {
        dispatch(push('/'))
      }).catch((error) => {
        throw new Error(error)
      })
  }
}
saveProduct関数を定義します。
- 外部DBと通信を行う処理のため、
return async (dispatch) => {...。 - 引数は文字列として渡ってくるため、
parseInt(price, 10),で十進数のint型数値へ変換。 -
set()メソッドを使うことで、Cloud firestore にデータを保存。
※ add/set/docメソッドの役割
DB(Cloud firestore) にデータを保存するとき、
(1) DB内で、データを保存するための場所(=ID)を自動で採番する
(2) そのIDの場所にデータを保存する
という流れで処理が行われる。
このとき、
- (1)を行う: **
doc()**メソッド - (2)を行う: **
set()**メソッド - (1)(2)を一気に行う: **
add()**メソッド
という役割のメソッドが存在する。doc()+set()=**add()**と考えると分かりやすい。そのため、
const data = {...}
const ref = db.collection("products").doc();
const id = ref.id;

return db.collection("products").doc(id).set(data)
これと、
const data = {...}

return db.collection("products").add(data)
これは最終的な結果は同じになる。
単純にデータを保存したいだけであれば**add()の方で問題ないが、今回のアプリでは「自動採番されたIDをフィールド値として保存したい」ため、doc()+set()で処理を行っている。
(**add()**を使用すると、IDの自動採番と同時にデータの保存処理が行われるので、IDをデータ内部に取り込む処理が行えない)
先のoperations.jsのうち、
.
.
.
    const ref = productsRef.doc();
    const id = ref.id;
    data.id = id
.
.
.
の箇所で、自動採番されたIDをdataの中に追加している。
動作確認
saveProduct()の動作確認をしてみます。
http://localhost:3000/product/edit
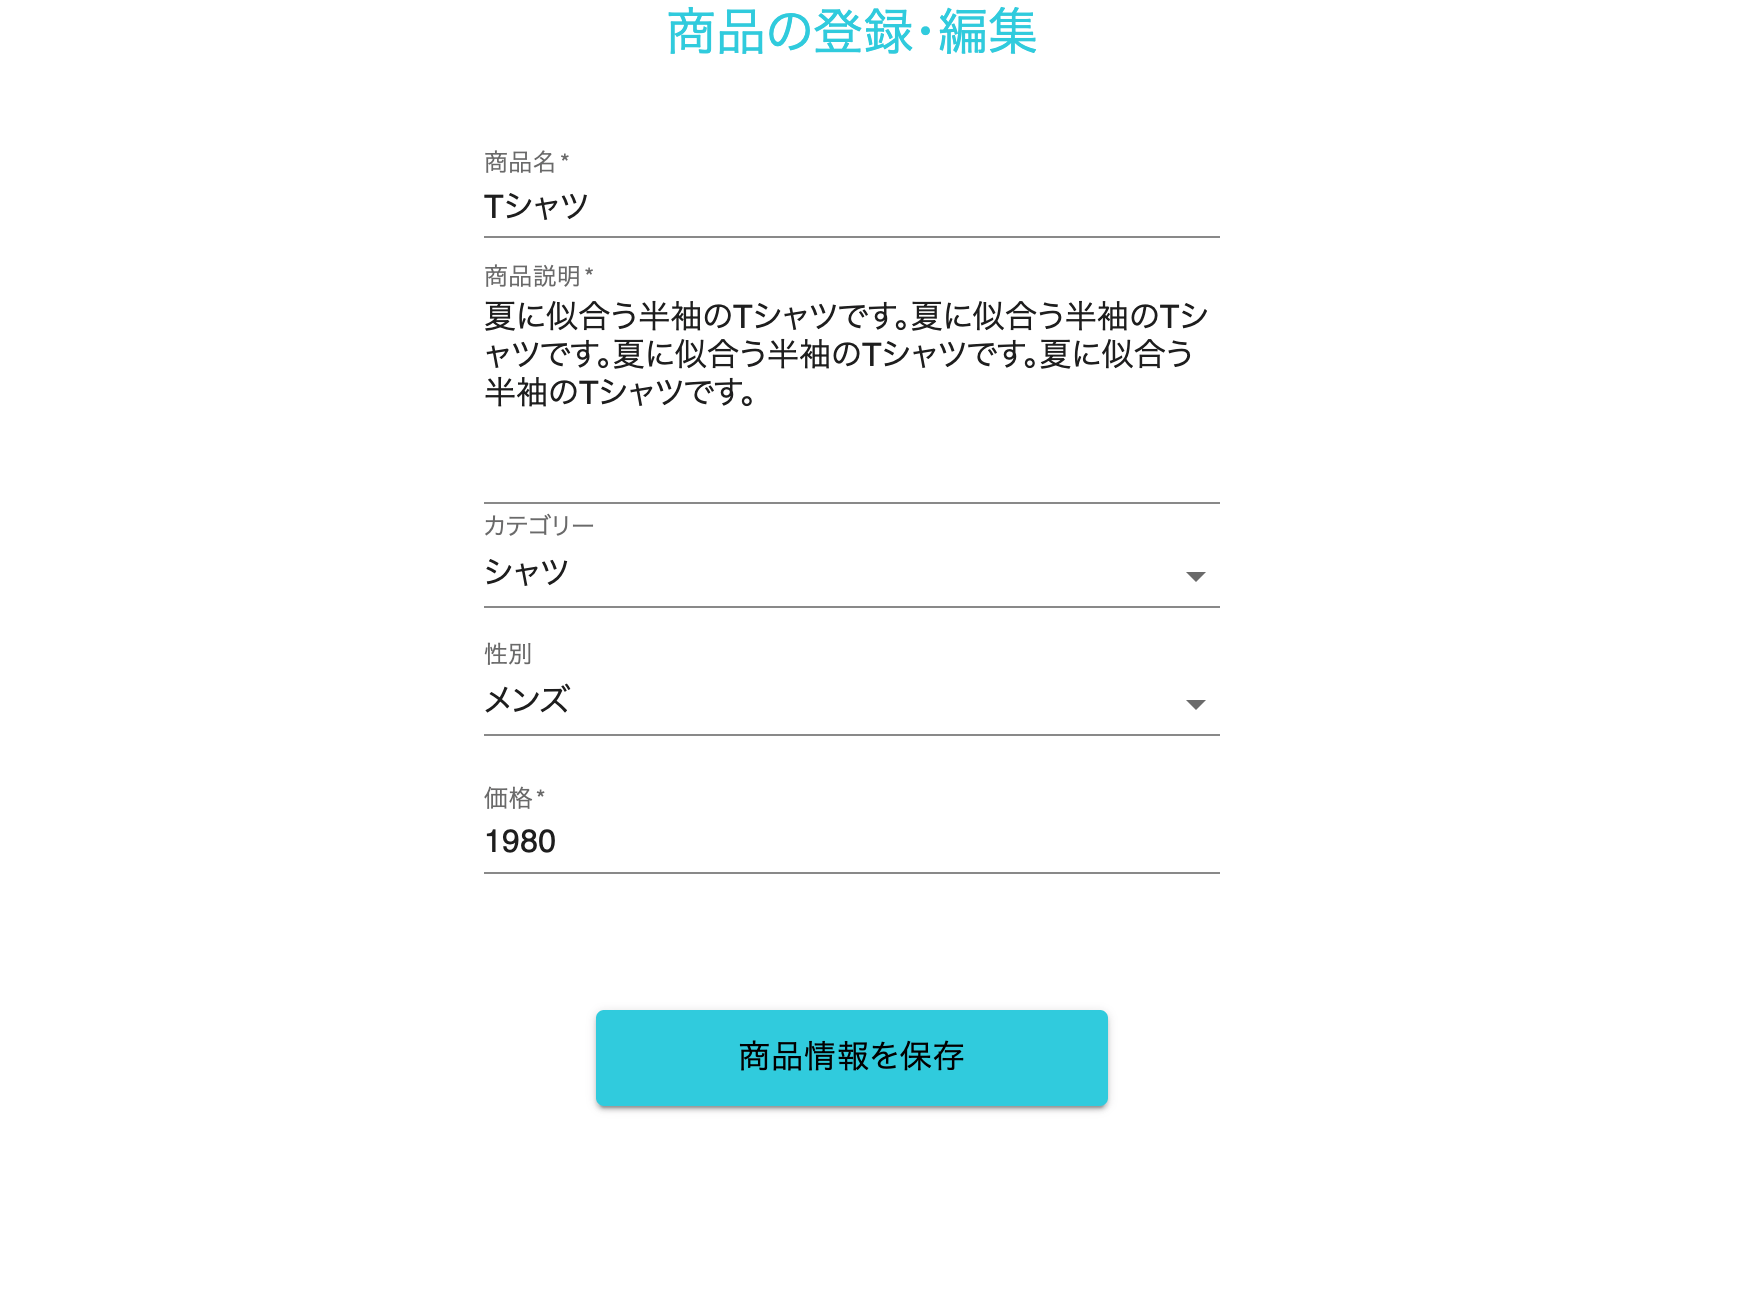
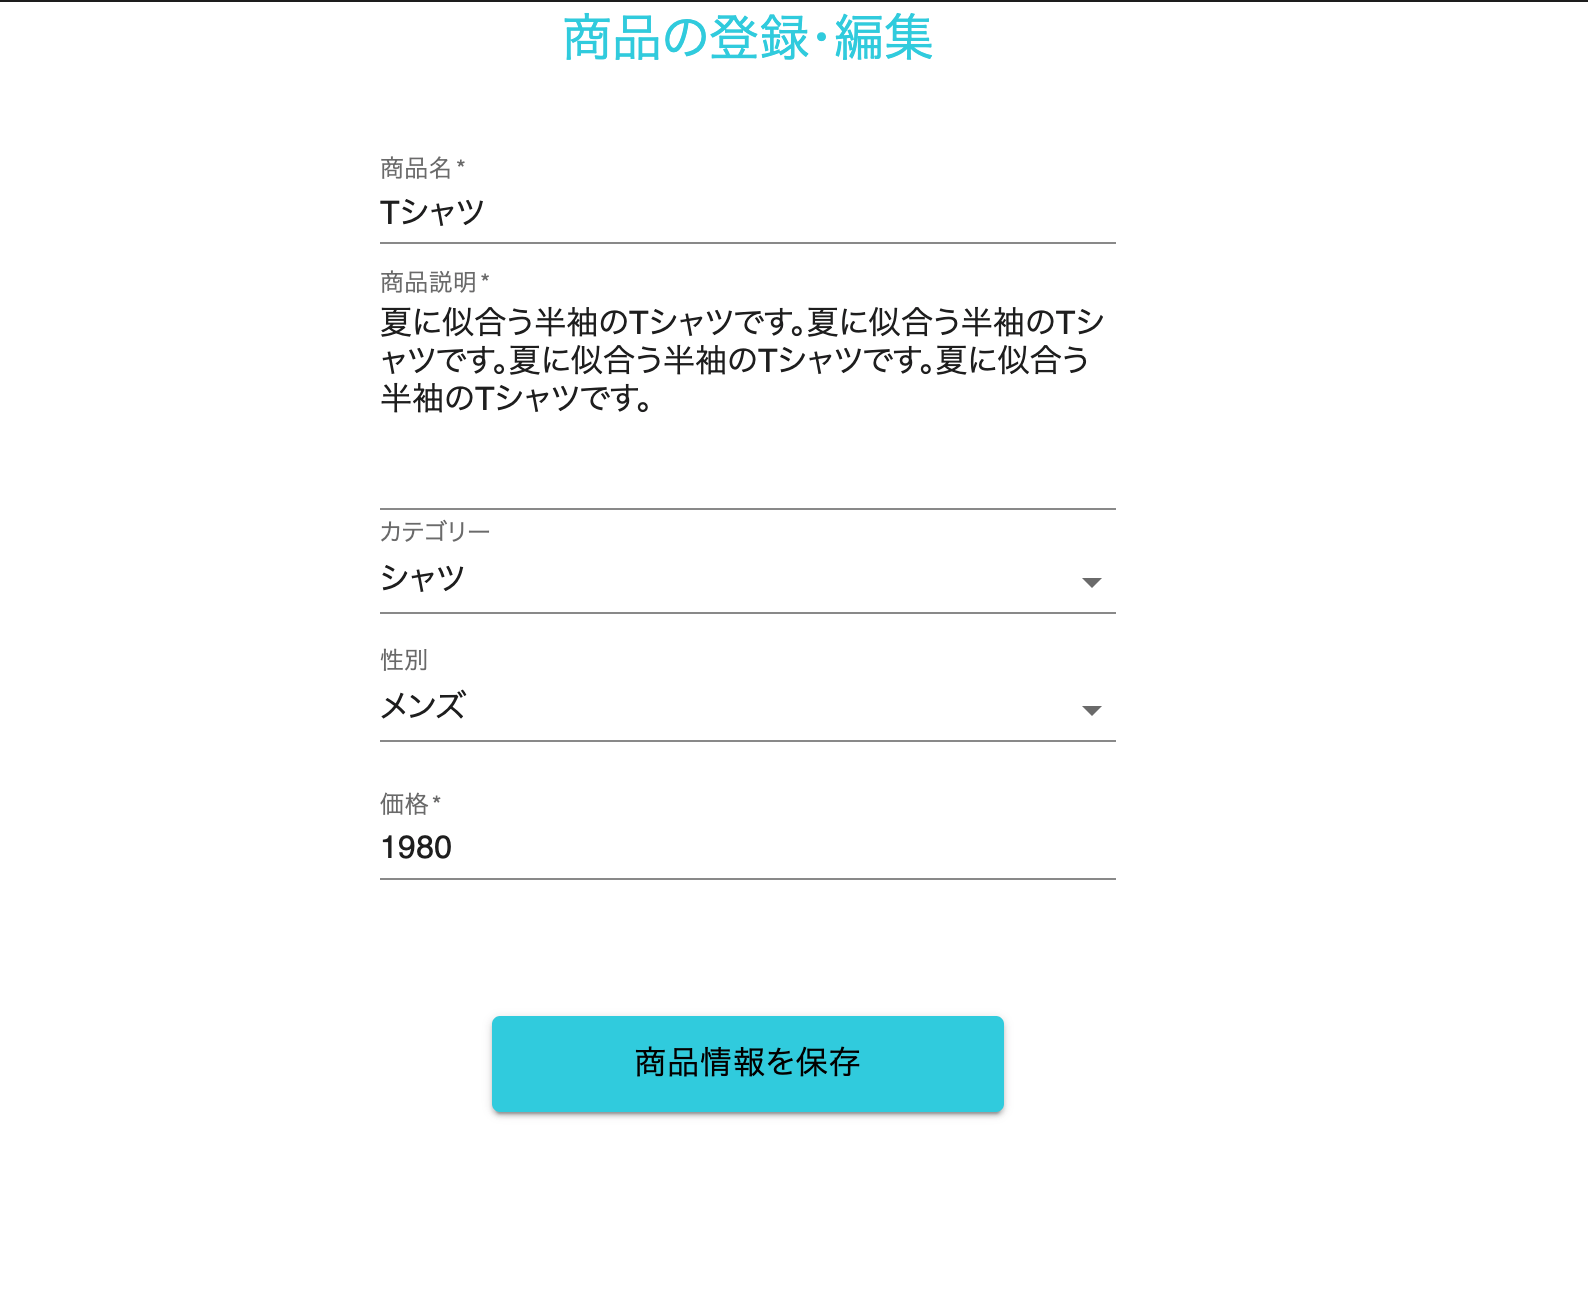
入力フォームにテキストを入れて、「商品情報を保存」をクリックします。
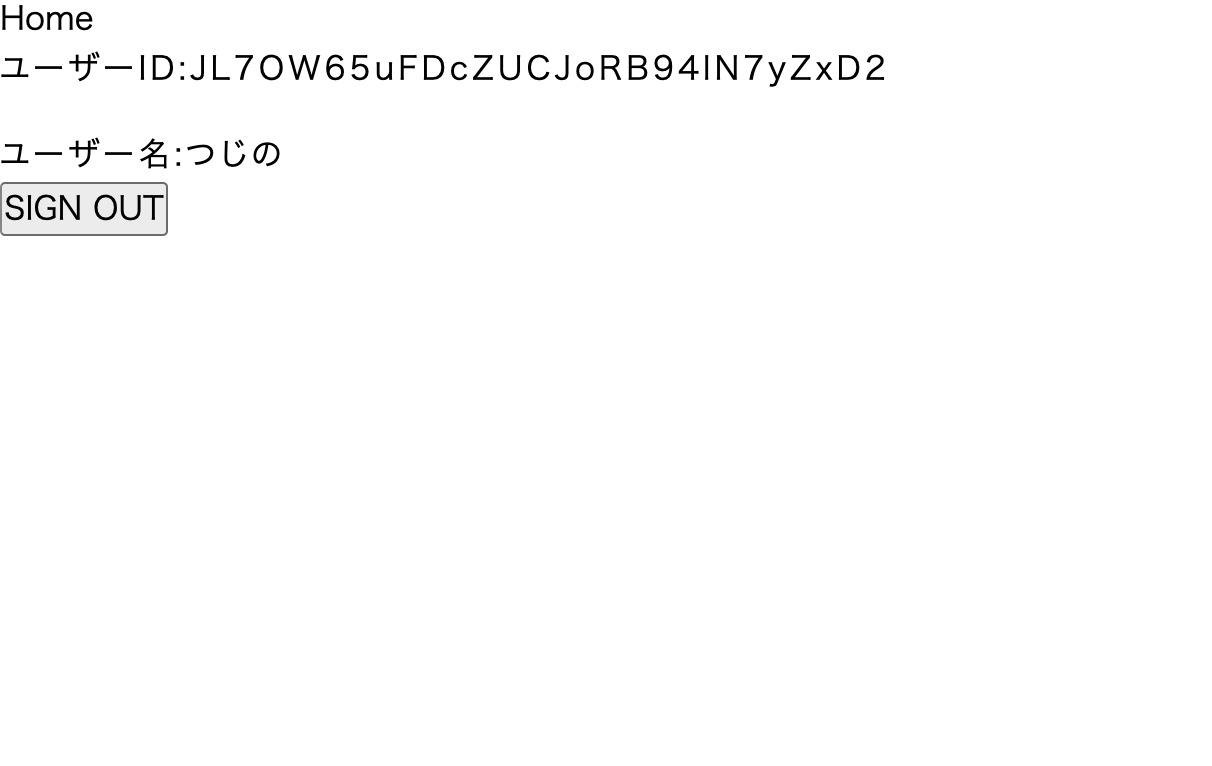
saveProduct()が正常に動作すれば、ルートへリダイレクトします。
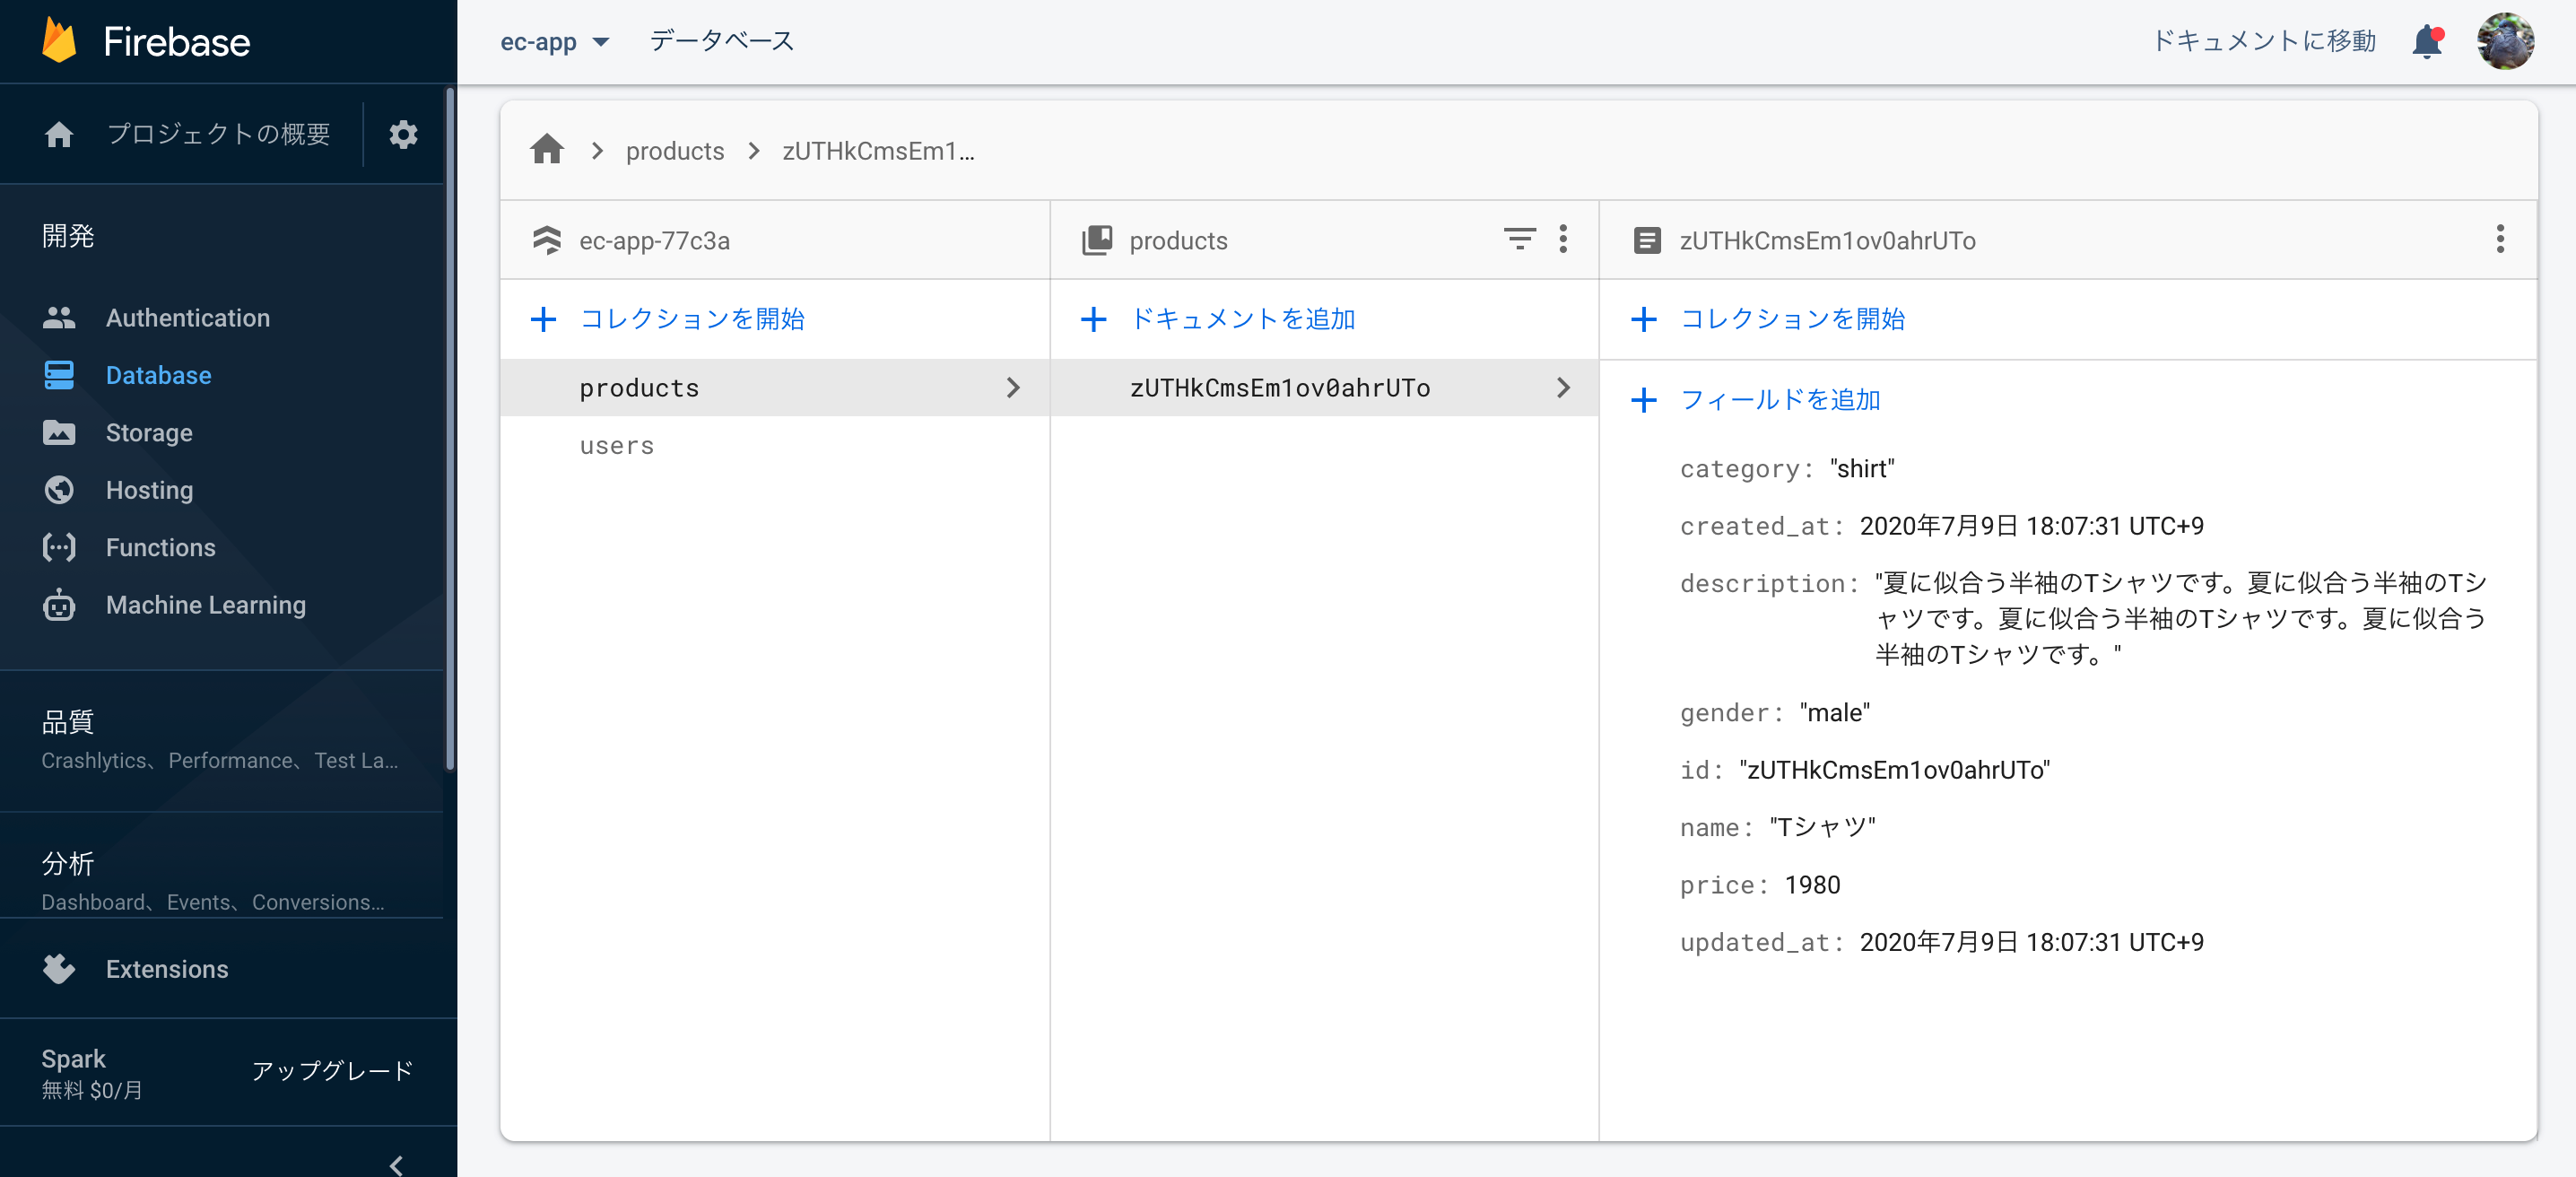
実際にデータが保存されたのか、Firebaseコンソールから確認します。
先ほどの入力テキストが保存されています!
入力値に加え、Cloud Firestore上で自動採番されたID(zUTHkCmsEm1ov0ahrUTo)が、idカラムとして保存されていることも確認できます!
まとめ
本講座の要点をまとめると、
- 商品登録ページを作成(CRUDのC)
- 商品登録用関数
saveProduct()を定義 - Cloud Firestoreへのデータ保存では、
doc/set/addメソッドを使用する。
