NSLayoutAnchor
SwiftでStoryboard上ではなく、コードでAuto Layoutしたい時があると思います。
今回はiOS 9で追加されたAuto Layoutのクラスである、NSLayoutAnchorを使って
コードのみでAuto Layoutを書いてみます。
NSLayoutAnchorを使う事前準備
設定位置の取得方法を載せて起きます。
| プロパティ名 | 位置 |
|---|---|
| leadingAnchor | 左端 |
| trailingAnchor | 右端 |
| topAnchor | 上端 |
| bottomAnchor | 下端 |
| centerYAnchor | オブジェクトのY座標軸の中心 |
| centerXAnchor | オブジェクトのX座標軸の中心 |
| widthAnchor | オブジェクトの横幅 |
| heightAnchor | オブジェクトの縦幅 |
では早速、NSLayoutAnchorを使った例を紹介します。
let leadingConstraint = redView.topAnchor.constraint(equalTo:self.view.topAnchor, constant: 50.0).isActive = true
上記は
redViewの左端は、親ビューの上端から50ptの位置であるという制約です。
redView.translatesAutoresizingMaskIntoConstraints = false
生成したビューのプロパティにtranslatesAutoresizingMaskIntoConstraintsというものがあり、これをオフにする必要があります。
このプロパティはAuto Layout以前に使われていた、AutoresizingMaskという仕組みで、ビューの動的なサイズ変更を実現していました。
これをAuto Layoutに変換するかどうかを設定するフラグです。
このtranslatesAutoresizingMaskIntoConstraintsは、AutoresizingMaskの設定値を
Auto Layoutの制約に変換するかどうかを決めるものです。
デフォルトではtrueになっていて、これをtrueにすると、自分で追加する制約とコンフリクトしてしまうので、特に理由がなければ上記のようにfalseにしておく方がいいです。
NSLayoutAnchorを使ってみる
試しに縦横中央でサイズも親ビューの半分のUIViewを作ってみます。
import UIKit

class ViewController: UIViewController {

    override func viewDidLoad() {
        super.viewDidLoad()

        let redView = UIView()
        redView.backgroundColor = UIColor.red
        redView.frame = view.frame
        redView.translatesAutoresizingMaskIntoConstraints = false
        view.addSubview(redView)

        // redViewの横方向の中心は、親ビューの横方向の中心と同じ
        redView.centerXAnchor.constraint(equalTo: self.view.centerXAnchor).isActive = true
        // redViewの縦方向の中心は、親ビューの縦方向の中心と同じ
        redView.centerYAnchor.constraint(equalTo: self.view.centerYAnchor).isActive = true
        // redViewの幅は、親ビューの幅の1/2
        redView.widthAnchor.constraint(equalTo: self.view.widthAnchor, multiplier: 0.5).isActive = true
        // redViewの親ビューの幅の1/2
        redView.heightAnchor.constraint(equalTo: self.view.heightAnchor, multiplier: 0.5).isActive = true
    }

    override func didReceiveMemoryWarning() {
        super.didReceiveMemoryWarning()
        // Dispose of any resources that can be recreated.
    }

}
結果

※注意点
制約をかけたいviewを追加した後に行う必要があるので
addSubViewしたあとにconstraintの設定をする
まとめ
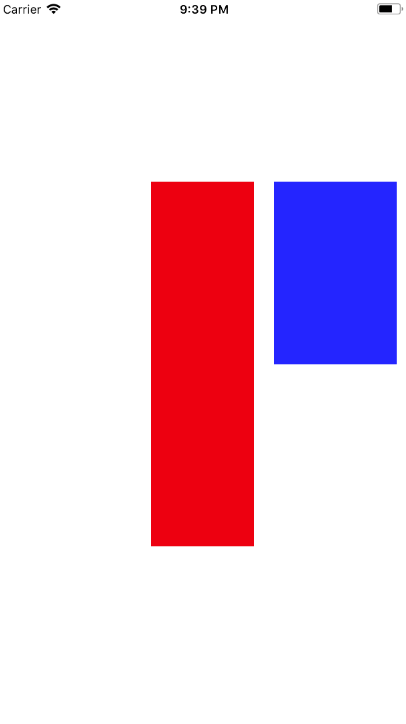
NSLayoutAnchorのまとめとして、簡単なサンプルを載せておきます。
import UIKit

class ViewController: UIViewController {

    override func viewDidLoad() {
        super.viewDidLoad()

        let redView = UIView()
        redView.backgroundColor = UIColor.red
        redView.frame = view.frame
        redView.translatesAutoresizingMaskIntoConstraints = false
        view.addSubview(redView)

        let blueView = UIView()
        blueView.backgroundColor = UIColor.blue
        blueView.translatesAutoresizingMaskIntoConstraints = false
        view.addSubview(blueView)

        // redViewの横方向の中心は、親ビューの横方向の中心と同じ
        redView.centerXAnchor.constraint(equalTo: self.view.centerXAnchor).isActive = true
        // redViewの縦方向の中心は、親ビューの縦方向の中心と同じ
        redView.centerYAnchor.constraint(equalTo: self.view.centerYAnchor).isActive = true
        // redViewの幅は、親ビューの幅の1/2
        redView.widthAnchor.constraint(equalTo: self.view.widthAnchor, multiplier: 0.25).isActive = true
        // redViewの高さは親ビューの高さの1/2
        redView.heightAnchor.constraint(equalTo: self.view.heightAnchor, multiplier: 0.5).isActive = true

        // blueViewの左端は、redViewの右端から20ptの位置
        blueView.leadingAnchor.constraint(equalTo: redView.trailingAnchor, constant: 20.0).isActive = true
        // blueViewの上端は、redViewの上端と同じ位置
        blueView.topAnchor.constraint(equalTo: redView.topAnchor).isActive = true
        // blueViewの幅は、redViewの幅と同じで20pt加えた大きさ
        blueView.widthAnchor.constraint(equalTo: redView.widthAnchor, multiplier: 1, constant: 20.0).isActive = true
        // blueViewの高さは、redViewの高さの半分
        blueView.heightAnchor.constraint(equalTo: redView.heightAnchor, multiplier: 0.5).isActive = true

    }

    override func didReceiveMemoryWarning() {
        super.didReceiveMemoryWarning()
        // Dispose of any resources that can be recreated.
    }


}
