はじめに
今回、自動スクロール(auto scroll)機能を実装する機会があったので、その方法を備忘録として残しておきます。
実装
調べてみたところ、Timerを使って一定時間ごとにスクロール(OffSetやIndexPathなどを変更)させていく、という方法があるようだったので、その方針でやってみました。
今回はUIScrollViewを継承したUICollectionViewとUITableViewを自動スクロールさせてみました。
UICollectionView
まずは自動スクロール動作を管理するTimer型の変数を定義します。
private var autoScrollTimer = Timer()
自動スクロールを開始・停止するメソッドを用意します。UICollectionViewは一定時間ごとに表示IndexPathを変更して、左右に自動スクロールさせています。
// 自動スクロールを開始する
    private func startAutoScroll(duration: TimeInterval, direction: ScrollDirectionType) {
        // 表示中のIndexPathを取得
        var indexPath = collectionView.indexPathsForVisibleItems.sorted { $0.item < $1.item }.first ?? IndexPath(item: 0, section: 0)
        // 最初のItem
        let firstItem = IndexPath(item: 0, section: 0)
        // 最後のItem
        let lastItem = IndexPath(item: collectionView.numberOfItems(inSection: 0) - 1, section: 0)
        // 自動スクロールを終了させるかどうか
        var shouldFinish = false
        autoScrollTimer = Timer.scheduledTimer(withTimeInterval: duration, repeats: true, block: { [weak self] (_) in
            guard let self = self else { return }
            // item2つ分ずつスクロールさせる
            switch direction {
            case .left:
                indexPath = (indexPath.item + 2 >= self.collectionView.numberOfItems(inSection: 0)) ? lastItem : IndexPath(item: indexPath.item + 2, section: 0)
                shouldFinish = indexPath.item == lastItem.item
            case .right:
                indexPath = (indexPath.item - 2 <= 0) ? firstItem : IndexPath(item: indexPath.item - 2, section: 0)
                shouldFinish = indexPath.item == firstItem.item
            default: break
            }
            DispatchQueue.main.async {
                self.collectionView.scrollToItem(at: indexPath, at: .left, animated: true)
                if shouldFinish { self.stopAutoScrollIfNeeded() }
            }
        })
    }

    // 自動スクロールを停止する
    private func stopAutoScrollIfNeeded() {
        if autoScrollTimer.isValid {
            view.layer.removeAllAnimations()
            autoScrollTimer.invalidate()
        }
    }

~~~ 省略

enum ScrollDirectionType {
    case upper, under, left, right
}
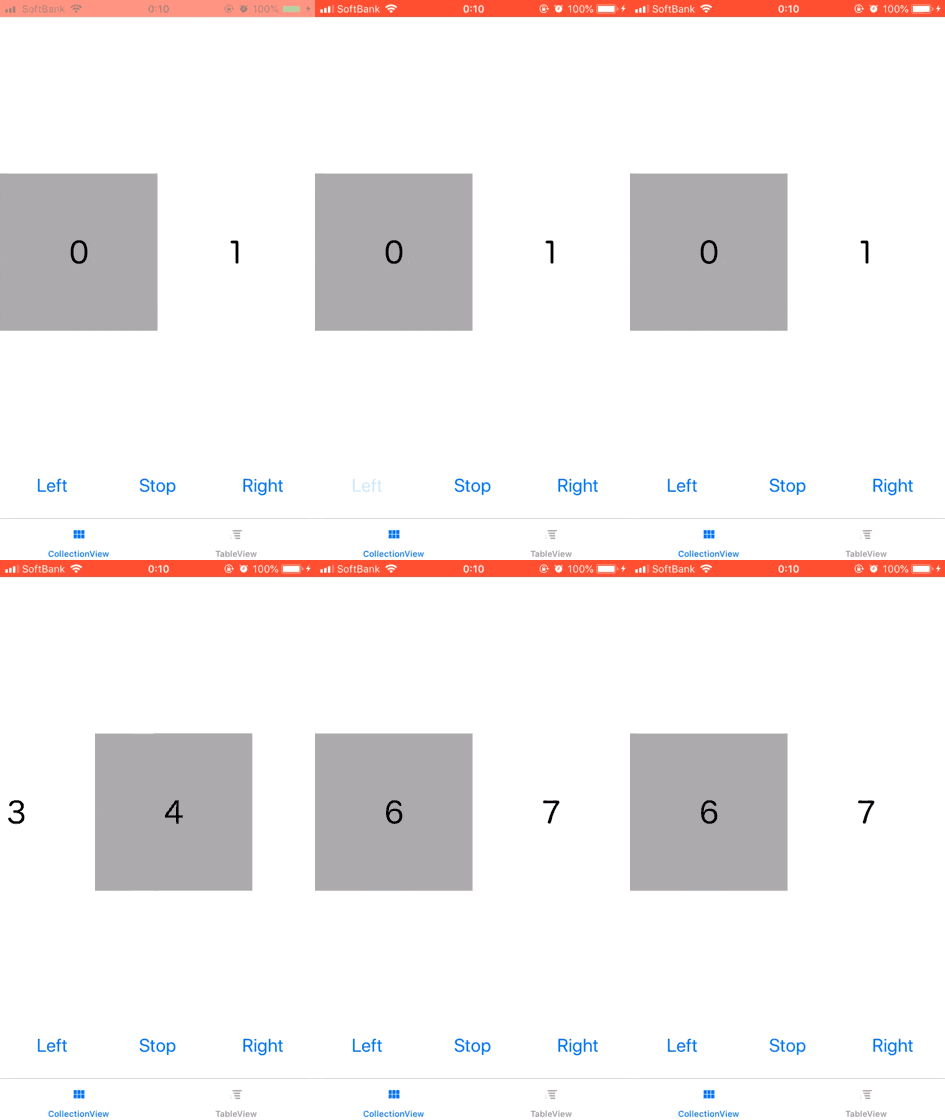
今回はボタンタップによって自動スクロールの開始・停止を行ってみます。自動スクロールの間隔は1秒としています。
@IBAction func didTapLeft(_ sender: UIButton) {
        startAutoScroll(duration: 1.0, direction: .left)
    }

@IBAction func didTapStop(_ sender: UIButton) {
        stopAutoScrollIfNeeded()
    }
動作結果

UITableView
CollectionViewの場合と同様に、Timer型の変数を定義します。
private var autoScrollTimer = Timer()
自動スクロールを開始・停止するメソッドを用意します。UITableViewは一定時間ごとにContentOffsetを変更して、上下に自動スクロールさせています。
    // 自動スクロールを開始する
    private func startAutoScroll(duration: TimeInterval, direction: ScrollDirectionType) {
        // 表示されているTableViewのOffsetを取得
        var currentOffsetY = tableView.contentOffset.y
        // 自動スクロールを終了させるかどうか
        var shouldFinish = false
        autoScrollTimer = Timer.scheduledTimer(withTimeInterval: duration, repeats: true, block: { [weak self] (_) in
            guard let self = self else { return }
            // 10ずつY軸のoffsetを変更していく
            switch direction {
            case .upper:
                currentOffsetY = (currentOffsetY - 10 < 0) ? 0 : currentOffsetY - 10
                shouldFinish = currentOffsetY == 0
            case .under:
                let highLimit = self.tableView.contentSize.height - self.tableView.bounds.size.height
                currentOffsetY = (currentOffsetY + 10 > highLimit) ? highLimit : currentOffsetY + 10
                shouldFinish = currentOffsetY == highLimit
            default: break
            }
            DispatchQueue.main.async {
                UIView.animate(withDuration: duration * 2, animations: {
                    self.tableView.setContentOffset(CGPoint(x: 0, y: currentOffsetY), animated: false)
                }, completion: { _ in
                    if shouldFinish { self.stopAutoScrollIfNeeded() }
                })
            }
        })
    }

    // 自動スクロールを停止する
    private func stopAutoScrollIfNeeded() {
        if autoScrollTimer.isValid {
            view.layer.removeAllAnimations()
            autoScrollTimer.invalidate()
        }
    }
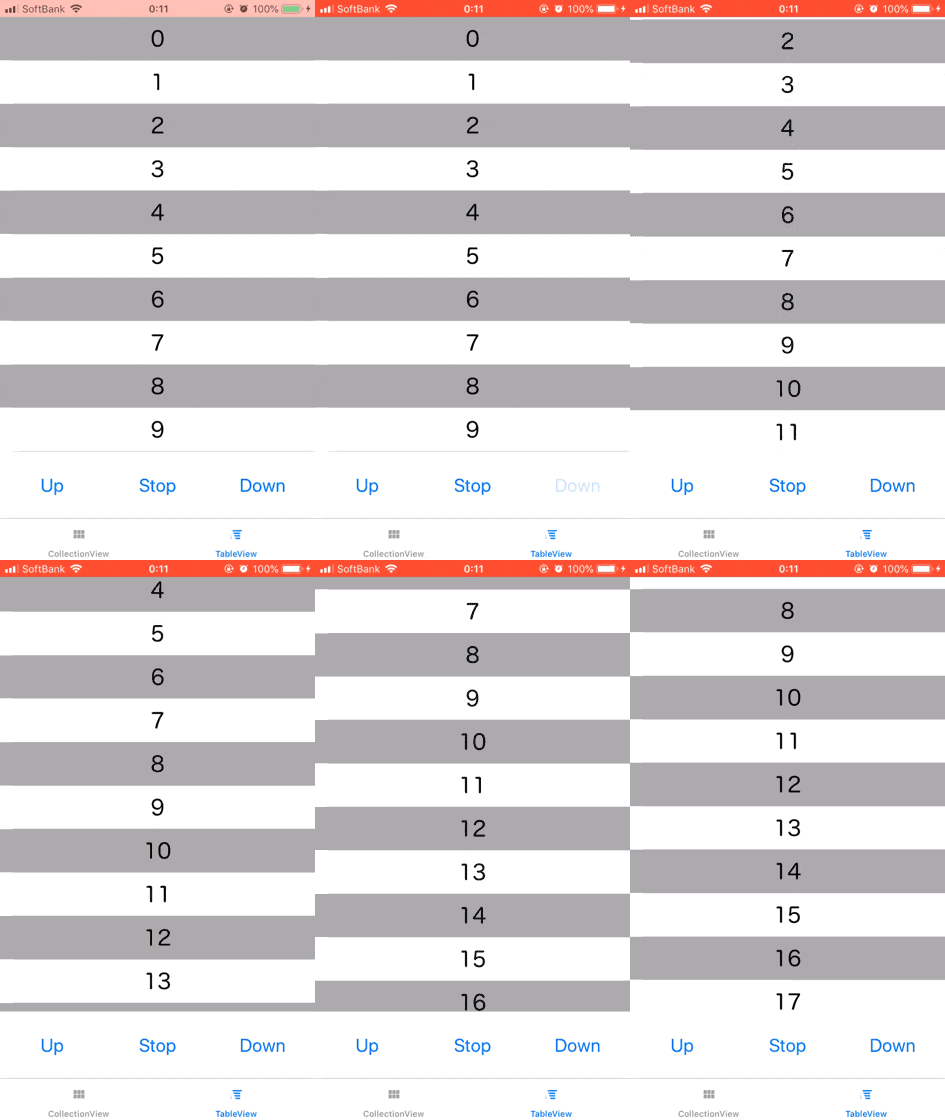
同じくボタンタップによって自動スクロールの開始・停止を行ってみます。自動スクロールの間隔は0.1秒としています。
@IBAction func didTapUp(_ sender: UIButton) {
        startAutoScroll(duration: 0.1, direction: .upper)
    }

@IBAction func didTapStop(_ sender: UIButton) {
        stopAutoScrollIfNeeded()
    }
動作結果

ソースコード
以下のリポジトリに作成したサンプルのソースを置いてあります。
https://github.com/ddd503/AutoScroll-CollectionView-TableView