はじめに
今回は、Appleが公開しているFrameworkであるVisionを使って画像内の文字列を検出してみます。
※ iOS13からはOCR(文字認識)の機能が追加されていますが今回の記事では触れていません。
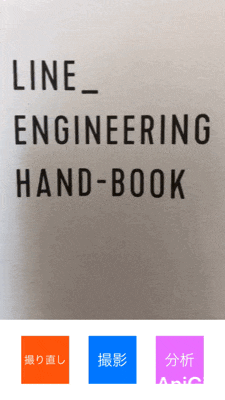
完成イメージ
実装方針
以下の流れで実装しました。
- カメラ機能を用意して、撮影映像のキャプチャを取得
- キャプチャに対する画像解析(文字列検出)をVisionにリクエスト
- 受け取った解析結果をView(キャプチャ上)に反映
カメラ機能を用意
今回はAVFoundationを使ってカメラ機能を用意しました。
カメラ機能自体の実装に関しては詳細を省きますが、ViewControllerのinit時に別途用意したAVCaptureSessionを渡して、画面表示のタイミングで撮影をスタートしています。
※ 作成したサンプルのソースコードは最下部にリポジトリのURLを貼ってあります。
init(session: AVCaptureSession) {
        self.session = session
        previewLayer = AVCaptureVideoPreviewLayer(session: session)
        super.init(nibName: String(describing: CameraViewController.self), bundle: .main)
}
______________________________________________________________________________
 // 以下は、viewDidLoadのタイミングで呼んでいます
    private func setupCamera() {
        // AVCaptureVideoPreviewLayerの設定
        previewLayer.videoGravity = .resizeAspectFill
        previewLayer.connection?.videoOrientation = .portrait

        // 撮影機能を描画したいViewのlayerにAVCaptureVideoPreviewLayerを追加
        captureSessionView.layer.addSublayer(previewLayer)

        guard !session.isRunning else { return }

        // セッションをスタートさせます。
        // 時間がかかる処理なのでMainThreadをブロックしないようsubThreadで処理を行います。
        startSession()
    }

    private func startSession() {
        sessionQueue.async { [weak self] in
            self?.session.startRunning()
        }
    }
撮影ボタンを用意して、タップイベントで撮影映像のキャプチャを行い、デリゲートで結果を受けます。
※ 撮影時点では画像解析は行わないので、キャプチャは別途プロパティで保持しておきます。
@IBAction func didTapShoot(_ sender: UIButton) {
        // AVCapturePhotoOutputクラスのキャプチャ用メソッドを呼ぶ
        output.capturePhoto(with: capturePhotoSettings, delegate: self)
}

__________________________________________________________________________

// 撮影結果を受けるデリゲート
extension CameraViewController: AVCapturePhotoCaptureDelegate {
    func photoOutput(_ output: AVCapturePhotoOutput, didFinishProcessingPhoto photo: AVCapturePhoto, error: Error?) {
        // 画像解析用にプロパティに別途格納しておく
        capturePhoto = photo

        // 画面表示用のUIImageを用意
        let photoImage: () -> (UIImage) = {
            if let photoData = photo.fileDataRepresentation(), let photoImage = UIImage(data: photoData) {
                return photoImage
            } else {
                fatalError("画像データの取得に失敗")
            }
        }

        // 用意したUIImageからUIImageViewを生成し、画面に描画
        captureImageView = UIImageView(image: photoImage())
        captureImageView.contentMode = .scaleAspectFill
        captureImageView.frame = captureSessionView.frame
        captureSessionView.addSubview(captureImageView)

        // 撮影再開までセッションを停止
        stopSession()
    }
}
画像解析をリクエスト
別途、リクエスト用のボタンを用意し、タップイベントで画像解析をリクエストします。
今回行う 「文字列検出」 では、VNDetectTextRectanglesRequestクラスとVNImageRequestHandlerクラスを用いてリクエストを行います。
- VNDetectTextRectanglesRequest・・・文字列検出を要求するクラス
- VNImageRequestHandler・・・用意した要求をVisionにリクエストするクラス
@IBAction func didTapAnalysis(_ sender: UIButton) {
        let textRequest = VNDetectTextRectanglesRequest { (request: VNRequest, error: Error?) in

            if let error = error {
                print(error.localizedDescription)
            }

            // 解析結果を取り出す
            guard let results = request.results else {
                print("no result")
                return
            }

            // 結果をVNTextObservation(文字列解析結果を扱う型)にキャスト
            let boxs = results.compactMap { $0 as? VNTextObservation }

            // ここで解析結果をViewに描画する処理を行う

        }

        // 以下、キャプチャした画像データからVNImageRequestHandlerを生成していきます。

        guard let photo = capturePhoto,
            let photoData = photo.fileDataRepresentation(),
            let image = UIImage(data: photoData),
            let ciImage = CIImage(image: image) else {
                return
        }

        /*
         解析時のCGImageの向きをUIImageと統一するため、initに関するextensionを別途用意しています。
         詳細は以下
         https://developer.apple.com/documentation/imageio/cgimagepropertyorientation
         */
        let orientation = CGImagePropertyOrientation(image.imageOrientation)

        // VNImageRequestHandlerを生成
        let imageRequestHandler = VNImageRequestHandler(ciImage: ciImage, orientation: orientation, options: [:])

        do {
            // 要求をリクエスト
            try imageRequestHandler.perform([textRequest])
        } catch {
            fatalError(error.localizedDescription)
        }
}
ここまででキャプチャから検出された文字列情報を受け取ることができます。
解析結果をViewに描画
検出した文字列情報をを画面に描画する際は、
「Visionから返されるframe(CGRect)は、普段UIKitで扱っているframeと違うため、UIKit用に変換してから描画する」 ことに注意して実装する必要がある。
            // 結果をVNTextObservation(文字列解析結果を扱う型)にキャスト
            let boxs = results.compactMap { $0 as? VNTextObservation }

            // ここで解析結果をViewに描画する処理を行う
            boxs.forEach { [weak self] in
                // 文字列ごとに枠線で囲む
                self?.highlightWord(box: $0)
                if let characterBoxes = $0.characterBoxes {
                    characterBoxes.forEach {
                        // 一文字ごとに枠線で囲む
                        self?.highlightLetters(box: $0)
                    }
                }
            }
描画処理
    /// 文字列ごとの枠線つける
    ///
    /// - Parameter box: 文字列の短形情報
    func highlightWord(box: VNTextObservation) {
        let outline = CALayer()
        outline.frame = convertRect(fromRect: box.boundingBox, toViewRect: captureImageView)
        outline.borderWidth = 2.0
        outline.borderColor = UIColor.red.cgColor
        captureImageView.layer.addSublayer(outline)
    }

    /// 一文字ごとの枠線つける
    ///
    /// - Parameter box: 文字ごとの短形情報
    func highlightLetters(box: VNRectangleObservation) {
        let outline = CALayer()
        outline.frame = convertRect(fromRect: box.boundingBox, toViewRect: captureImageView)
        outline.borderWidth = 1.0
        outline.borderColor = UIColor.blue.cgColor
        captureImageView.layer.addSublayer(outline)
    }

    /// Vision用からUIKit用にFrameを変換する
    ///
    /// - Parameters:
    ///   - fromRect: Visionから受け取ったFrame
    ///   - toViewRect: どのView上でのFrameに変換するか
    /// - Returns: Frame(CGRect)
    func convertRect(fromRect: CGRect, toViewRect: UIView) -> CGRect {
        var toRect = CGRect()
        toRect.size.width = fromRect.size.width * toViewRect.frame.size.width
        toRect.size.height = fromRect.size.height * toViewRect.frame.size.height
        toRect.origin.y =  (toViewRect.frame.height) - (toViewRect.frame.height * fromRect.origin.y)
        toRect.origin.y  = toRect.origin.y - toRect.size.height
        toRect.origin.x =  fromRect.origin.x * toViewRect.frame.size.width
        return toRect
    }
以上で、画像内から文字列を検出して枠で囲むことができました。
※ 最終的なサンプルコードは下にリポジトリのURLを貼ってあります。
ソースコード
今回作成したサンプルのソースは以下のリポジトリにあります。(一部リファクタしてあります)
https://github.com/ddd503/Vision-Text-Detection-Sample