はじめに
AWS SSO がようやく東京リージョンで利用できるようになったのでDjangoを使ってシングルサインオンを試してみました。
前提条件や動作環境
- macOS 10.15.6
- Python 3.7.8
- Django 3.1.1
- python3-saml 1.9.0
- django-sslserver 0.22
概要
AWS SSOによるカスタム SAML 2.0 アプリケーションを作成します。
必要最低限動くことを確認するため、エラーハンドリングは行ってません。
方針等
- AWS SSOのIDソースには
AWS SSO IDストアを利用する - 開発言語には
Pythonを選択する - Webアプリケーションフレームワークには
Djangoを利用する - 開発時にもHTTPSによる通信を許可する
セットアップ
# 仮想環境の作成
$ python -m venv ~/envs/example-awssso

# 起動
$ source ~/envs/example-awssso/bin/activate
インストール、プロジェクト作成
# Django インストール
(example-awssso) $ python -m pip install Django

# バージョン確認
(example-awssso) $ python -m django --version
3.1.1

# プロジェクト作成
(example-awssso) $ django-admin startproject webapp .
インストール(ssl)
開発用です。SSL通信を許可します。くれぐれも本番環境では利用しないようにしてください。
自己証明書作成については割愛します。
(example-awssso) $ pip install django-sslserver
インストール(python3-saml)
SAML認証サポートには色々ありましたが、python3-samlを試してみることにしました。
python3-samlのインストール前にxmlsecの依存解決をします。
https://github.com/onelogin/python3-saml
https://pypi.org/project/xmlsec/
# xmlsec 依存関係解決
(example-awssso) $ brew install libxml2 libxmlsec1 pkg-config

# インストール
(example-awssso) $ pip install python3-saml
AWS SSO
AWS管理コンソールでカスタムアプリケーションを設定します。
- 「アプリケーション」から【新規アプリケーションの追加】を選択する
- 「AWS SSO アプリケーションカタログ」から【カスタム SAML 2.0 アプリケーションの追加】を選択する
- 「AWS SSO SAML メタデータファイル」の【ダウンロード】を選択し、メタデータファイルをダウンロードする
- 「アプリケーションのプロパティ」の【アプリケーション開始URL】に
https://localhost:8000/sso/を入力する - 「アプリケーションメタデータ」の【メタデータファイルがない場合は、手動でメタデータ値を入力できます。】を選択する
- 【アプリケーション ACS URL】に
https://localhost:8000/acs/を入力する - 【アプリケーション SAML 対象者】に
https://localhost:8000/metadata/を入力する
- 【アプリケーション ACS URL】に
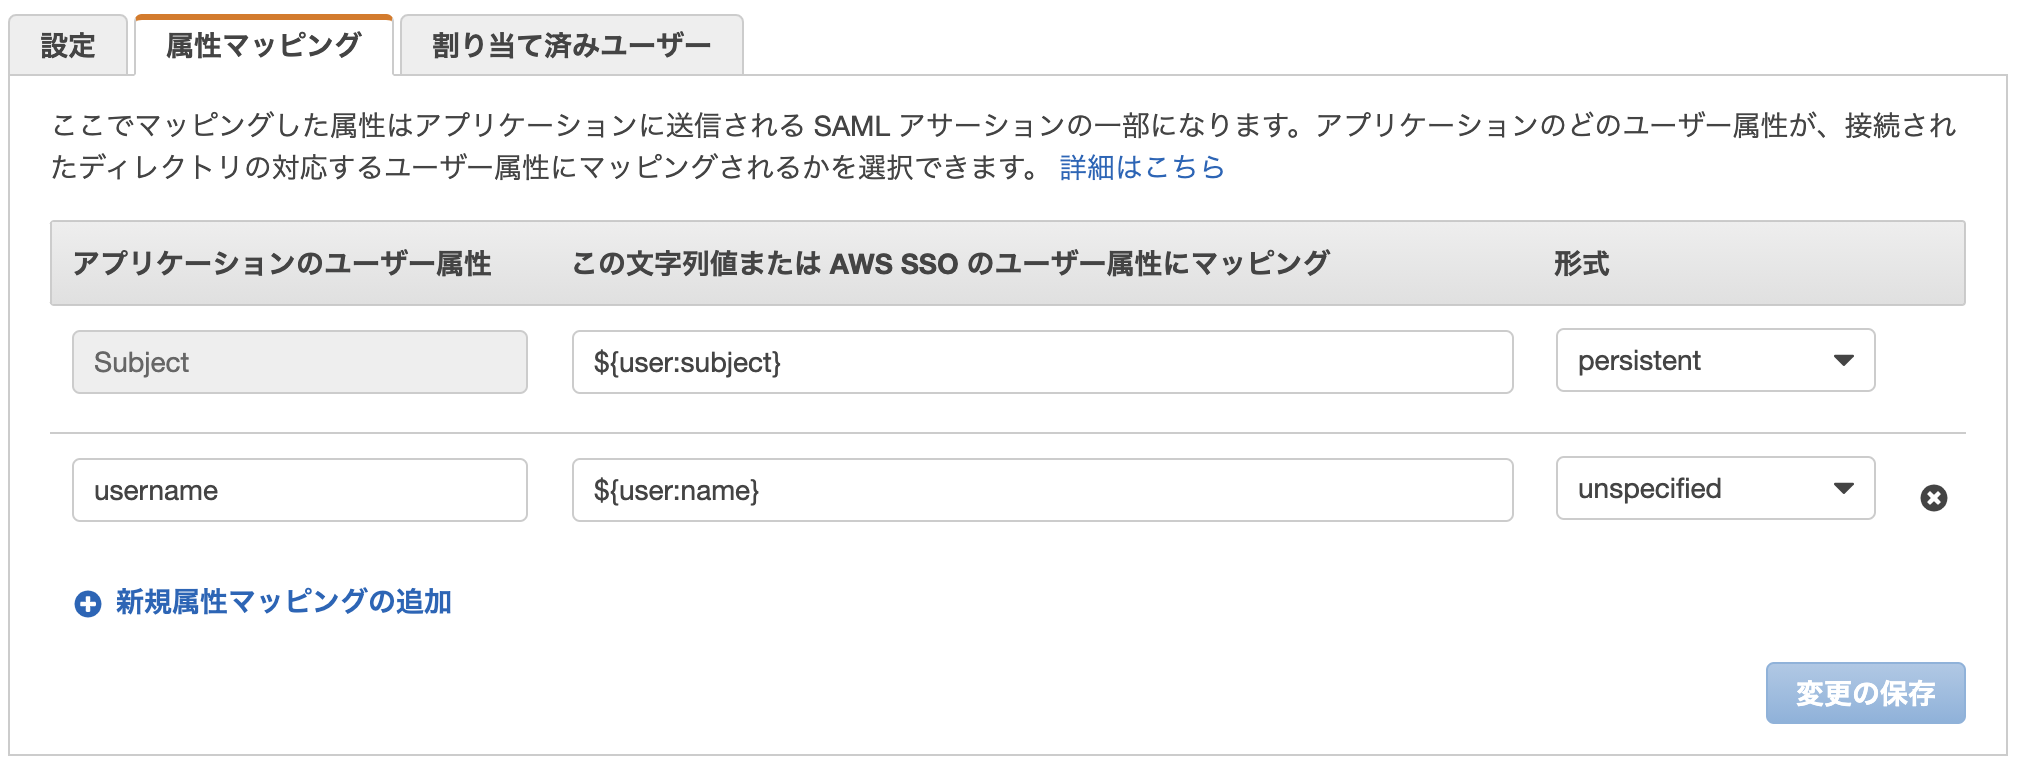
- 登録されたアプリケーションを選択し、【属性マッピング】タグを選択する
7.Subjectに$(user:subject}、persistentを入力する
8. 属性にusername、${user:name}、unspecifiedを入力する
9. 【変更の保存】を選択する - 「ユーザー」から【ユーザーを追加する】を選択して任意のユーザーを追加してください。
- 「アプリケーション」から【割り当て済みユーザー】タブを選択して【ユーザーの割り当て】から作成したユーザーを追加する
※6
アプリケーションセットアップ
python3-samlのGitHubにDjangoのサンプルコードがあるのでそちらも参考にしてください。
(example-awssso) $ mkdir saml

# 設定用の空ファイルを作成
(example-awssso) $ touch saml/settings.json
(example-awssso) $ touch saml/advanced_settings.json
advanced_settings.json
{
  "security": {
    "nameIdEncrypted": false,
    "authnRequestsSigned": false,
    "logoutRequestSigned": false,
    "logoutResponseSigned": false,
    "signMetadata": false,
    "wantMessagesSigned": false,
    "wantAssertionsSigned": false,
    "wantNameId": true,
    "wantNameIdEncrypted": false,
    "signatureAlgorithm": "http://www.w3.org/2001/04/xmldsig-more#rsa-sha256",
    "digestAlgorithm": "http://www.w3.org/2001/04/xmlenc#sha256"
  },
  "contactPerson": {
    "technical": {
      "givenName": "technical_name",
      "emailAddress": "technical@example.com"
    },
    "support": {
      "givenName": "support_name",
      "emailAddress": "support@example.com"
    }
  },
  "organization": {
    "en-US": {
      "name": "sp_test",
      "displayname": "SP test",
      "url": "https://localhost:8000"
    }
  }
}
settings.json
AWS SSO SAML メタデータファイルの内容から以下の設定値を編集して保存します。
sp
- entityId
- assertionConsumerService.url
- NameIDFormat
idp
AWS SSO SAML メタデータファイルの内容から設定してください。
()内はメタデータファイルの属性値です。
- entityId(entityID)
- singleSignOnService.url(SingleSignOnService.Location)
- singleLogoutService.url(SingleLogoutService.Location)
- x509cert(X509Certificate)
{
  "strict": true,
  "debug": true,
  "sp": {
    "entityId": "https://localhost:8000/metadata/",
    "assertionConsumerService": {
      "url": "https://localhost:8000/acs/",
      "binding": "urn:oasis:names:tc:SAML:2.0:bindings:HTTP-POST"
    },
    "singleLogoutService": {
      "url": "https://localhost:8000/sls/",
      "binding": "urn:oasis:names:tc:SAML:2.0:bindings:HTTP-Redirect"
    },
    "NameIDFormat": "urn:oasis:names:tc:SAML:2.0:nameid-format:persistent",
    "x509cert": "",
    "privateKey": ""
  },
  "idp": {
    "entityId": "https://portal.sso.ap-northeast-1.amazonaws.com/saml/assertion/<AWS SSO ID>",
    "singleSignOnService": {
      "url": "https://portal.sso.ap-northeast-1.amazonaws.com/saml/assertion/<AWS SSO ID>",
      "binding": "urn:oasis:names:tc:SAML:2.0:bindings:HTTP-Redirect"
    },
    "singleLogoutService": {
      "url": "https://portal.sso.ap-northeast-1.amazonaws.com/saml/logout/<AWS SSO ID>",
      "binding": "urn:oasis:names:tc:SAML:2.0:bindings:HTTP-Redirect"
    },
    "x509cert": "<AWS SSO 証明書>"
  }
}
webapp/settings.py
テンプレートディレクトリ設定を追加します。
  TEMPLATES = [
      {
        'BACKEND': 'django.template.backends.django.DjangoTemplates',
-       'DIRS': [],
+       'DIRS': [
+           os.path.join(BASE_DIR, 'templates')
+       ],
その他設定をファイルに追記します
+ INSTALLED_APPS += ['sslserver']
+
+ # session
+ SESSION_ENGINE = 'django.contrib.sessions.backends.file'
+
+ # ssl
+ SECURE_SSL_REDIRECT = True
+ SESSION_COOKIE_SECURE = True
+ CSRF_COOKIE_SECURE = True
+
+ # python3-saml
+ SAML_FOLDER = os.path.join(BASE_DIR, 'saml')
+
+ # login, logout
+ LOGIN_REDIRECT_URL = '/'
+ LOGOUT_REDIRECT_URL = '/'
webapp/urls.py
SSOに必要なURLを定義します。
views.pyはこのあと新規作成します。
  from django.contrib import admin
  from django.urls import path
+ from django.contrib.auth.views import LogoutView
+ from .views import index, sso, acs, metadata

  urlpatterns = [
      path('admin/', admin.site.urls),
+     path('', index, name='index'),
+     path('sso/', sso, name='sso'),
+     path('acs/', acs, name='acs'),
+     path('logout/', LogoutView.as_view(), name='logout'),
+     path('metadata/', metadata),
  ]
webapp/views.py
ソースコメントに記載していますが、以下のビューを作成します。
- / (トップページ)
- /sso/ (AWS SSOへのリダイレクト)
- /acs/ (アサーション検証)
- /logout/ (ログアウト処理)
- /metadata/ (メタデータ出力)
(example-awssso) $ touch webapp/views.py
from django.conf import settings
from django.http import HttpResponse, HttpResponseRedirect, HttpResponseServerError
from django.shortcuts import render
from django.views.decorators.csrf import csrf_exempt
from onelogin.saml2.auth import OneLogin_Saml2_Auth
from onelogin.saml2.settings import OneLogin_Saml2_Settings
from onelogin.saml2.utils import OneLogin_Saml2_Utils


def init_saml_auth(params):
    """SAMLクライアント初期化

    クライアント初期化パラメータ、saml/settings.json・saml/advanced_settings.json ファイルで初期化を行う
    """
    auth = OneLogin_Saml2_Auth(params, custom_base_path=settings.SAML_FOLDER)
    return auth


def prepare_django_request(request):
    """SAMLクライアント初期化パラメータ取得

    HTTPリクエストオブジェクトからSAMLクライアント初期化パラメータを生成する
    """
    params = {
        'https': 'on' if request.is_secure() else 'off',
        'http_host': request.META['HTTP_HOST'],
        'script_name': request.META['PATH_INFO'],
        'server_port': request.META['SERVER_PORT'],
        'get_data': request.GET.copy(),
        'post_data': request.POST.copy()
    }
    return params


def index(request):
    """TOPページ表示

    TOPページをレンダリングする
    """

    # コンテキストパラメータ初期化
    attributes = False

    if 'samlUserdata' in request.session:
        if len(request.session['samlUserdata']) > 0:
            attributes = request.session['samlUserdata'].items()

    return render(request, 'index.html', { 'attributes': attributes, })


@csrf_exempt
def sso(request):
    """AWS SSOリダイレクト

    AWS SSOへリダイレクトする
    """

    # 初期化パラメータ取得
    prepare_params = prepare_django_request(request)
    # 初期化
    auth = init_saml_auth(prepare_params)

    return HttpResponseRedirect(auth.login())


@csrf_exempt
def acs(request):
    """アサーション検証

    ユーザーがアプリケーションへのアクセス許可されているかを検証する
    """

    # 初期化パラメータ取得
    prepare_params = prepare_django_request(request)
    # 初期化
    auth = init_saml_auth(prepare_params)

    request_id = None
    if 'AuthNRequestID' in request.session:
        request_id = request.session['AuthNRequestID']

    auth.process_response(request_id=request_id)
    errors = auth.get_errors()

    if not errors:
        if 'AuthNRequestID' in request.session:
            del request.session['AuthNRequestID']
        request.session['samlUserdata'] = auth.get_attributes()
        request.session['samlNameId'] = auth.get_nameid()
        request.session['samlNameIdFormat'] = auth.get_nameid_format()
        request.session['samlNameIdNameQualifier'] = auth.get_nameid_nq()
        request.session['samlNameIdSPNameQualifier'] = auth.get_nameid_spnq()
        request.session['samlSessionIndex'] = auth.get_session_index()

    return HttpResponseRedirect(auth.redirect_to('/'))


def metadata(request):
    """SPメタデータ表示

    メタデータを出力する
    """
    saml_settings = OneLogin_Saml2_Settings(settings=None, custom_base_path=settings.SAML_FOLDER, sp_validation_only=True)
    metadata = saml_settings.get_sp_metadata()
    errors = saml_settings.validate_metadata(metadata)

    if len(errors) == 0:
        return HttpResponse(content=metadata, content_type='text/xml')
    else:
        return HttpResponseServerError(content=', '.join(errors))
動作確認
# SECRET_KEY設定
(example-awssso) $ export DJANGO_SECRET_KEY='01234567890123456789012345678901234567890123456789'
# Django起動
(example-awssso) $ python ./manage runsslserver 0.0.0.0:8000 --certificate ./certs/localhost.crt.pem --key ./certs/localhost.key.pem
https://localhost:8000/にアクセスします。
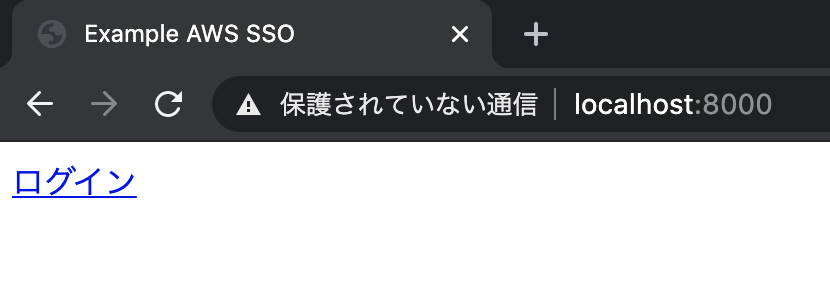
【ログイン】を選択します。
AWS SSOにリダクレイトされるのでIDストアに作成したユーザーでログインします。
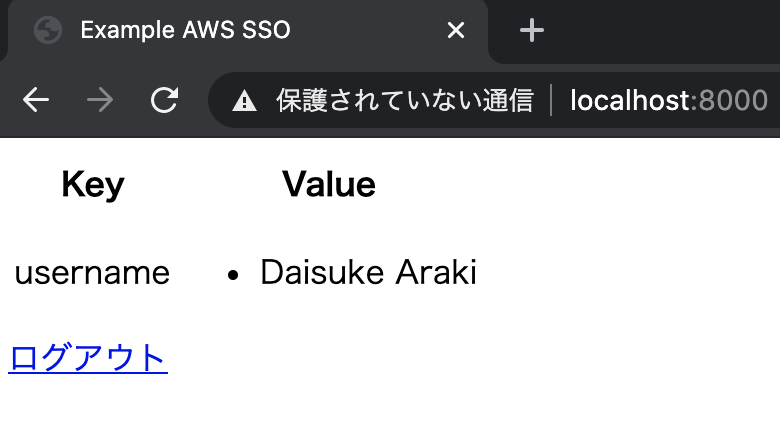
SAMLレスポンスからセッションに記録したユーザー情報が画面に表示されます。
さいごに
今までIAMユーザーでAWS管理コンソールにアクセスしていたものを一元管理して、AWS Organizationsにぶら下がるすべてのアカウントに対するアクセスとユーザーを簡単に管理できるようになりますね。
加えて、先日AWS SSOのアカウント割り当て APIとCloudFormationサポートも追加されたので自動化も柔軟に対応できそうです。