はじめに
今回扱う内容
GitHubの簡易クライアントアプリの実装を通してAngularの以下のコンセプトを理解する。
- Angularとは
- コンポーネント指向
- TypeScriptの型を使ってみる(フロントで型システムを使う便利さ)
- サービスによる通信ロジックの分離
- AngularCLIを使ったスキャフォールディングの楽さ
注意事項
1.5hで進めるには結構盛り沢山な内容です。
資料とコードは後ほど共有しますので途中トラブったりしてもご安心ください。
※ 「今回扱う内容」以外にも伝えたいことがたくさんありますが時間の関係上割愛します
本資料: https://qiita.com/daikiojm/private/edfa033a95a59fa7e5bb
GitHub: https://github.com/daikiojm/ng-hands-on-2018-03-12
もくじ
- Angularとは
- AngularCLIでプロジェクトを作成
- コンポーネントに触れてみる
- TypeScriptで型を定義してみる
- サービスによる通信ロジックの分離
- 検索機能の実装
- インクリメンタルサーチの実装(おまけ)
Angularとは

JavaScriptのSPAオールインワンフレームワークといったイメージ。
現状、SPA以外に部分的に導入するといった用途には向かない。
今回作ってみるもの
デモ↓
https://daikiojm.github.io/ng-hands-on-2018-03-12/
今回は、GitHubAPI(v3)のうち、ユーザーのリポジトリ一覧取得とリポジトリ検索のAPIを利用する。
AngularCLIでプロジェクトを作成
以下のコマンドでAngularCLIのバージョン確認
$ ng -v

    _                      _                 ____ _     ___
   / \   _ __   __ _ _   _| | __ _ _ __     / ___| |   |_ _|
  / △ \ | '_ \ / _` | | | | |/ _` | '__|   | |   | |    | |
 / ___ \| | | | (_| | |_| | | (_| | |      | |___| |___ | |
/_/   \_\_| |_|\__, |\__,_|_|\__,_|_|       \____|_____|___|
               |___/

Angular CLI: 1.7.3
Node: 9.4.0
OS: darwin x64
Angular:
...
以下のコマンドでAngularプロジェクトを作成
$ ng-hands-on
ng-hands-on というディレクトリが作成され、Angularプロジェクトが作成される。
動作確認
以下のコマンドで開発サーバーを起動
$ ng serve
ブラウザで http://localhost:4200/を開く
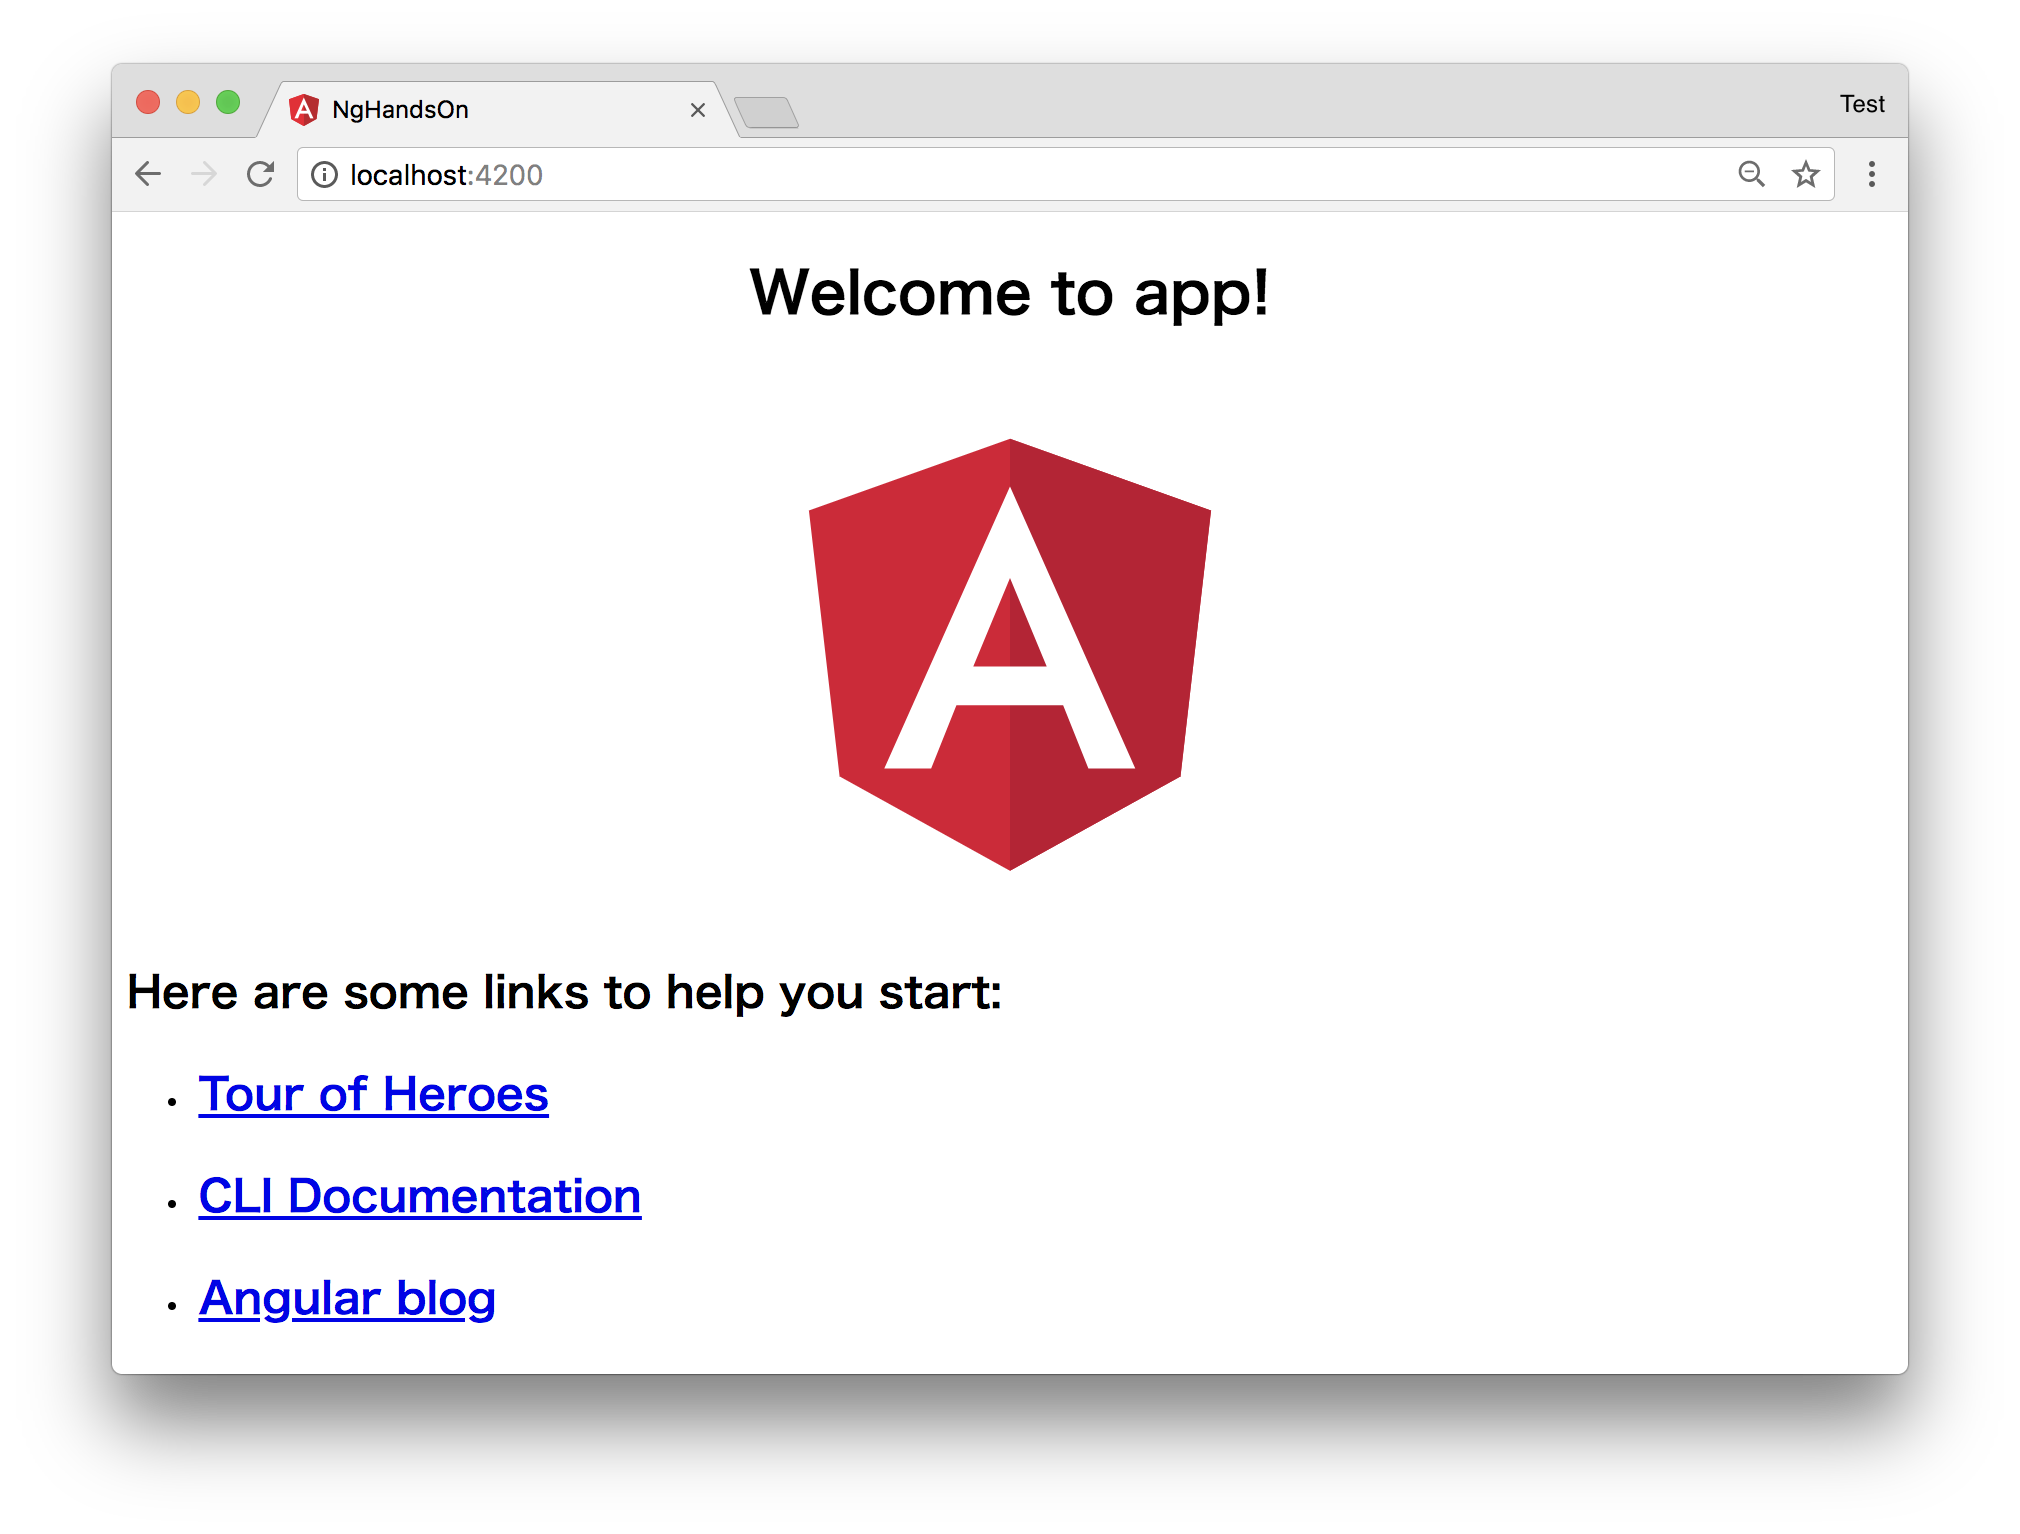
※ ここまでがAngularCLIの「Hello world!」的な内容
プロジェクトの構成を覗いてみる
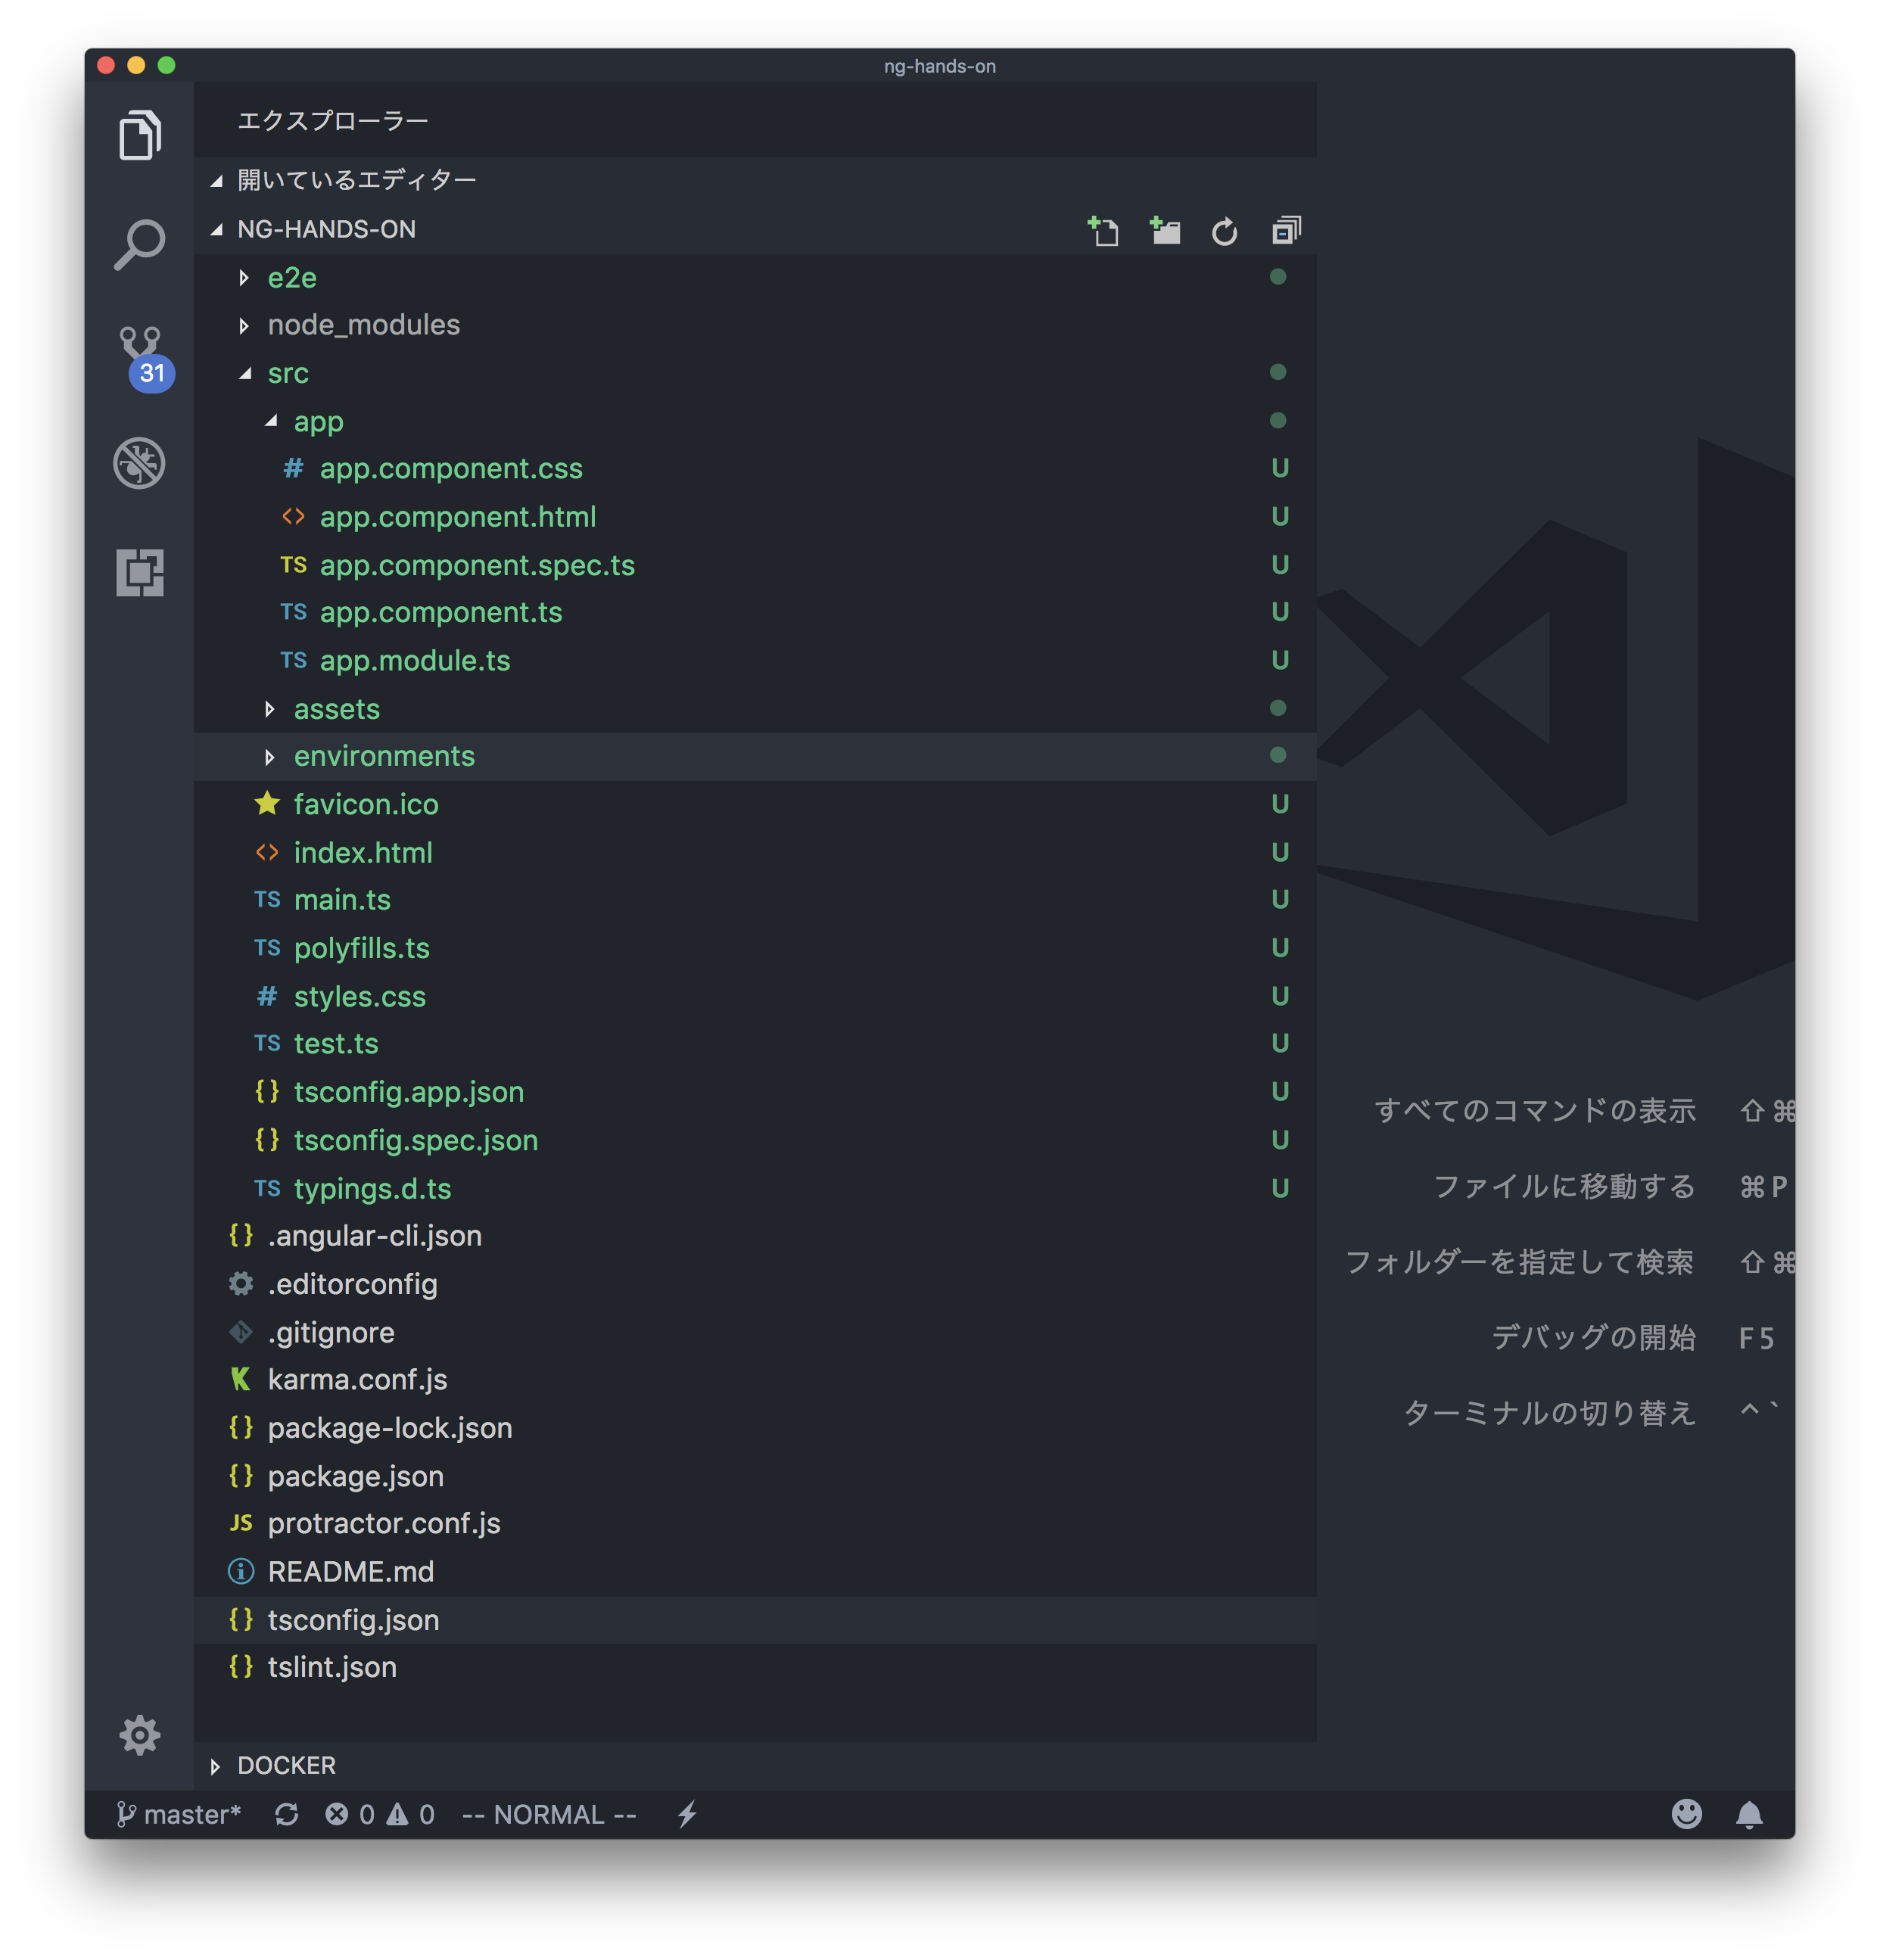
このように、ng newコマンドひとつでアプリケーションの雛形が出来る👏
コンポーネント指向
コンポーネントを作成
以下のコマンドでToolbarコンポーネントを作成
$ ng generate component components/toolbar
app/components/toolbarディレクトリが作成され、以下のファイルが生成される。
- toolbar.component.css
- toolbar.component.html
- toolbar.component.spec.ts
- toolbar.component.ts
また、app.module.tsが自動で更新される。
作成したコンポーネントを配置する
app.component.htmlに次のように追記
<!--The content below is only a placeholder and can be replaced.-->
<app-toolbar></app-toolbar>
<div style="text-align:center">
  <h1>
...
動作確認
ブラウザを確認
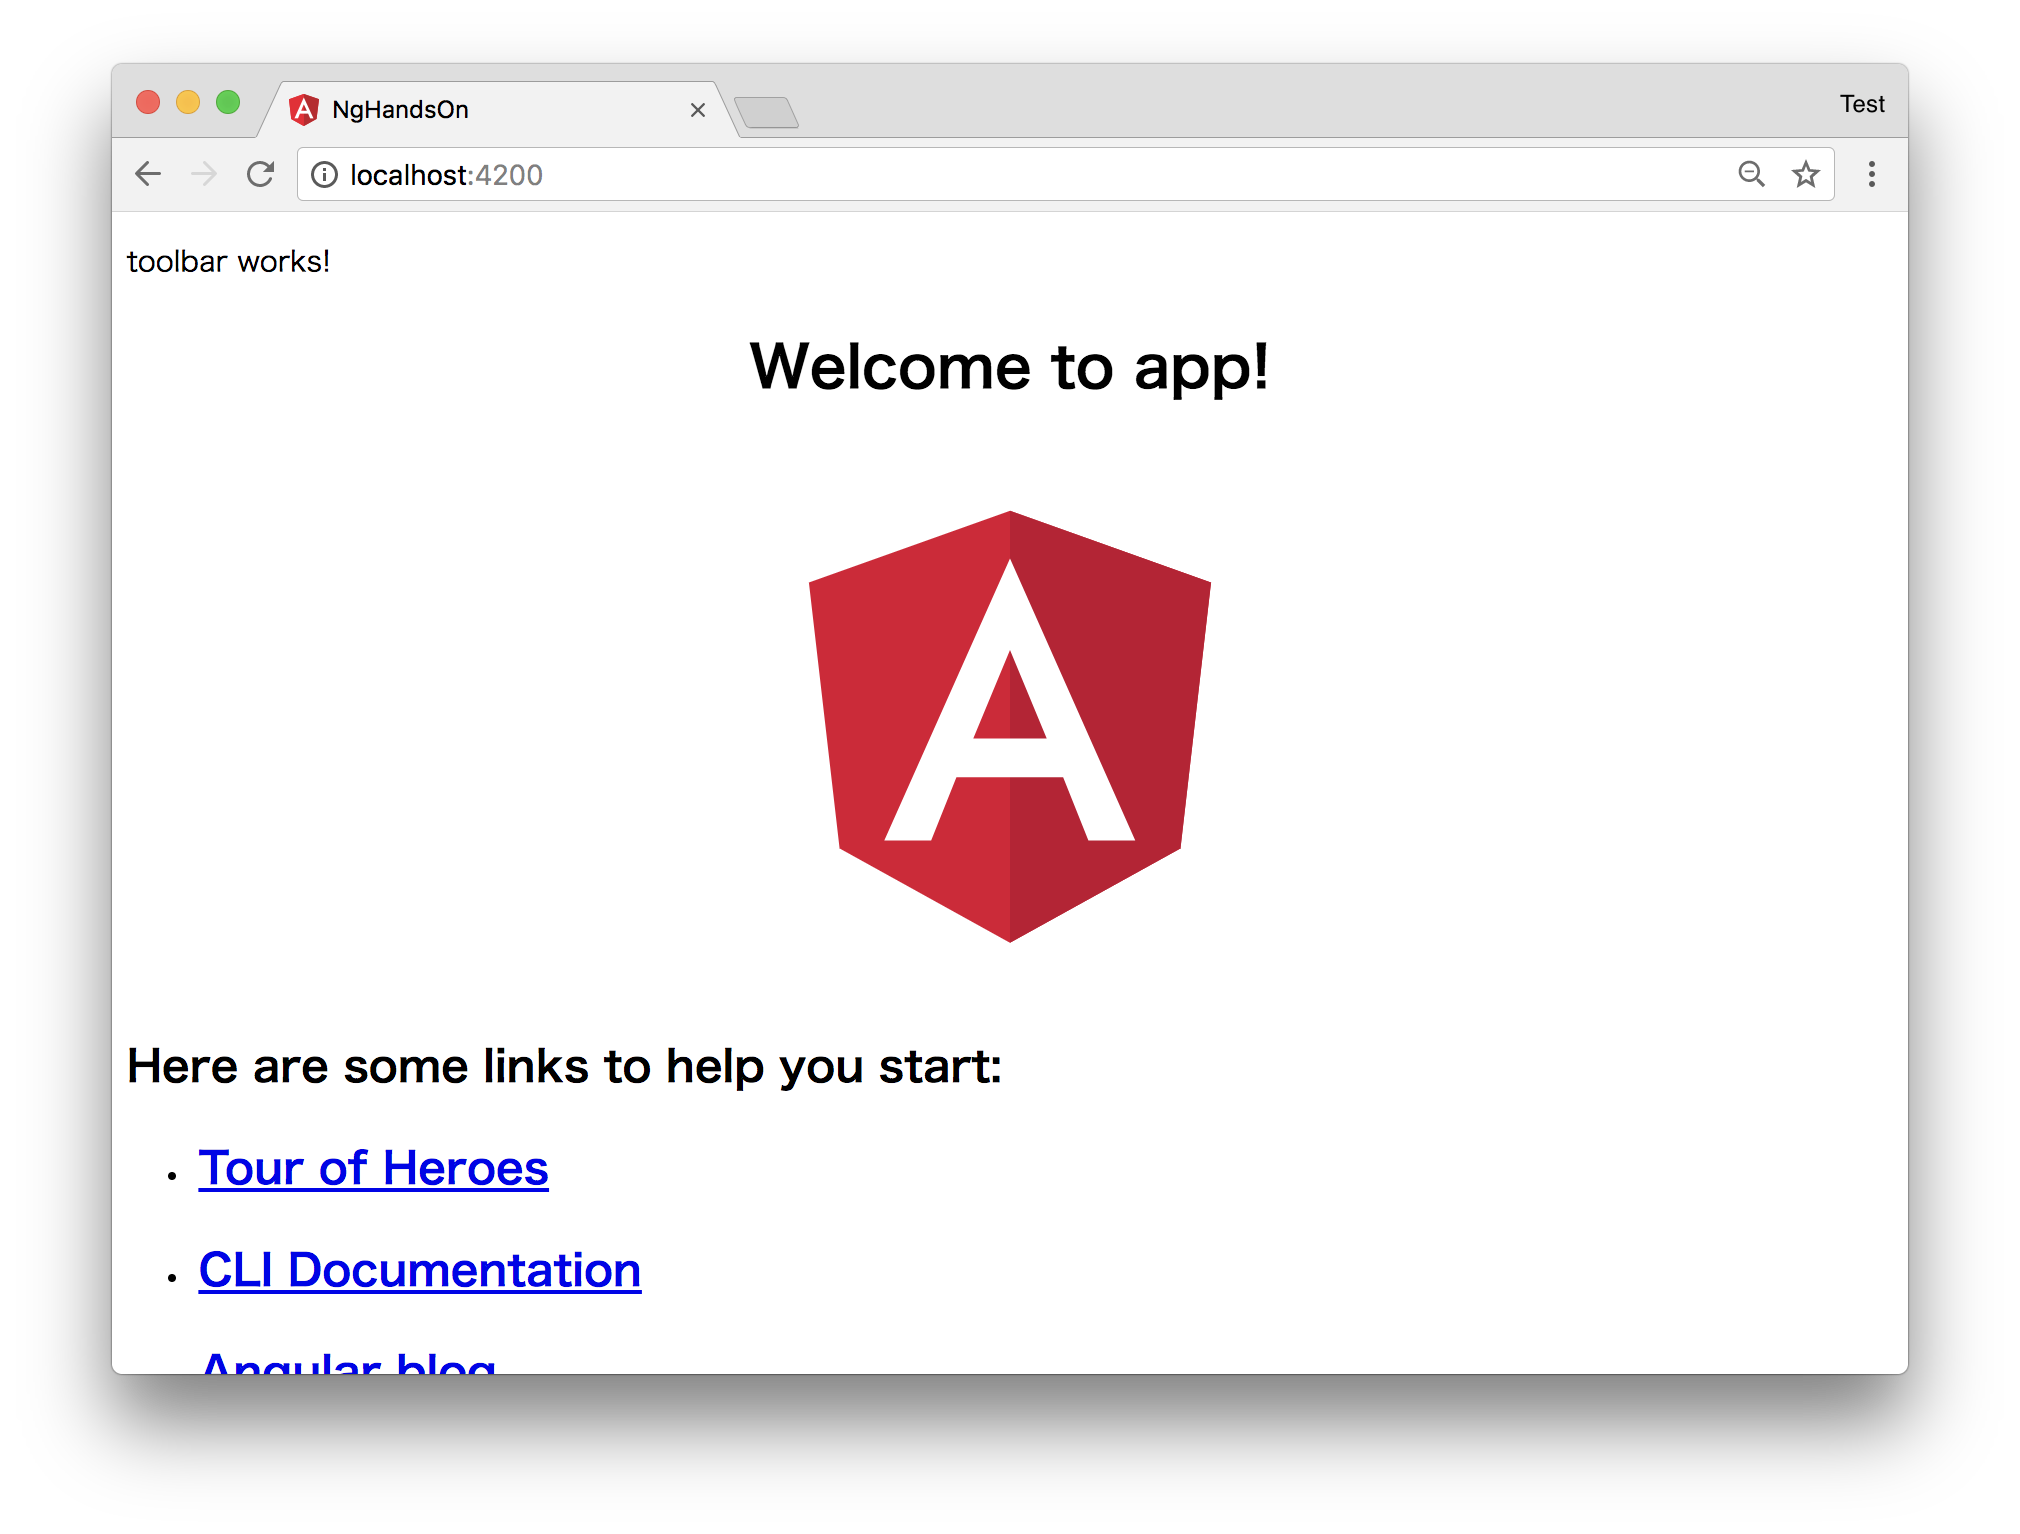
toobarコンポーネントが配置できた💅
コンポーネントを編集
toolbar.componentにタイトルを表示させて、スタイルも調整してみます
toolbar.component.html
<p>{{ title }}</p>
toolbar.component.ts
import { Component, OnInit } from '@angular/core';

@Component({
  selector: 'app-toolbar',
  templateUrl: './toolbar.component.html',
  styleUrls: ['./toolbar.component.css']
})
export class ToolbarComponent implements OnInit {
  title = 'gh-client';

  constructor() { }

  ngOnInit() {
  }
}
toolbar.component.css
:host {
  height: 56px;
  width: 100%;
  position: fixed;
  top: 0;
  background-color: #25292e;
  color: #ffffff;
}
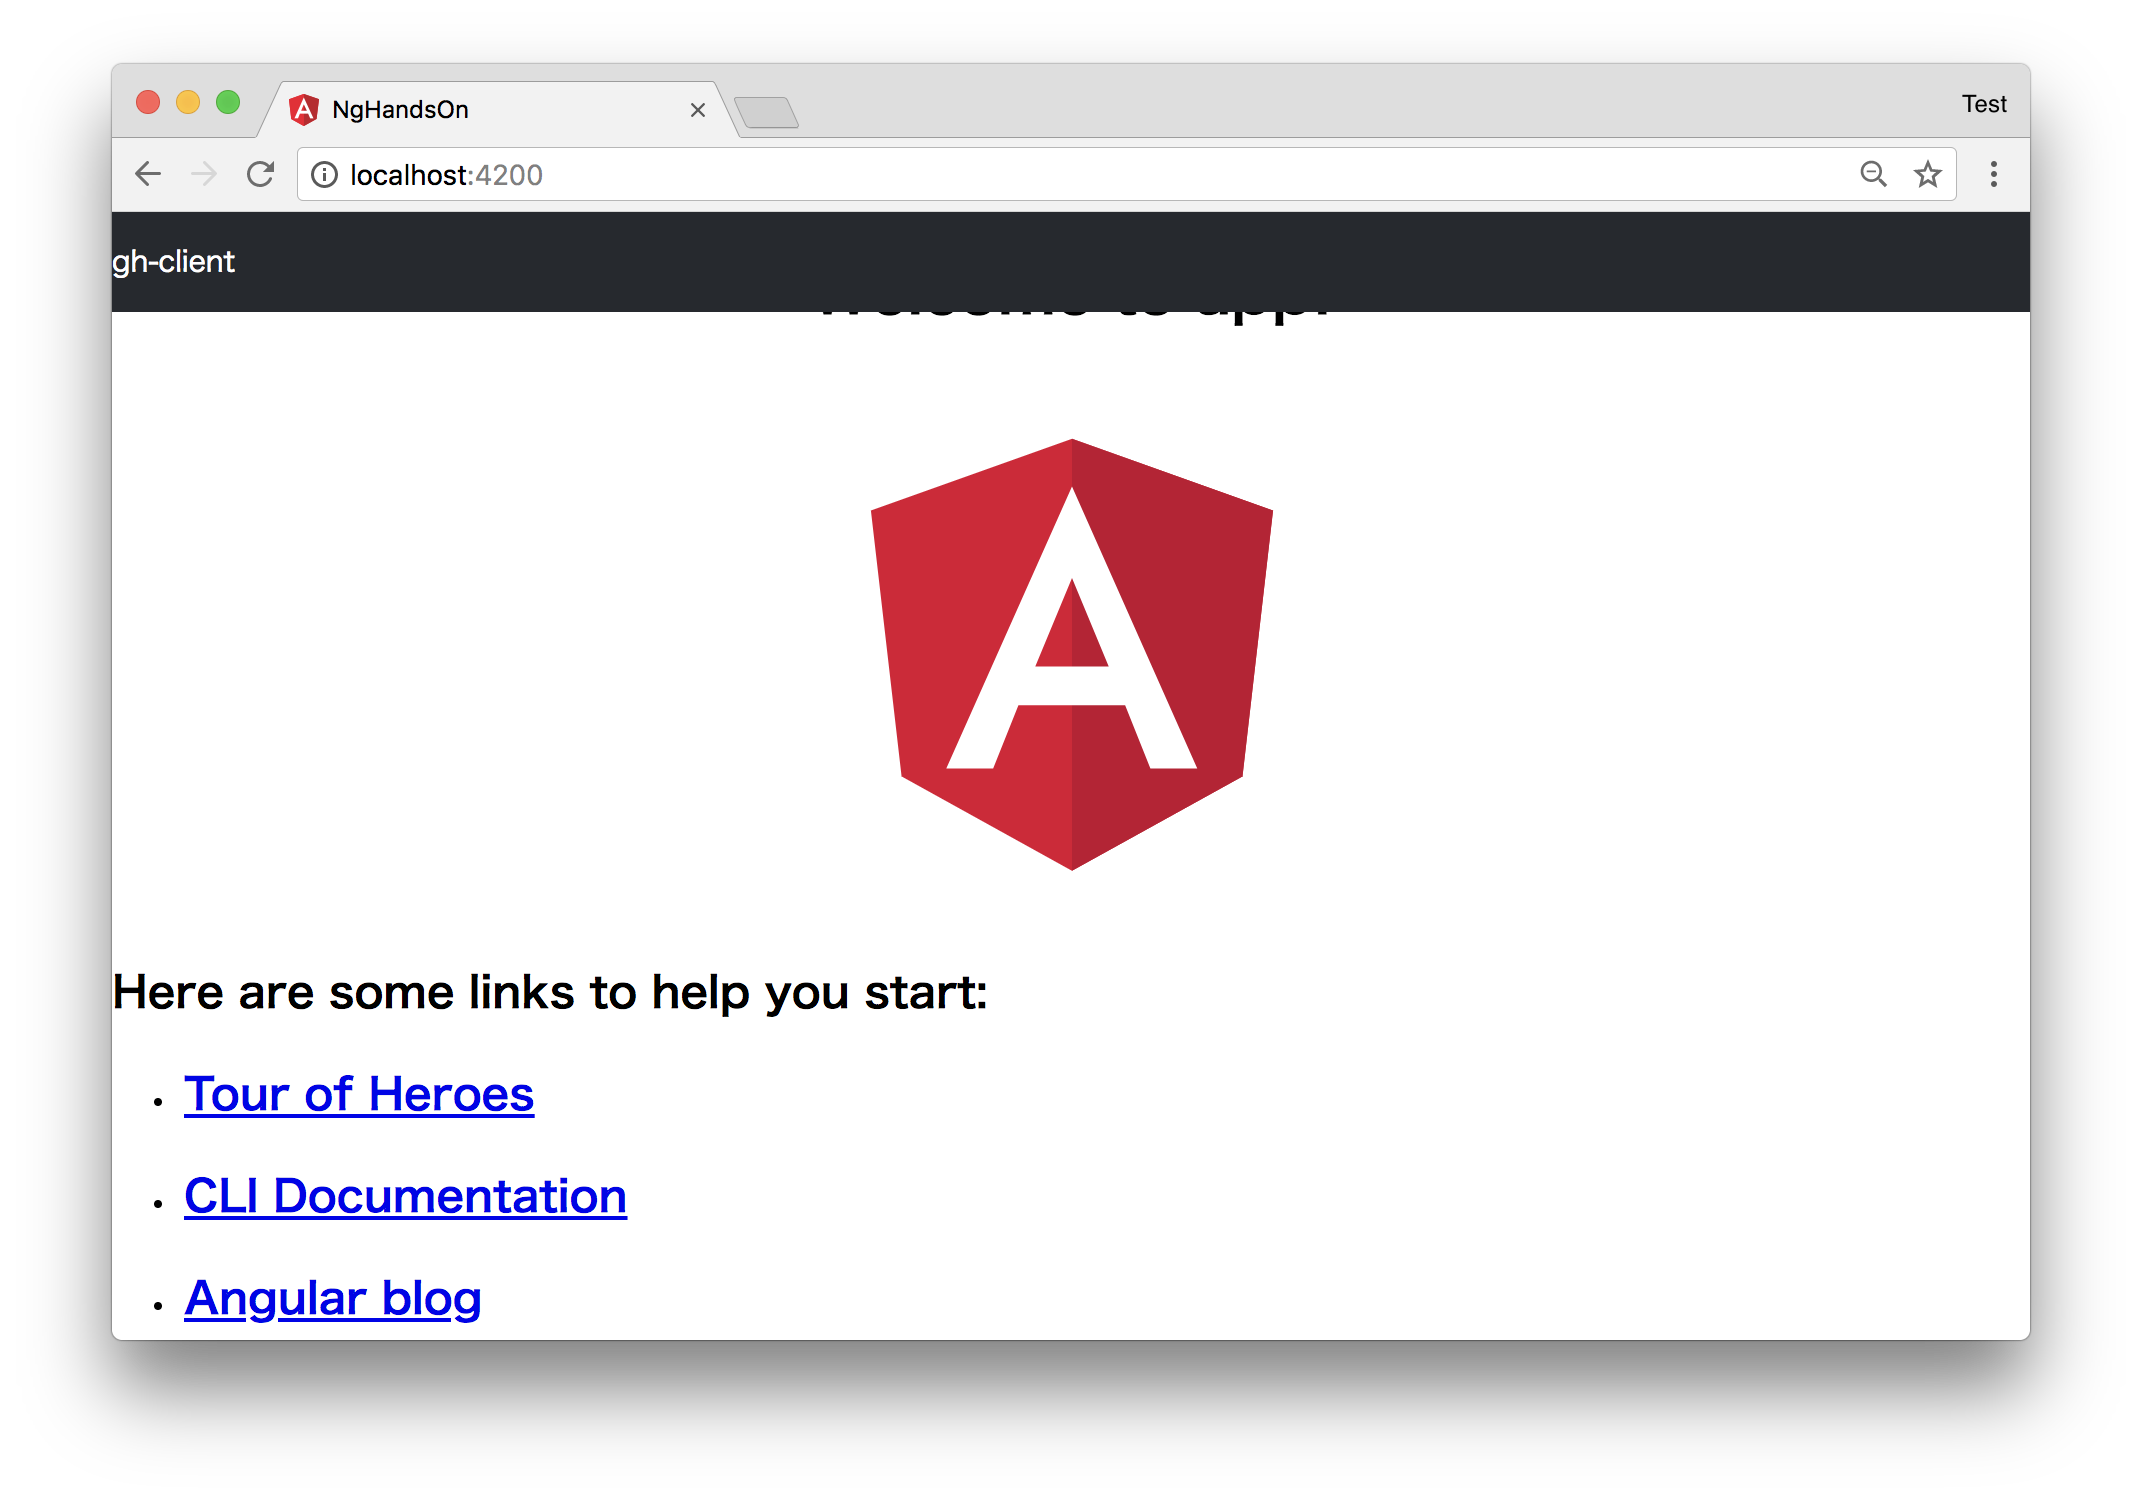
動作確認
Toolbarにタイトルが表示され、スタイルが適用されていることがわかります。
TypeScriptの型を使ってみる
APIのレスポンス型を定義する
次のコマンドでインターフェースを定義するファイルの雛形を生成する
$ ng generate interface types/Repository type
app/types/にrepos.type.tsというファイルが作成されるので、次のように編集
export interface Repository {
  id: number;
  name: string;
  full_name: string;
  description: string;
  url: string;
  stargazers_count: number;
  forks_count: number;
}
※ 今回はAPIレスポンスの一部の型を定義
サービスによる通信ロジックの分離
APIとHTTP通信するサービスを作成する
次のコマンドで、サービスの雛形を作成
$ ng generate service services/github-api
app/services/にgithub-api.service.tsというファイルが作成される
app.module.tsにAngularのHttpClientModuleをインポートする
import { BrowserModule } from '@angular/platform-browser';
import { NgModule } from '@angular/core';
import { HttpClientModule } from '@angular/common/http'; // 追記

import { AppComponent } from './app.component';
import { ToolbarComponent } from './toolbar/toolbar.component';


@NgModule({
  declarations: [
    AppComponent,
    ToolbarComponent
  ],
  imports: [
    BrowserModule,
    HttpClientModule // 追記
  ],
  providers: [],
  bootstrap: [AppComponent]
})
export class AppModule { }
上記コマンドで生成された github-api.service.ts に以下をインポート
- HttpClient
- Observable(rxjs)
- 前の手順で定義したAPIレスポンスの型
import { Injectable } from '@angular/core';
import { HttpClient } from '@angular/common/http';
import { Observable } from 'rxjs/Observable';

import { Repository } from './../types/repository.type';
コンストラクタでHttpClientを指定(DI)する
@Injectable()
export class GithubApiService {

  constructor(private http: HttpClient) { }

}
GitHubのAPIにGetリクエストを投げるメソッドを実装
  getRepos(): Observable<Repository[]> {
    return this.http.get<Repository[]>('https://api.github.com/users/vsavkin/repos');
  }
作成したサービスを、Component側でDI出来るようにするために、app.moduleに登録する
app.module.tsにインポートする
import { GithubApiService } from './services/github-api.service';
NgModuleのprovidersに登録
providers: [GithubApiService],
Component側でServiceロジックを使う
まずは、app.component.tsに以下をインポート
import { Observable } from 'rxjs/Observable';

import { GithubApiService } from './services/github-api.service';
import { Repository } from './types/repository.type';
コンストラクタでServiceを指定(DI)する
constructor(private githubApiService: GithubApiService) {}
ngOnInit()の中で、予め定義したrepos$変数にObservableな値を返すメソッドを代入
ngOnInit() {
  this.repos$ = this.githubApiService.getRepos();
}
※ ngOnInit()はComponentが読み込まれたタイミングで呼ばれる(ライフサイクルフック)
app.component.htmlを次のように編集
<app-toolbar></app-toolbar>

<div>{{ repos$ | async | json }}</div>
ブラウザで結果を確認すると...
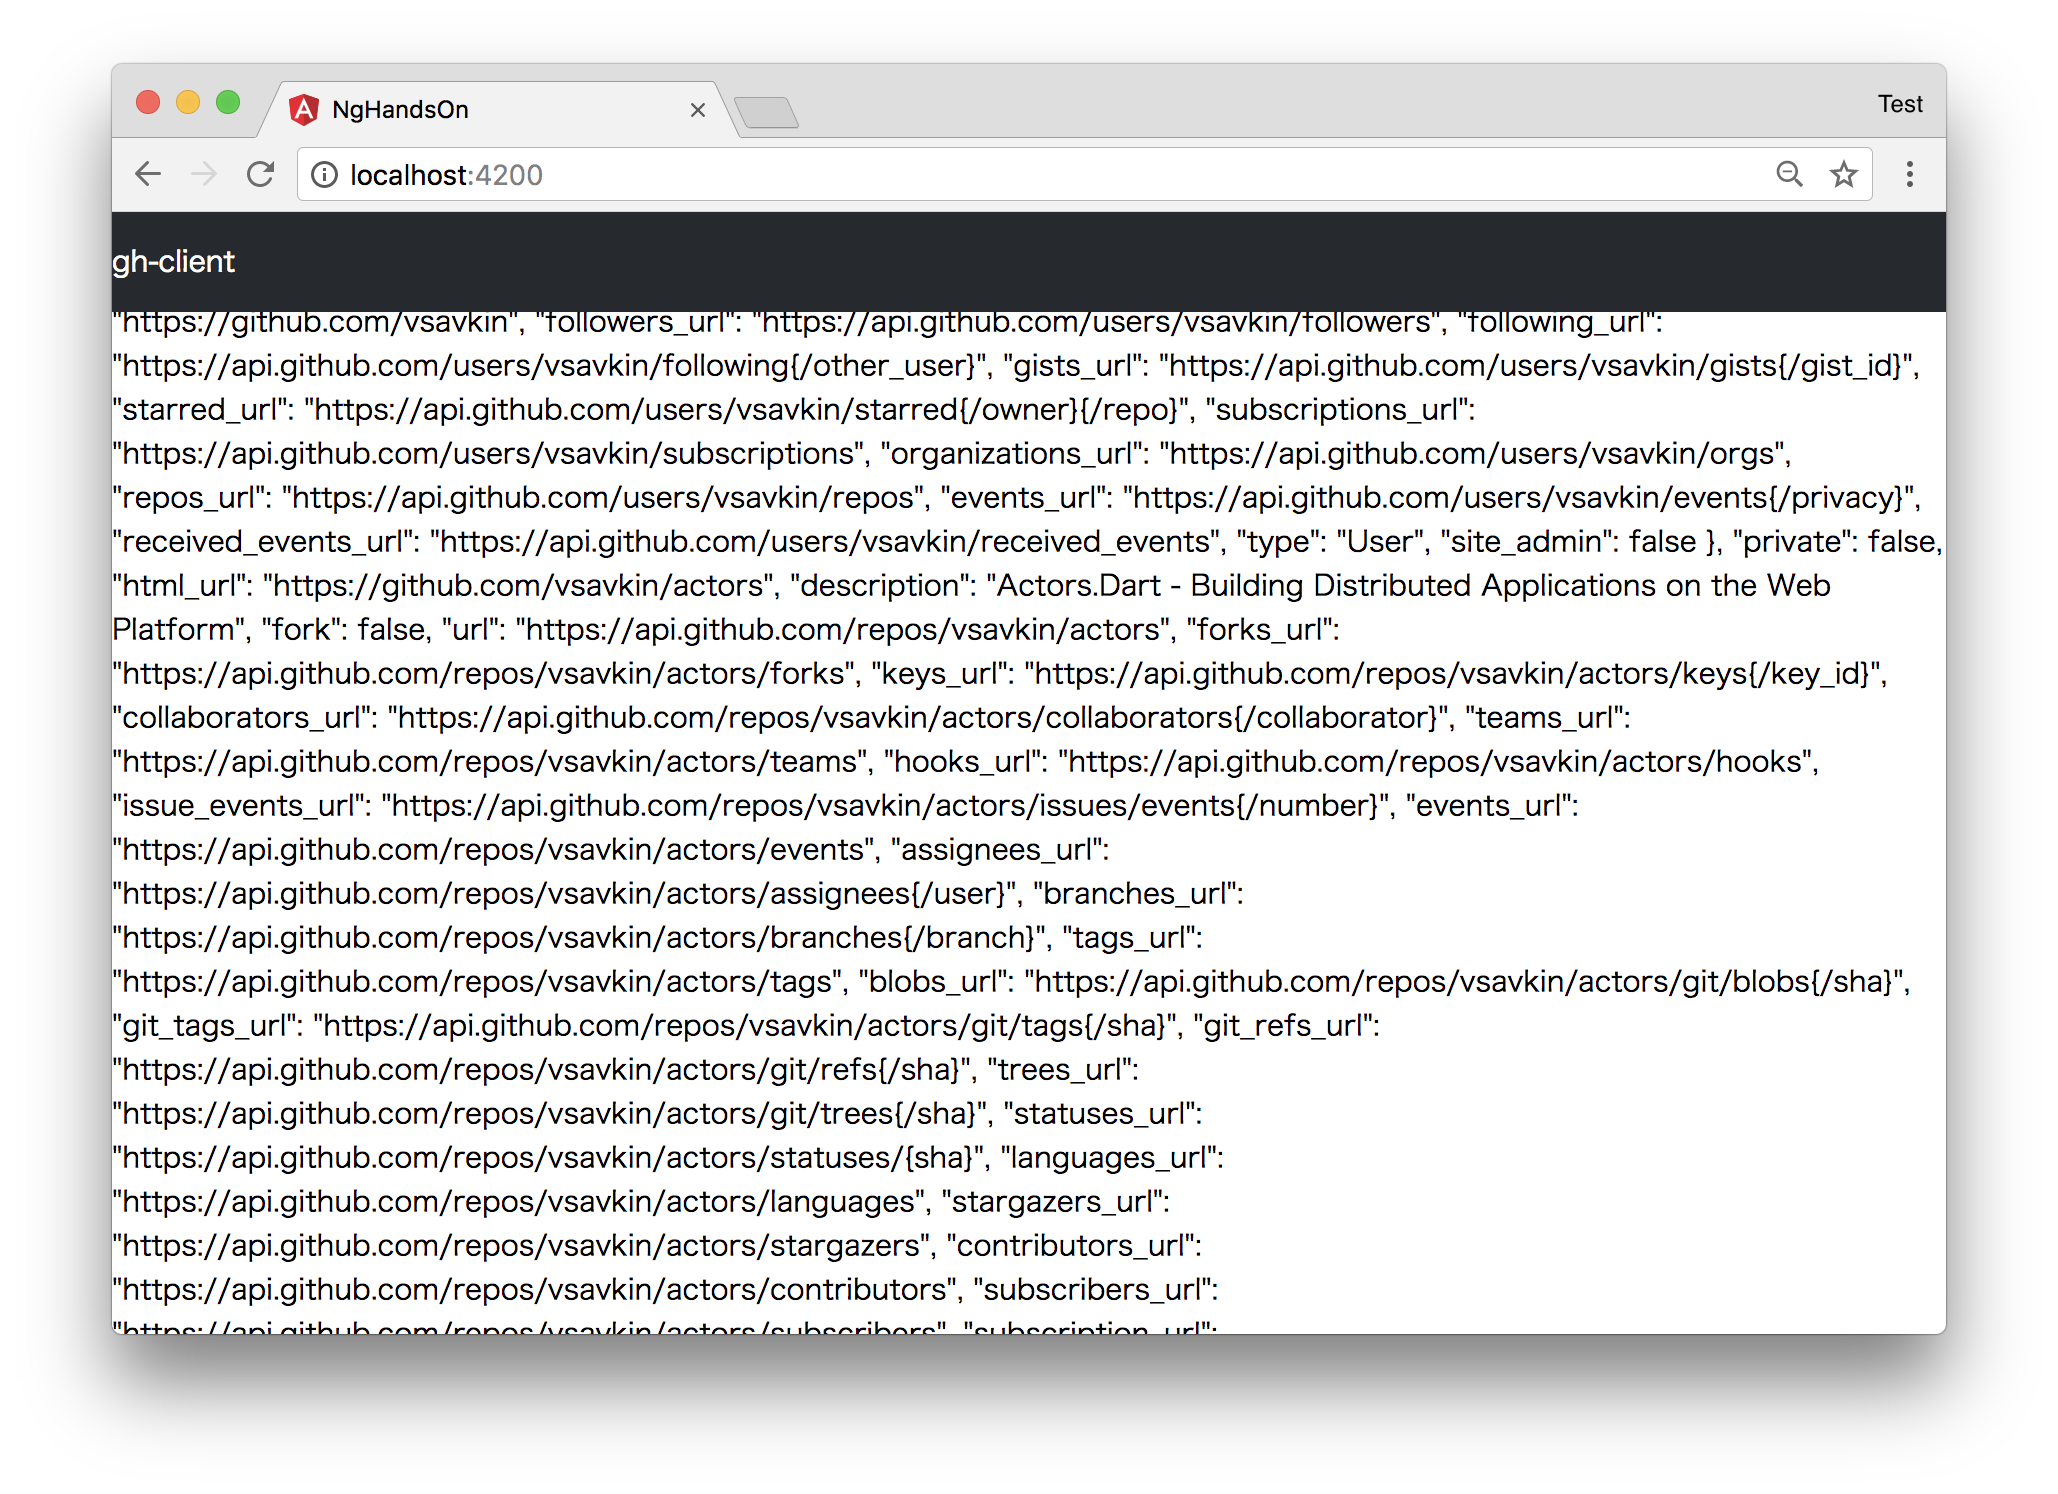
※ Angularで提供されている標準パイプの機能を使って、非同期型の解決とObjectのjson変換を行っている
リポジトリ情報を表示するComponentを作成
AngularCLIでComponentを作成
$ ng generate component components/repository
repository.component.tsを次のように編集
import { Component, OnInit, Input } from '@angular/core'; // Inputを追加

import { Repository } from './../../types/repository.type'; // 追加

@Component({
  selector: 'app-repository',
  templateUrl: './repository.component.html',
  styleUrls: ['./repository.component.css']
})
export class RepositoryComponent implements OnInit {
  @Input() repo: Repository;

  constructor() { }

  ngOnInit() {
  }

}
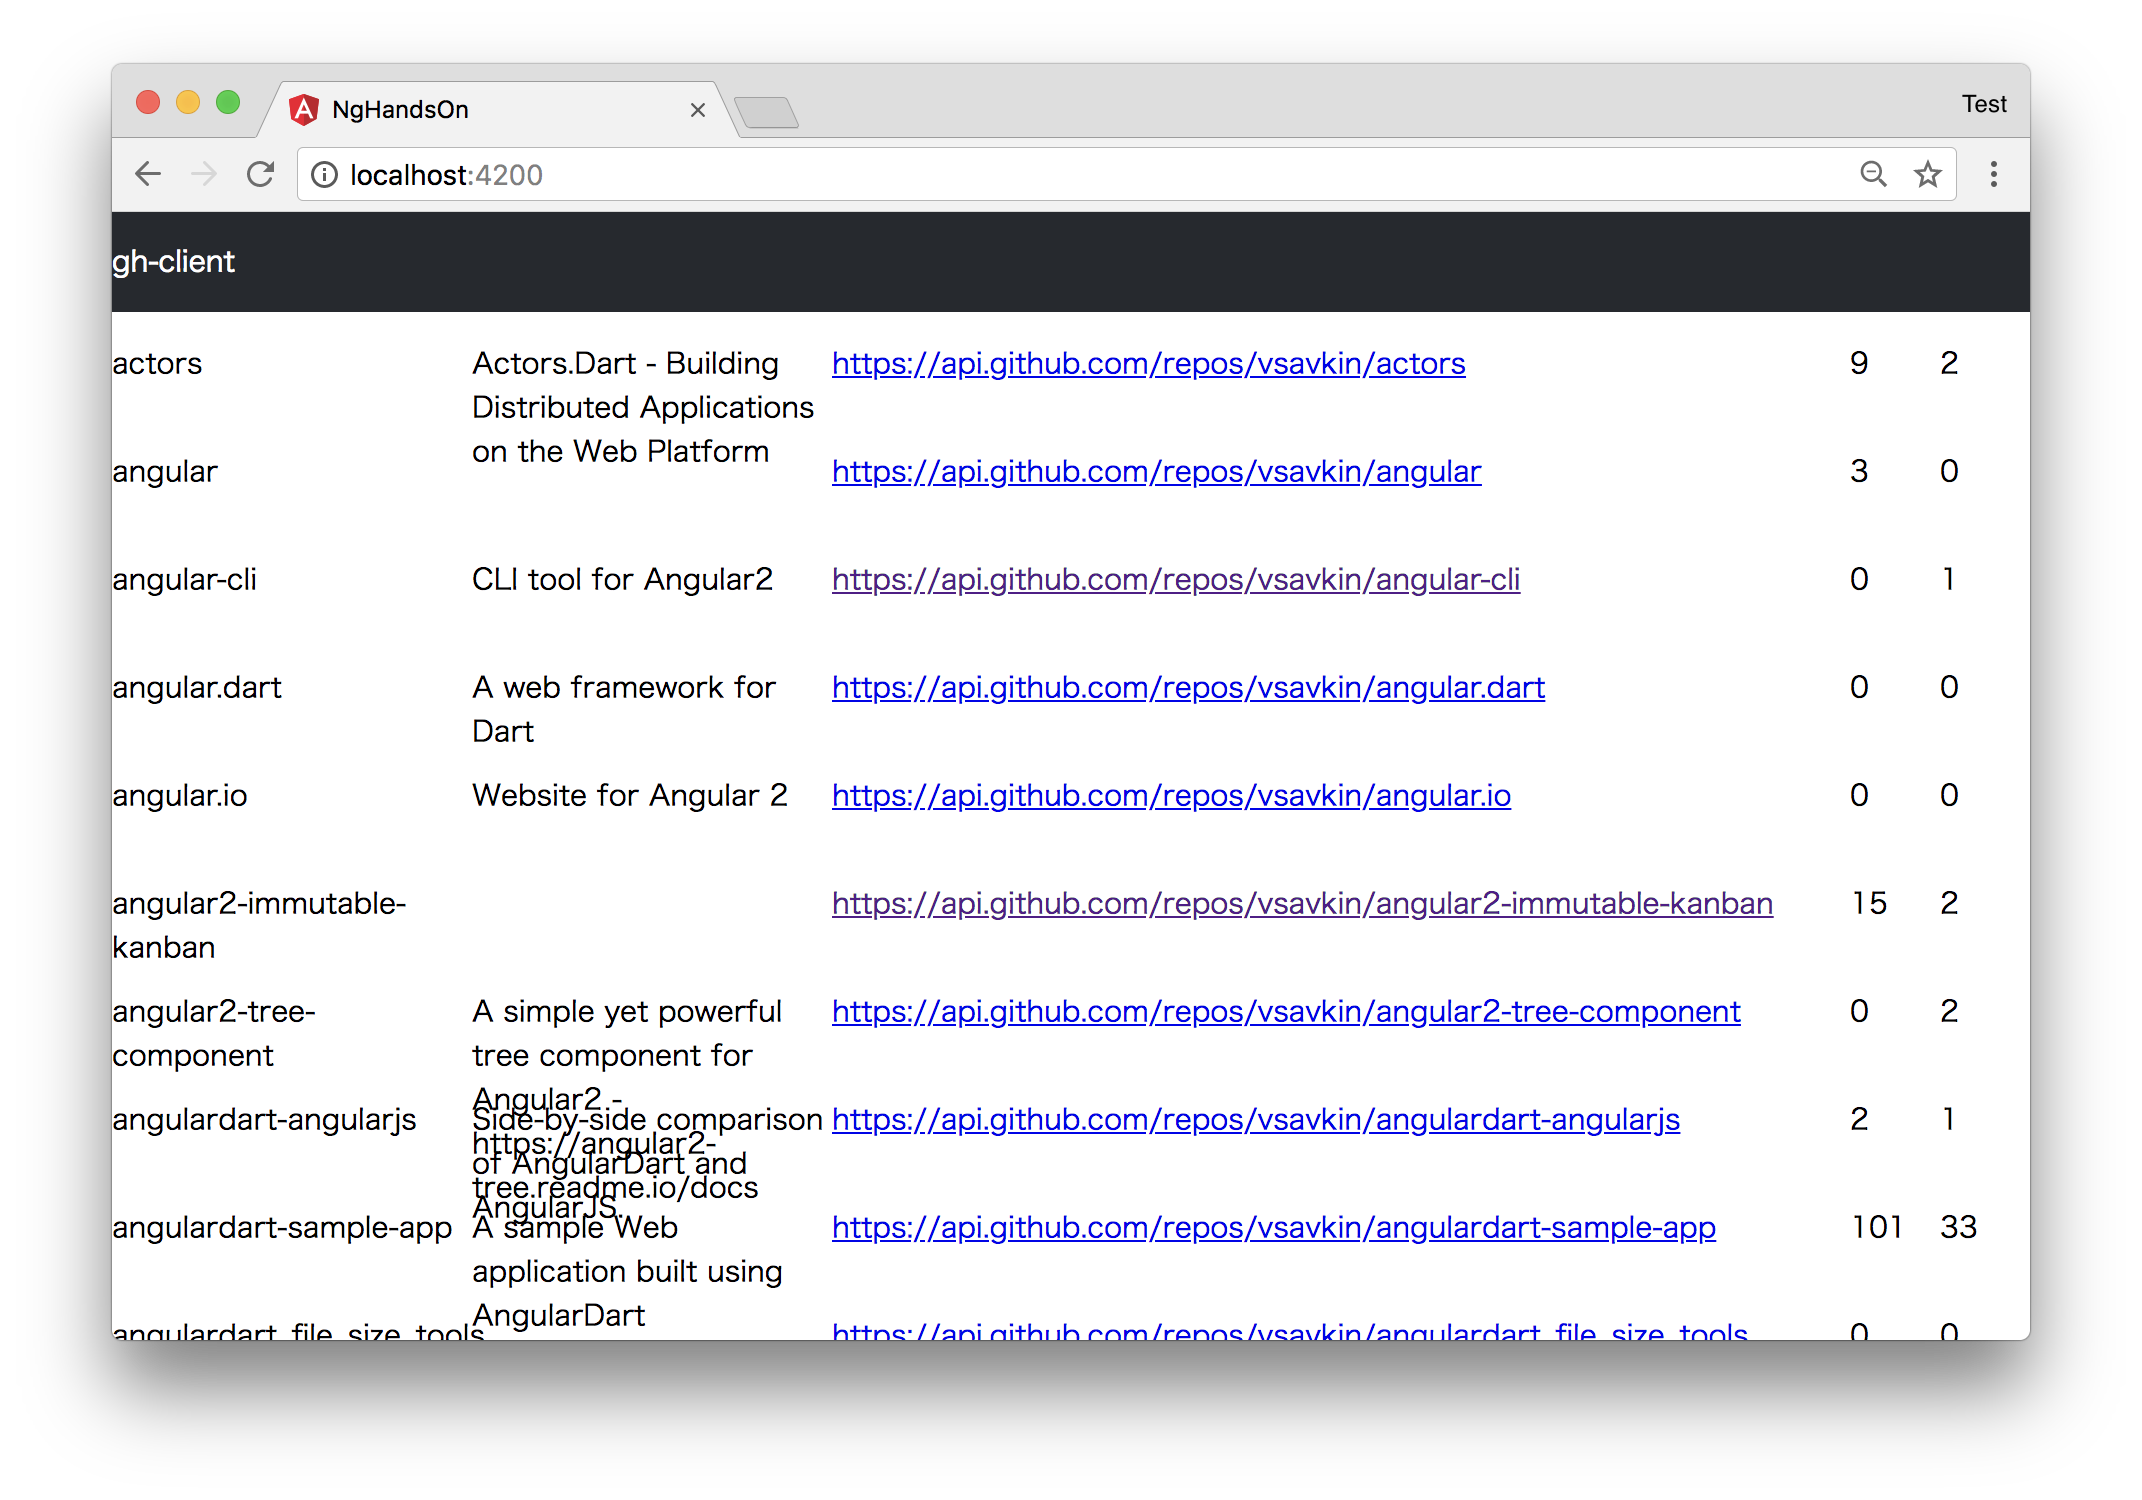
repository.component.html
<div class="repository">
  <p>{{ repo.name }}</p>
  <p>{{ repo.description }}</p>
  <p><a href="{{ repo.url }}">{{ repo.url }}</a></p>
  <p>{{ repo.stargazers_count }}</p>
  <p>{{ repo.forks_count }}</p>
</div>
repository.component.css
.repository {
  display: grid;
  grid-template-rows: 60px;
  grid-template-columns: 200px 200px 1fr 50px 50px;
}
作成したComponentを使用する
app.component.htmlを次のように書き換える
<app-toolbar></app-toolbar>

<div class="repository-list">
  <app-repository *ngFor="let repo of repos$ | async" [repo]="repo"></app-repository>
</div>
ブラウザを確認すると...

ここまでの内容を整理
- Angularプロジェクトの作成(ng new)
- 型定義(ng g interface)
- Componentの作成(ng g component)
- Serviceの作成(ng g service)
- Directive、Pipe、Input
検索機能の実装
追加で使用する型を定義
検索結果の型を定義
$ ng generate interface types/SearchRepositories type
search-repositories.type.tsを編集
import { Repository } from './repository.type';

export interface SearchRepositories {
  total_count: number;
  incomplete_results: boolean;
  items: Repository[];
}
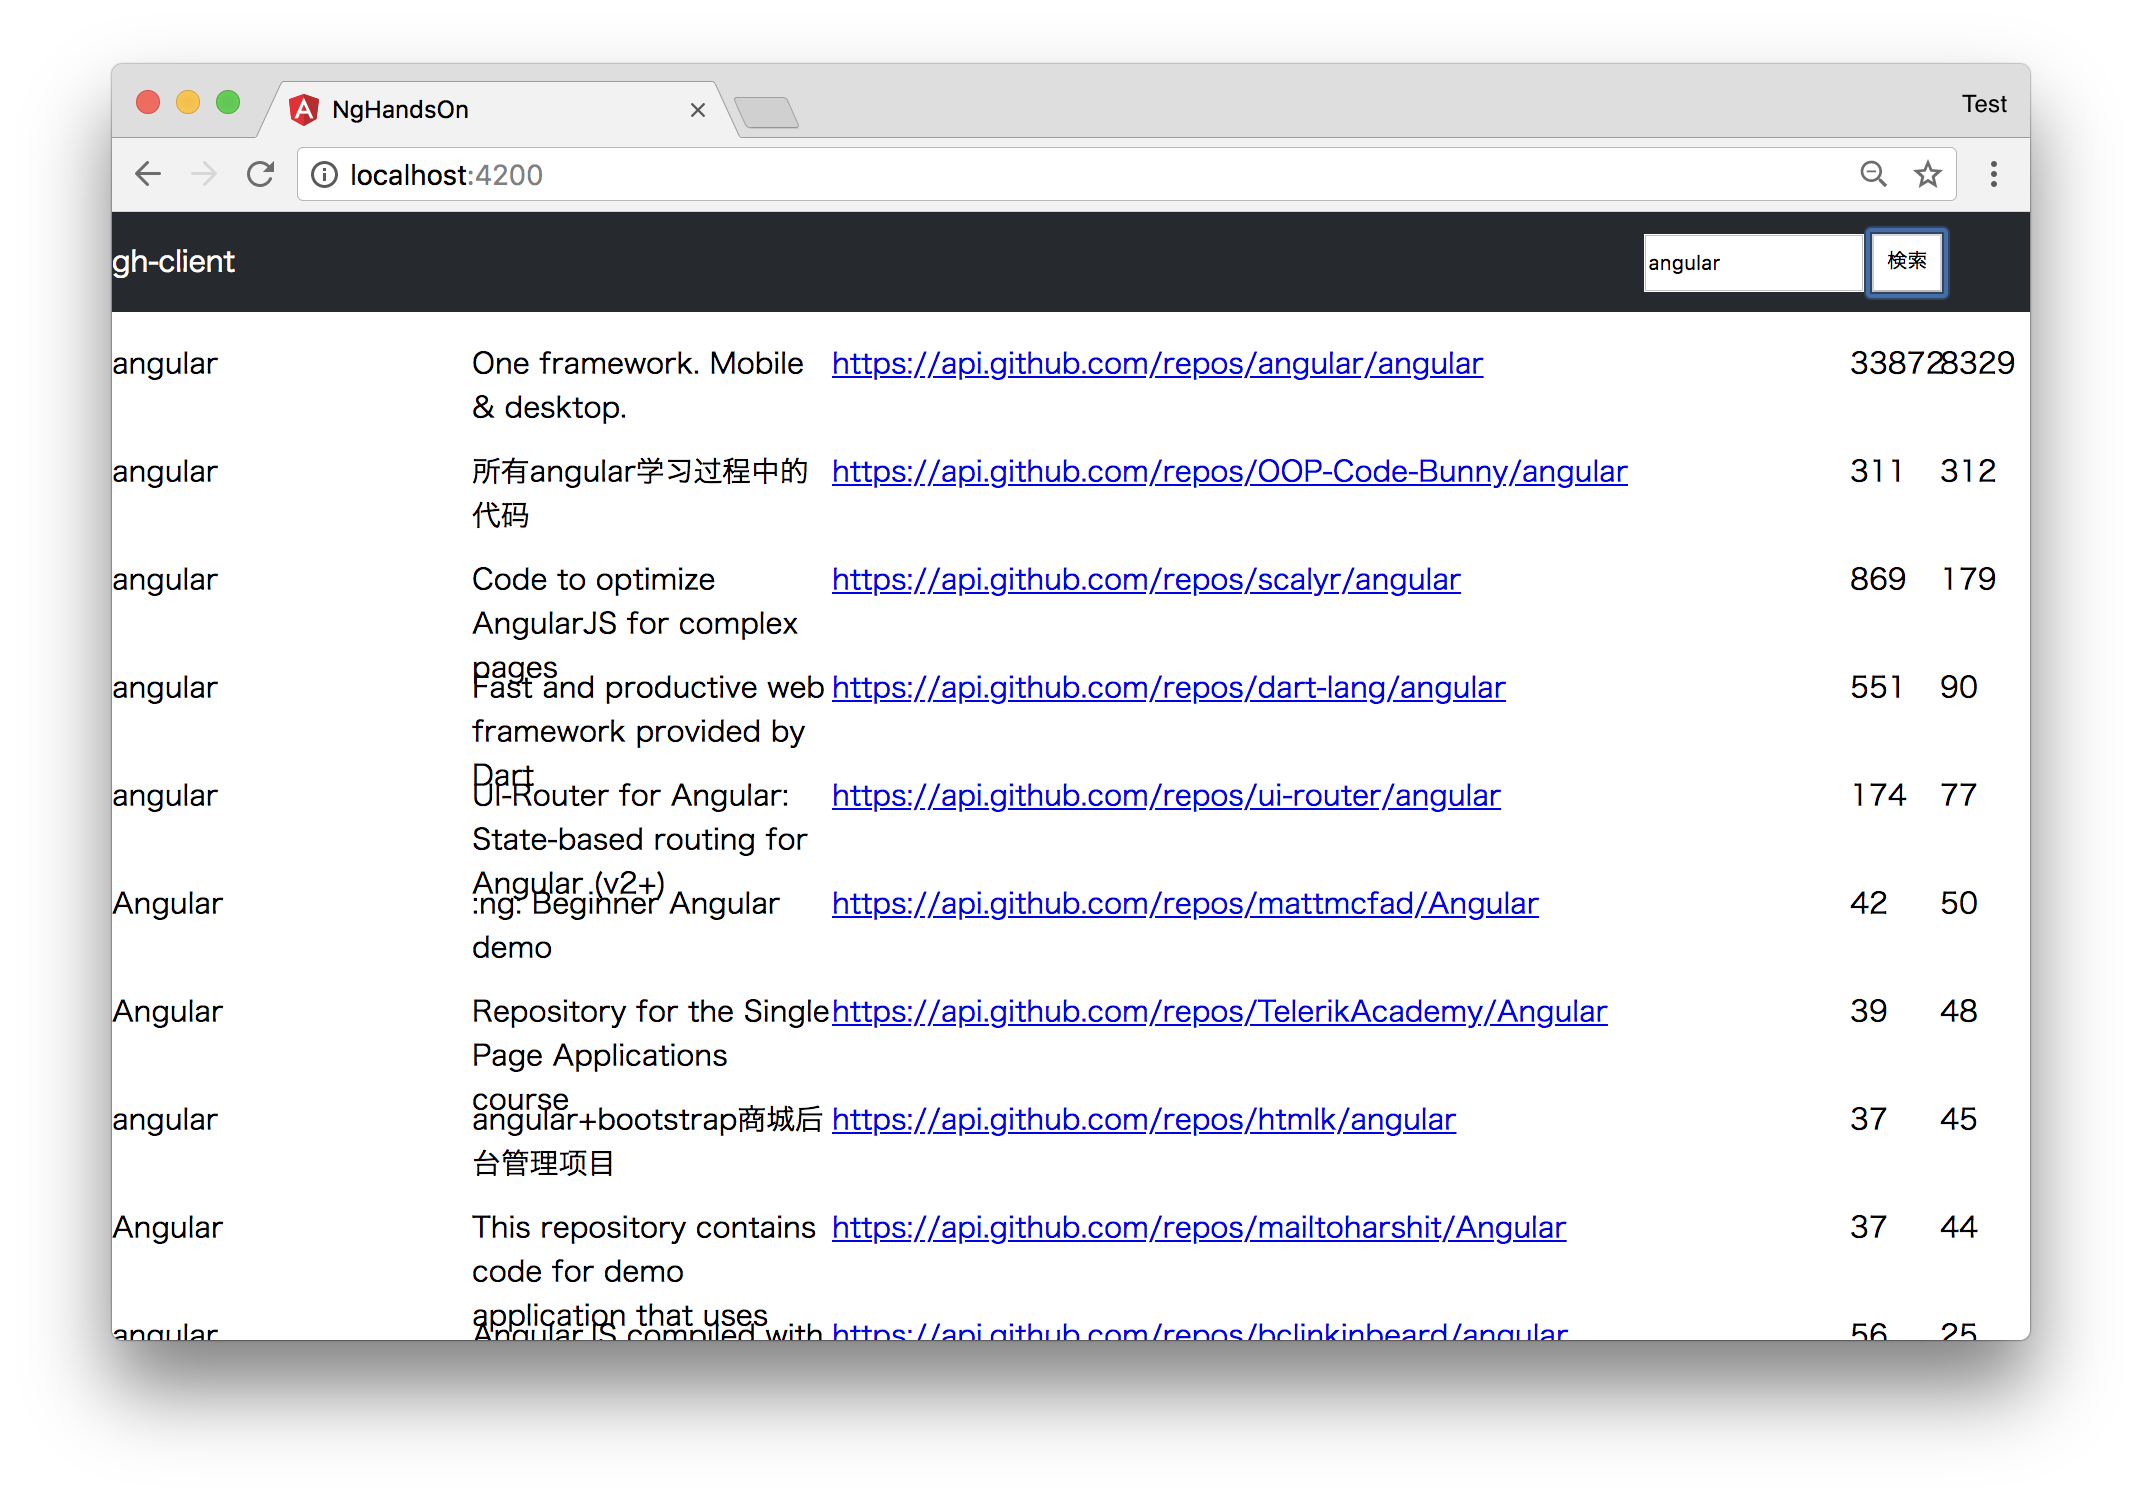
検索APIにリクエストを投げるメソッドを実装
github-api.service.tsを編集
- rxjsのmapオペレータをインポート
- 前の手順で定義したSearchRepositoriesをインポート
- searchReposを実装
import { map } from 'rxjs/operators';
import { SearchRepositories } from './../types/search-repositories.type';

...

// 追加
  searchRepos(word: string): Observable<Repository[]> {
    return this.http.get<SearchRepositories>(`https://api.github.com/search/repositories?q=${word}`)
      .pipe(map(res => res.items));
  }
検索フォームを実装
まずは、app.module.tsにFormsModuleをインポート
import { FormsModule } from '@angular/forms';
NgModuleにも追加
  imports: [
    BrowserModule,
    HttpClientModule,
    FormsModule // 追加
  ],
...
toolbar.component.tsを編集
import { Component, Output, EventEmitter } from '@angular/core'; // Output, EventEmitterを追加

@Component({
  selector: 'app-toolbar',
  templateUrl: './toolbar.component.html',
  styleUrls: ['./toolbar.component.css']
})
export class ToolbarComponent {
  @Output() search = new EventEmitter<string>();

  title = 'gh-client';
  searchWord: string;

  onClickSearch() {
    if (this.searchWord) {
      this.search.emit(this.searchWord);
    }
  }
}
toolbar.component.htmlを編集
<p class="title">{{ title }}</p>
<div class="search">
  <input class="search__input" type="text" placeholder="検索" [(ngModel)]="searchWord">
  <button class="search__button" (click)="onClickSearch()">検索</button>
</div>
toolbar.component.cssを編集
...
  display: flex;
  justify-content: space-between;
}

.search {
  width: 240px;
  margin: 12px;
  display: flex;
  justify-content: center;
}

.search__input {
  display: block;
  margin-right: 5px;
}
検索結果を画面に反映させる
toolbar.componentで入力された検索ワードをapp.componentで受け取り、Serviceに検索ワードを渡す
app.component.tsを編集
ngOnInit()の内容は削除
toolbar.componentから検索イベントを受け取った際に実行されるイベントハンドラを実装
// 追加
search(word: string) {
  console.log(`search: ${word}`);
  this.repos$ = this.githubApiService.searchRepos(word);
}
app.component.tsを編集
- app-toolbarの
searchイベントにイベントハンドラを紐付ける
<app-toolbar (search)="search($event)"></app-toolbar>
ブラウザを確認してみる...
インクリメンタルサーチの実装(おまけ)
次のコミットを参照
https://github.com/daikiojm/ng-hands-on-2018-03-12/commit/4255d6458dc59600608be154595476c032dc7918