Firebase Cloud Functionsでサムネイル作成に続き、Google Cloud Vision APIを使って、Firebase Cloud Storageにアップロードした画像への自動タグ付けを行ってみたいと思います。
Google Cloud Vision APIのコール部分は、@google-cloud/visionを使いました。
FirebaseとGCPはアカウント含めいい感じに統合されている(というよりバックエンドは一緒)ので、Vision APIとの連携時にもプロジェクトIDやAPIキーの指定などを行わずに簡単に使用することができました。
事前準備
今回のサンプルは、Firebase CLI(v3.16.0)で作成し、TypeScriptで実装していきます。
Cloud Storageにアップロードした画像の公開URL(署名付きURL)の取得を行う際に、サービスアカウントキーと呼ばれる秘密鍵が必要になります。
次の手順で取得したサービスアカウントキーをfunctionsディレクトリ以下にコピーしておきます。
今回は、service-account-credentials.jsonというファイル名にリネームしています。
サービスアカウントキーの取得
- Firebaseのコンソール右上にある歯車から「プロジェクトの設定」をクリック
- プロジェクト設定ページにあるサービスアカウントタブを開き、「新しい秘密鍵の生成」をクリック
サンプルコード
「バケットへのファイル追加をフック→サムネイル生成」までの流れは、Firebase Cloud Functionsでサムネイル作成と同様になります。
import * as functions from 'firebase-functions';
import * as admin from 'firebase-admin';
admin.initializeApp(functions.config().firebase);
const gcs = require('@google-cloud/storage')({
  keyFilename: 'service-account-credentials.json',
});
import * as vision from '@google-cloud/vision';
import * as sharp from 'sharp';
import * as path from 'path';
import * as os from 'os';

const THUMB_MAX_WIDTH = 200;
const THUMB_PREFIX = 'thumb_';

// sharpで最大幅のみを指定してリサイズ
const resizeImage = (tmpFilePath: string, destFilePath: string, width: number): Promise<any> => {
  return new Promise((resolve, reject) => {
    sharp(tmpFilePath)
      .resize(width, null)
      .toFile(destFilePath, (err, info) => {
        if (!err) {
          resolve();
        } else {
          reject(err);
        }
      });
  });
};

// パブリック参照できるURLを取得
const getDownloadURL = (bucket: any, filePath: string): Promise<string> => {
  const config = {
    action: 'read',
    expires: '03-01-2500'
  };
  const file = bucket.file(filePath);
  return file.getSignedUrl(config);
}


export const detectImage = functions.storage.object().onChange(event => {
  // eventからファイル情報取得
  const filePath = event.data.name;
  const contentType = event.data.contentType;
  const fileDir = path.dirname(filePath);
  const fileName = path.basename(filePath);
  const thumbFilePath = path.normalize(path.join(fileDir, `${THUMB_PREFIX}${fileName}`));
  const tempLocalFile = path.join(os.tmpdir(), filePath);
  const tempLocalThumbFile = path.join(os.tmpdir(), thumbFilePath);

  // 画像以外だったら何もしない
  if (!contentType.startsWith('image/')) {
    console.log('This is not an image.');
    return null;
  }

  // 既にサムネイル画像だったら何もしない
  if (fileName.startsWith(THUMB_PREFIX)) {
    console.log('Already a Thumbnail.');
    return null;
  }

  // 削除時だったら何もしない
  if (event.data.resourceState === 'not_exists') {
    console.log('This is a deletion event.');
    return null;
  }

  const bucket = gcs.bucket(event.data.bucket);
  const file = bucket.file(filePath);
  const metadata = { contentType: contentType };

  const client = new vision.ImageAnnotatorClient();

  (async () => {
    // バケットにアップロードされたファイルを仮想マシンのテンプディレクトリにダウンロード
    await file.download({ destination: tempLocalFile });

    // リサイズ
    await resizeImage(tempLocalFile, tempLocalThumbFile, THUMB_MAX_WIDTH);

    // リサイズされたサムネイルをバケットにアップロード
    await bucket.upload(tempLocalThumbFile, { destination: thumbFilePath, metadata: metadata });

    // Vision APIでラベル(タグ)検出
    const detectionRes = await client.labelDetection(tempLocalFile);
    const labels = await detectionRes[0].labelAnnotations.map(label => label.description) || [];

    // パブリック参照できるURLを取得
    const downloadUrl =  await getDownloadURL(bucket, filePath);
    const thumbnailUrl = await getDownloadURL(bucket, thumbFilePath);

    // Realtime Databaseに画像情報を保存
    const imageObj = {
      path: filePath,
      thumbnail: thumbFilePath,
      download_url: downloadUrl[0],
      thumbnail_url: thumbnailUrl[0],
      tags: labels,
      timestamp: new Date().toISOString()
    };
    await admin.database().ref('/images').push(imageObj);

  })()
  .then(() => console.log('Generate Thumbnail and Detect Image Success!'))
  .catch(err => console.log(err));
});
-
getDownloadURL()
- 画像の公開URL(署名付きURL)の取得を行っています。getSignedUrl()に許可するアクションと署名の有効期限を設定します。
-
client.labelDetection()
- @google-cloud/visionで用意されているAPIを使って、Cloud Vision APIの呼び出しを行っています。
-
admin.database()...
- 最後にRealtimeDatabaseに画像の各種詳細情報を保存します。
依存関係
package.jsonは次の通りです。
{
  "name": "functions",
  "scripts": {
    "build": "./node_modules/.bin/tslint -p tslint.json && ./node_modules/.bin/tsc",
    "serve": "npm run build && firebase serve --only functions",
    "shell": "npm run build && firebase experimental:functions:shell",
    "start": "npm run shell",
    "deploy": "firebase deploy --only functions",
    "logs": "firebase functions:log"
  },
  "main": "lib/index.js",
  "dependencies": {
    "@google-cloud/storage": "^1.5.1",
    "@google-cloud/vision": "^0.14.0",
    "firebase-admin": "~5.4.2",
    "firebase-functions": "^0.7.1",
    "sharp": "^0.18.4"
  },
  "devDependencies": {
    "@types/sharp": "^0.17.6",
    "tslint": "^5.8.0",
    "typescript": "^2.5.3"
  },
  "private": true
}
動作確認
まずは、Firebase CLIでFunctionをデプロイ。
$ firebase deploy --only functions
コンソールからCloud Storageに直接画像をアップロードすると、しばらくしてthumb_ファイルが作成作成されます。
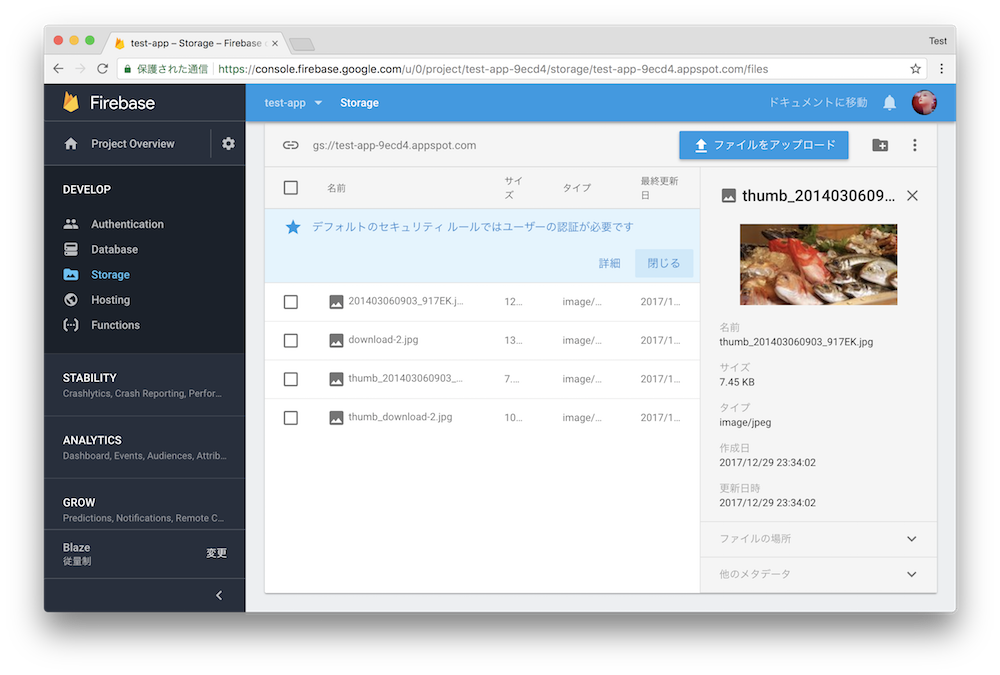
また、それと同時にDatabaseには今回保存した画像のURLとタグ情報が保存されています。

Google Cloud Vision APIからはラベル情報が英語で返却されますが、日本語のタグ情報が欲しい場合は、更にGoogle Cloud Translation APIで翻訳する方法もあるかと思います。
注意
GCPのコンソールからGoogle Cloud Vision APIの利用を有効化する際には、無料枠での利用であってもクレジットカードの登録を行い、課金を有効にする必要があります。
また、上記操作を行うと、Firebaseの課金体系も自動的に切り替わるようです。
画像の通り、無料のSparkプランから従量制のBlazeプランへの移行されていました。
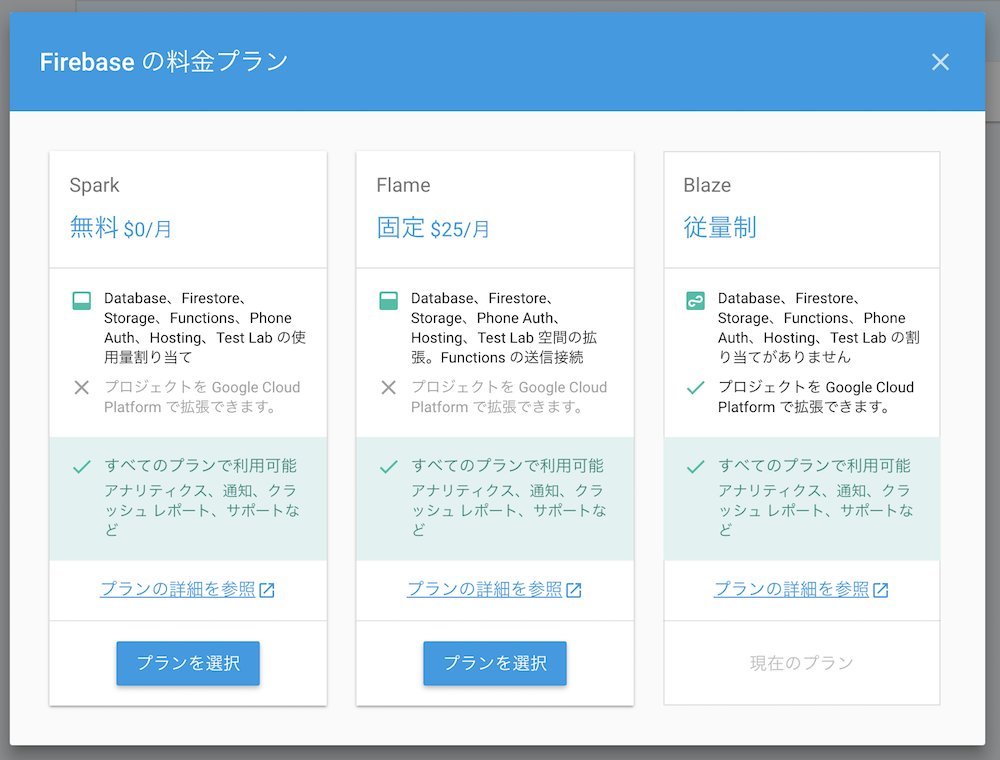
この後、Sparkプランにダウングレードした所、APIの呼び出しに失敗したので、どうやら無料枠での利用はできなそうです...
Cloud Functionsから他のGoogleサービスのアウトバウンド通信は制限されていないはずなので、FirebaseとGCPの課金状態が連携しているということなのでしょう。(あとでちゃんと調べたい)
プロジェクトをGoogle Cloud Platformで拡張できます。
とある通り、Google Cloud Platformで提供されているAPIを利用する場合は、Blazeプラン以上が必要になるようです。
所感
既存機能の組み合わせですが、数十行のコードとデプロイのコマンドだけで、ここまでできしまうのはいいですね。
また、GCPのリソース内で完結すると、APIキーの管理などを気にせず使えるのも楽です。
次は、Firebase Cloud Functionsと全文検索と組み合わせあたりを試してみたいです。