Ruby on Railsのインストール
Rails appの環境構築、Hello Worldの表示までやっていきます。
まずはRuby on Rails をインストールするためにRubyGemsというパッケージ管理フレームワークをダウンロードします。
そして、コマンドラインで
$ gem install rails -v 4.2.2
gemコマンドを使ってインストールします。今回はバージョン4.2.2を使います。
これでrailsのインストールが完了しました。
アプリケーション作成
railsコマンドでアプリケーションを作ります。
$ rails _4.2.2_ new hello_app
rails バージョン確認 new アプリケーション名
てな感じです、バージョン確認のところではアプリケーションを作成したときにそのバージョンがもしすでに使えなくなっているときにエラーがでます。
このコマンドを実行するとhello_appという名前で現在のディレクトリにフォルダが作成されるはずです。
hello_appの構成は以下のようになっています。
app/ ----モデル、ビュー、コントローラ、ヘルパーを含むアプリケーションの中心となるコード。
app/assets---- CSS, JavaScript, 画像ファイルなど
bin/ ---- バイナリ実行ファイル
config/ ----アプリケーション環境設定ファイル
db/ ----データベースファイル
doc/ ----ドキュメンテーション
lib/ ----ライブラリ
lib/assets---- ライブラリのCSS, JavaScript, 画像ファイルなど
log/ ----ログファイル
public/ ----パブリックデータ(エラーページなど)
bin/rails---- コード生成、コンソールセッション、ローカルサーバ開始プログラムなど
test/ ----アプリケーションテスト
tmp/ ----一時ファイル
vendor/ ----プラグイン、gemなどサードパーティーコード
vendor/assets---- サードパーティーのSS, JavaScript, 画像ファイルなど
README.rdoc ----簡略説明書
Rakefile ----ユーティリティタスク(rakeコマンド用)
Gemfile ----Gemパッケージ管理ファイル
Gemfile.lock---- すべてのアプリケーションコピーに同じバージョンが使われているかどうかチェックするためのgemリスト
config.ru ----Rack middleware環境設定
.gitignore ----Gitによって無視されるべきかどうかのパターンファイル
Bundler
Bundlerはデフォルトのアプリケーションを再インストールするためにつかわれます。
Gemfileを開くとデフォルトでインストールされるアプリケーションがいくつかあると思います。
source 'https://rubygems.org'


# Bundle edge Rails instead: gem 'rails', github: 'rails/rails'
gem 'rails', '4.2.2'
# Use sqlite3 as the database for Active Record
gem 'sqlite3'
# Use SCSS for stylesheets
gem 'sass-rails', '~> 5.0'
# Use Uglifier as compressor for JavaScript assets
gem 'uglifier', '>= 1.3.0'
# Use CoffeeScript for .js.coffee assets and views
gem 'coffee-rails', '~> 4.1.0'
# See https://github.com/sstephenson/execjs#readme for more supported runtimes
# gem 'therubyracer', platforms: :ruby

# Use jquery as the JavaScript library
gem 'jquery-rails'
# Turbolinks makes following links in your web application faster. Read more:
# https://github.com/rails/turbolinks
gem 'turbolinks'
# Build JSON APIs with ease. Read more: https://github.com/rails/jbuilder
gem 'jbuilder', '~> 2.0'
# bundle exec rake doc:rails generates the API under doc/api.
gem 'sdoc', '~> 0.4.0', group: :doc

# Use ActiveModel has_secure_password
# gem 'bcrypt', '~> 3.1.7'

# Use Unicorn as the app server
# gem 'unicorn'

# Use Capistrano for deployment
# gem 'capistrano-rails', group: :development

group :development, :test do
  # Call 'debugger' anywhere in the code to stop execution and get a
  # debugger console
  gem 'byebug'

  # Access an IRB console on exceptions page and /console in development
  gem 'web-console', '~> 2.0'

  # Spring speeds up development by keeping your application running in the
  # background. Read more: https://github.com/rails/spring
  gem 'spring'
end
もしこれを変更した場合に
hello_app以下で
$ bundle install
コマンドを実行することで再インストールすることができます。
gemコマンドにはいろいろなバージョンの記述の仕方があります。
gem 'sqlite3'
アプリケーション名のあとに何も記述しないとBundlerは自動的に最新バージョンをインストールします。
gem 'uglifier', '>= 1.3.0'
これは1.3.0以上の最新バージョンをインストールします。
gem 'coffee-rails', '~> 4.0.0'
これは4.0.0以上新しい、しかし4.1以上でないバージョンをインストールします。
今回は特に変更しないので何もしません。
rails server
次はローカルサーバを立ち上げましょう。コマンドはrails serverで実行すると以下のようになるはずです。
$ rails server
=> Booting WEBrick
=> Rails application starting on http://localhost:3000
=> Run `rails server -h` for more startup options
=> Ctrl-C to shutdown server
ブラウザでhttp://localhost:3000 を開くと以下のようになります。
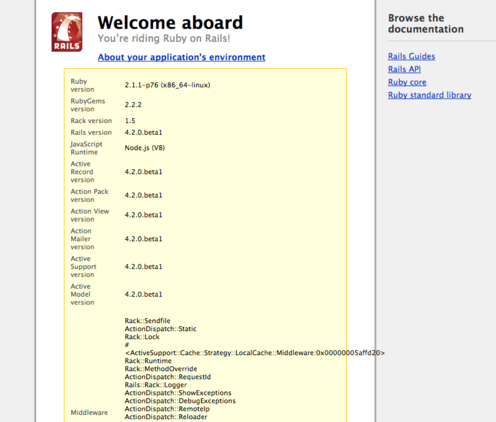
これでサーバーが立ち上がりました。
MVC
railsアプリケーションはMVC(model-view-controller)で構成されていてHello Worldを表示するためにはまずコントローラでコントローラアクションを定義します。
今現在デフォルトであるコントローラはhello_app/app/controllers/application_controller.rbです。
このなかにhelloという名前のコントローラアクションを定義します。
そしてrender関数をつかってhello, world!というテキストを返します。
class ApplicationController < ActionController::Base
  # Prevent CSRF attacks by raising an exception.
  # For APIs, you may want to use :null_session instead.
  protect_from_forgery with: :exception

  def hello
    render text: "hello, world!"
  end
end
これだけではまだ表示されません。
Route
ルート(Route)ファイルからルート(Root)を設定しなくてはなりません。
つまりURLをたたいたときにどのファイルのページを開くかRouteファイルに教えてあげなければいけないのです。
ルートファイルはhello_app/config/routes.rbです。
開くと
Rails.application.routes.draw do
  .
  .
  .
  # You can have the root of your site routed with "root"
  # root 'welcome#index'
  .
  .
  .
end
root 'welcome#index'
というのが見つかるはずです。
これはいま初期ページ(root)がデフォルトのwelcomeページだというのを表します。
これを
Rails.application.routes.draw do
  .
  .
  .
  # You can have the root of your site routed with "root"
  root 'application#hello'
  .
  .
  .
end
#をとって、application#helloに書き換えます。
これでapplication_controllerのhelloアクションが最初に呼び出されるように設定されました。
そしてブラウザで開くと、
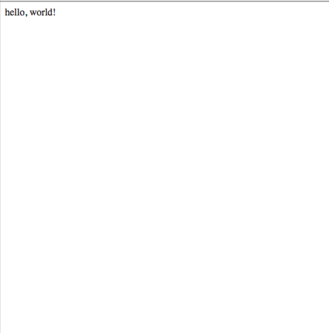
これでRuby on Railsの環境構築、インストール、サーバーたちあげ、Hello Worldの表示が一通りできました。