自分なりのRedux導入法を紹介したいと思います。
Reduxとは?についてはすでに色々な記事があると思うので、自分で探してください。
create-react-app を使ってカウンターアプリを作って説明していきます。
Reactアプリ作成
$ create-react-app counter-app
パッケージインストール
Reduxアーキテクチャを実現するために必要なパッケージをインストールします。
$ yarn add prop-types redux react-redux
Reduxの導入
1. Store
状態(state)を保持する場所で、状態とはjsonデータが集まったもののイメージです。
index.jsファイルを編集します。
rootReducers はこれから用意しますので、気にしないでください。
// src/index.js
import React from 'react';
import ReactDOM from 'react-dom';
import './index.css';
import App from './App';
import registerServiceWorker from './registerServiceWorker';
import { createStore } from 'redux';
import rootReducer from './reducers/index';
import { Provider } from 'react-redux';

// Storeの作成
const store = createStore(rootReducer);

ReactDOM.render(
  <Provider store={store}>
    <App />
  </Provider>,
  document.getElementById('root')
);
registerServiceWorker();
2. Actions
よくActionTypesとActionsを分けたりするみたいですが、
個人的にはActionsは状態ごとに分け、一緒に定義しています。
GitHub - redux-utilities/flux-standard-action: A human-friendly standard for Flux action objects.
によると、
{
  type: 'ADD_TODO',
  payload: new Error(),
  error: true,
  meta: 'optional values'
}
と4つのpropertyがあって
- type: (必須) Actionのタイプ
- payload: Actionで渡ってきた引数など。errorがtrueの場合はエラーオブジェクトにすべき。
- error: エラーかどうか
- meta: なんでも良い。追加情報など。
だそうです。
今回はとくにActionから渡したい値もないので、typeだけ定義します。
// src/actions/counter.js
// Action Types
export const INCREMENT = 'INCREMENT';
export const DECREMENT = 'DECREMENT';

// Actions
export function increment() {
  return { type: INCREMENT }
}

export function decrement() {
  return { type: DECREMENT }
}
3. Reducers
Reducerは定義したActionを元に状態の変更を行います。
Reducer(還元剤)なので、変更後の状態は副作用のないものでなければなりません。
reducersディレクトリを作成、counter.jsとindex.jsファイルを作成します。
CounterのReducerを用意。
// src/reducers/counter.js
import { INCREMENT, DECREMENT } from '../actions/counter';

const initialState = {
  count: 0
};

export function counterReducer(state = initialState, action){
  switch(action.type) {
    case INCREMENT:
      return {
        ...state,
        count: ++state.count
      };
    case DECREMENT:
      return {
        ...state,
        count: --state.count
      };
    default:
      return state;
  }
}
全てのReducerを取りまとめるRootのReducerを用意。
// src/reducers/index.js
import { combineReducers } from 'redux';
import { counterReducer } from './counter';

const rootReducer = combineReducers({
  // 状態ごとのReducer
  counterReducer,
})

export default rootReducer;
5. Container Components
Reduxを取り入れたReact Componentには2種類に分けられ、
Presentational ComponentsとContainer Componentsがあります。
簡単にいうと
| Presentational Components | Container Components | |
|---|---|---|
| 目的 | どのように見えるか | どのような動きになるか |
| Reduxを意識した作り | NO | YES |
| データの読み込み | propsから | Redux stateから |
| データの変更 | propsからcllbacksを呼ぶ | Redux actionsをdispatchする |
| 書かれ方 | 手動で | React Reduxから生成される |
という風に区別でき、
Presentational ComponentsはReduxを意識せず、見た目だけにフォーカスしたコンポーネントで、
Container ComponentsはそのPresentational Componentsとこれまで用意したReduxアーキテクチャ(Reducers, Actions, Store)をつなぐためのコンポーネントなイメージです。
Counter というコンポーネントが出てきていますが、
これはPresentational Componentsで次に説明しますので、一旦無視してください。
App.jsを編集します。
// src/App.js
import React, { Component } from 'react';
import './App.css';
import PropTypes from 'prop-types';
import { connect } from 'react-redux';
import { increment, decrement } from './actions/counter';
import Counter from './components/counter';

class App extends Component {
  render() {
    return (
      <div className="App">
        <Counter {...this.props} />
      </div>
    );
  }
}

// 型チェック
App.propTypes = {
  counter: PropTypes.object.isRequired,
  dispatch_increment: PropTypes.func.isRequired,
  dispatch_decrement: PropTypes.func.isRequired
}

// state => props
function mapStateToProps(state) {
  return {
    counter: state.counterReducer,
  }
}

// dispatch => props
function mapDispatchToProps(dispatch) {
  return {
    dispatch_increment: () => dispatch(increment()),
    dispatch_decrement: () => dispatch(decrement())
  }
}

export default connect(mapStateToProps, mapDispatchToProps)(App);
5. Presentational Components
先ほど出てきた Counter がカウンターアプリの見た目部分を担当しているコンポーネントです。
componentsディレクトリを作成、その下にcounter.jsファイルを作成します。
// src/components/counter.js
import React, { Component } from 'react';

class Counter extends Component {
  render() {
   let { counter, dispatch_increment, dispatch_decrement } = this.props;
   return (
     <div>
       <div>{counter.count}</div>
       <button onClick={dispatch_increment}>+</button>
       <button onClick={dispatch_decrement}>-</button>
     </div>
   );
  }
}

export default Counter;
ご覧の通り、Presentational Componentsからは、Actionの切り替えやstateにあるデータの読み込みをpropsから行っており、見た目部分に集中できています。
完成
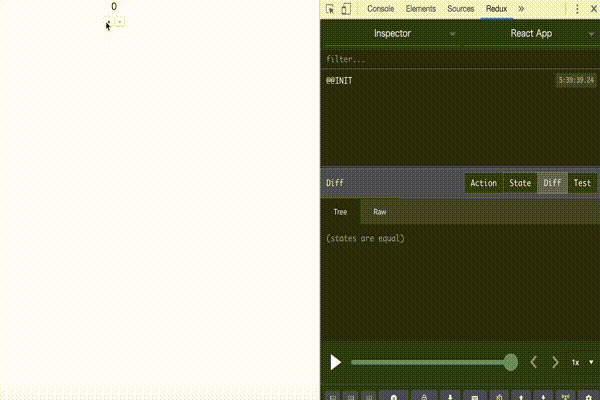
番外編: Redux Dev Tools
せっかくReduxを導入したので、開発ツールを使いましょう。
これで飛躍的にデバッグがしやすくなります!
Redux Devtools Extensionを使った時のこの感動を伝えたい - Qiita
まとめ
以上で自分なりのRedux導入方法を書いてみました。
redux-actions 、 redux-saga なども使うと良いですが、今回は基本的な部分だけを紹介しました。