目標
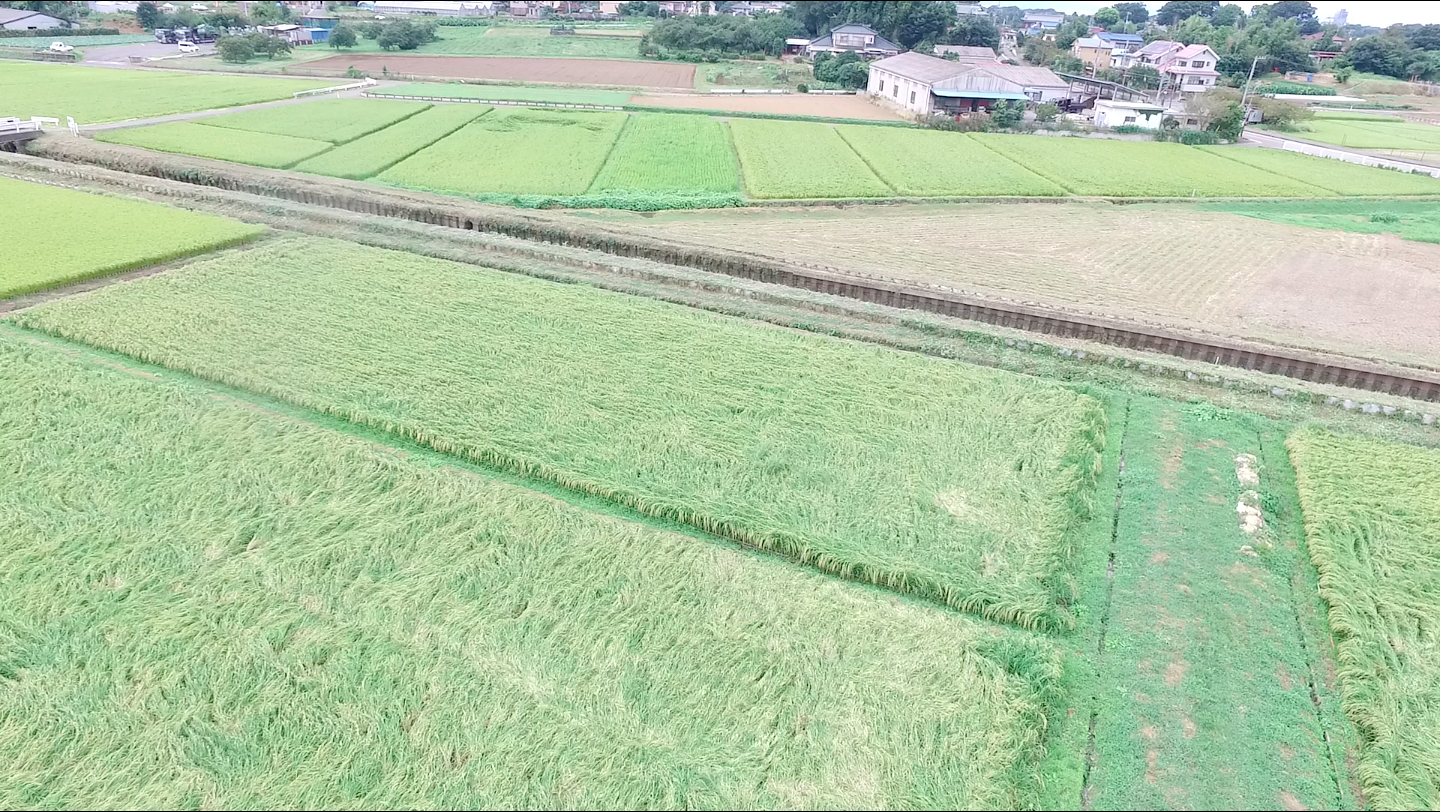
ドローンで撮影した上記画像を真上から撮影した画像にしたい!
更に田んぼの面積も求めたい!
というのが最終的な目標になります。
使用する技術
本記事では下記の言語の環境とライブラリのインストールが完了しているものだと仮定します。
- Python3
- OpenCV3
- numpy
- matplotlib
Python3で射影変換をする
最初に画像を真上からのものに変換していきます。
射影変換には、OpenCVのgetPerspectiveTransformメソッドとwarpPerspectiveメソッドを利用します。
import cv2
import numpy as np
import matplotlib.pyplot as plt

    # 画像を読み込む
    img = cv2.imread('読み込む画像名')

    # 画像の横と縦の長さを切り出す
    rows,cols,ch = img.shape

    # 画像の座標上から4角を切り出す
    pts1 = np.float32([[320,236],[1104,402],[12,332],[1053,640]])
    pts2 = np.float32([[0,0],[1250,0],[0,500],[1250,500]])

    # 透視変換の行列を求める
    M = cv2.getPerspectiveTransform(pts1,pts2)

    # 変換行列を用いて画像の透視変換
    rst = cv2.warpPerspective(img,M,(1250,500))
    # 透視変換後の画像を保存
    cv2.imwrite('出力する画像名',rst)
まず、コード全体が上記になります。
座標を入力
pts1 = np.float32([[左上の座標],[右上の座標],[左下の座標],[右下の座標]])
pst1に代入するのは、画像の中の座標になります。
著者は手作業で調べました。
pts2 = np.float32([[0,0],[1250,0],[0,500],[1250,500]])
出力座標
こちらが変換後の座標です。順番は、左上、右上、左下、右下でpst1と同じ順番です。
rst = cv2.warpPerspective(img,M,(1250,500))
下から2番目のコードが最終的な大きさや比率を決定しています。
元画像の比率で出力
rst = cv2.warpPerspective(img,M,(rows,cols))
元画像の比率のまま出力してくれます。
射影変換の結果
matplotlibで出力した結果が上記になります。
左の画像の赤い点が指定した座標です。
右側の画像が上から撮った角度に直したものです。
特定の色相を抽出して面積を計算
python3で特定の画像を抽出し、その色相の面積を計算します。
def extract_color (src,h_th_low,h_th_up,s_th,v_th):
    # HSV変換
    hsv = cv2.cvtColor(src, cv2.COLOR_BGR2HSV)
    h,s,v = cv2.split(hsv)


    # 色相の赤における0°と360°を調整
    if h_th_low > h_th_up:
        ret,h_dst_1 = cv2.threshold(h,h_th_low,255,cv2.THRESH_BINARY)
        ret,h_dst_2 = cv2.threshold(h,h_th_up,255,cv2.THRESH_BINARY_INV)

        # BINARYとBINARY_INVのどちらかをとる
        dst = cv2.bitwise_or(h_dst_1,h_dst_2)

    else:
        # 赤以外はそのまま適用する
        ret,dst = cv2.threshold(h,h_th_low,255,cv2.THRESH_TOZERO)
        ret,dst = cv2.threshold(dst,h_th_up,255,cv2.THRESH_TOZERO_INV)

        ret,dst = cv2.threshold(dst,0,255,cv2.THRESH_BINARY)

        # S(明度)とV(彩度)についても同様の場合分けを行う
        ret, s_dst = cv2.threshold(s, s_th, 255, cv2.THRESH_BINARY)
        ret, v_dst = cv2.threshold(v, v_th, 255, cv2.THRESH_BINARY)

        dst = cv2.bitwise_and(dst, s_dst)
        dst = cv2.bitwise_and(dst, v_dst)

        return dst

if __name__ == '__main__':
    # 生成された画像を読み込み
    right_image = cv2.imread('読み込むファイル名')

    # 緑色だけを抽出
    green_image = extract_color(right_image,0,178,50,0)

    # 緑色を抽出後の画像を読み込み
    m = cv2.countNonZero(green_image)
    h, w = green_image.shape

    # 画像の面積と緑色の割合を計算
    per = round(100*float(m)/(w * h),1)

    # 計算結果を表示
    print("Moment[px]:",m)
    print("Percent[%]:", per)

    # 最終的な画像を表示、保存
    cv2.imshow("Mask",green_image)
    cv2.imwrite('出力するファイル名',green_image)
    cv2.waitKey(0)

    # 全てのウィンドウを閉じる
    cv2.destroyAllWindows()
出力画像
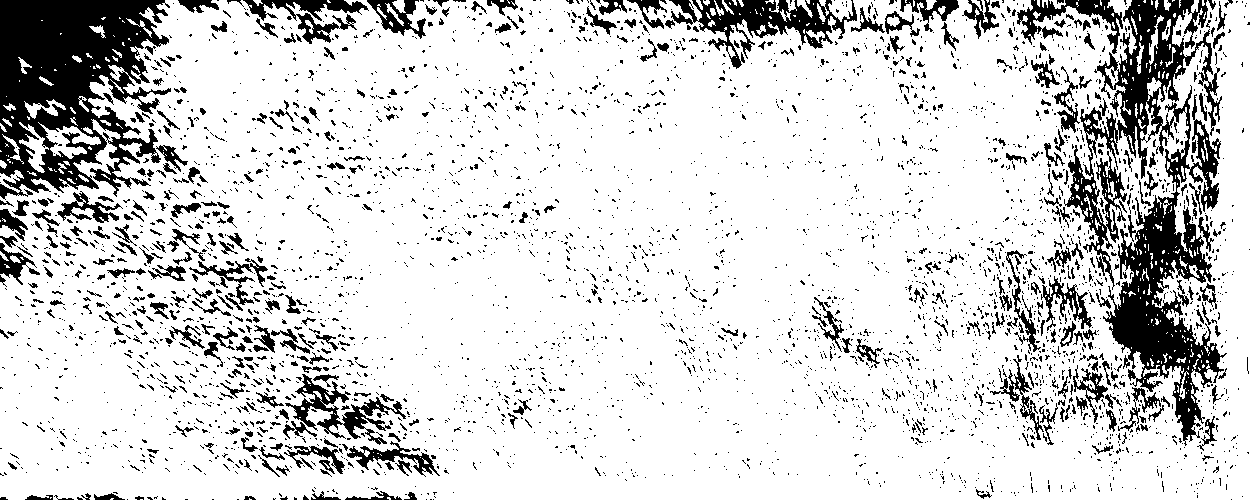
先ほどのOutputの画像から緑色の色相を抽出しました。
計算結果
Moment[px]:522283
Percent[%]:83.6
全体の中の83.6%が緑色だよと教えてくれます。
全てのコード(サンプル)
下記がコード全てになります。
import cv2
import numpy as np
import matplotlib.pyplot as plt

def fix_distortion():
    # 画像を読み込む
    img = cv2.imread('./sources/hata.png')

    # 画像の横と縦の長さを切り出す
    rows,cols,ch = img.shape

    # 画像の座標上から4角を切り出す
    pts1 = np.float32([[320,236],[1104,402],[12,332],[1053,640]])
    pts2 = np.float32([[0,0],[1250,0],[0,500],[1250,500]])

    # 透視変換の行列を求める
    M = cv2.getPerspectiveTransform(pts1,pts2)

    # 変換行列を用いて画像の透視変換
    rst = cv2.warpPerspective(img,M,(1250,500))
    # 透視変換後の画像を保存
    cv2.imwrite('./sources/yugami.png',rst)


def extract_color (src,h_th_low,h_th_up,s_th,v_th):
    # HSV変換
    hsv = cv2.cvtColor(src, cv2.COLOR_BGR2HSV)
    h,s,v = cv2.split(hsv)


    # 色相の赤における0°と360°を調整
    if h_th_low > h_th_up:
        ret,h_dst_1 = cv2.threshold(h,h_th_low,255,cv2.THRESH_BINARY)
        ret,h_dst_2 = cv2.threshold(h,h_th_up,255,cv2.THRESH_BINARY_INV)

        # BINARYとBINARY_INVのどちらかをとる
        dst = cv2.bitwise_or(h_dst_1,h_dst_2)

    else:
        # 赤以外はそのまま適用する
        ret,dst = cv2.threshold(h,h_th_low,255,cv2.THRESH_TOZERO)
        ret,dst = cv2.threshold(dst,h_th_up,255,cv2.THRESH_TOZERO_INV)

        ret,dst = cv2.threshold(dst,0,255,cv2.THRESH_BINARY)

        # S(明度)とV(彩度)についても同様の場合分けを行う
        ret, s_dst = cv2.threshold(s, s_th, 255, cv2.THRESH_BINARY)
        ret, v_dst = cv2.threshold(v, v_th, 255, cv2.THRESH_BINARY)

        dst = cv2.bitwise_and(dst, s_dst)
        dst = cv2.bitwise_and(dst, v_dst)

        return dst


if __name__ == '__main__':
    # fix_distortionメソッド実行
    fix_distortion()

    # 生成された画像を読み込み
    right_image = cv2.imread('./sources/yugami.png')

    # 緑色だけを抽出
    green_image = extract_color(right_image,0,178,50,0)

    # 緑色を抽出後の画像を読み込み
    m = cv2.countNonZero(green_image)
    h, w = green_image.shape

    # 画像の面積と緑色の割合を計算
    per = round(100*float(m)/(w * h),1)

    # 計算結果を表示
    print("Moment[px]:",m)
    print("Percent[%]:", per)

    # 最終的な画像を表示、保存
    cv2.imshow("Mask",green_image)
    cv2.imwrite('./sources/agri.png',green_image)
    cv2.waitKey(0)

    # 全てのウィンドウを閉じる
    cv2.destroyAllWindows()
参考になれば嬉しいです。


