なにするの
React アプリケーションでreact-leaflet-pixi-overlay を利用して地図上にオブジェクトを描画してみます。
やってみる
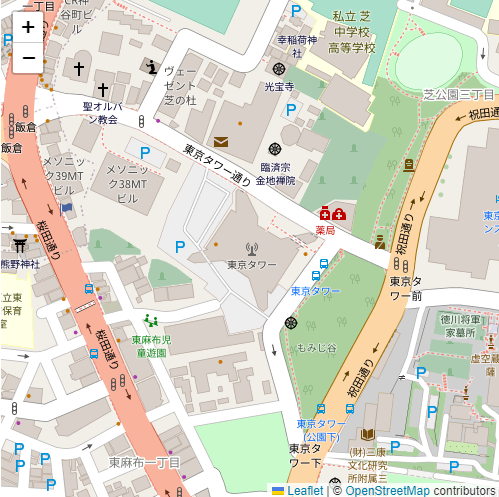
1. Reactアプリケーションで地図を描画する
React アプリケーションを作成し、ライブラリをインストール。
Leaflet の React ラッパー、react-leaflet を使います。
npx create-react-app leaflet-pixi-sample
cd leaflet-pixi-sample
npm install react-leaflet --save
Example に従い、App.js を書き換えます。
App.js
import 'leaflet/dist/leaflet.css'
import { MapContainer, TileLayer } from 'react-leaflet'
function App() {
return (
<div className="App">
{/* MapContainer コンポーネントの中に地図タイルやマーカーを配置する */}
<MapContainer
// center:地図の初期中心点を指定
center={[35.658581, 139.745433]}
// zoom:地図の初期ズームサイズを指定
zoom={17}
style={{
width: '500px',
height: '500px',
margin: 'auto',
}}
>
{/* TileLayer コンポーネントで地図タイルを配置する */}
<TileLayer
// attribution:地図の出典を表示
attribution='© <a href="https://www.openstreetmap.org/copyright">OpenStreetMap</a> contributors'
// url:地図タイル取得先を指定
url="https://{s}.tile.openstreetmap.org/{z}/{x}/{y}.png"
/>
</MapContainer>
</div>
)
}
export default App
プロジェクトを実行。
npm start
2. Pixi.js で地図上にオブジェクトを描画する
追加のライブラリをインストールします。
Pixi.js を用いた Leaflet オーバーレイ描画ライブラリ Leaflet.PixiOverlay ……の Reactラッパー、react-leaflet-pixi-overlay を使います。
npm install react-leaflet-pixi-overlay --save
App.js を書き換えて地図上にマーカーを配置してみます。
App.js
import 'leaflet/dist/leaflet.css'
import { MapContainer, TileLayer } from 'react-leaflet'
import PixiOverlay from 'react-leaflet-pixi-overlay'
function App() {
return (
<div className="App">
{/* MapContainer コンポーネントの中に地図タイルやマーカーを配置する */}
<MapContainer
// center:地図の初期中心点を指定
center={[35.658581, 139.745433]}
// zoom:地図の初期ズームサイズを指定
zoom={17}
style={{
width: '500px',
height: '500px',
margin: 'auto',
}}
>
{/* TileLayer コンポーネントで地図タイルを配置する */}
<TileLayer
// attribution:地図の出典を表示
attribution='© <a href="https://www.openstreetmap.org/copyright">OpenStreetMap</a> contributors'
// url:地図タイル取得先を指定
url="https://{s}.tile.openstreetmap.org/{z}/{x}/{y}.png"
/>
{/* PixiOverlay コンポーネントで地図上にオブジェクトを配置する */}
<PixiOverlay
markers={[
{
id: '0',
iconColor: 'green',
position: [35.658581, 139.745433],
},
{
id: '1',
iconColor: 'orange',
position: [35.6576, 139.7489],
// ポップアップやクリックイベント、ツールチップも設定できます
popup: '芝公園',
popupOpen: true,
onClick: () => alert('Clicked!'),
tooltip: 'Tooltip!',
},
]}
/>
</MapContainer>
</div>
)
}
export default App
プロジェクトを実行。
npm start
おわりに
大量のマーカーを配置して性能検証をしてみたいところです。
react-leaflet-pixi-overlay ではカスタムアイコンも配置できるようですが、ポリゴンやヒートマップなどのより複雑なオブジェクトは Leaflet.PixiOverlay で描画したり、直接WebGLを操作する必要がありそうですね。

