Djangoでline botを作る!
まずはline developersのアカウントを取得するためlineのアカウントでログイン
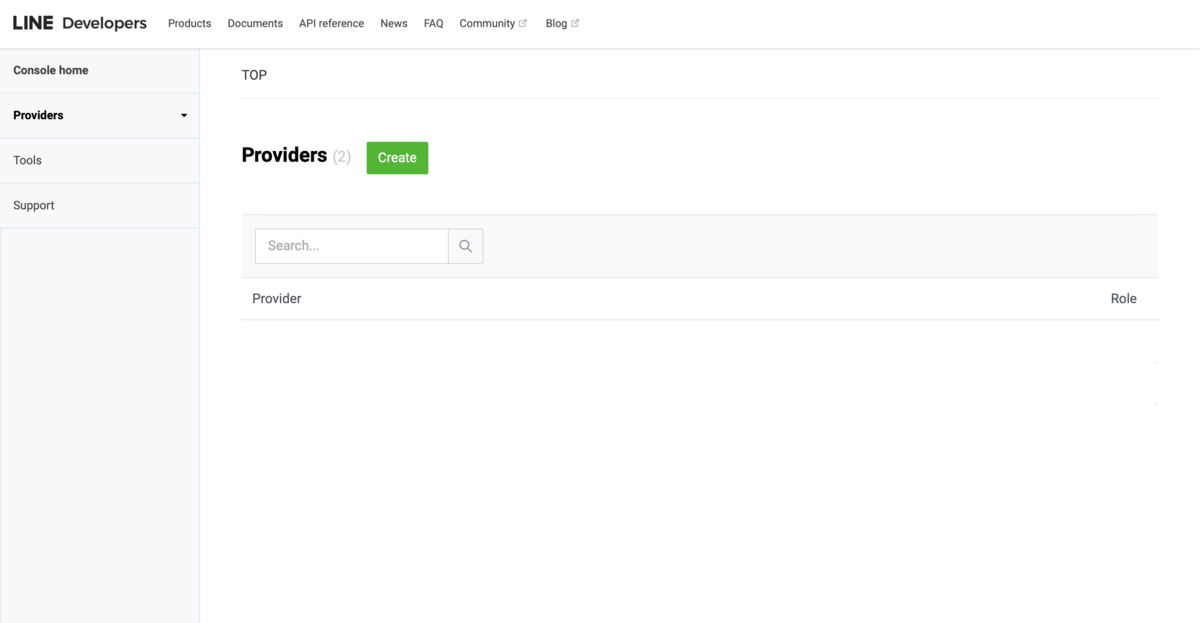
左上のconsole homeから新規provider をcreateする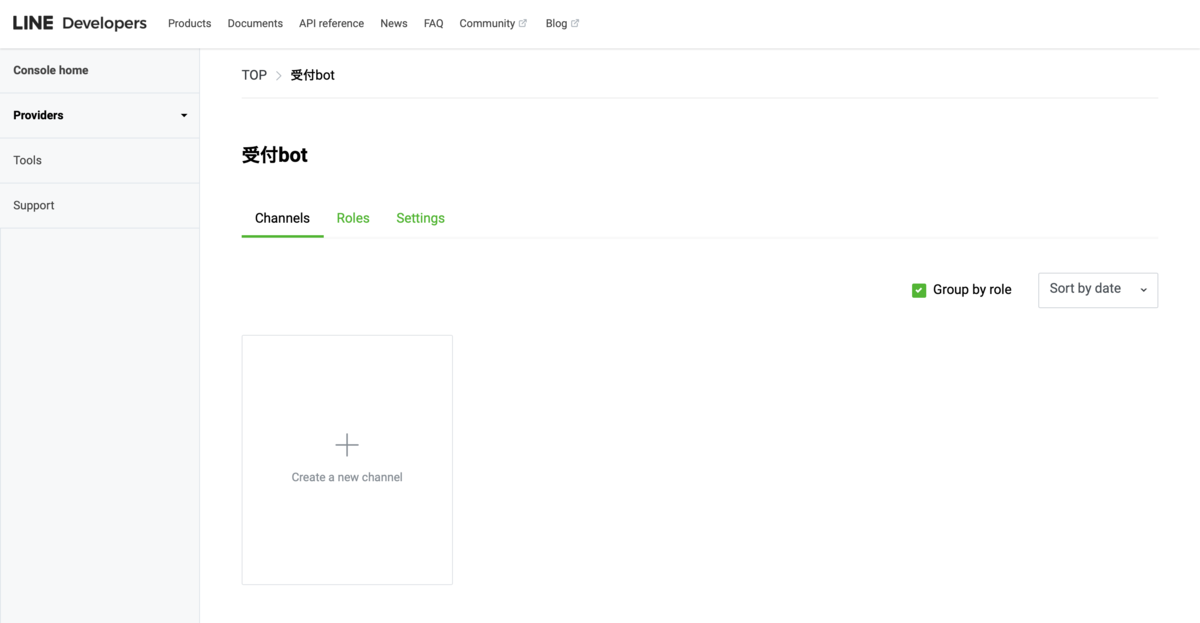
そのしたのproviderからcreate new channelを選択し、channel typeはmessaging API
その後はそれぞれの設定をする。ここまでするとqrコードで自分の作るline botが登録できるようになる。
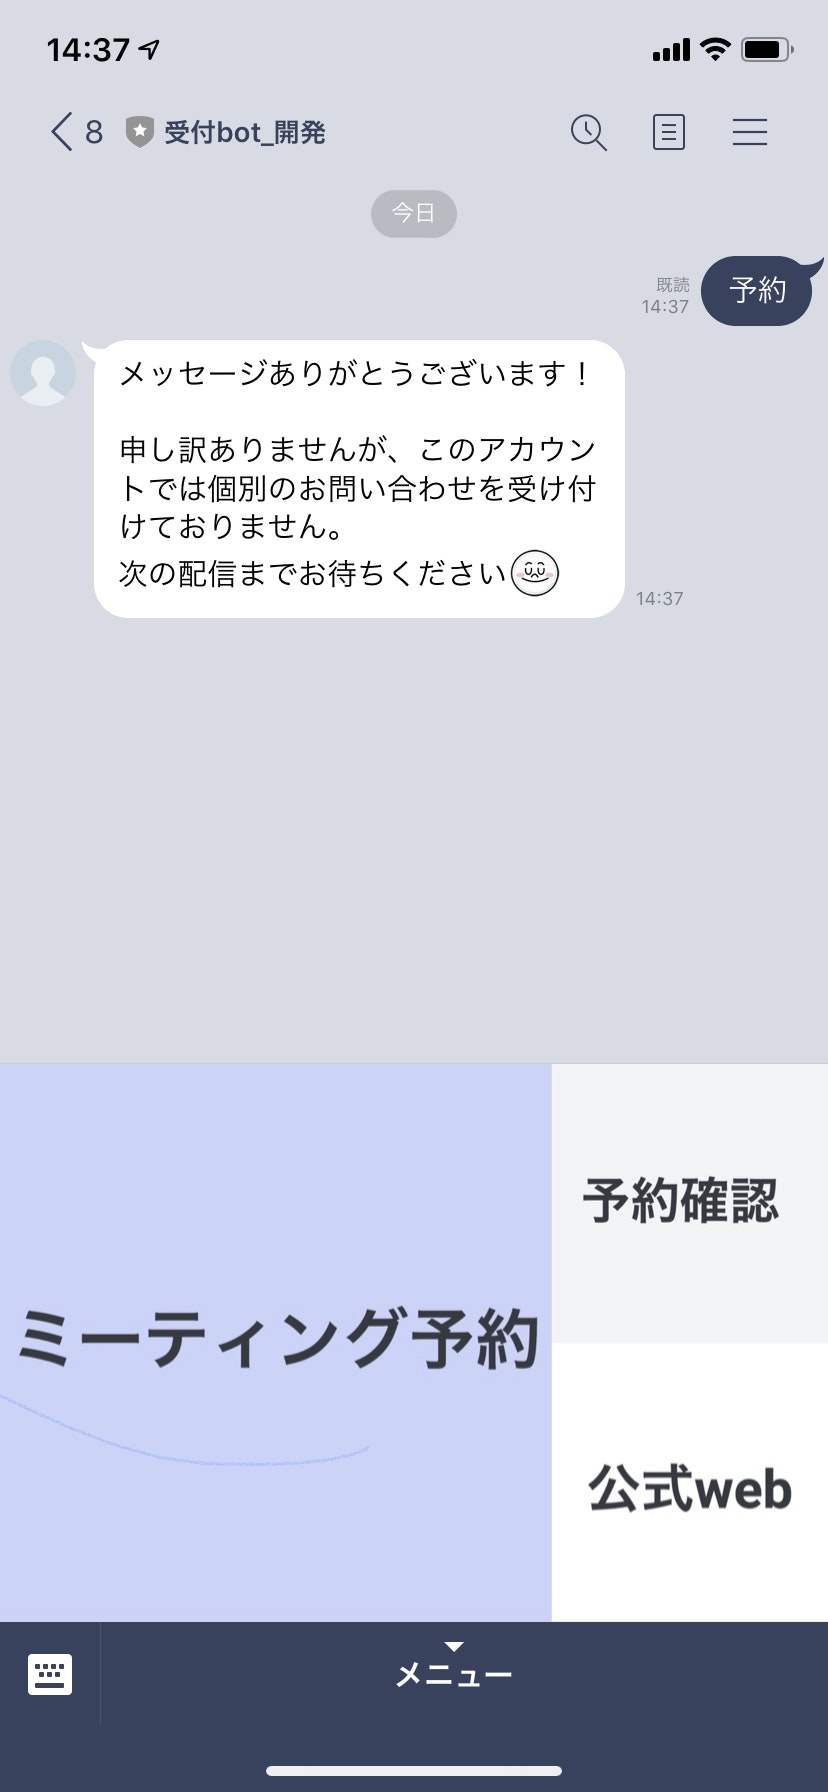
今回はこのミーティング予約と押したら、ユーザーが予約と自動で送信するようにしてそれに対して何かを返したいと思います
まずはここにログインして先ほど作ったアカウントを選択
https://www.linebiz.com/jp/login/
左のメニューからリッチメニューを選択右上の作成ボタンをクリック
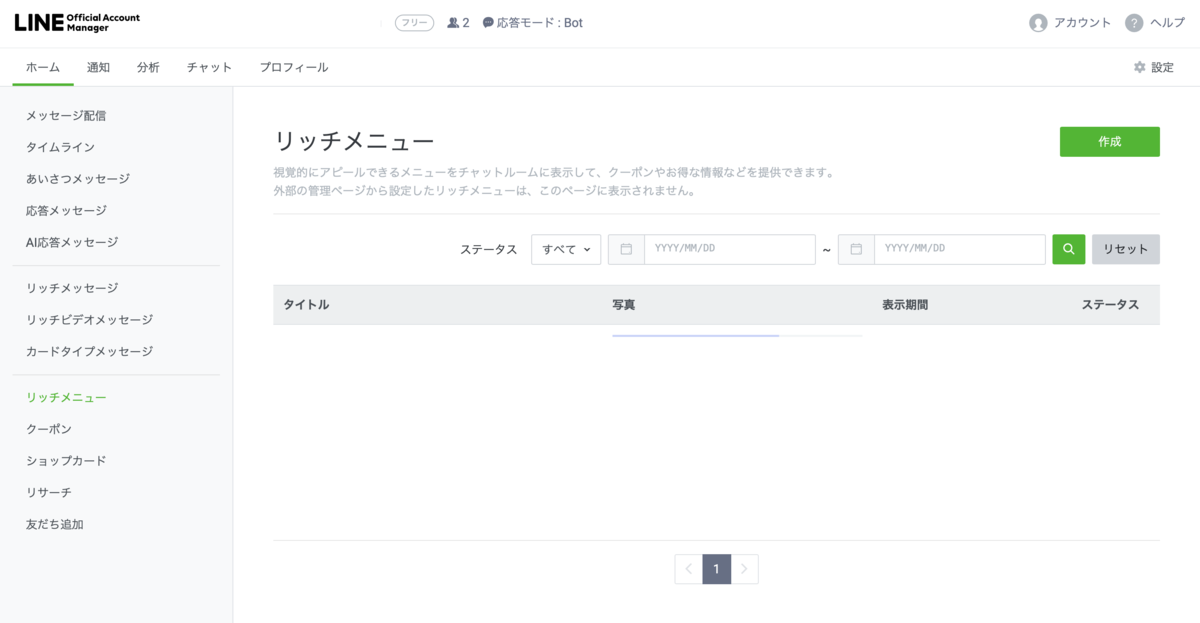
表示設定はタイトル以外はデフォルトでOK
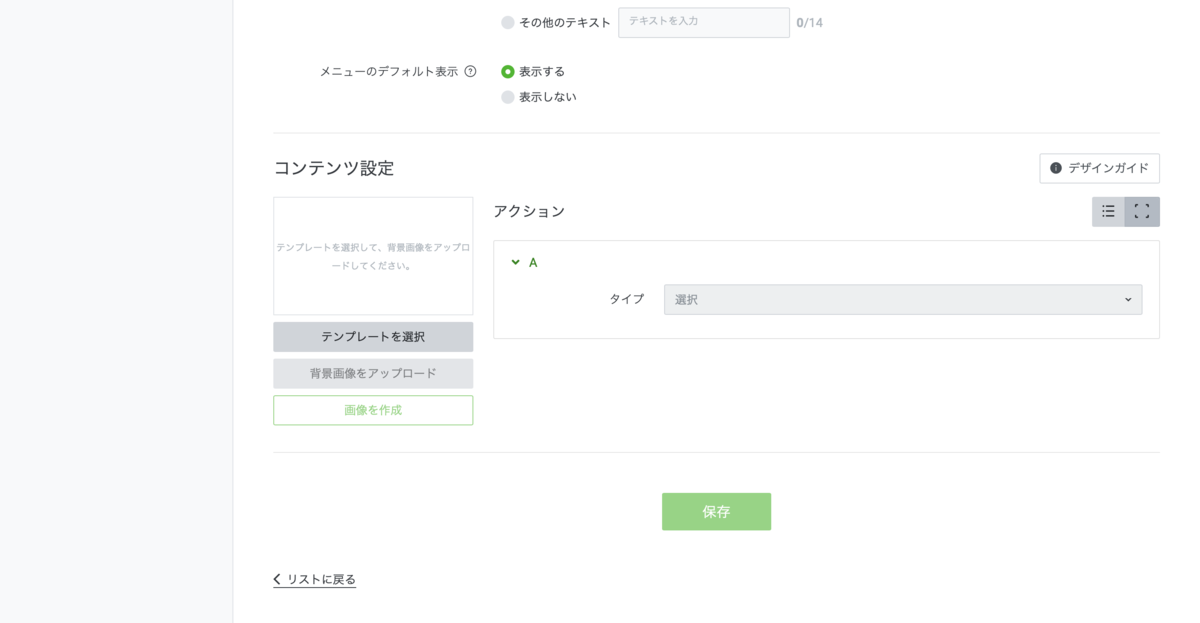
その下のコンテンツ設定はテンプレートを選択し画像を貼るか、自分で文字入りの画像を作る。
作れたらアクションのところでタイプをテキストにして予約にする。
保存して実際に作ったメニューを自分のスマホでタップすると予約というメッセージが送られると思います。
Djangoを使ってを使ってメッセージを返す
ここまで行ったら次はDjangoで送られてきた予約メッセージに対して何かを返したいと思います
今回はpythonのバージョン・パッケージ管理システムであるanacondaを使ってdjangoをinstallします。
https://www.anaconda.com/products/individual
入れてない人は↑の一番したからダウンロードしてください
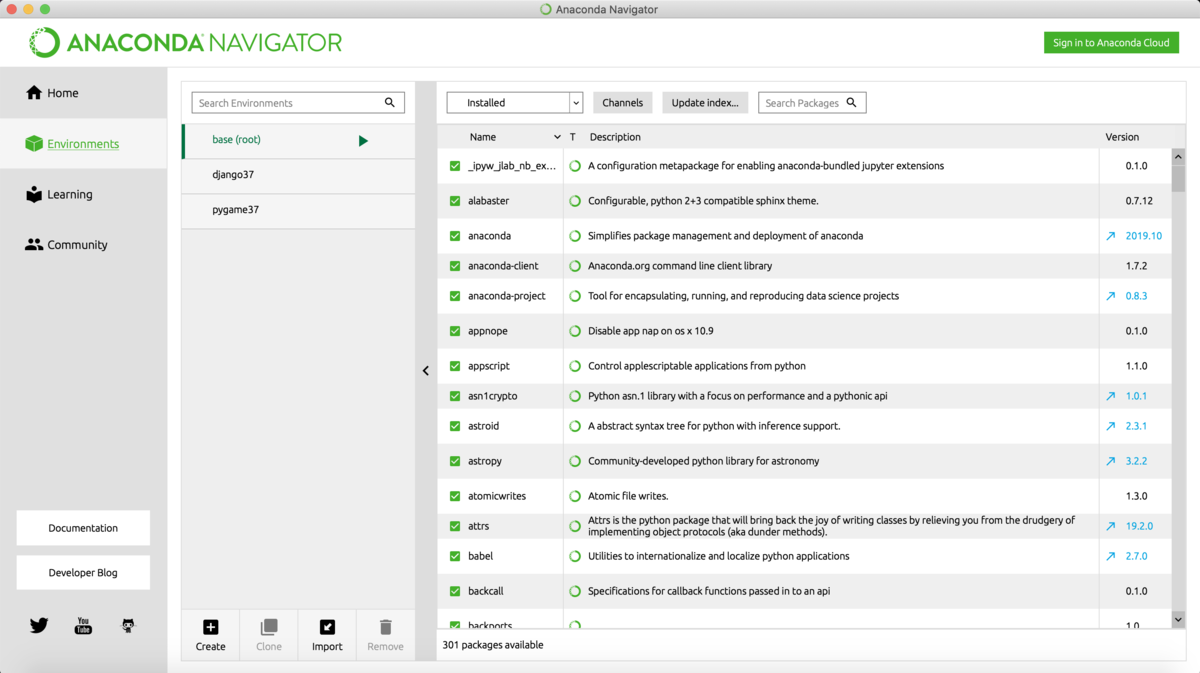
anacondaが入れられたらanaconda navigatorを立ち上げて
Environmentsを選択
左下のcreateを選択
名前をdjango37などにしてpythonを選択しversionは3.7を選択
右下のcreateを選択し環境構築が完了
この状態ではまだdjangoは入ってないのでターミナルを開いて
$ conda activate django37
で環境を立ち上げる
その後
$ conda install django37
でDjangoをinstallこれで環境ができました。
そしたらまずは
$ django-admin startproject reception_line_bot
でプロジェクトを作成します。
reception_line_bot/
    manage.py
    reception_line_bot/
        __init__.py
        settings.py
        urls.py
        asgi.py
        wsgi.py
こんな感じに作れたと思います。
次にアプリケーションを作ります。
$cd reception_line_bot
でreception_line_botの中に入ってから,
$ python manage.py startapp bot
とすると
bot/
    __init__.py
    admin.py
    apps.py
    migrations/
        __init__.py
    models.py
    tests.py
    views.py
となったと思います。
次にエディタでreception_line_bot/urls.pyを編集していきます。
"""reception_line_bot URL Configuration

The `urlpatterns` list routes URLs to views. For more information please see:
    https://docs.djangoproject.com/en/3.0/topics/http/urls/
Examples:
Function views
    1. Add an import:  from my_app import views
    2. Add a URL to urlpatterns:  path('', views.home, name='home')
Class-based views
    1. Add an import:  from other_app.views import Home
    2. Add a URL to urlpatterns:  path('', Home.as_view(), name='home')
Including another URLconf
    1. Import the include() function: from django.urls import include, path
    2. Add a URL to urlpatterns:  path('blog/', include('blog.urls'))
"""
from django.contrib import admin
from django.urls import path
import bot.views
urlpatterns = [
    path('admin/', admin.site.urls),

]
こうなっていると思いますが、urlpatternsのところにdjangoが受け取ったline botのリクエストをどのファイルのどの関数に送るかを指定します。
なので今回は
import bot.views
urlpatterns = [
# path('admin/', admin.site.urls),
 path('', bot.views.reception),
]
とします。receptionはこれからviews.pyに書く関数です。
views.pyにコードを書く前にline botを作成した時に発行されたチャンネルシークレットとアクセストークンはコードの中に直接書くとまずいので、jsonを通してviews.pyで受け取れるようにしたいと思います。なので一番上のline_reception_botの下にsetting.jsonを作り、
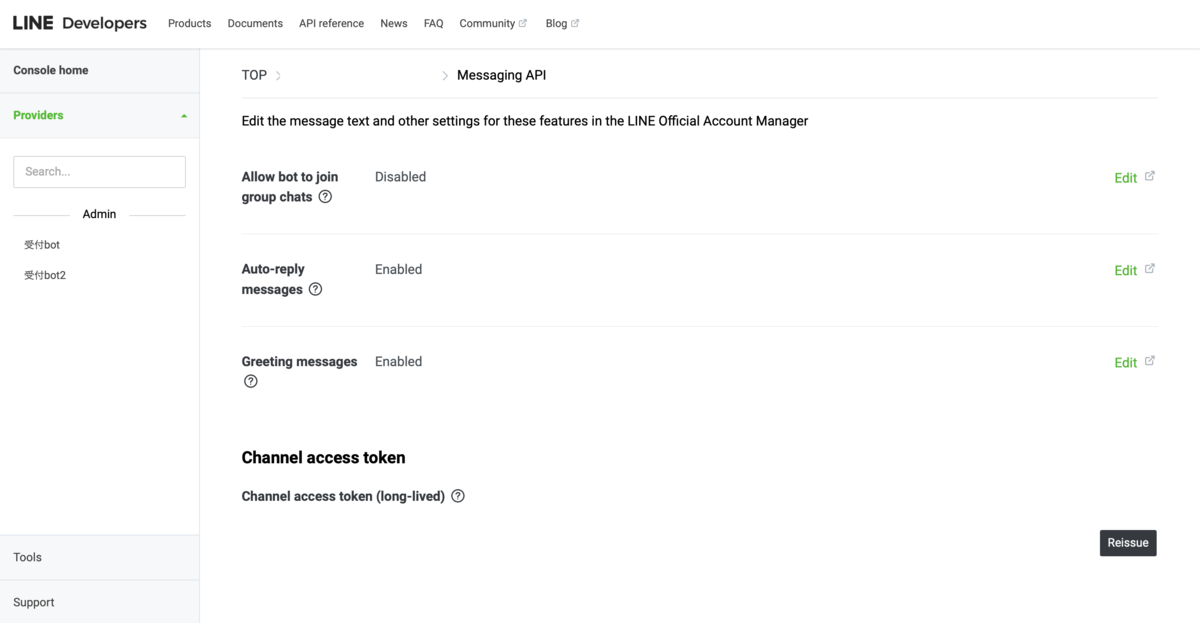
providersからチャネルを選択しmessaging APIの一番したでaccess tokenを発行し、コピペします。
次に
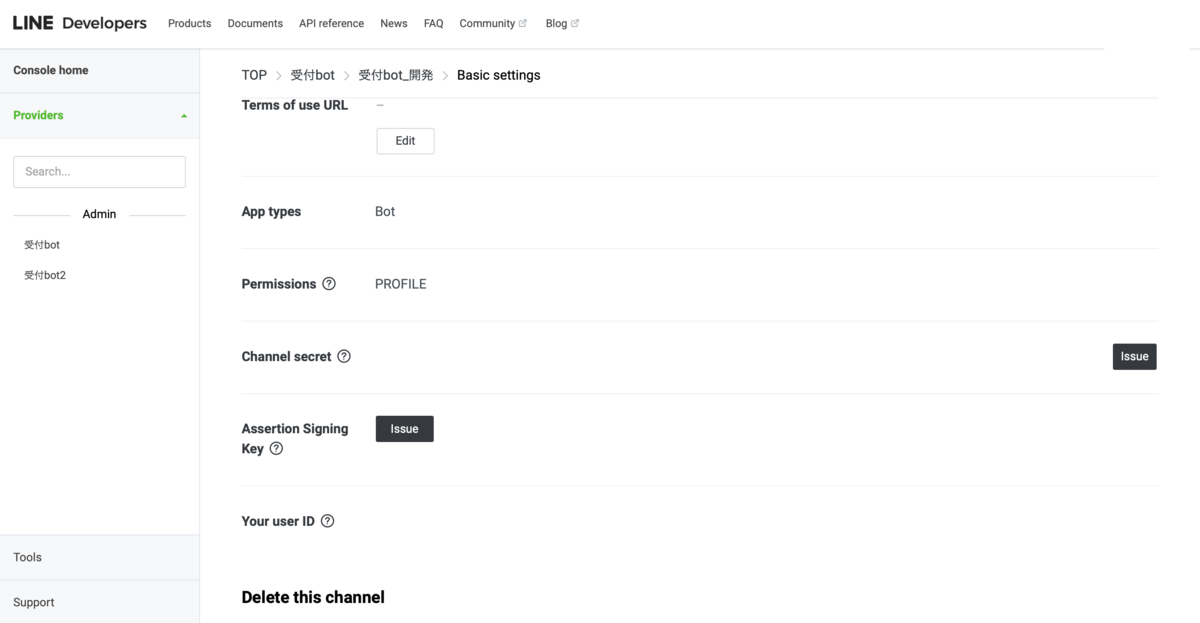
messaging APIの隣のBasic settingsのところからChannel secretを取得します。
その二つを先ほど作ったsetting.jsonにコピペしていきます
{

"LINE":{

"channel_secret":"fakfkajpdpaida132941",

"access_token":"a3nm7yOY7IoUt8blZ6QqK6RShadfsajdjfadfljfafdsdjsdfailfajjpqjpoejpqjpfjpqejiepqwifqpjdjidcS9yEBGieq+VMQs0EL+mQDtwdB04daft89/aad1O/w1cDnyilFU="

 }

}
こんな感じ、(channel_secretとaccess_tokenは適当に変えました)
そしたらviews.pyを開いてユーザーが送ってきたメッセージに対して何か送るコードを書いていきます。
from django.views.generic import TemplateView
from django.shortcuts import render
from django.http.response import JsonResponse
from django.views.decorators.csrf import csrf_exempt
import json
import urllib.request
from reception_line_bot.settings import BASE_DIR

# Create your views here.


@csrf_exempt

def reception(request):
    json_open = open('setting.json', 'r')
    json_load = json.load(json_open)
    channel_secret = json_load['LINE']['channel_secret']
    access = json_load['LINE']['access_token']
    request_body = request.body
    data = confirm_json_loads(request_body)
    request_body = request.body
    body = request.body.decode('utf-8')
    print(body)
    reply_token = data["events"][0]["replyToken"]
    reply_message(reply_token,access)
    return JsonResponse({"message":"OK"})

def confirm_json_loads(body:str)->dict:
    """
    json_loadsが動いているのかの確認

    Args:
        body str:
            requestのjson文字列

    Return:
        dict:
            Seccess:json.loads(body)の返り値
            Error:ログイン失敗のメッセージ


    """
    try:
        return json.loads(body)
    except Exception as e:
        print("error")
        message = JsonResponse({'message': 'Login failure.'}, status=403)
        return message

def reply_message(token:str,access)->None:
    return False
    """
    ユーザーに返答メッセージを送ります

    Args:
        token str:
            lineトークン

        message str:
            select_message関数で返されたメッセージ

        user_id str:
            メッセージ送信者のlineユーザid

    """

    url = 'https://api.line.me/v2/bot/message/reply'
    print(url)
    data = {
        'replyToken': token,
        'messages':[
            {
                'type': 'text',
                'text': "hello world"
            },
        ]
    }
    print(f"data{data}")
    headers = {
        'Content-Type': 'application/json',
        'Authorization': 'Bearer'+" "+access
    }
    print(f"headers:{headers}")
    req = urllib.request.Request(url, json.dumps(data).encode(), headers)
    print(req)
    with urllib.request.urlopen(req) as res:
        body = res.read()
これで完成です。