概要
micro:bit は I2C バスに加速度センサー MMA8653FC が接続されている。この加速度センサーからさまざまな方法で加速度を読み出してみる。
(1) 一番簡単な方法 (MicroPython)
microbit.accelerometer オブジェクトから get_ ~ () メソッドで読み出す。単位は約 mg (ミリ・ジー)。
from microbit import *

while True:
    # 軸ごとに読み出す。
    x = accelerometer.get_x()
    y = accelerometer.get_y()
    z = accelerometer.get_z()
    print("%d, %d, %d" % (x, y, z))

    # 3 軸を一遍に tuple として読み出すこともできる。
    xyz = accelerometer.get_values()
    print(xyz)

    sleep(500)
実行結果:

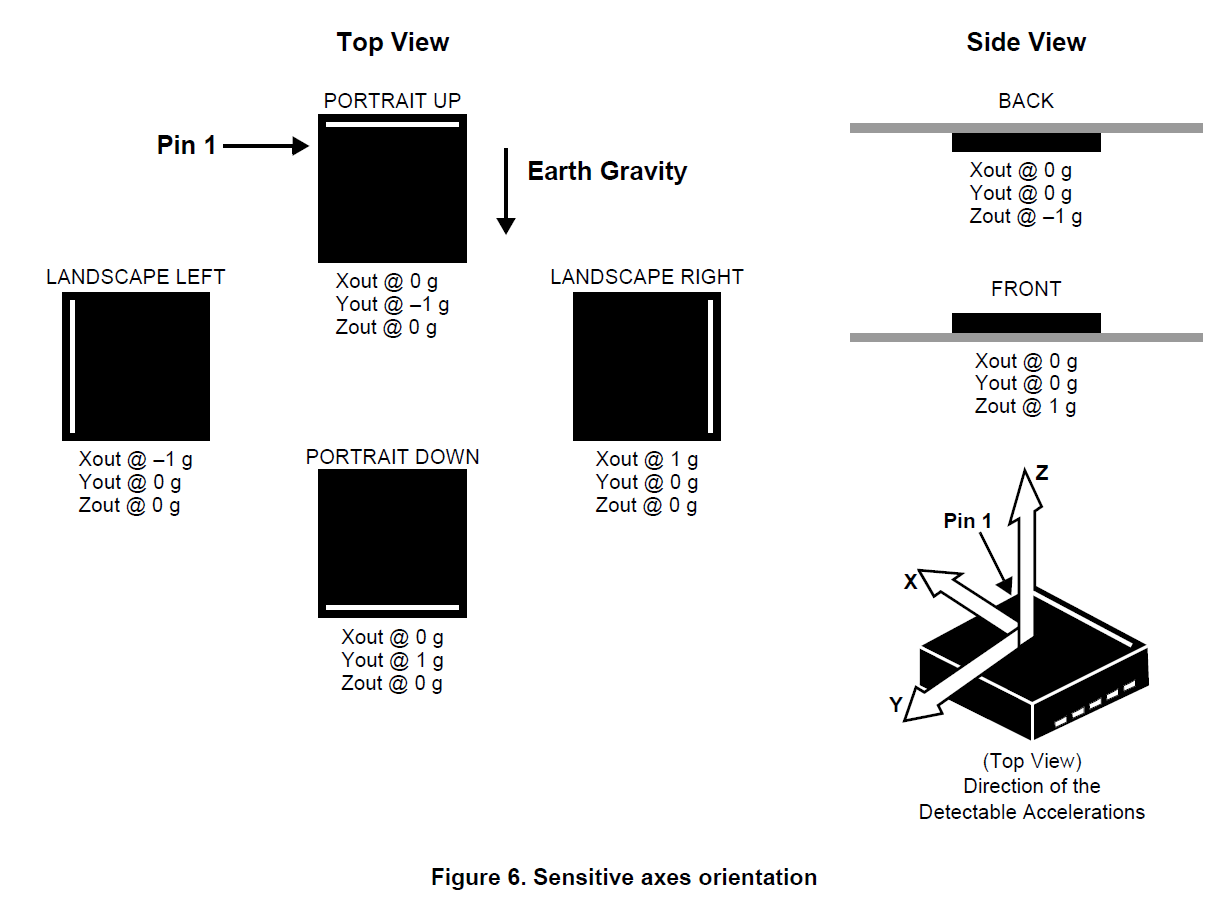
検知方向:

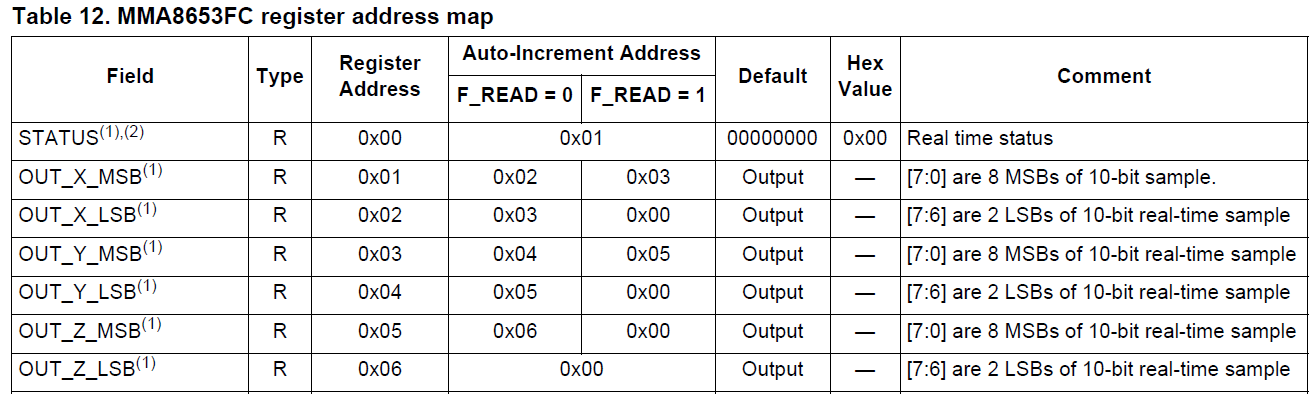
(2) I2C バスから読み出す方法 (MicroPython)
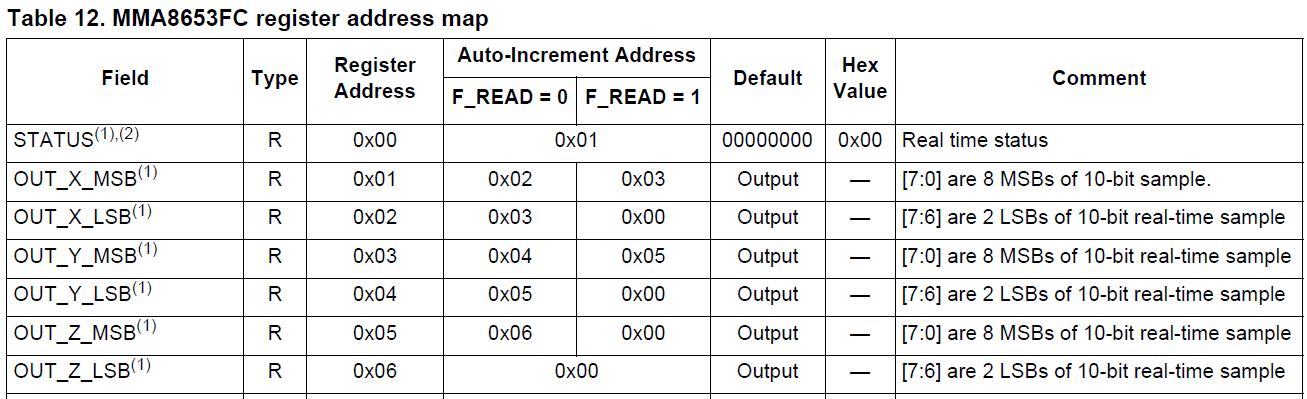
10 ビットの測定データが OUT_X(Y,Z)_MSB と OUT_X(Y,Z)_LSB とに分けてに格納される。
from microbit import *
# 10 ビットの生データを ± 2 g に変換するための函数
def raw2g(raw):
if 0b1000000000 == (0b1000000000 & raw): # 最上位ビットに 1 が立っていたら負数なので
raw -= 2**10 # -0d1 ~ -0d512 に変換する。
return 4/(2**10) * raw # 1 LSB = 4 / 2**10 = 0.00390625g
while True:
# 0x1d がディバイスアドレス。レジスタアドレス 0x00 から 7 バイトを読み出す。
# (もちろんレジスタアドレス 0x01 から 6 バイトを読み出すことにしてもよい)
raw = i2c.read(0x1d, 7)
# 2 つの 8 ビットデータを 10 ビットデータに並べ換える。
raw_x = raw[1]<<2 | raw[2]>>6
raw_y = raw[3]<<2 | raw[4]>>6
raw_z = raw[5]<<2 | raw[6]>>6
g_x = raw2g(raw_x)
g_y = raw2g(raw_y)
g_z = raw2g(raw_z)
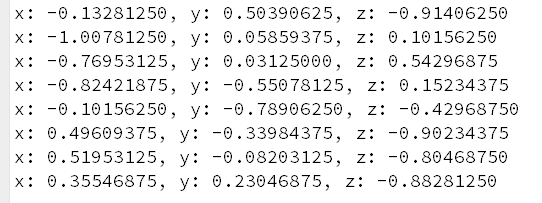
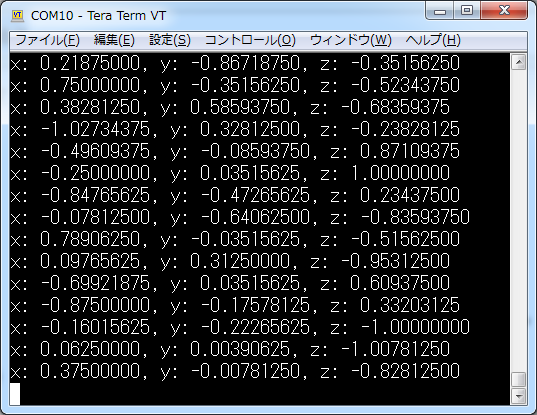
print("x: %.8f, y: %.8f, z: %.8f" % (g_x, g_y, g_z))
sleep(500)
実行結果:
検知方向:
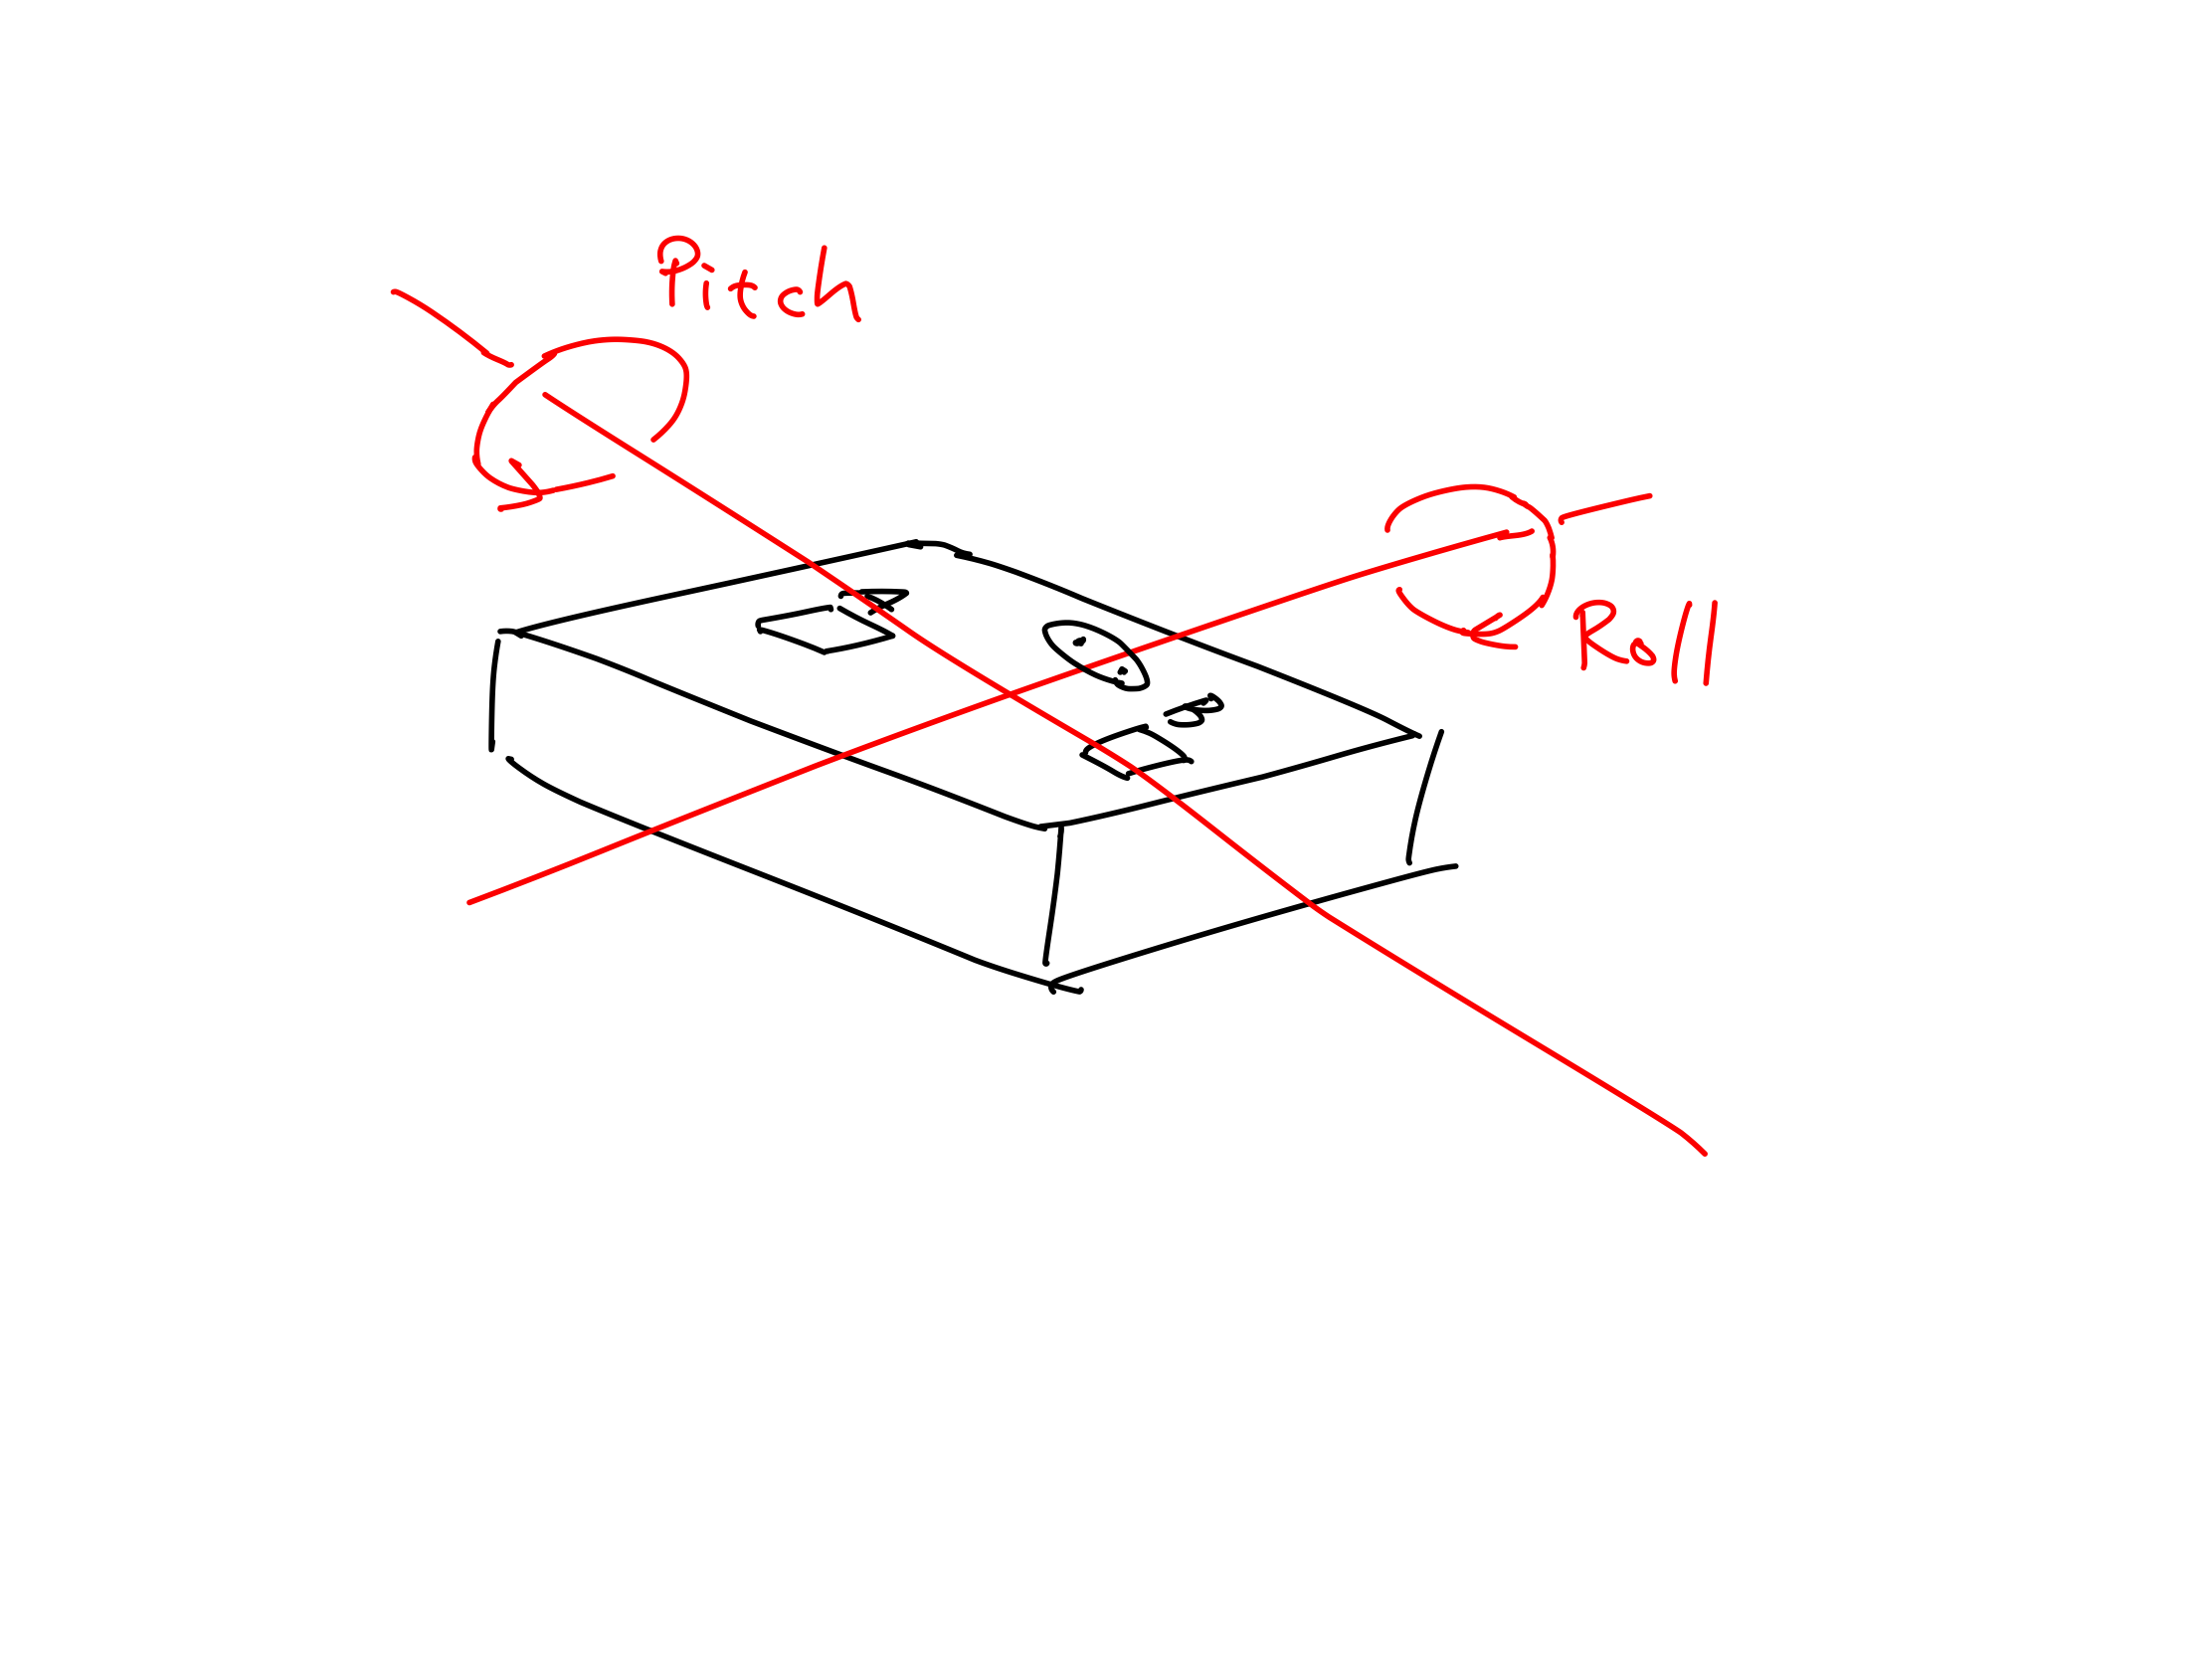
(3) MicroBitAccelerometer オブジェクトから読み出す方法 (mbed)
mbed でコンパイルする。加速度だけでなくピッチ、ロールを取得するためのメソッドも用意されている。
# include "MicroBit.h"
MicroBit uBit;
MicroBitI2C i2c = MicroBitI2C(I2C_SDA0, I2C_SCL0);
MicroBitAccelerometer accelerometer = MicroBitAccelerometer(i2c);
int main(void){
uBit.init();
//accelerometer.setPeriod(100);
while(1){
// 3 軸の加速度を取得する (単位は約 mg)。
int g_x = accelerometer.getX();
int g_y = accelerometer.getY();
int g_z = accelerometer.getZ();
// ピッチを角度単位、ラジアン単位で取得する。
int pitch = accelerometer.getPitch();
float pitchRad = accelerometer.getPitchRadians();
// ロールを角度単位、ラジアン単位で取得する。
int roll = accelerometer.getRoll();
float rollRad = accelerometer.getRollRadians();
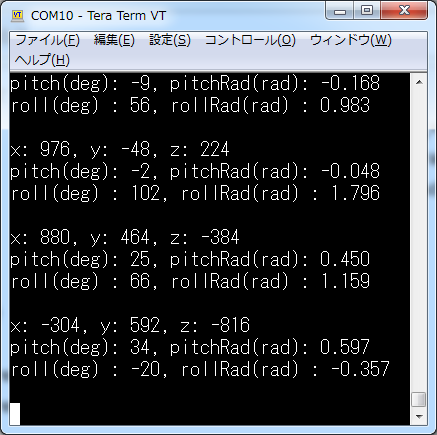
printf("x: %d, y: %d, z: %d\n", g_x, g_y, g_z);
printf("pitch(deg): %d, pitchRad(rad): %.3f\n", pitch, pitchRad);
printf("roll(deg) : %d, rollRad(rad) : %.3f\n", roll, rollRad);
printf("\n");
wait_ms(500);
}
release_fiber();
return 0;
}
実行結果:
検知方向:
(4) I2C バスから読み出す方法 (mbed)
mbed でコンパイルする。
ディバイスアドレス (7 ビットアドレッシング) は 0x1d (0b 001 1101) であるが 8 ビット幅の Bit7-1 として送信されるので 0x1d<<1 のようにして左に 1 ビットシフトする (0b 0011 101?)。Bit0 には R/!W のどちらかが入る。
レジスタアドレス 0x01 から 6 バイトを読み出す。
# include "MicroBit.h"
MicroBit uBit;

float raw2g(int raw){
    if(0x200 == (0x200 & raw)){     // 0x200 = 0b 10 0000 0000
        raw -= 1024;                // 1024 = 2^10
    }
    return 0.00390625 * (float)raw; // 1 LSB = 0.00390625 = 4/(2^10)
}

int main(void){
    uBit.init();

    char buf1[] = {0x01};
    char buf2[6];

    while(1){
        uBit.i2c.write(0x1d<<1, buf1, 1, true); // true を指定して repeated START にする。
        uBit.i2c.read(0x1d<<1, buf2, 6);

        int raw_x = buf2[0]<<2 | buf2[1]>>6;
        int raw_y = buf2[2]<<2 | buf2[3]>>6;
        int raw_z = buf2[4]<<2 | buf2[5]>>6;

        float x = raw2g(raw_x);
        float y = raw2g(raw_y);
        float z = raw2g(raw_z);

        printf("x: %.8f, y: %.8f, z: %.8f\n", x, y, z);
        wait_ms(500);
    }

    release_fiber();
    return 0;
}
実行結果:
検知方向:
参考
- micro:bit IoT in C, pp.81-90
- Beginning BBC micro:bit, pp.90-95
- MMA8653FC 3-Axis, 10-bit Digital
Accelerometer Data Sheet (.pdf) - https://lancaster-university.github.io/microbit-docs/ubit/accelerometer/