・目的
スマフォから外部デバイスとしてESP8266に繋げてコントロールする為の予備実験。
加えて表示するHTMLをSPIFFSにてリソースから取って表示させてみる。
・準備
とりあえず、AP/Webサーバーを立ち上げてスマフォからみれるかどーかをテスト。
以下、書き込むソース。
# include <ESP8266WiFi.h>
# include <ESP8266WebServer.h>

static const char *ssid = "gkgk";
static const char *pwd = "12341234";

ESP8266WebServer server(1234);
IPAddress ip( 192, 168, 128, 21);
IPAddress subnet( 255, 255, 255, 0 );

void handleRoot() {
    Serial.println("receive req: /");
    server.send(200, "text/html", "<h1>Welcome GKGK</h1>");
}

void setup() {
  Serial.begin(9600);
  WiFi.mode(WIFI_AP);
  WiFi.softAPConfig(ip, ip, subnet);
  WiFi.softAP(ssid, pwd);
  server.on("/", handleRoot);
  server.begin();
  Serial.println("ap setup...");
}
void loop() {
  server.handleClient();
}
AP
SSID:gkgk
pwd:12341234
WebServer
192.168.128.21:1234/
とした。
ビルドして書き込んで実行。
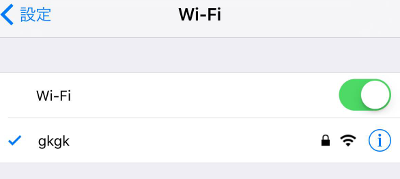
iphoneでesp8266にwifi接続してみる。
繋がった。
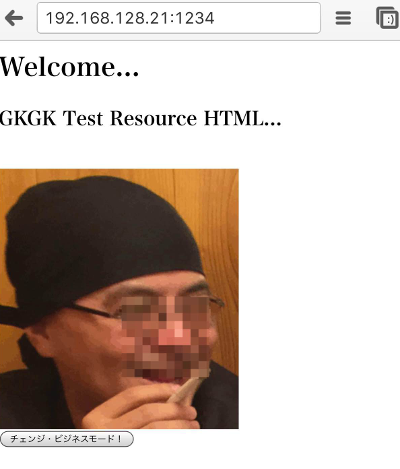
chromeで見てみる。
http://192.168.128.21:1234
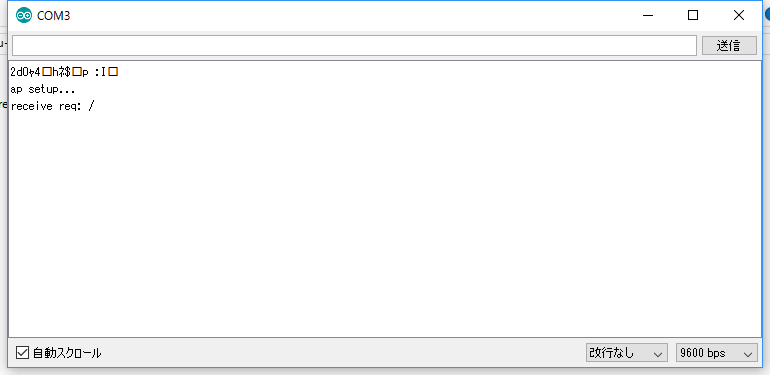
リクエストを受信してシリアルに出力している。
なんという手軽さ。。。
SPIFFSで内部フラッシュ?に書いたリソースを読めるように環境を作る。
[1]
下記のページに飛び、
https://github.com/esp8266/arduino-esp8266fs-plugin
Download the tool archive from releases page
のリンクをクリックし、zipファイルをダウンロードして解凍。
[2]
解凍したものを以下のように置く。
[Aruduinoインストールフォルダ]/Arduino/tools/ESP8266FS/tool/esp8266fs.jar
[3]
IDEが起動しているなら、再起動。
IDEのツールに、「ESP8266 Sketch Data Upload」が出ていればOK。
リソースの準備
[1]
スケッチのフォルダに、dataディレクトリを作成

[2]
indexページのテンプレートをファイルで用意。
以下ソース。
<html lang="ja">
  <head>
    <meta charset="utf-8">
    <title>GKGK TEST</title>
  </head>
  <body>
    <h1>Welcome...</h1>
    <h2>GKGK Test Resource HTML...</h2><br/>
    <form name="g_form" method="post" action="/">
	    <img src="${img}" onclick="forms['g_form'].submit();"/><br/>
	    <input type="hidden" name="FLAG" value="${flag}" />
    	<input type="submit" value="${submit_msg}"/>
    </form>
  </body>
</html>
サブミットボタンもしくは、画像を押したら表示が切り替わる感じ。
表示させるindexページのテンプレートと、そのHTML内に表示する
画像を用意した。
[4]
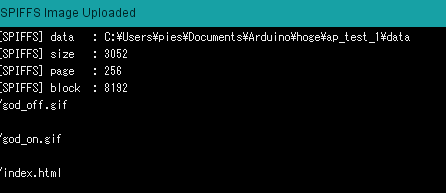
IDEのツール->ESP8266 Sketch Data Uploadをクリック。
ESP8266への書き込みが始まる。

Aruduino側の実装。
# include <ESP8266WiFi.h>
# include <ESP8266WebServer.h>
# include <FS.h>

static const char *ssid = "gkgk";
static const char *pwd = "12341234";

ESP8266WebServer server(1234);
IPAddress ip( 192, 168, 128, 21);
IPAddress subnet( 255, 255, 255, 0 );

String strIndexHtml;
boolean flagGod;

// indexページ
void handleRoot() {

    Serial.println("receive req: /");
    // Postの場合、パラメータからフラグを設定
    if (server.method() == HTTP_POST) {
      String s = server.arg("FLAG");
      if (s == "1") {
        flagGod = true;
      } else {
        flagGod = false;
      }
    }
    // テンプレートのindexページ文字列をフラグによって設定
    String msg = "";
    if (!flagGod) {
      msg = "チェンジ・ぷらいべーとモード!";
    } else {
       msg = "チェンジ・ビジネスモード!";
    }
    String arg1 = "${submit_msg}";
    String tmpl = "" + strIndexHtml;
    tmpl.replace(arg1, msg);
    tmpl.replace("${flag}", flagGod ? "0" : "1");
    tmpl.replace("${img}", flagGod ? "/img2.gif" : "/img1.gif");
	Serial.println(tmpl);

	// クライアントに返す
    server.send(200, "text/html", tmpl);

}

// /img1.gifハンドラ
void handleImg1() {
    Serial.println("receive req: /img1.gif");
    // リソースから読み込んで画像をかえす。
  	SPIFFS.begin();
    File hogeFile = SPIFFS.open("/god_on.gif", "r");
    // バイナリのリソースを返すならこんな感じ。
    server.streamFile(hogeFile, "image/gif");
    hogeFile.close();
}
// /img2.gifハンドラ
void handleImg2() {
    Serial.println("receive req: /img2.gif");

    // リソースから読み込んで画像をかえす。
	 SPIFFS.begin();
    File hogeFile = SPIFFS.open("/god_off.gif", "r");
    // バイナリのリソースを返すならこんな感じ。
    server.streamFile(hogeFile, "image/gif");
    hogeFile.close();
}

// テキストファイルを読み込み
String loadTextFile(String path) {
  String txt = "";
  String line = "";
  char c;
  File hogeFile = SPIFFS.open(path, "r");
    strIndexHtml = "";
  if (hogeFile) {
    Serial.println("file open success...");

    while (hogeFile.available()) {
      // 1文字読み込み
      c = hogeFile.read();
      // 改行の場合
      if (c == '\n' || c == '\r') {
        // 行文字列の長さが1以上の場合
        if (line.length() > 0) {
          txt = txt + line + "\n";
          //Serial.println(line);
        }
        // 改行文字が来たので行文字列をクリア
        line = "";
      } else {
        // 改行文字でなければ行文字列に読み込んだ1文字を追加
        line = line + String(c);
      }
    }
    if (line.length() > 0) {
      txt = txt + line;
    }

    hogeFile.close();
  } else {
    Serial.println("file open failed...");
  }
  Serial.println(path + " is loaded...");

  return txt;

}


// リソース読み込み
void loadHtmlResource() {

  String line = "";
  char c;

  SPIFFS.begin();
//  Dir dir = SPIFFS.openDir("/");
//  while (dir.next()) {
//    Serial.print(dir.fileName());
//    File f = dir.openFile("r");
//    Serial.println(String(" ") + f.size());
//  }

  strIndexHtml = loadTextFile("/index.html");
}


void setup() {
  flagGod = false;
  Serial.begin(9600);
  WiFi.mode(WIFI_AP);
  WiFi.softAPConfig(ip, ip, subnet);
  WiFi.softAP(ssid, pwd);

  // ハンドラ設定
  server.on("/", handleRoot);
  server.on("/img1.gif", handleImg1);
  server.on("/img2.gif", handleImg2);

  server.begin();
  Serial.println("ap setup...");
  loadHtmlResource();
  Serial.println(strIndexHtml);
  Serial.println("load complete...");
}
void loop() {
  server.handleClient();
}
フラグで画像を切り替える感じの処理にしている。
スレッドセーフとかは、とりあえず、無視。。。
処理の切り替えによるアクションをLチカでしても良かったが、
画像のよーなリソースをどう扱うか試してみたかったので、こんな感じにした。
・実行確認
前述のソースをビルドしてESP8266上にロードし、実行。
リソースから読み込んだものを表示出来たことを確認。
日本語も何も気にせず出るんだなぁ。。。
で、ビジネスモードにする為、ボタンを押す。

POSTの処理もうまくいっている。
再度、ボタンを押して元の画面が出るか確認する。
プライベートモードに無事戻るw
・TODO
スレッドセーフな感じにするのはどーした良いか調べる。
(そもそも、Arduino的にはどーなんだろう。。。)
Basic認証とかできるっぽいので、調べておく。


