忘れるのでメモ
[前提]
・mpythonはスペックが上がらない限り、BLEのAPIを提供していないっぽい。
(16k中、12k使うかららしい)
・Javascript環境が提供するAPIはサービス?を自分で作れないっぽい。
(と、思う。。。)
・mbedはBLEのライブラリのコンパイルがうまく行かなかった
なので、micro:bit側は、aruduinoで実装することにした。
mbedは、そのうち、なんとかする。。。
参考ページ:
ほぼ、ここに、環境構築から接続まで書いてある。
すばらしい。。。
でも、忘備録なので、Aruduinoでの開発環境の構築を記載する。
[micro:bitのAruduino開発環境の構築]
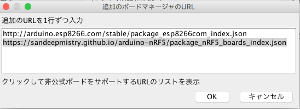
1.AruduinoのIDEを起動し、環境設定を開き、「追加のボードマネージャーのURL」に以下追加。
2.環境設定で、「スケッチの保存場所」を覚えておく。
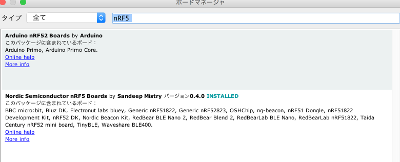
3.「ツール」→「ボード」→「ボードマネージャー」を開き
nRF5 で検索。Nordic Semiconductor nRF5 based boardsをインストール。
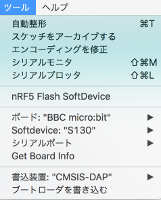
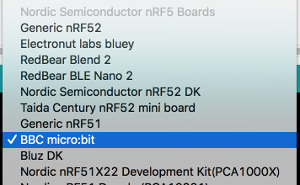
4.「ツール」にて、ボード選択
「ボード」 :「BBC Micro:bit」
5.すぐにLEDをためせるので、前述、参考ページの人のライブラリを導入。(とても助かる!)
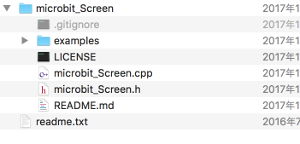
①以下、URLから、ダウンロードし解凍。
https://github.com/ht-deko/microbit_Screen
②フォルダごと、「スケッチの保存場所」下のLibrariesフォルダにコピー
6.BLE接続環境の導入
(BLEを使わないなら要らない。今回はBLEを使う目的なので以下実行)
①2.のスケッチの保存場所下に、
「tools/nRF5FlashSoftDevice/tool」
フォルダを作成。
②以下のURLから、「nRF5FlashSoftDevice.jar」をダウンロードする。
https://github.com/sandeepmistry/arduino-nRF5/
ダウンロード後、①で作成したフォルダにコピー後、AruduinoIDEを再起動する。

③「ツール」にて、以下選択。
「SoftDevice」:S310
「書き込み装置」:CMSIS-DAP
④「ツール」にて、「nRF5 Flash SoftDevice」 を選択。
なんか聞かれる(ハズ。事後で、キャプチャがない。。。)ので「accept」し、
IDEを再起動する。
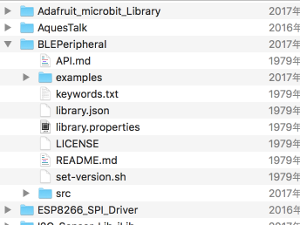
⑤以下URLからBLEのライブラリをダウンロードし、解凍。
https://github.com/sandeepmistry/arduino-BLEPeripheral
フォルダごと、「スケッチの保存場所」下のLibrariesフォルダにコピー
7.USBでmicro:bitを接続。IDEの「ツール」「シリアルポート」を、
micro:bitにする。
[Aruduinoでmicro:bitのLEDマトリクスを光らせてみる]
前述の親切な人のライブラリを使って、LEDを光らせてみる。
ソース
# include <microbit_Screen.h>

void setup() {
  // put your setup code here, to run once:
    Serial.begin(9600);
    SCREEN.begin();
    Serial.println("Hello micro:bit");
}

void loop() {
  // put your main code here, to run repeatedly:
    SCREEN.showIcon(IconNames::Happy);
}
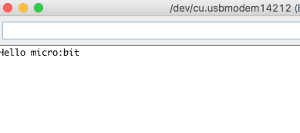
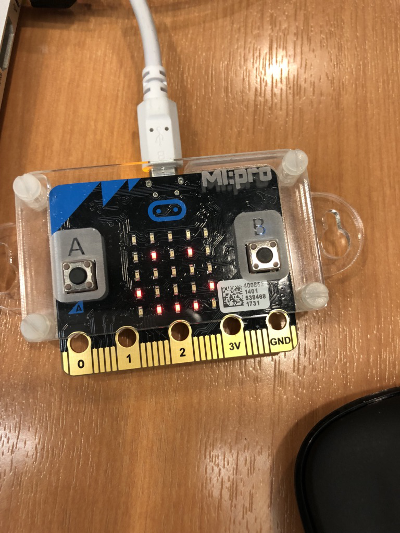
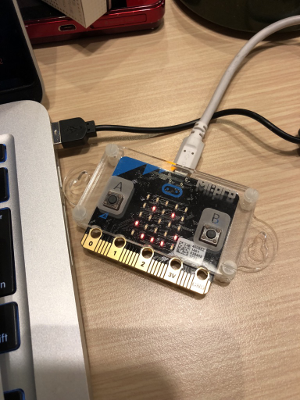
実行結果は、こんな感じ。
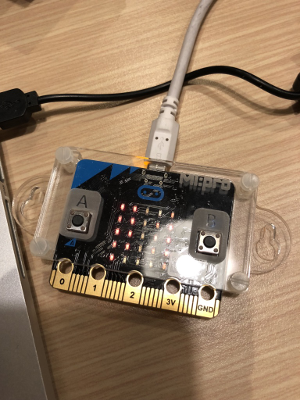
シリアルで文字が送られ、LEDのマトリクスは、ちゃんと、
ニコちゃんマークになっている。
[micro:bitでペリフェラル作成]
[仕様]
セントラルから、テキトーな10文字の文字列を受け取り、LEDマトリクスで表示する。
接続時の認証とかはしない。(やり方をまだ知らない。。。)
1.macのコンソールでuuidgenでテキトーなUUIDを準備
(とりあえず、サービスもキャラクたりスティックも同じ奴を使った。。。)
ex.
uuidgen
ED3A76F6-70B5-4BBE-840D-EAA341F78417
2.ソースを準備。micro:bitに焼く。
ソース
// Import libraries (BLEPeripheral depends on SPI)
# include <SPI.h>
# include <BLEPeripheral.h>
# include <microbit_Screen.h>


BLEPeripheral blePeripheral = BLEPeripheral();

// create service
//uuidgen
BLEService               ledService           = BLEService("ED3A76F6-70B5-4BBE-840D-EAA341F78417");

char defaultVal[] = {'N', 'O', 'N', 'E', ' ', ' ', ' ', ' ', ' ', 0x00};

BLECharacteristic hogeCharacteristic = BLECharacteristic("ED3A76F6-70B5-4BBE-840D-EAA341F78417",
                                                          BLERead | BLEWrite,
                                                          11);
char* receivedBuf = "          ";

void setup() {
  Serial.begin(9600);
  SCREEN.begin();

  blePeripheral.setDeviceName("BBC micro:bit TestA");
  blePeripheral.setLocalName("Micro:bit HogeDevice");

  blePeripheral.setAdvertisedServiceUuid(ledService.uuid());
  hogeCharacteristic.setValue(defaultVal);

  blePeripheral.addAttribute(ledService);
  blePeripheral.addAttribute(hogeCharacteristic);

  // BLE init
  blePeripheral.begin();
  Serial.println(F("BLE HOGE Peripheral"));
}

void loop() {

  //
  SCREEN.showIcon(IconNames::Chessboard);

  // Blocking wait...
  BLECentral central = blePeripheral.central();
  if (central) {
    // central connected to peripheral
    Serial.print(F("Connected to central: "));
    Serial.println(central.address());
    while (central.connected()) {

      SCREEN.showIcon(IconNames::Happy);

      if (hogeCharacteristic.written()) {
        // received from central...
        Serial.println("receive data!");
        if (hogeCharacteristic.value()) {
          String msg = String((const char*)hogeCharacteristic.value());
          Serial.println(msg);
          msg.toCharArray(receivedBuf, msg.length());
          char fuga[10] = {' ',' ',' ',' ',' ',' ',' ',' ',' ',' '};
          msg.toCharArray(fuga, msg.length());
          if (hogeCharacteristic.setValue(fuga)) {
            Serial.println("success response write ");
          } else {
            Serial.println("failed response write ");
          }
          msg.trim();
          SCREEN.showString(msg);
          delay(2000);
        }
      }
    }
    Serial.print(F("Disconnected from central: "));
    Serial.println(central.address());
    SCREEN.showIcon(IconNames::Sad);
    delay(2000);
  }
}
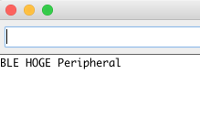
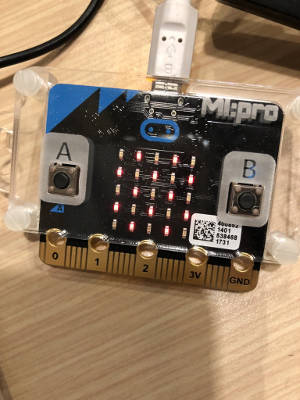
準備完了。。。
(交互に光ってるマトリクスはチェスボード。)
[iPhoneでmicro:bitに接続し、文字列を送信]
[仕様]
BLEでmicro:bitに接続し、テキトーな文字列を送信する。
認証は、前述のとーりしない。。。
単純に1画面で実装。
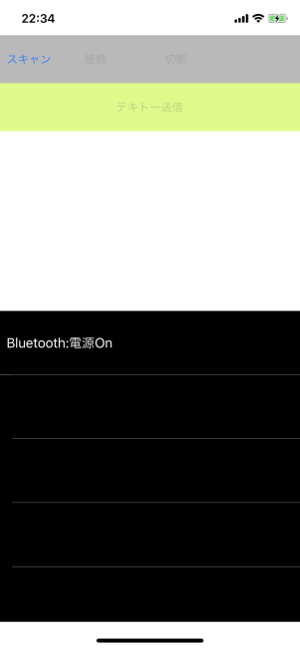
スキャン、接続、切断ボタン、送信ボタン、通信ログを表示テーブルを持つ。
楽なので、swiftで実装した。
//
//  ViewController.swift
//  MicrobitBleSample1
//
//  Created by pies on 2017/12/17.
//  Copyright © 2017年 pies. All rights reserved.
//
import UIKit
import CoreBluetooth

class ViewController: UIViewController,
    CBCentralManagerDelegate,CBPeripheralDelegate,
    UITableViewDataSource, UITableViewDelegate {
    let CMD_LEN = 10
    let hogeServiceUUId = CBUUID(string: "ED3A76F6-70B5-4BBE-840D-EAA341F78417")
    let testDeviceName = "Micro:bit TestDevice Hoge"


    @IBOutlet weak var tblLog: UITableView!

    @IBOutlet weak var btnScan: UIButton!

    @IBOutlet weak var btnConnectDevice: UIButton!

    @IBOutlet weak var btnTestSend: UIButton!

    @IBOutlet weak var btnDisConnectDevice: UIButton!


    var logMsg = [String]()

    var cm: CBCentralManager!
    var hogeDevice: CBPeripheral?
    var hogeService: CBService?
    var hogeChar: CBCharacteristic?

    var selectedCmdIdx: Int = -1

    override func viewDidLoad() {

        super.viewDidLoad()

        btnScan.isEnabled = false
        btnConnectDevice.isEnabled = false
        btnTestSend.isEnabled = false
        btnDisConnectDevice.isEnabled = false

        tblLog.dataSource = self
        tblLog.delegate = self
        // ble初期化
        cm = CBCentralManager(delegate: self, queue:nil)

    }

    override func viewDidAppear(_ animated: Bool) {
        super.viewDidAppear(animated)
    }

    override func didReceiveMemoryWarning() {
        super.didReceiveMemoryWarning()
    }

    @IBAction func tapBtnScan(_ sender: Any) {

        if !cm.isScanning {
            // BLEデバイスの検出を開始.
            cm.scanForPeripherals(withServices: [hogeServiceUUId], options: nil)
            btnScan.isEnabled = false
            btnConnectDevice.isEnabled = false
            hogeDevice = nil
            logMsg.append("スキャン開始")
            reloadAndLast()
        }
    }

    // micro:bitと接続
    @IBAction func tapBtnConnectDevice(_ sender: Any) {

        if let tgtDevice = hogeDevice {
            btnConnectDevice.isEnabled = false
            logMsg.append("接続開始")
            cm.connect(tgtDevice, options: nil)
            reloadAndLast()
        }
    }

    // テキトー送信
    @IBAction func tapBtnTestSend(_ sender: Any) {
        if let tgtDevice = hogeDevice {
            if hogeService != nil && hogeChar != nil {
                tgtDevice.writeValue(toCmd("hoge"), for: hogeChar!, type: CBCharacteristicWriteType.withResponse)
                logMsg.append("送信:hoge")
                reloadAndLast()
                hogeDevice?.readValue(for: hogeChar!)
            }
        }
    }


    // 固定長にしてbyte array化
    func toCmd(_ cmd: String) -> Data {
        var buf = "\(cmd)"
        while buf.utf8.count < CMD_LEN {
            buf = "\(buf) "
        }
        print("[\(buf)]")
        var arr = [UInt8]()
        for c in buf.utf8 {
            arr.append(c)
        }
        // 相手はC言語の世界なのでケツにnull。。。
        arr.append(0x0)
        return Data(bytes: arr)
    }

    @IBAction func tapBtnDisconnect(_ sender: Any) {
        btnTestSend.isEnabled = false
        if hogeDevice != nil {
            btnDisConnectDevice.isEnabled = false
            cm.cancelPeripheralConnection(hogeDevice!)
            logMsg.append("切断実行")
            reloadAndLast()
        }
    }


    func tableView(_ tableView: UITableView, numberOfRowsInSection section: Int) -> Int {
        return logMsg.count
    }

    func tableView(_ tableView: UITableView, heightForRowAt indexPath: IndexPath) -> CGFloat {
        return 80.0
    }
    func tableView(_ tableView: UITableView, cellForRowAt indexPath: IndexPath) -> UITableViewCell {
        let cell = tableView.dequeueReusableCell(withIdentifier: "CELL_LOG")!
        let lblLog = cell.contentView.viewWithTag(1001) as! UILabel
        lblLog.text = logMsg[indexPath.item]
        return cell
    }

    func reloadAndLast() {
        tblLog.reloadData()
        DispatchQueue.main.asyncAfter(deadline: .now() + 0.2) { [unowned self] in
            let idx = IndexPath(item: self.logMsg.count - 1, section: 0)
            self.tblLog.scrollToRow(at: idx, at:.bottom, animated: true)
        }
    }


    func centralManagerDidUpdateState(_ central: CBCentralManager) {
        print("state \(central.state)")
        switch (central.state) {
        case .poweredOff:
            print("Bluetoothの電源がOff")
            logMsg.append("Bluetooth:電源Off")
            btnScan.isEnabled = false
            btnConnectDevice.isEnabled = false
        case .poweredOn:
            print("Bluetoothの電源はOn")
            logMsg.append("Bluetooth:電源On")

            if !btnScan.isEnabled && !cm.isScanning {
                btnScan.isEnabled = true
            }
        case .resetting:
            print("レスティング状態")
            logMsg.append("Bluetooth:レスティング状態")
        case .unauthorized:
            print("非認証状態")
            logMsg.append("Bluetooth:非認証状態")
        case .unknown:
            print("不明")
            logMsg.append("Bluetooth:不明")
        case .unsupported:
            print("非対応")
            logMsg.append("Bluetooth:非対応")

        }
        tblLog.reloadData()
    }


    func centralManager(_ central: CBCentralManager, didDiscover peripheral: CBPeripheral, advertisementData: [String : Any], rssi RSSI: NSNumber) {

        if let dName = advertisementData[CBAdvertisementDataLocalNameKey] as? String {

            print("device:\(dName)")

            // デバイス名確認
            if dName.hasPrefix("Micro:bit HogeDevice") {
                // サービス確認
                if let srvIds = advertisementData[CBAdvertisementDataServiceUUIDsKey] as? [Any] {
                    if srvIds.filter({$0 as? CBUUID == hogeServiceUUId}).count > 0 {
                        // hoge service確認
                        cm.stopScan()
                        logMsg.append("Micor:bit確認。スキャン停止")
                        print(CBAdvertisementDataServiceUUIDsKey)
                        logMsg.append("device:\(dName)\nuuid:\(peripheral.identifier)")
                        tblLog.reloadData()
                        self.hogeDevice = peripheral
                        btnScan.isEnabled = true
                        btnConnectDevice.isEnabled = true
                    } else {
                        logMsg.append("Micor:bit確認。hogeサービスなし")
                    }
                }
            }
        }
        reloadAndLast()


        // peripheral.

        //        cm.stopScan()
    }

    // peripheralと接続成功
    func centralManager(_ central: CBCentralManager, didConnect peripheral: CBPeripheral) {

        print("デバイスと接続成功")
        logMsg.append("デバイスと接続成功")

        // デバイスのdelegate設定
        peripheral.delegate = self

        // サービスのUUIDを確認
        peripheral.discoverServices([hogeServiceUUId])

        reloadAndLast()
    }

    // peripheralと接続失敗
    func centralManager(_ central: CBCentralManager, didFailToConnect peripheral: CBPeripheral, error: Error?) {

        print("デバイスと接続失敗,\ncause:\(error)")
        logMsg.append("デバイスと接続失敗")
        //logMsg.append("error:\(error)")

        btnConnectDevice.isEnabled = true
        btnTestSend.isEnabled = false
        reloadAndLast()

    }
    func centralManager(_ central: CBCentralManager, didDisconnectPeripheral peripheral: CBPeripheral, error: Error?) {

        btnTestSend.isEnabled = false
        btnDisConnectDevice.isEnabled = false
        print("デバイス切断")
        logMsg.append("デバイス切断")
        if error == nil {
            btnConnectDevice.isEnabled = true
        } else {
            print("cause:\(error!)")
        }
        reloadAndLast()
    }

    // peripheralサービス検索結果
    func peripheral(_ peripheral: CBPeripheral, didDiscoverServices error: Error?) {

        if error != nil {
            // サービス確認失敗
            logMsg.append("サービス確認失敗")
            print("サービス確認失敗\ncause:\(error!)")
        } else {
            // サービス確認成功
            logMsg.append("サービス確認成功")
            logMsg.append("Characteristics確認実行")
            btnTestSend.isEnabled = true
            btnDisConnectDevice.isEnabled = true

            hogeService = peripheral.services?.filter({$0.uuid == hogeServiceUUId})[0]
            peripheral.discoverCharacteristics([hogeServiceUUId], for: hogeService!)
        }

        reloadAndLast()
    }

    func peripheral(_ peripheral: CBPeripheral, didDiscoverCharacteristicsFor service: CBService, error: Error?) {
        if error != nil {
            logMsg.append("Characteristics確認:エラー")
            print("Characteristics確認:エラー")
            print("cause:\(error!)")
        } else {
            logMsg.append("Characteristics確認:成功")
            hogeChar = service.characteristics!.filter({$0.uuid == hogeServiceUUId})[0]
            logMsg.append("Characteristics読込リクエスト")
            peripheral.readValue(for: hogeChar!)
            btnTestSend.isEnabled = true
        }
        reloadAndLast()
    }

    func peripheral(_ peripheral: CBPeripheral, didUpdateValueFor characteristic: CBCharacteristic, error: Error?) {
        if error != nil {
            logMsg.append("Characteristics読込:エラー")
            print("Characteristics読込:エラー")
            print("cause:\(error!)")


        } else {
            logMsg.append("Characteristics読込:成功")
            print("Characteristics:\(characteristic.value)")
            if let data = characteristic.value {
                let str = String(data: data, encoding: .utf8)
                print("receive:\(str)")
            }
        }
        reloadAndLast()
    }

    func peripheral(_ peripheral: CBPeripheral, didWriteValueFor characteristic: CBCharacteristic, error: Error?) {
        if error != nil {

            print(error!)

        } else {
            if let data = characteristic.value {
                let str = String(data: data, encoding: .utf8)
                print("receive:\(str)")
            }
        }
    }
}
一応、ソースはここに置きました。。。
https://bitbucket.org/cyclon2joker/microbitblesample1
ビルドし、実機で実行してみる。
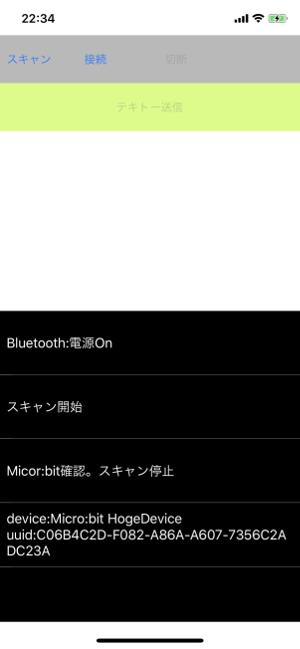
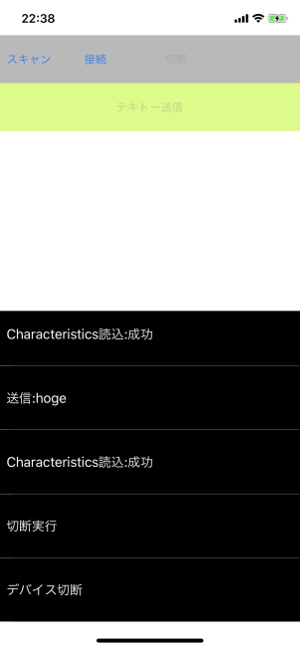
スキャンをタップし、micro:bitを検出しているのを確認。
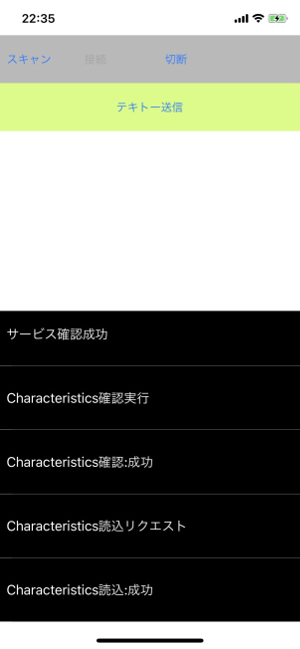
キャラクタリスティックまで読んでいる。
で、micro:bitは、
ニコちゃんマーク(接続したらHappyに設定。)
送信ボタンをタップ。
。。。
わかりにくいが(。。。)、「hoge」という文字が、
LEDマトリクスにスクロールしている。
シリアルにも流れてます。。。
切断する。
無事、一通りの動作完了。
[まとめ、感想]
arudionoで焼けることによって、かなり、扱いやすいデバイスだなーと思う。。。
最初からLEDマトリクスもセンサーもついてるし、それでいて安いし、
かなり、楽しめるオモチャだと思う。
子供の時にこんな面白いものが、タダでもらえるなんて、イギリスの子供は
めぐまれてるなーと。。。
[TODO]
・iBeaconを作ってみる。
・kotolinで接続してみる。
・mbedでビルド出来るようにする。
・モータを制御する拡張ボードを買ってなんかする。
