以下の流れを実際に手を動かしてやってみましょう。
- Rancher Serverの構築
- Kubernetes Clusterの構築
- weavescopeカタログのデプロイ
- RancherUIからkubectlコマンドの実行
- Guestbookアプリケーションのデプロイ
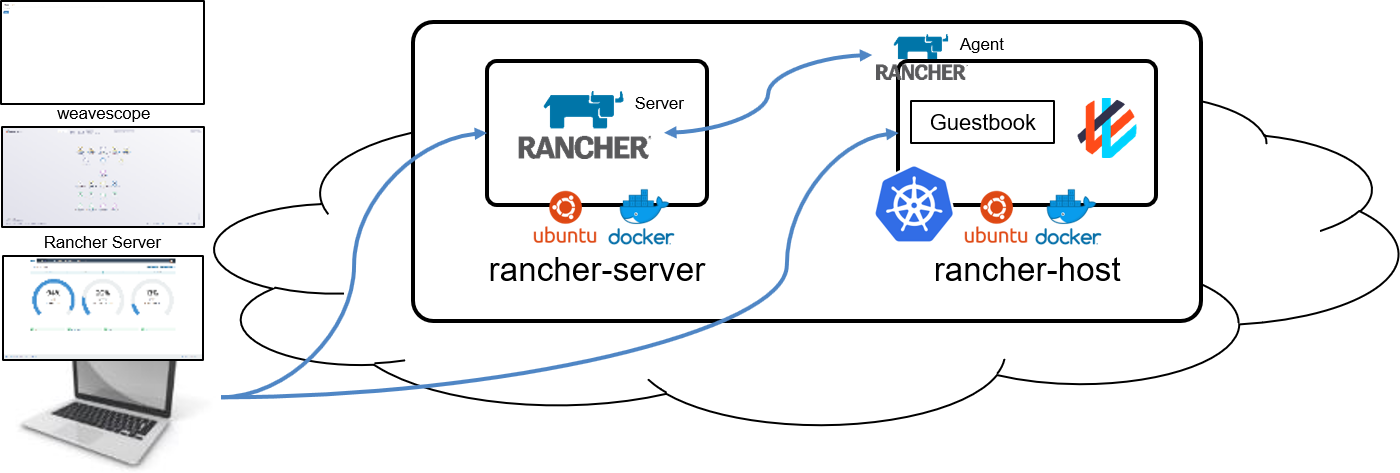
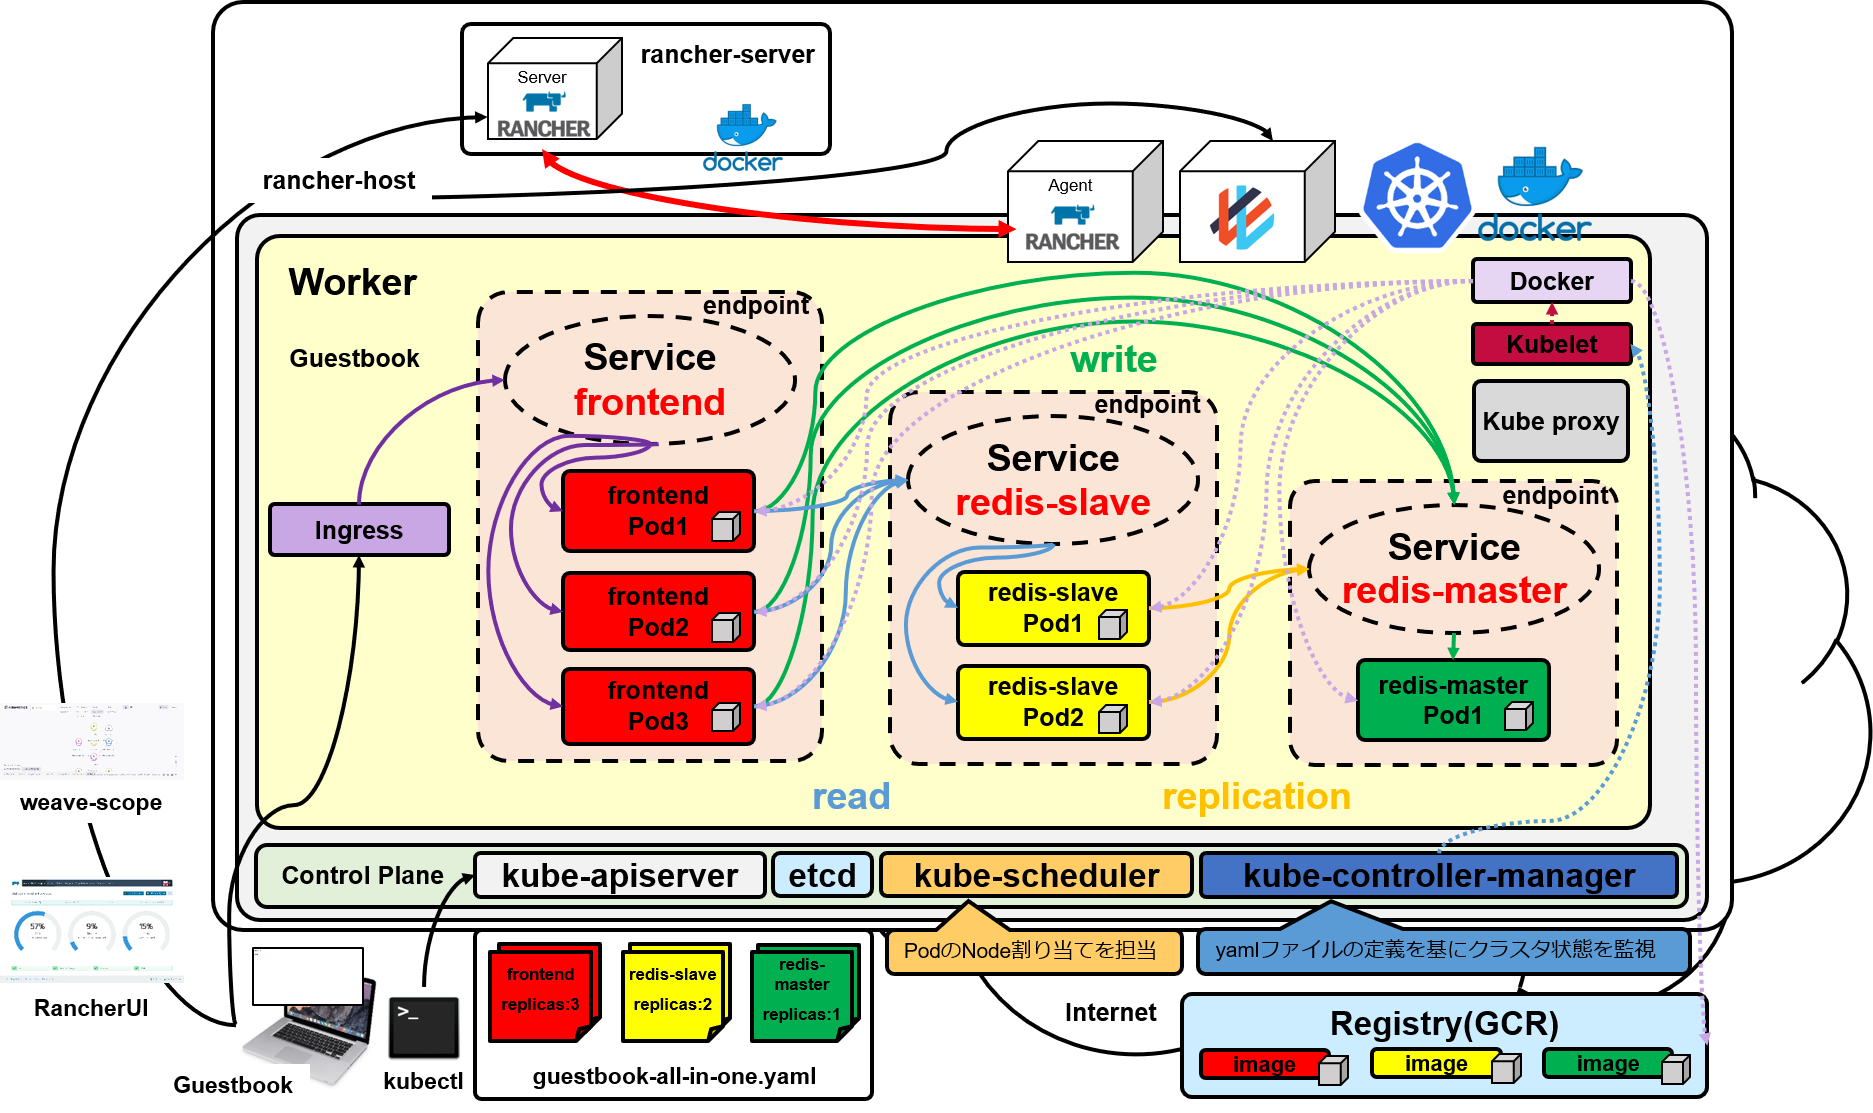
概要図
1.Rancher Serverの構築
1.仮想マシンを2つ準備
1台目
| 項目 | スペック |
|---|---|
| OS | Ubuntu18.04LTS |
| vCPU | 1 |
| メモリ | 4GB |
| HDD | 10GB以上 |
2台目
| 項目 | スペック |
|---|---|
| OS | Ubuntu18.04LTS |
| vCPU | 2 |
| メモリ | 8GB |
| HDD | 20GB以上 |
デフォルトでファイアウォールが設定されていて、ホスト間でのコンテナの通信が行えないためファイアウォール等は無効にしておきましょう。
2.Dockerインストール
2台の仮想マシンインスタンスにDockerをインストールします。
$ curl https://releases.rancher.com/install-docker/18.09.sh | sh
・
・(省略)
・
+ sh -c docker version
Client:
 Version:           18.09.3
 API version:       1.39
 Go version:        go1.10.8
 Git commit:        774a1f4
 Built:             Thu Feb 28 06:40:58 2019
 OS/Arch:           linux/amd64
 Experimental:      false

Server: Docker Engine - Community
 Engine:
  Version:          18.09.3
  API version:      1.39 (minimum version 1.12)
  Go version:       go1.10.8
  Git commit:       774a1f4
  Built:            Thu Feb 28 05:59:55 2019
  OS/Arch:          linux/amd64
  Experimental:     false

If you would like to use Docker as a non-root user, you should now consider
adding your user to the "docker" group with something like:

  sudo usermod -aG docker your-user

Remember that you will have to log out and back in for this to take effect!

WARNING: Adding a user to the "docker" group will grant the ability to run
         containers which can be used to obtain root privileges on the
         docker host.
         Refer to https://docs.docker.com/engine/security/security/#docker-daemon-attack-surface
         for more information.
3.Rancher2.0 Serverのインストール(1台:rancher-serverのみ)
1台目のrancher-serverで以下のコマンドを実行します。
$ sudo docker run -d --restart=unless-stopped -p 80:80 -p 443:443 rancher/rancher:v2.1.7
Unable to find image 'rancher/rancher:latest' locally
latest: Pulling from rancher/rancher
6cf436f81810: Pull complete
987088a85b96: Pull complete
b4624b3efe06: Pull complete
d42beb8ded59: Pull complete
20428076f45c: Pull complete
aa5f6ec4068f: Pull complete
fa0b81e2aefe: Pull complete
174adca119fa: Pull complete
b36e95625791: Pull complete
3b4599da8bc5: Pull complete
7c3eae4ec924: Pull complete
821c0eae95fd: Pull complete
Digest: sha256:1943e9b7d802992d3c61184af7ae2ca5d414c15152bc40ec995e71e28cb80844
Status: Downloaded newer image for rancher/rancher:latest
de338658e620ad279b3f6400237977a449a6a677778506ce37971b14c13c336e
4.ブラウザを起動して、RancherUIにアクセス(rancher-server)
ブラウザを起動して、https://IPアドレス/ にアクセスします。
詳細設定をクリックします。
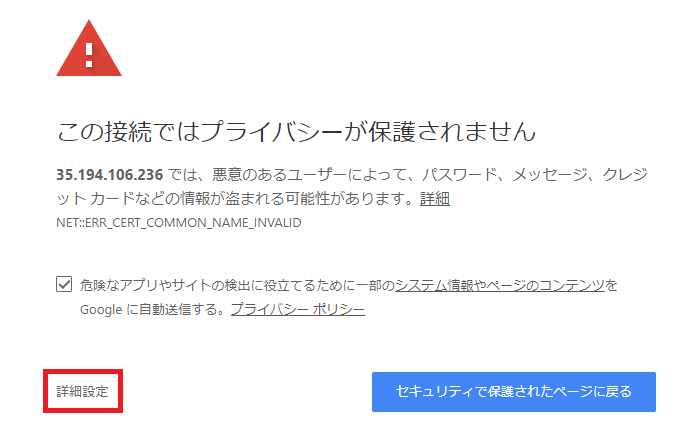
赤枠の箇所をクリックします。
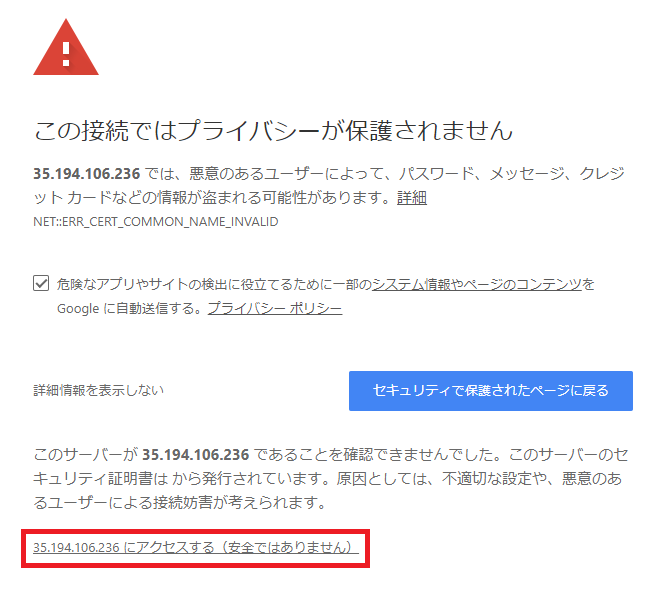
以下ログイン画面が表示されることを確認します。
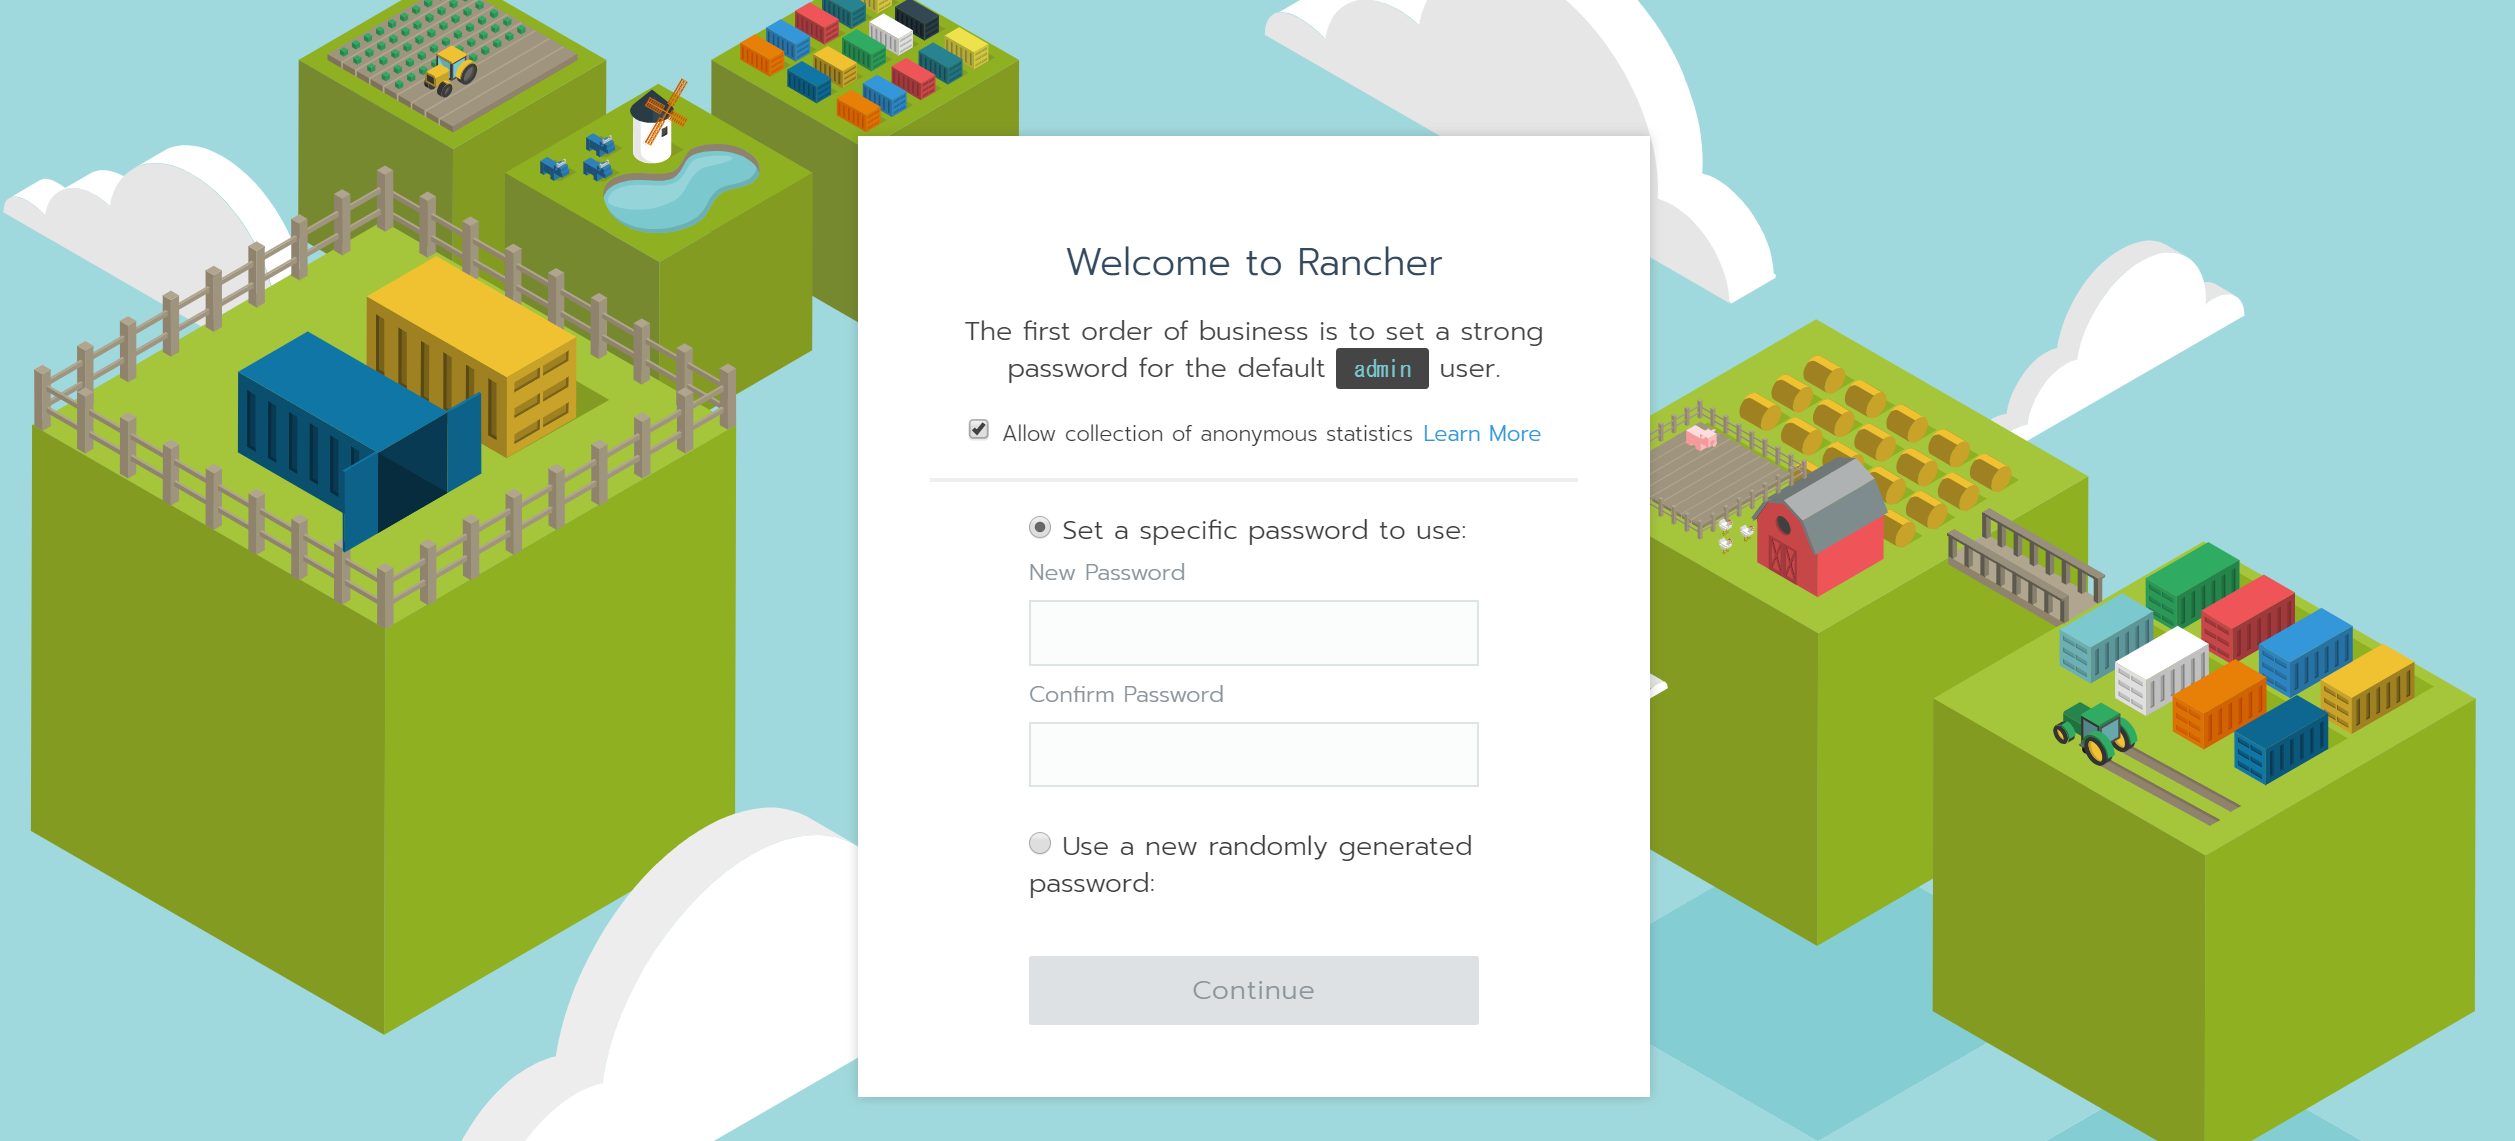
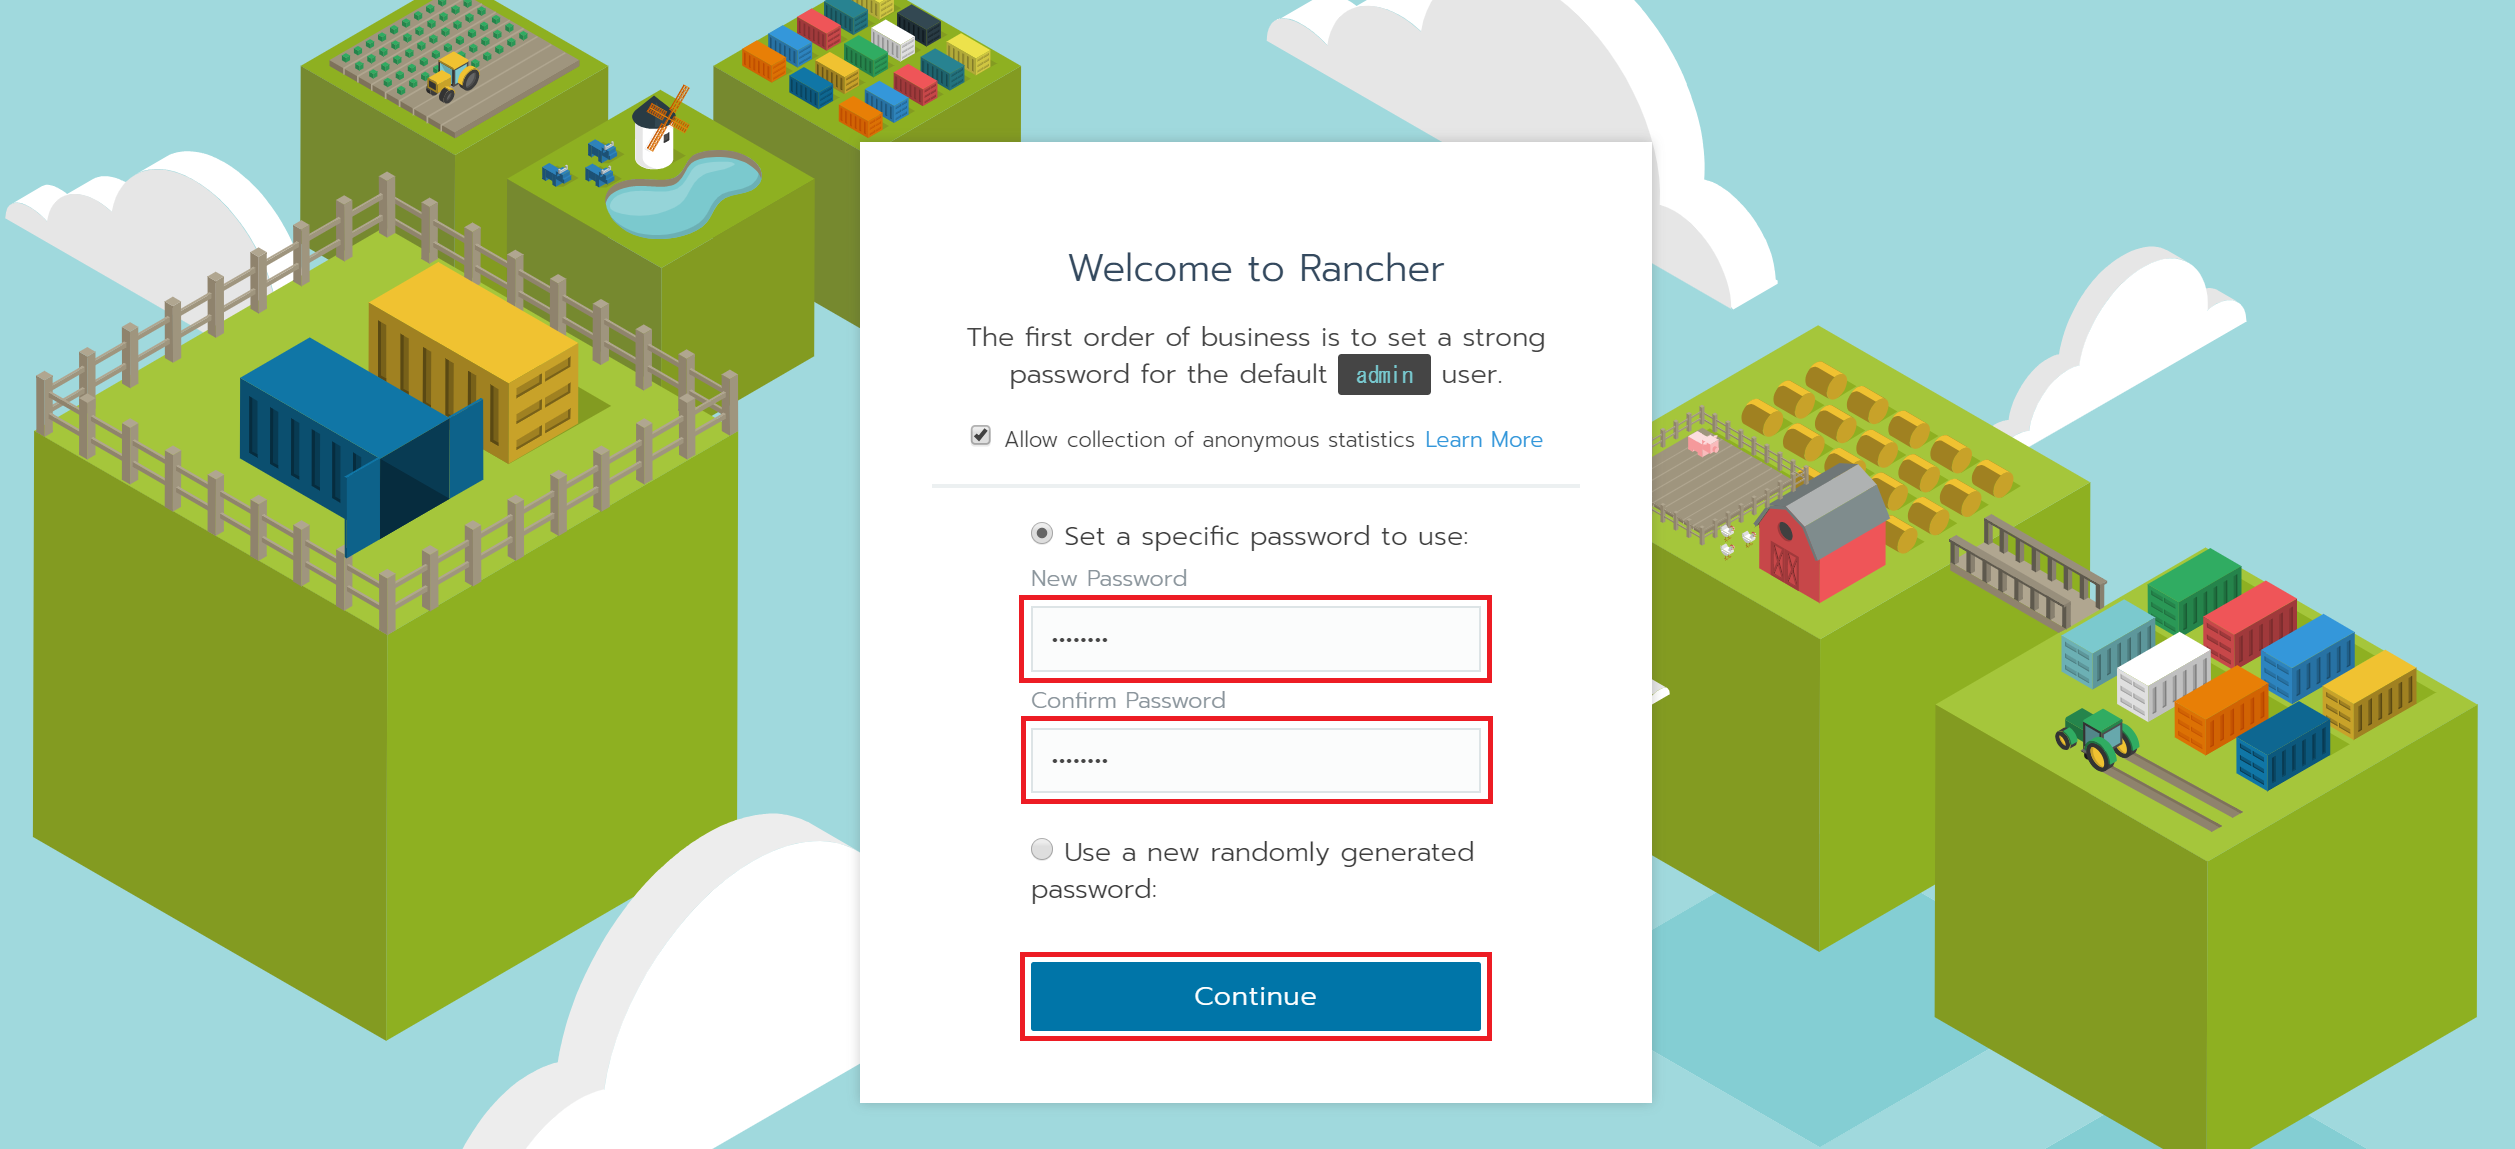
5.初回ログイン設定
adminユーザのパスワードを設定します。
任意のパスワードを「New Password」「Confirm Password」に入力して「Continue」ボタンを押下します。
Rancher Server URLを登録するので、そのまま「Save URL」をクリックします。
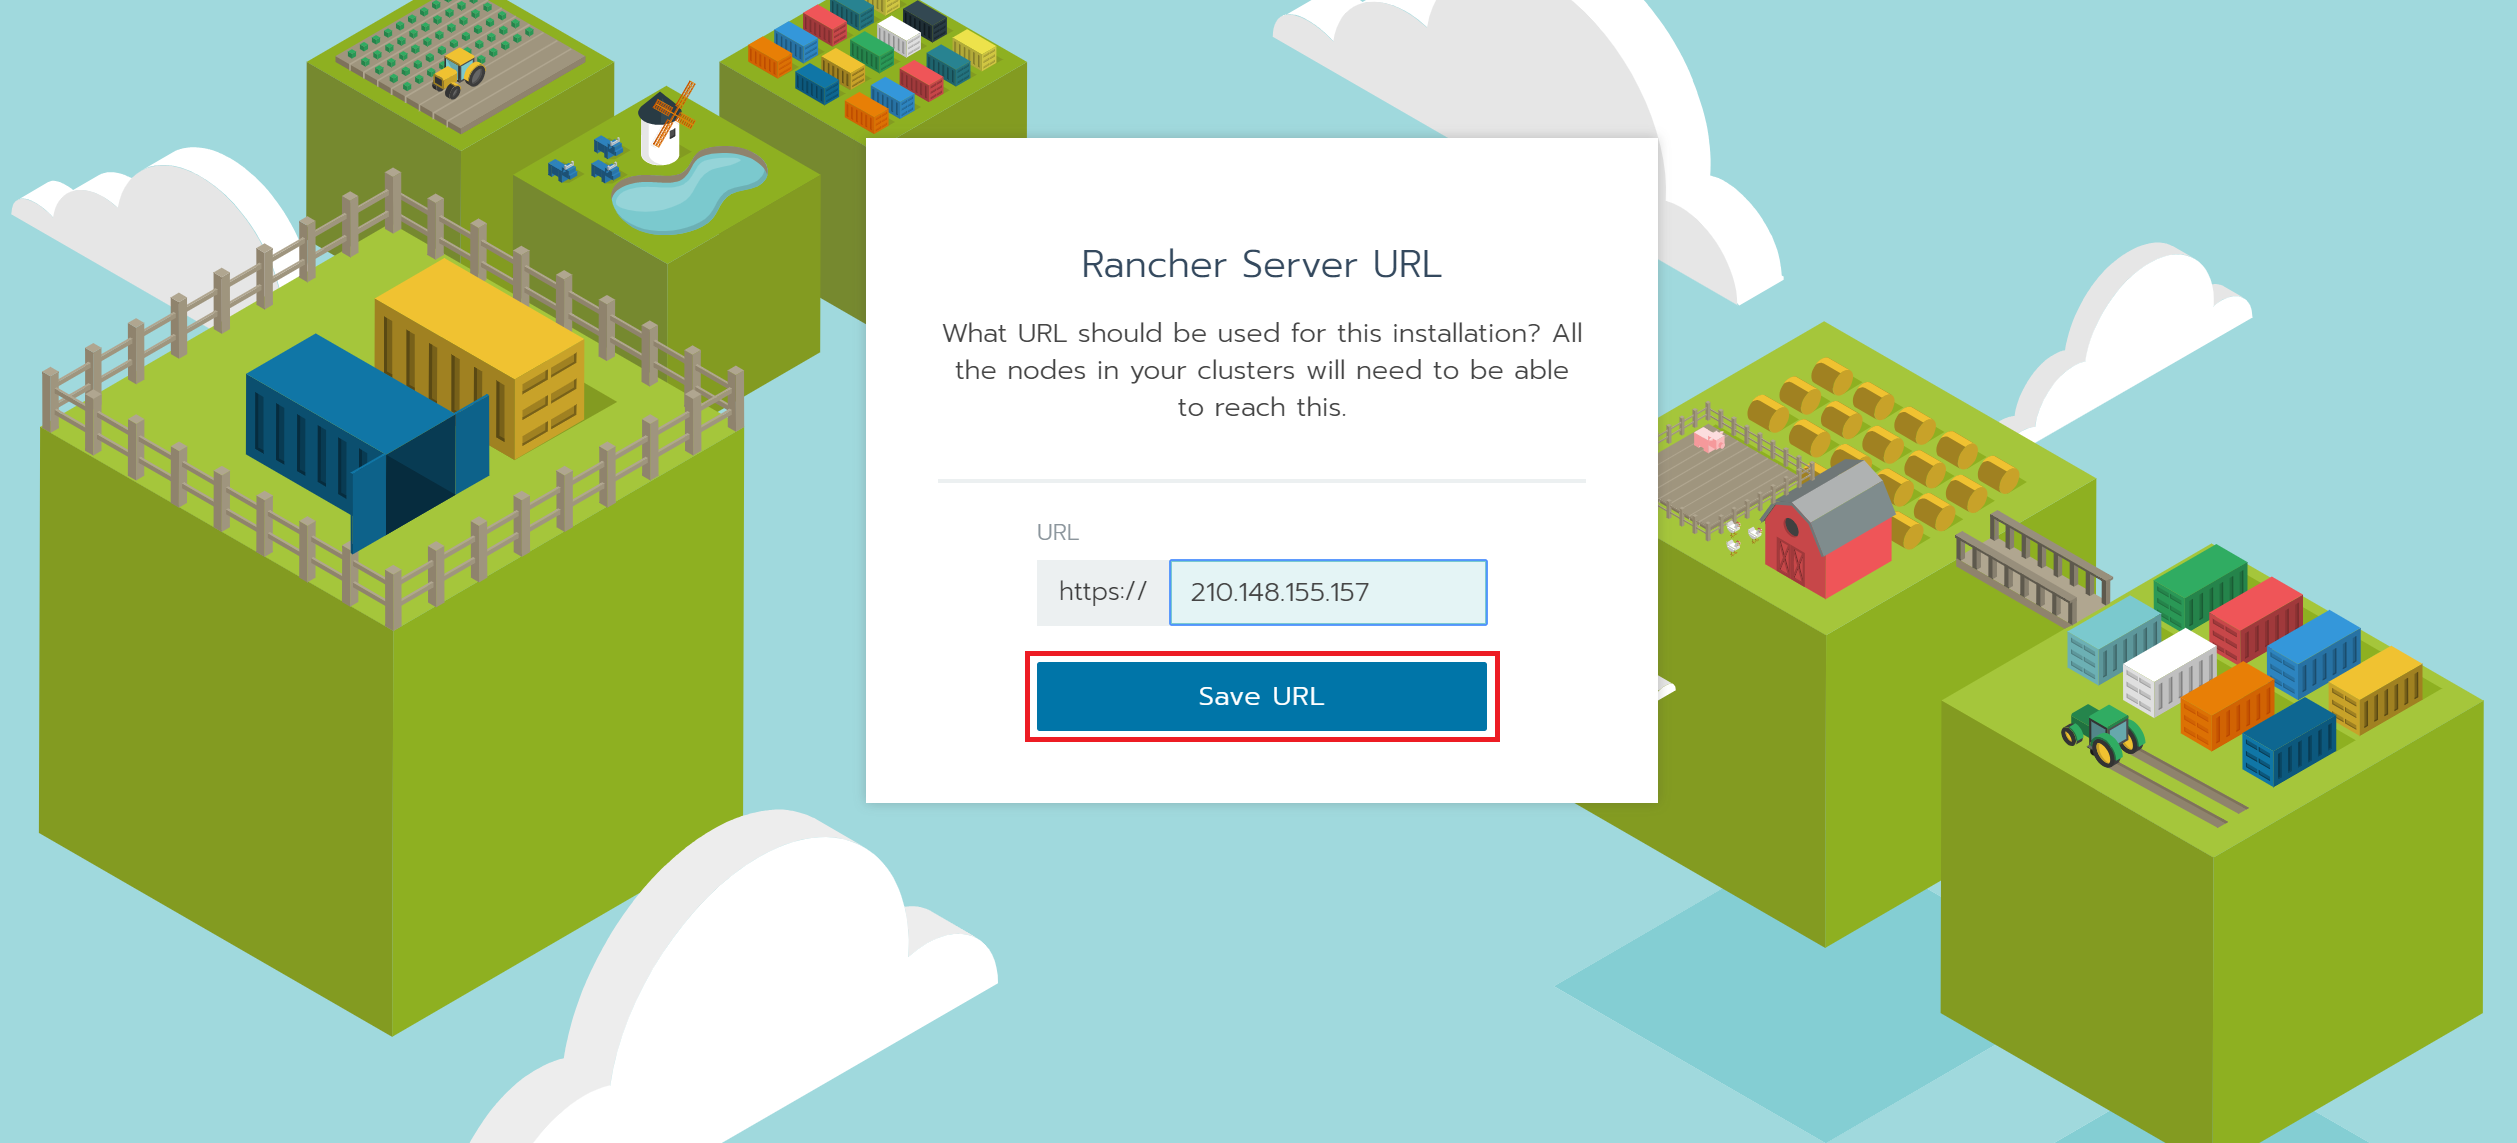
ログイン完了となります。
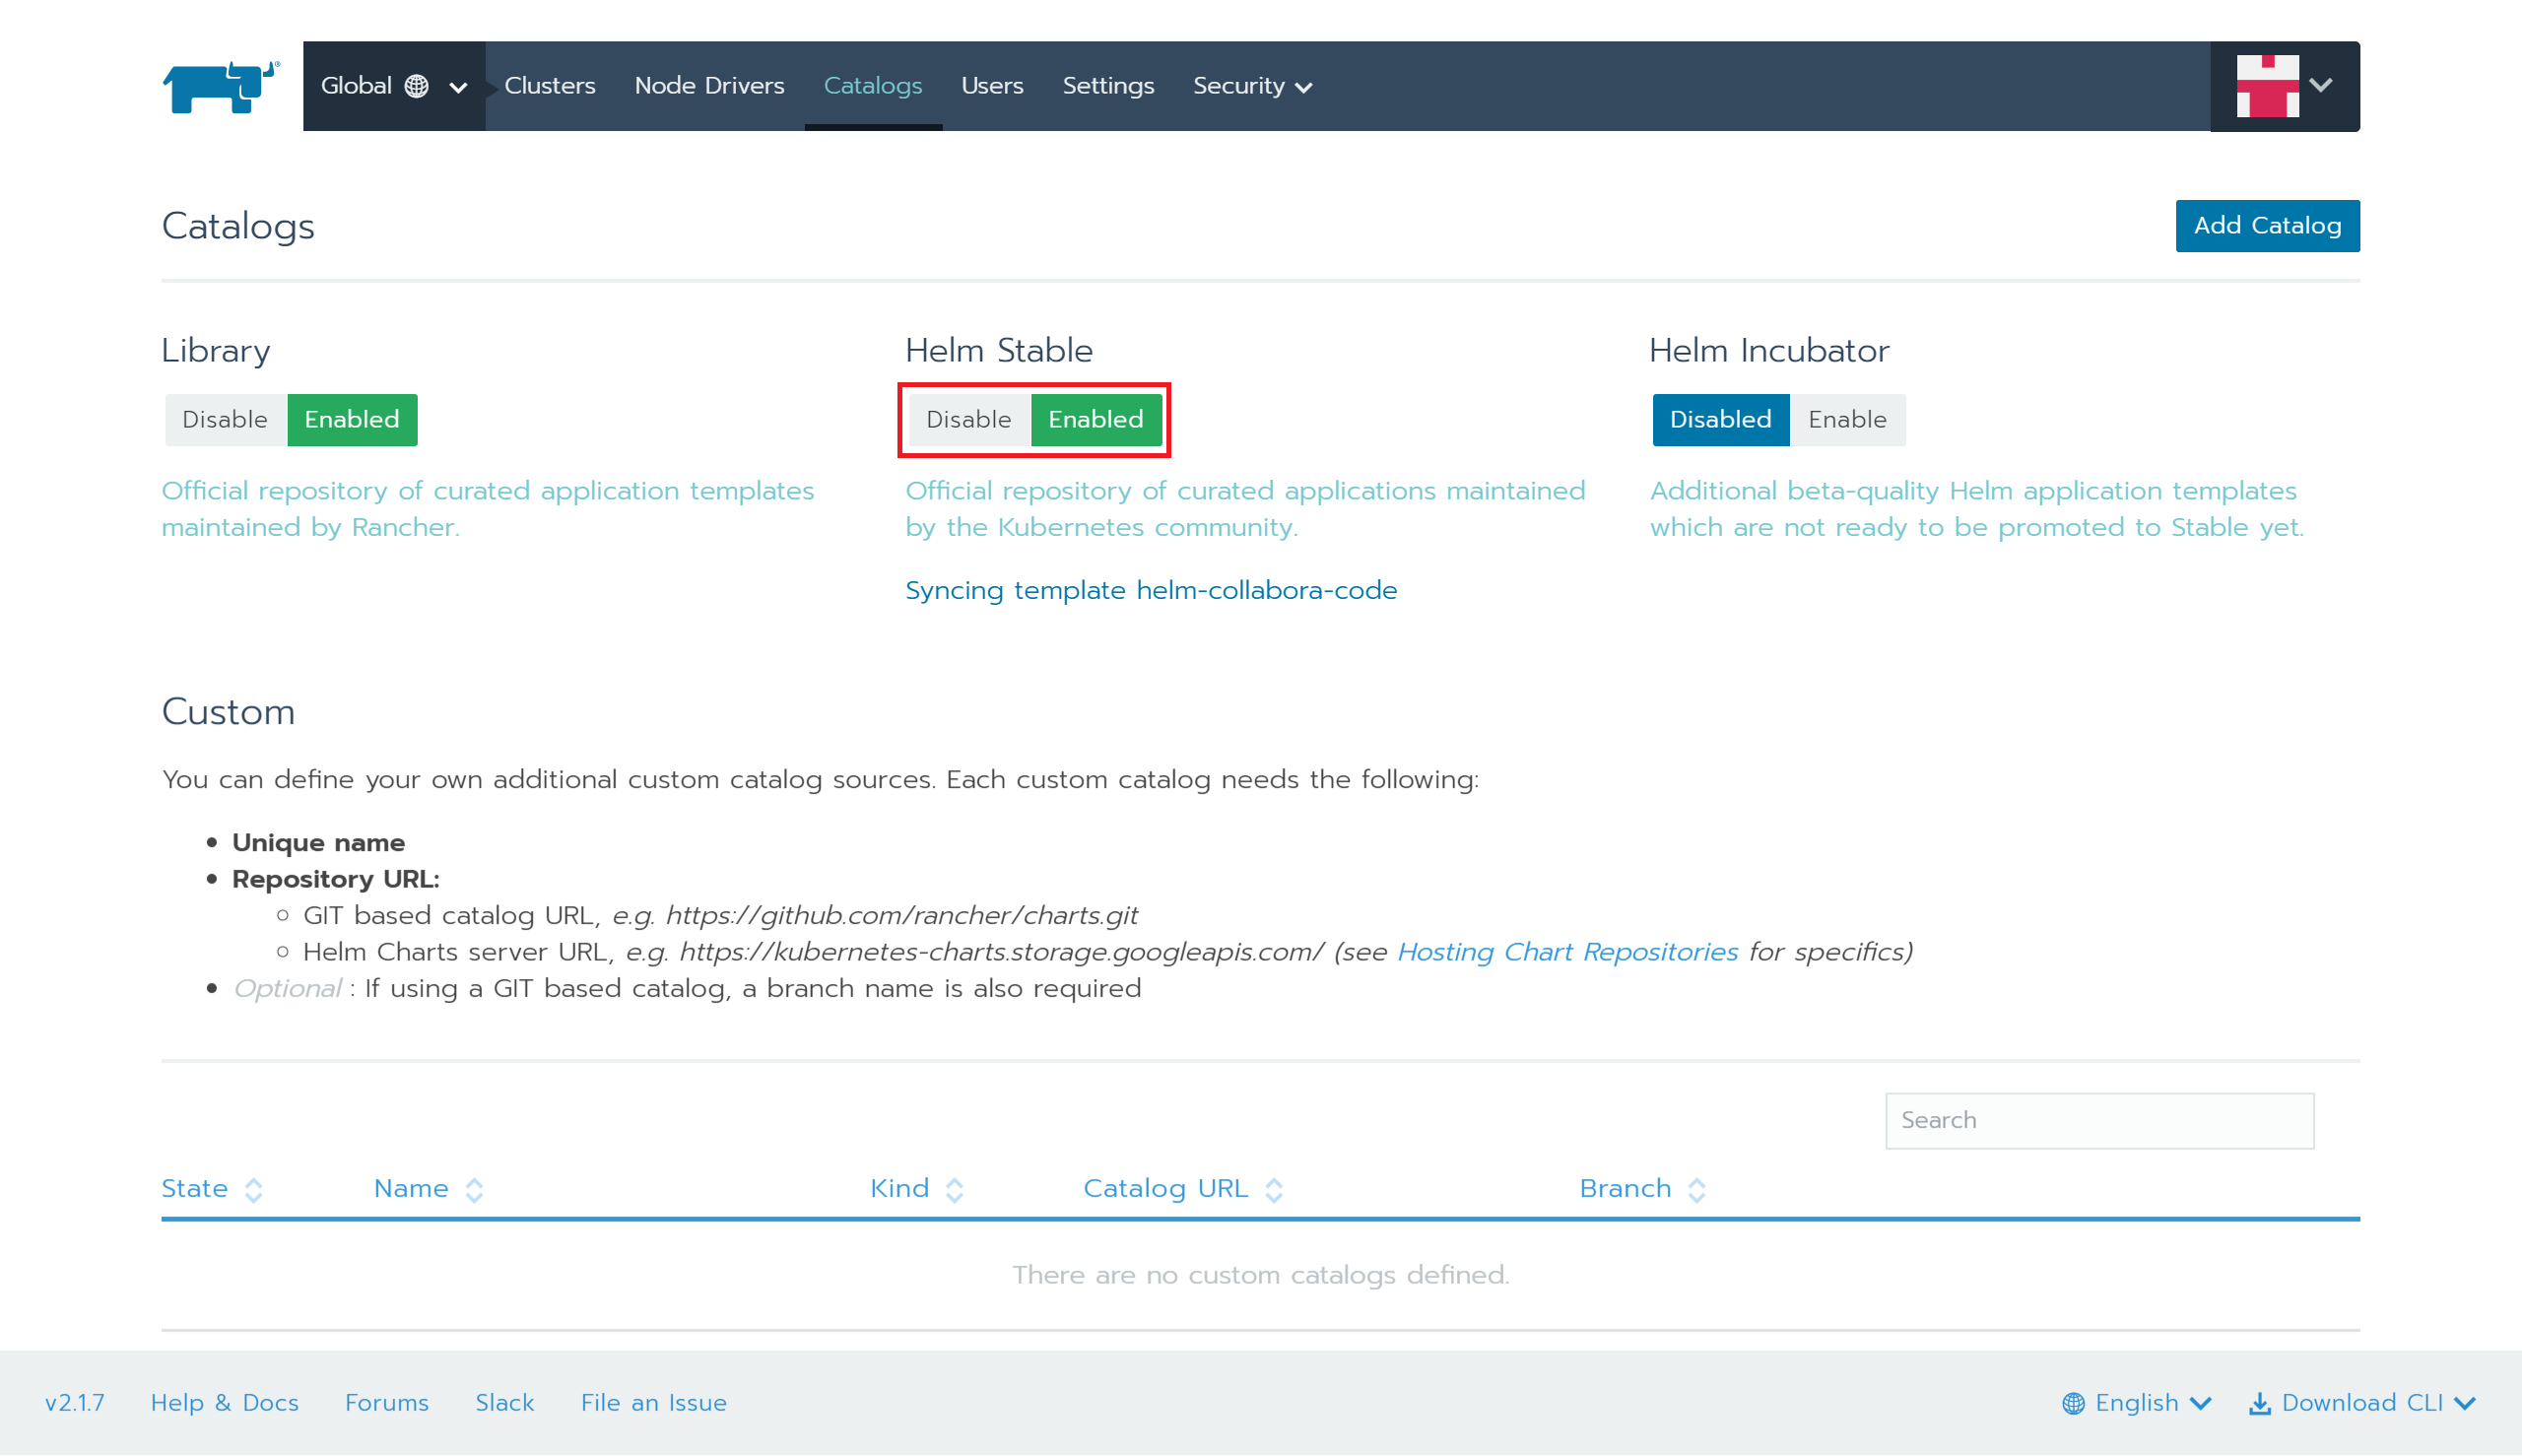
6.Helmカタログの有効化
上部メニューから「Catalogs」を選択します。

「Helm Stable」を「Enable」に設定します。
「Global」を選択します。

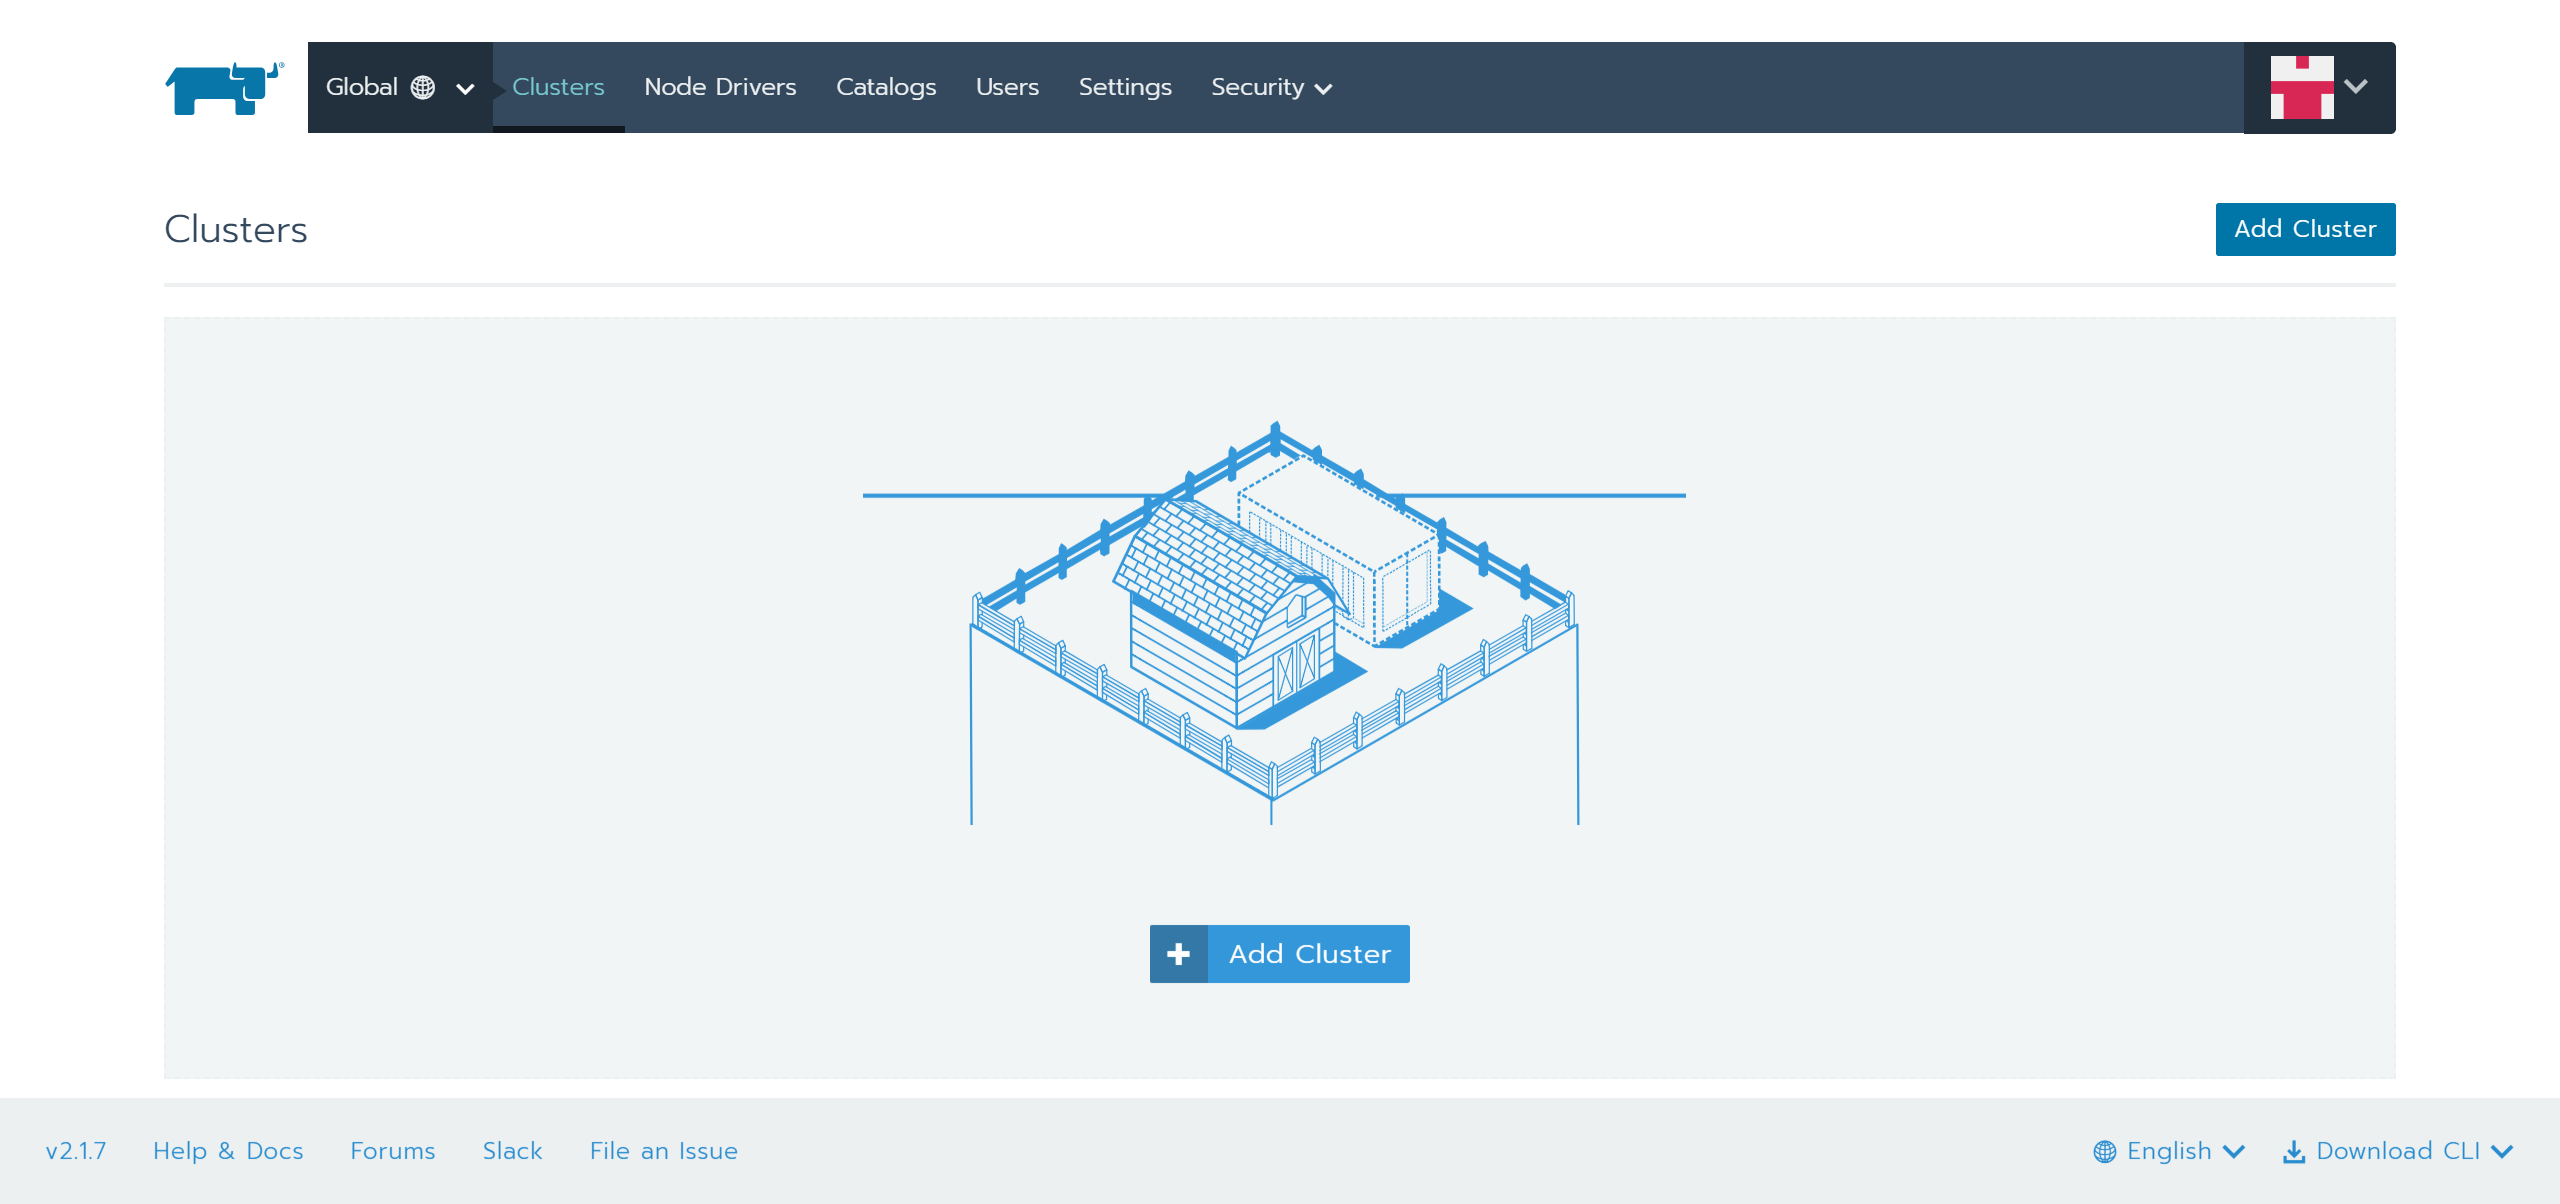
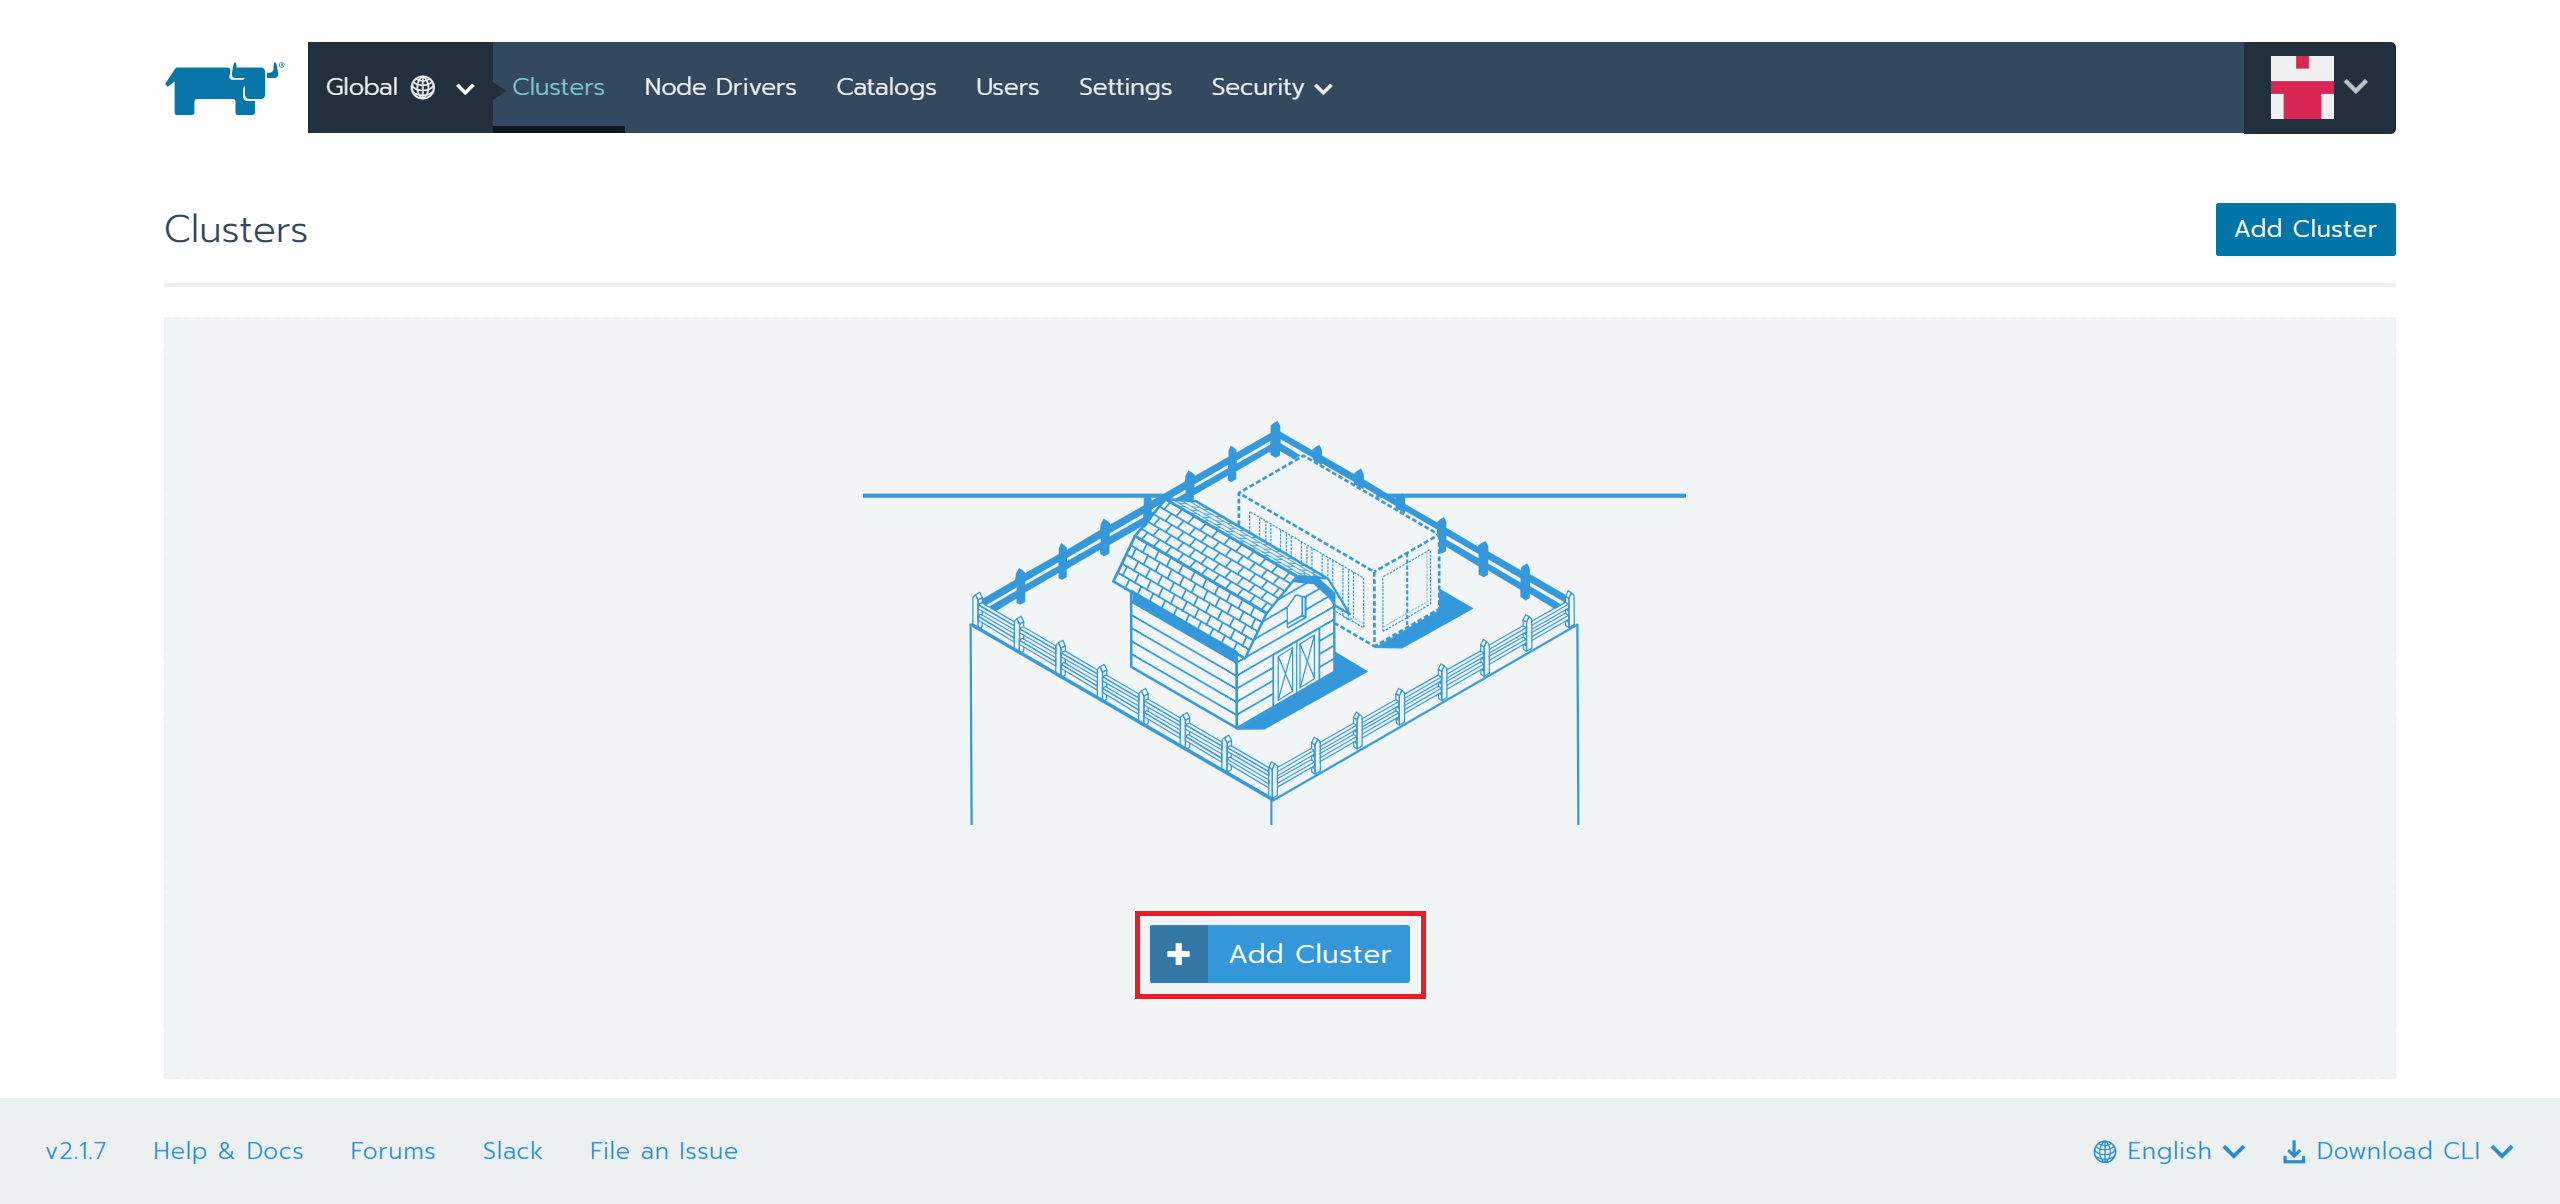
2.Kubernetes Clusterの構築
1.「Add Cluster」をクリック
2.「CUSTOM」を選択、「Cluster Name」に任意名を入力、「Next」ボタンを押下

3.「Show advanced options」をクリック
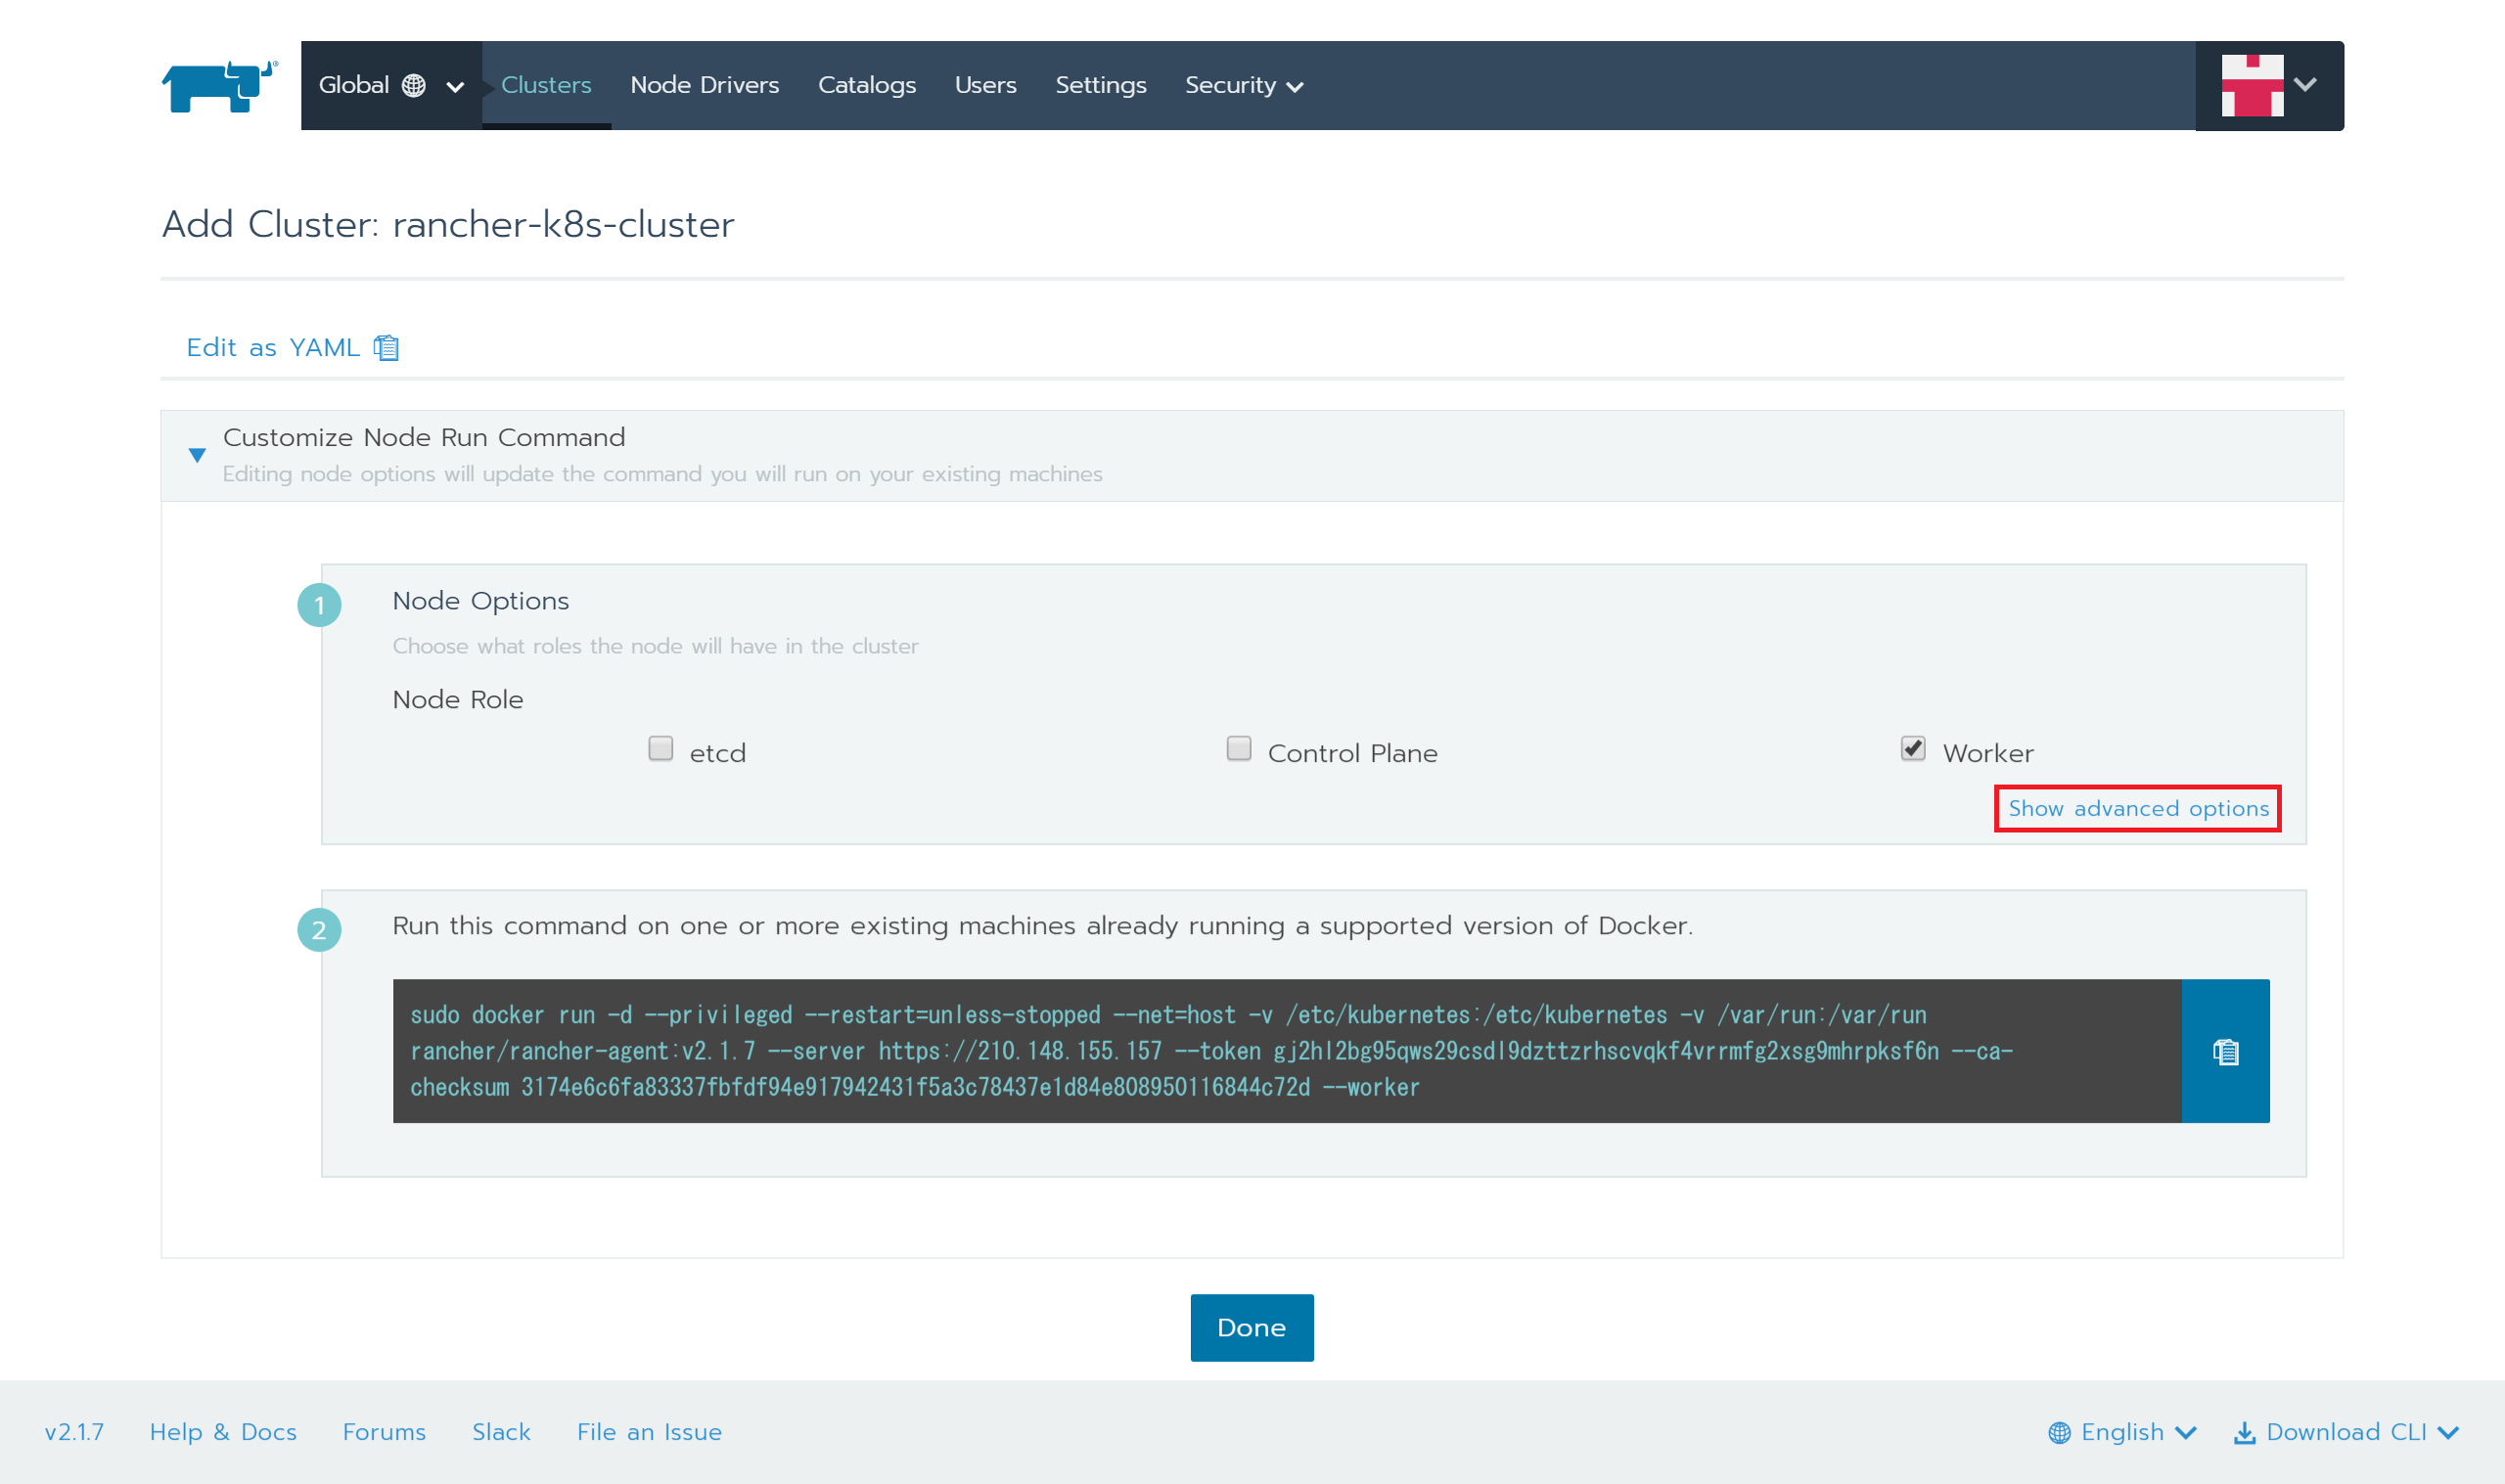
4.「Node Role」の「etcd」と「Control Plane」にチェック、「Node Address」の「Public Address」と「Internal Address」に**2台目(rancher-host)のIPアドレスを入力、「Copy to Clipboard」ボタンを押下、そのコマンドを2台目(rancher-host)**のコンソールで実行後に「Done」ボタンを押下
1.「Node Role」の「etcd」と「Control Plane」にチェックします。

2.「Node Address」の「Public Address」に**2台目(rancher-host)**のIPアドレスを入力します。

3.「Copy to Clipboard」ボタンを押下します。

4.そのコマンドを**2台目(rancher-host)**のコンソールで実行します。
3の手順でコマンド自体はクリップボードにコピーされているので、そのままペーストしてください。
$ sudo docker run -d --privileged --restart=unless-stopped --net=host -v /etc/kubernetes:/etc/kubernetes -v /var/run:/var/run rancher/rancher-agent:v2.1.7 --server https://210.148.155.157 --token gj2hl2bg95qws29csdl9dzttzrhscvqkf4vrrmfg2xsg9mhrpksf6n --ca-checksum 3174e6c6fa83337fbfdf94e917942431f5a3c78437e1d84e808950116844c72d --address 210.148.155.158 --etcd --controlplane --worker
Unable to find image 'rancher/rancher-agent:v2.1.7' locally
v2.1.7: Pulling from rancher/rancher-agent
6cf436f81810: Pull complete
987088a85b96: Pull complete
b4624b3efe06: Pull complete
d42beb8ded59: Pull complete
cc328e8c5f4e: Pull complete
fcb5007b524a: Pull complete
9653ff53debf: Pull complete
c75027384951: Pull complete
c5997b613e9e: Pull complete
Digest: sha256:865ec8052bfa002b8f6d8011735779c6f9ef044252e7573bba7ba6c951f5b086
Status: Downloaded newer image for rancher/rancher-agent:v2.1.7
26d16a656bafa64c46b4a253fb84d38ded047ef19f3b27673a5066adf8873f94
5.「Done」ボタンを押下します。

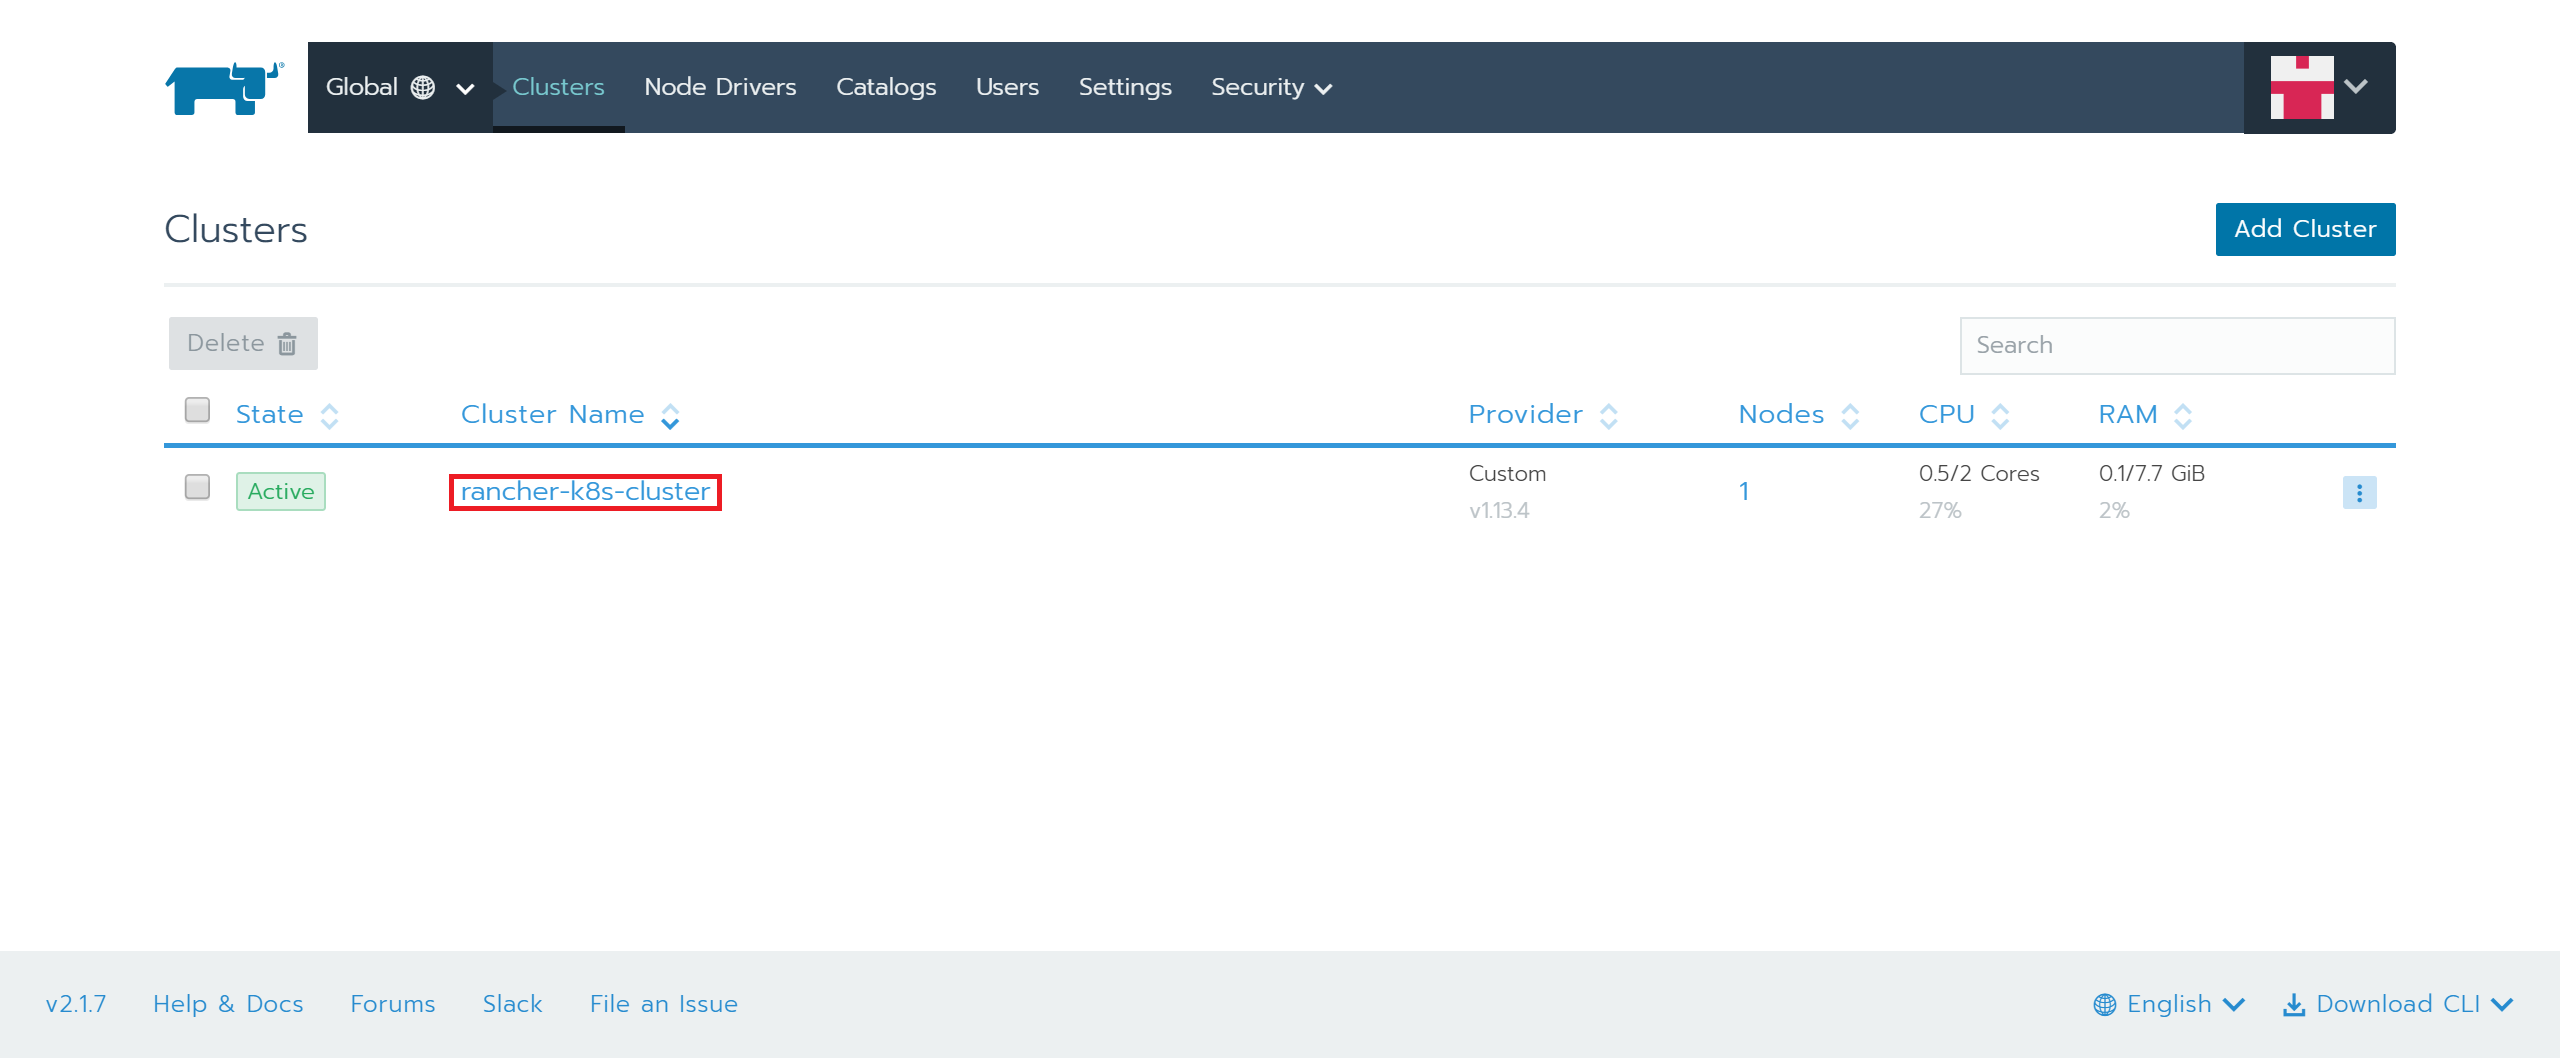
5.クラスタ名をクリック
Activeの表示に変わった段階で、クラスタ名をクリックしてください。
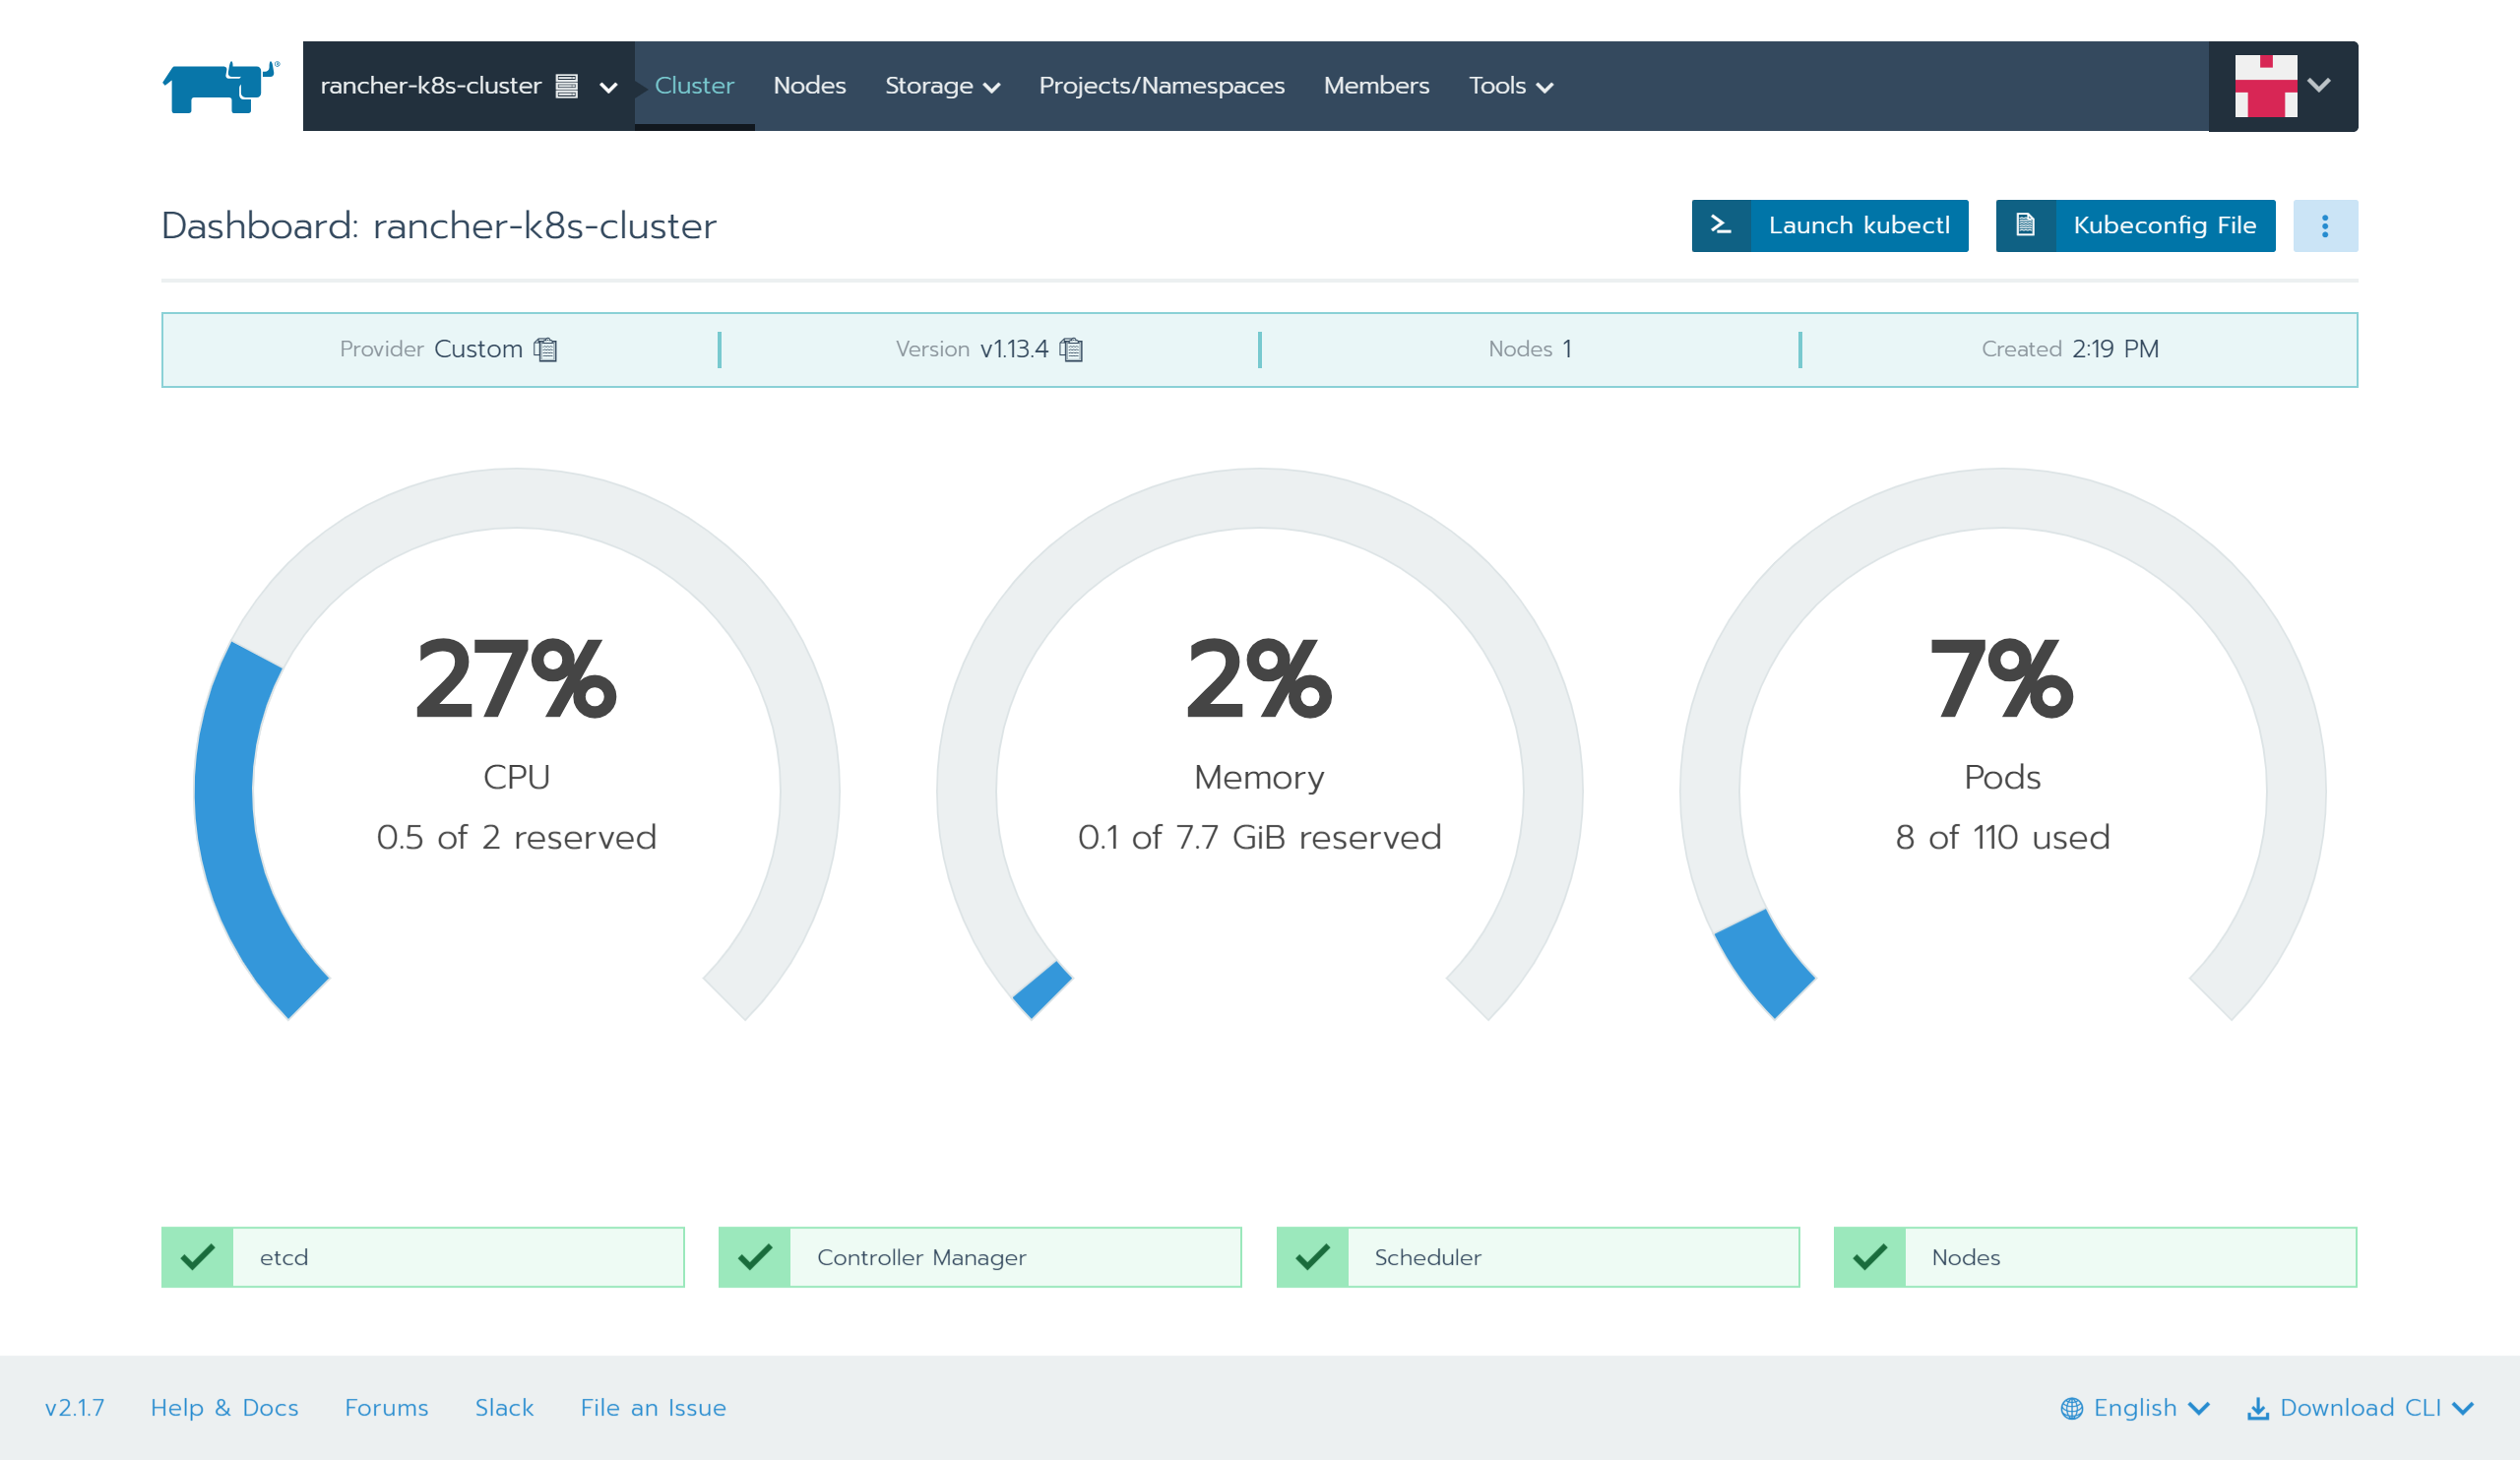
6.リソース状況を確認
3.weavescopeカタログのデプロイ
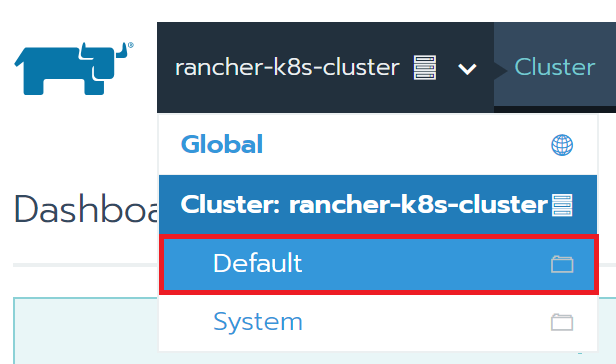
1.上部メニューから「Default」を選択、「Catalog Apps」を選択
「Default」を選択します。
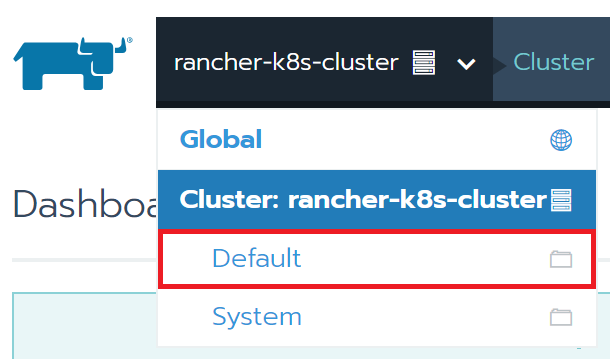
「Catalog Apps」を選択します。

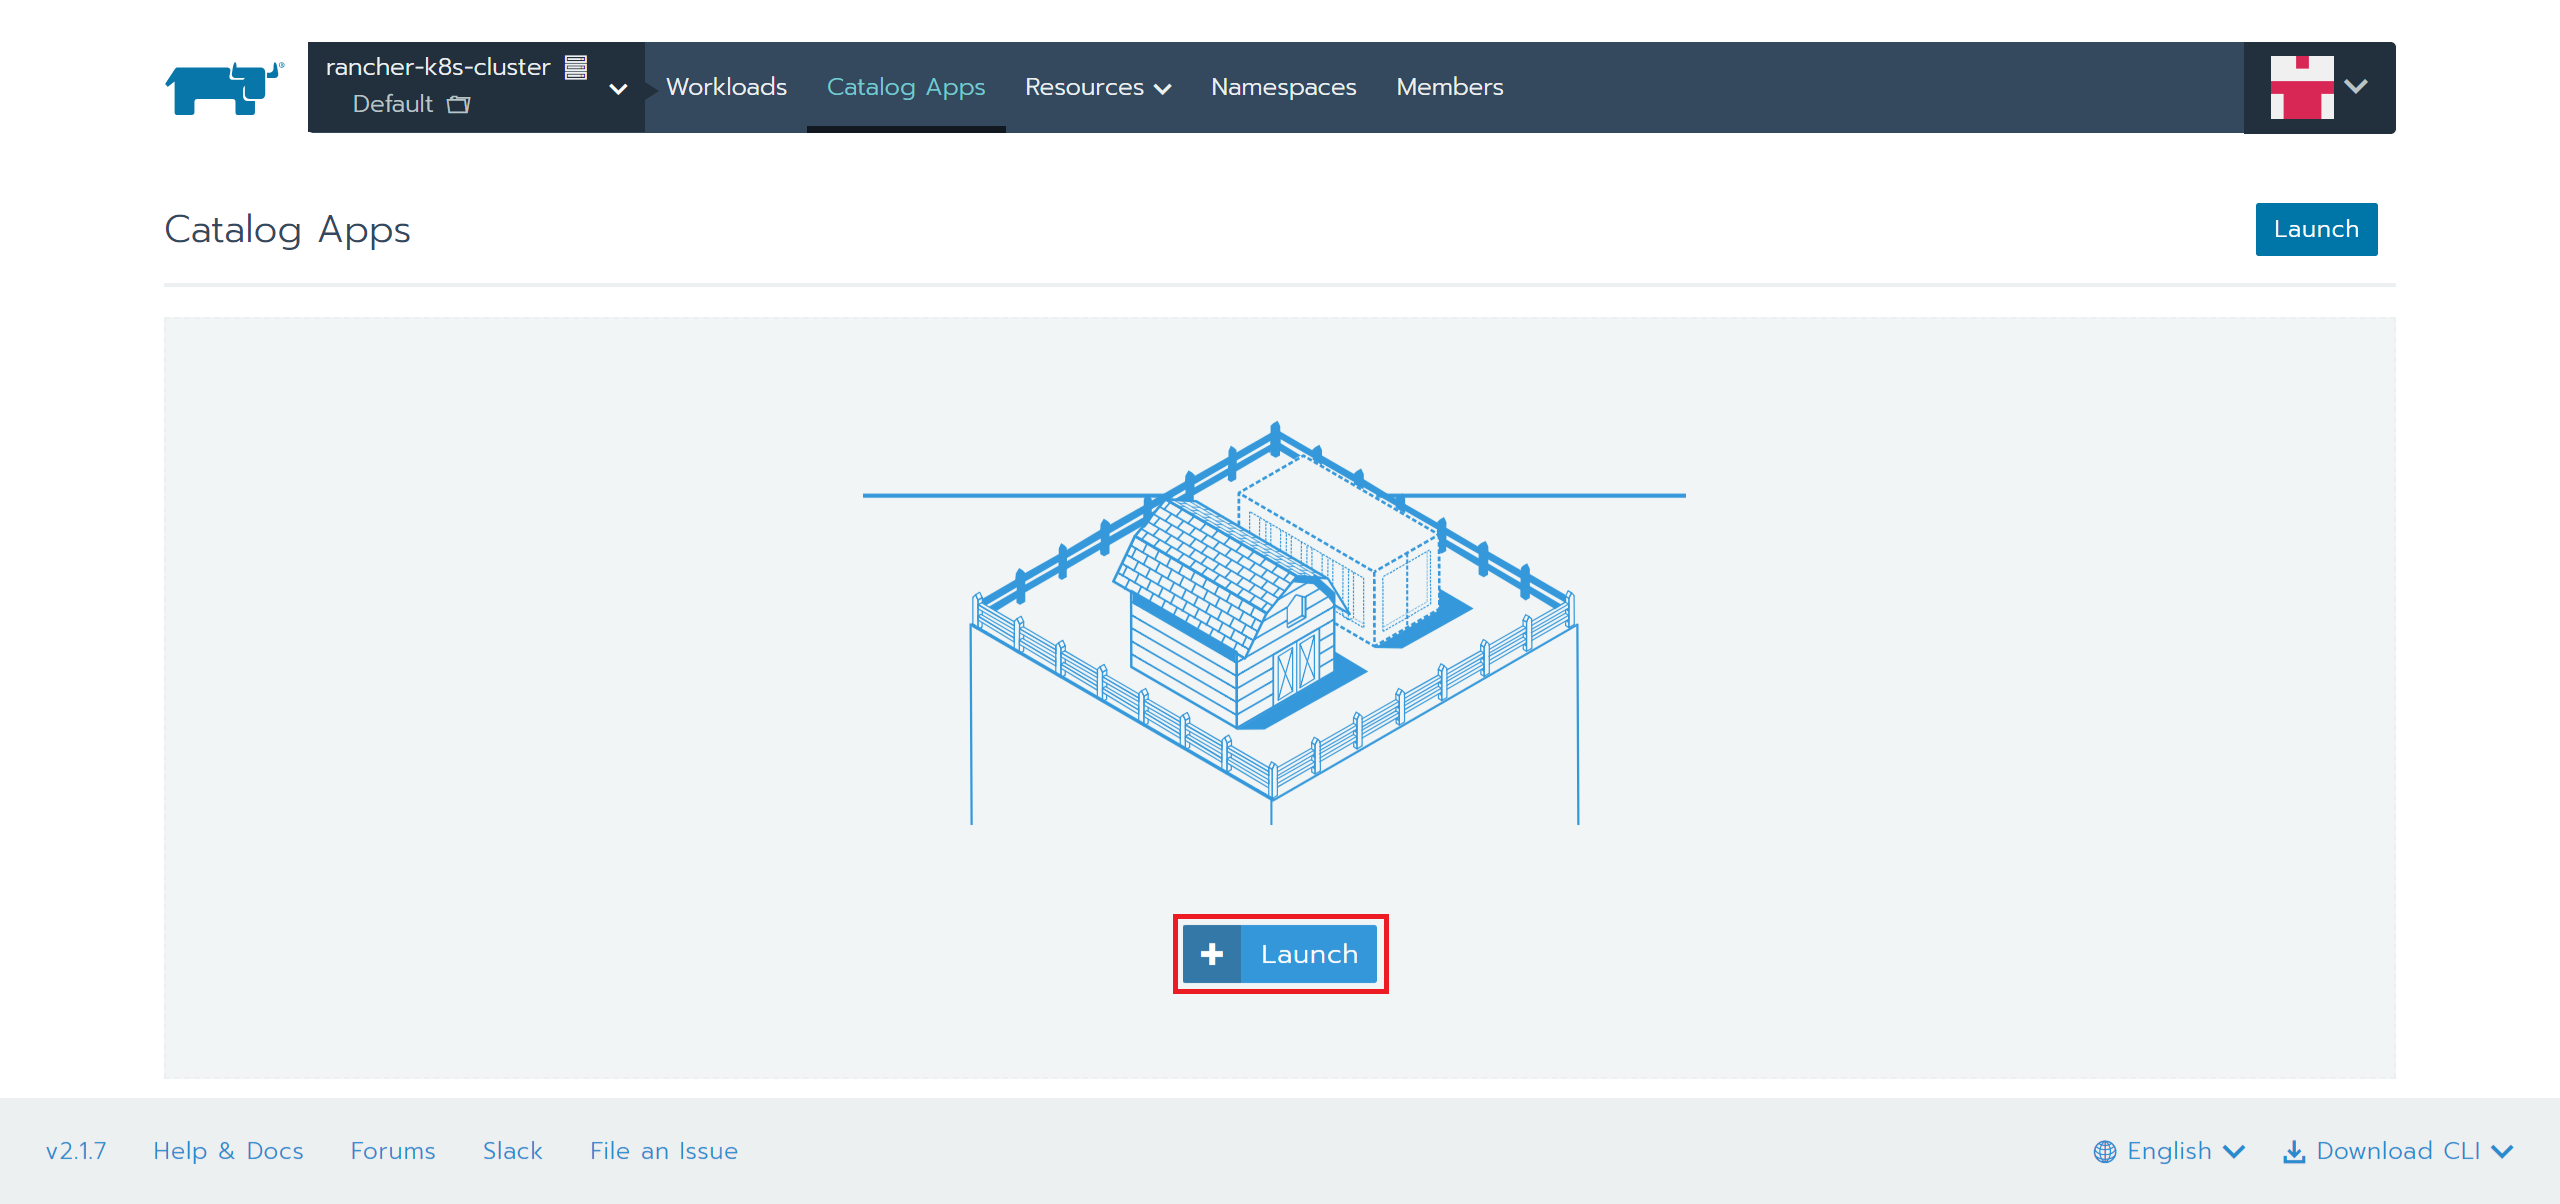
2.「Launch」ボタンを押下
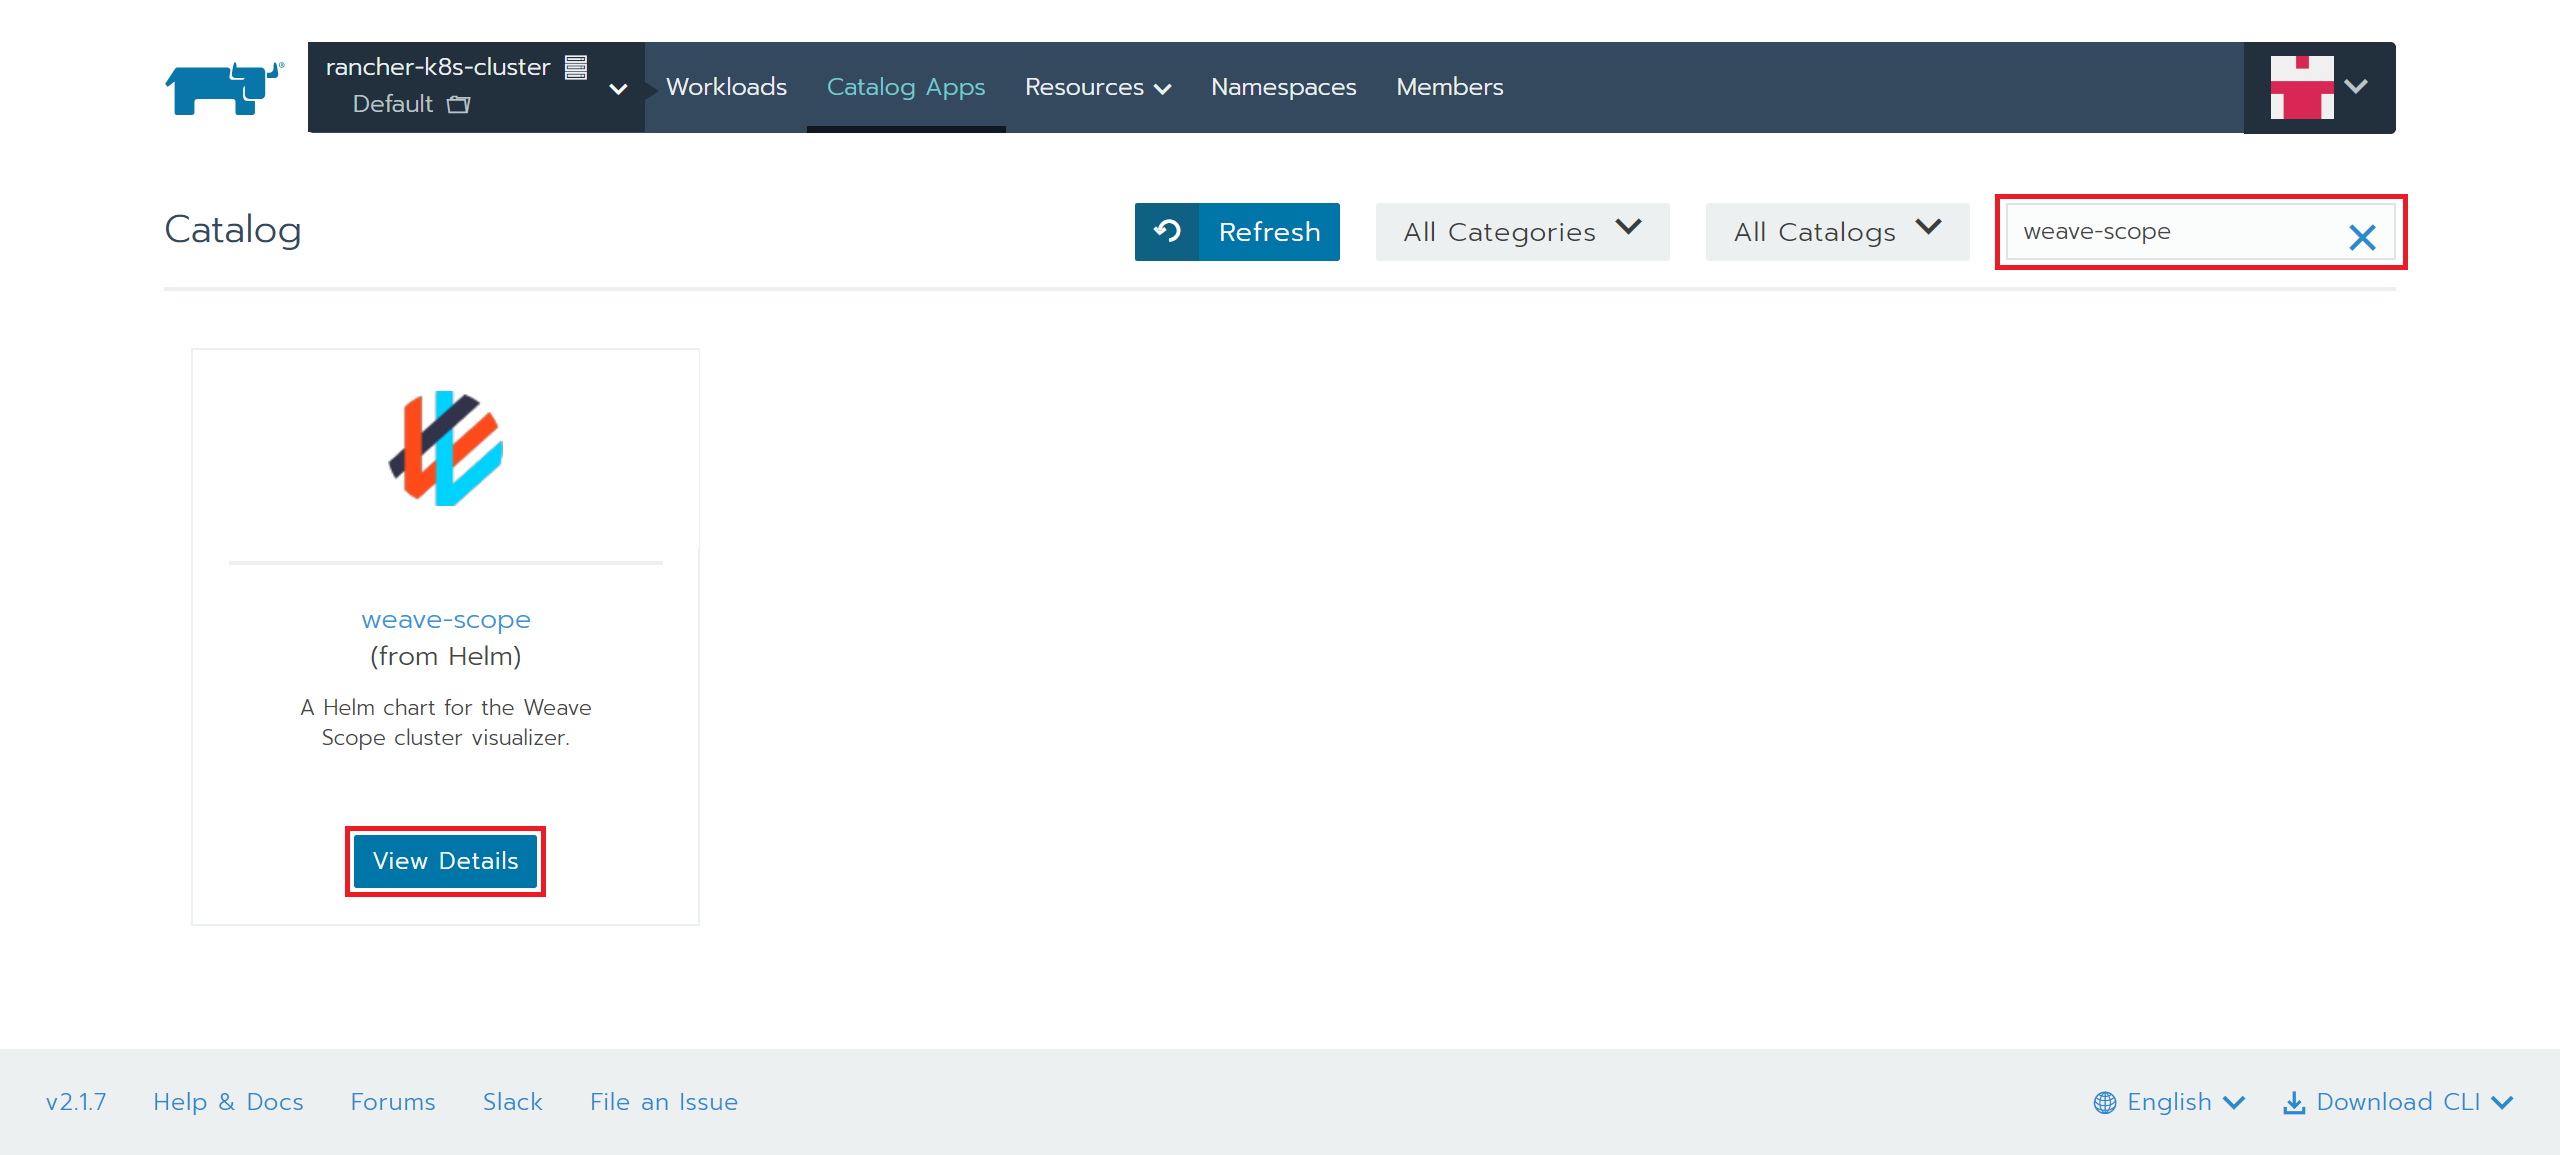
3.検索フィールドで「weave-scope」と入力して、「View Details」ボタンを押下
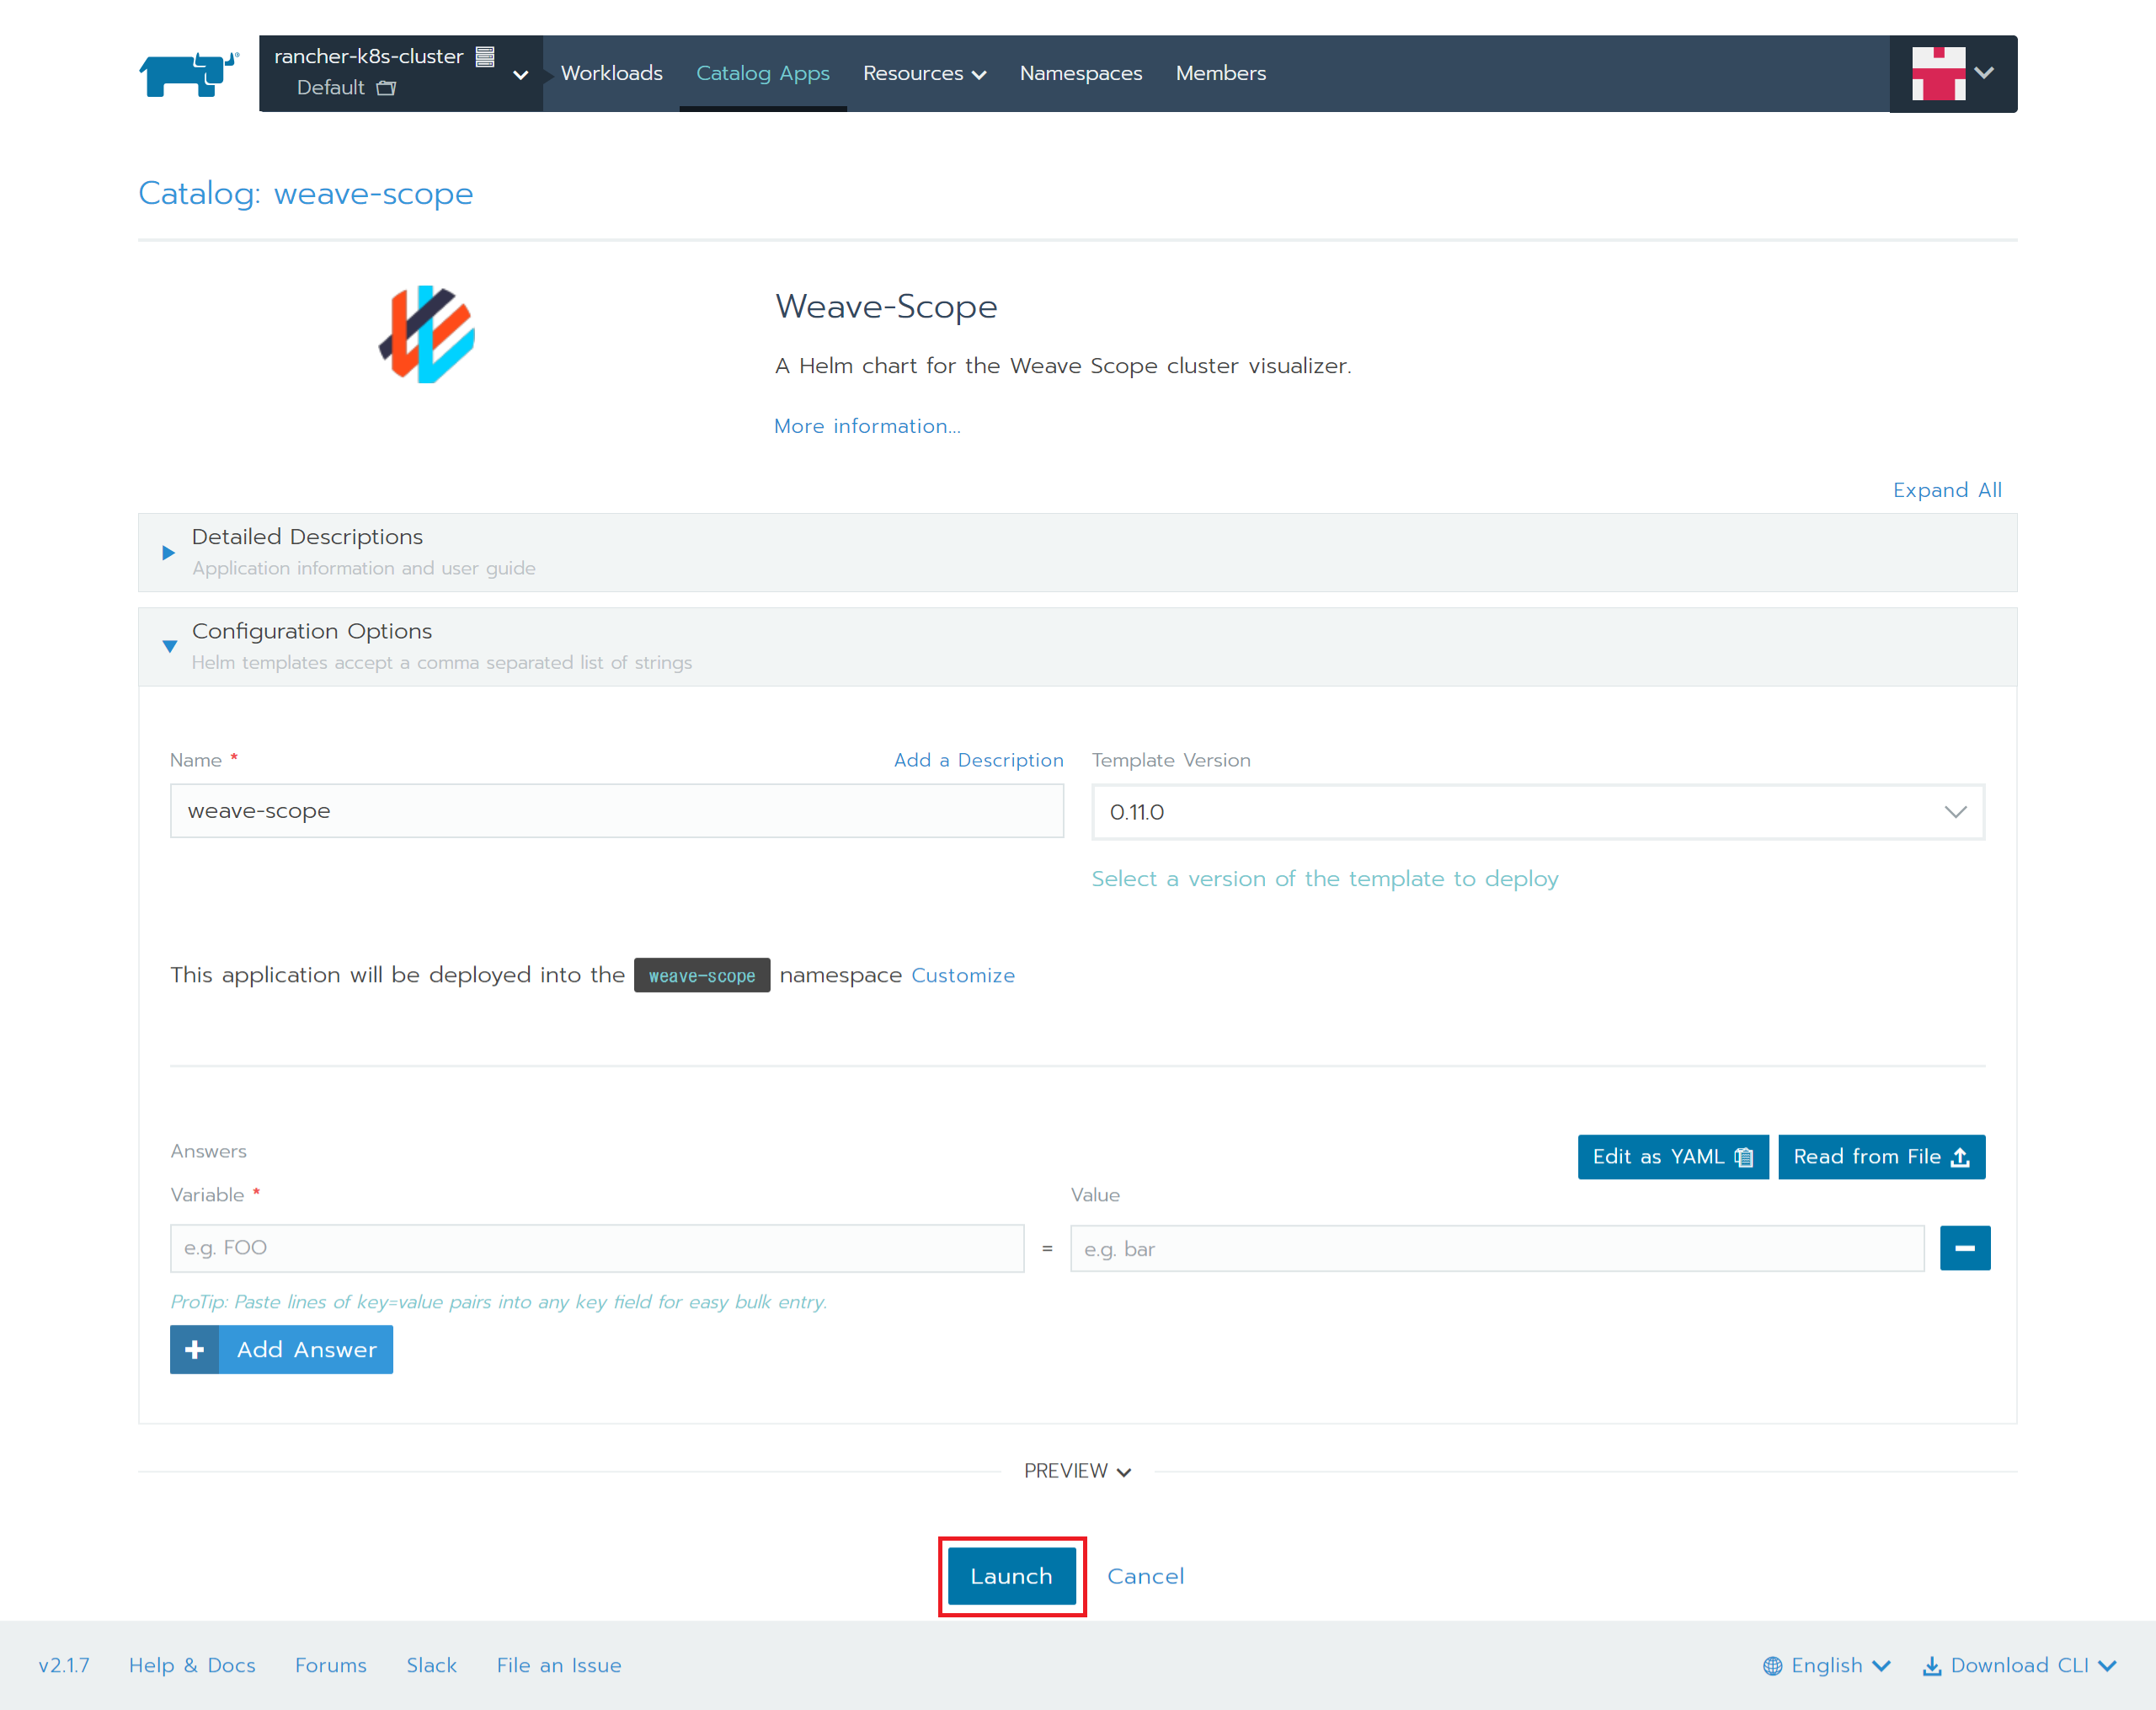
4.「Launch」ボタンを押下
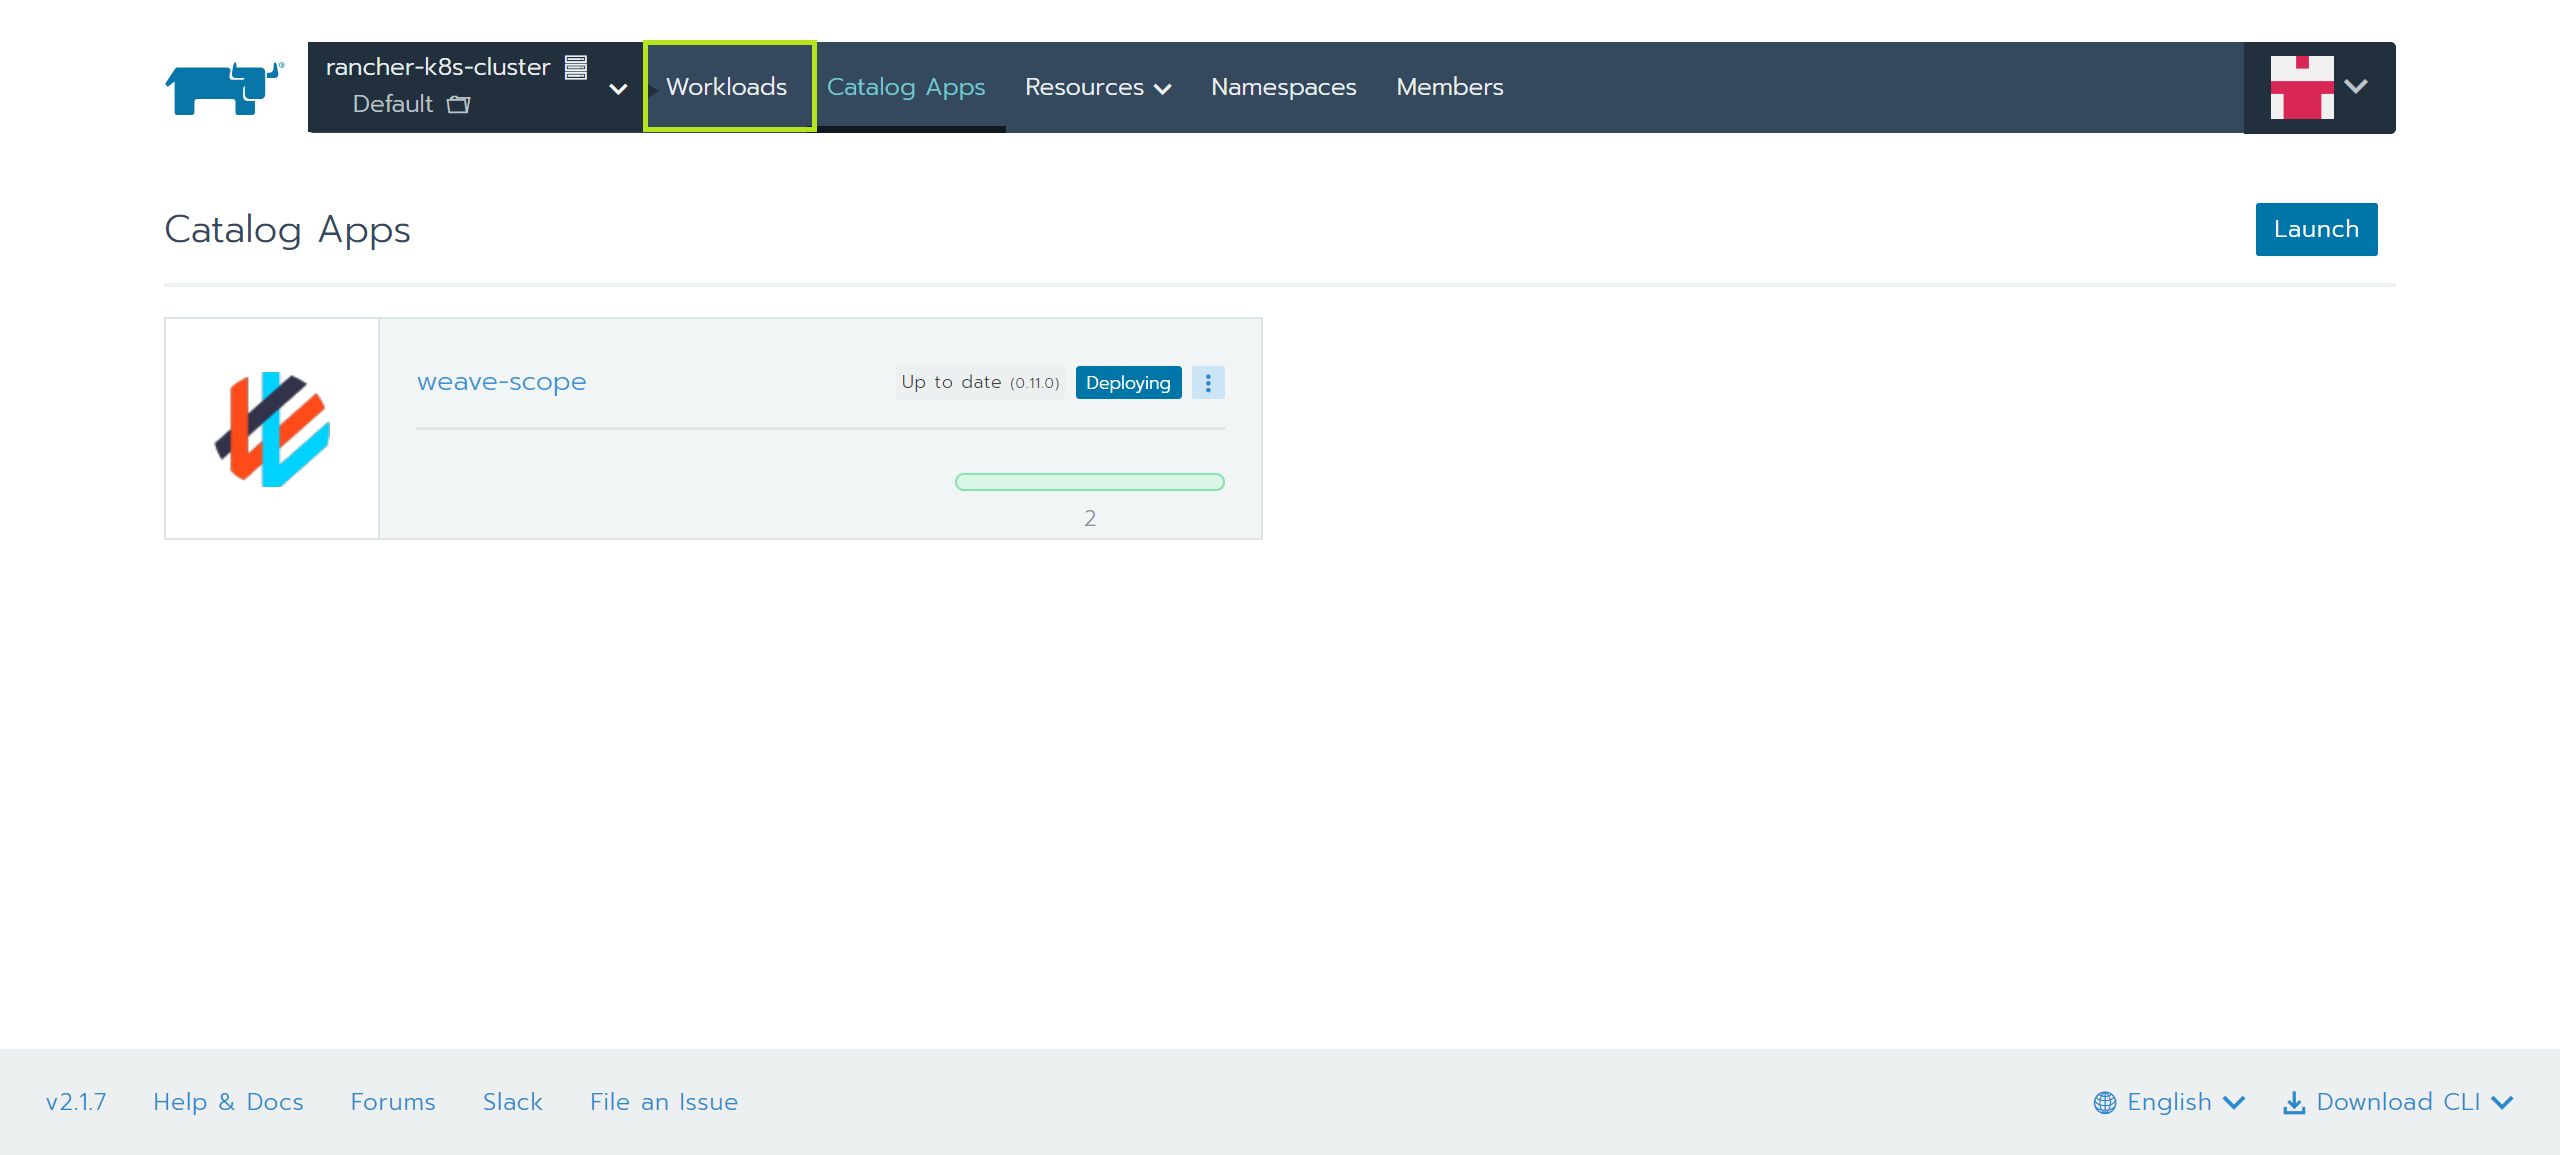
5.デプロイ完了後、上部メニューから「Workloads」を選択
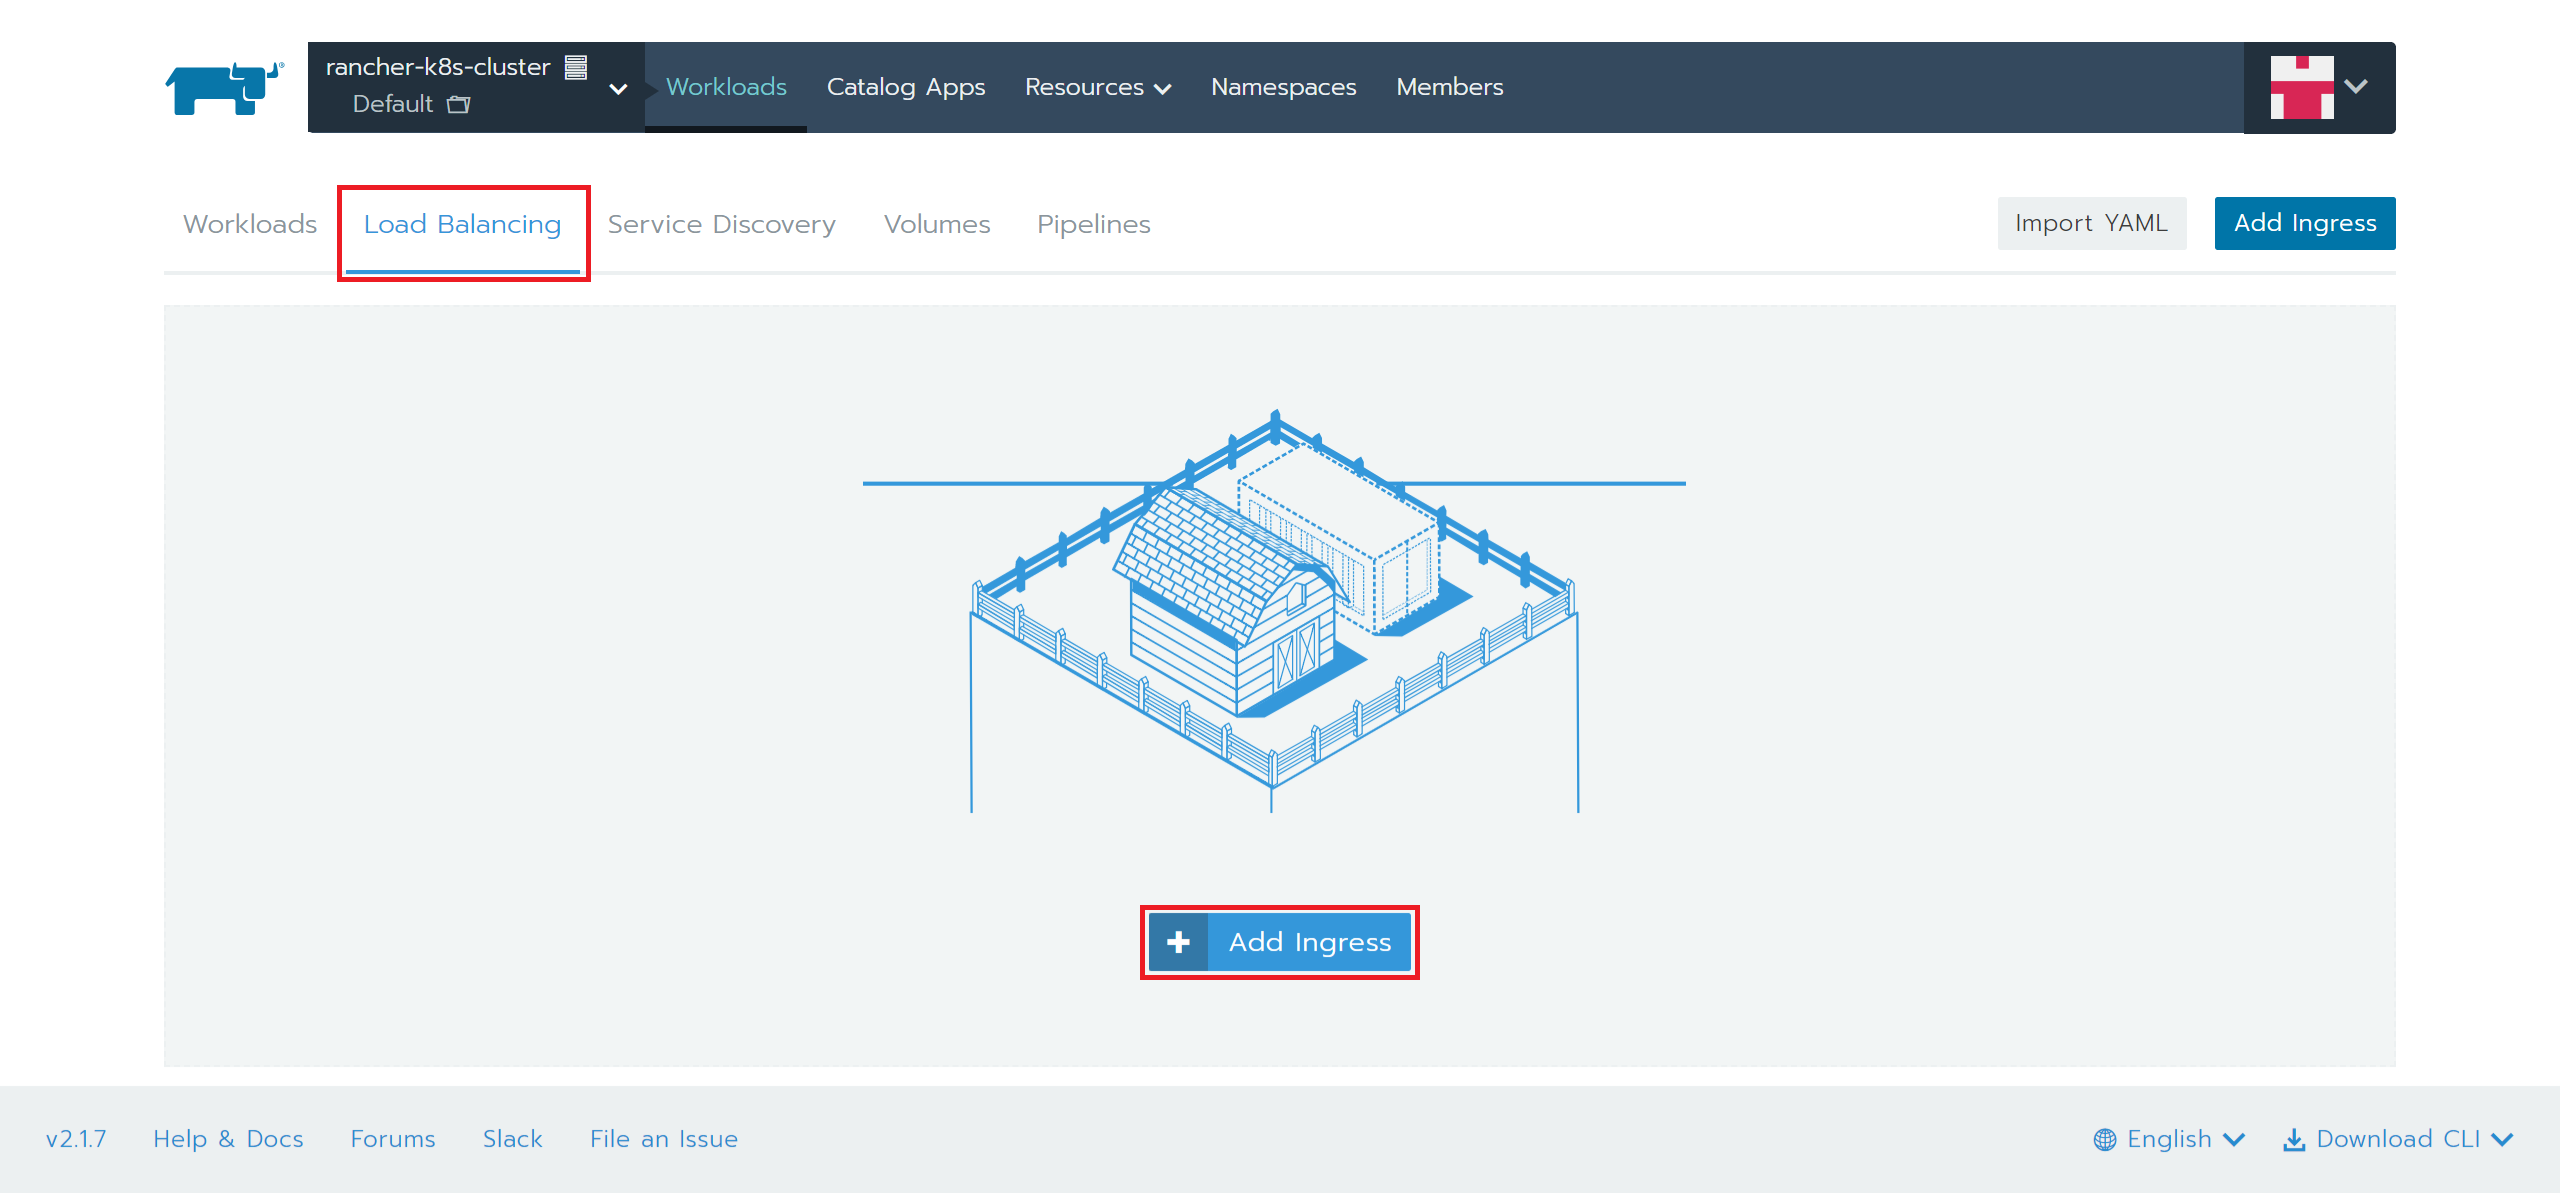
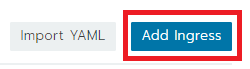
6.「Load Balancing」、「Add Ingress」をクリック
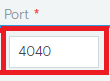
7.「Name」に任意名を入力、「Namespace」で「weave-scope」を選択、「Target」で「weave-scope-frontend-weave-scope」を選択、「Port」に「4040」と入力して、「Save」ボタンを押下
1.「Name」に任意名を入力します。

2.「Namespace」で「weave-scope」を選択します。

3.「Target」で「weave-scope-frontend-weave-scope」を選択します。

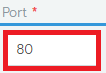
4.「Port」に「4040」と入力します。
5.「Save」ボタンを押下します。

8.自動生成されたURLをクリック
しばらくするとURLが生成されますので、クリックします。
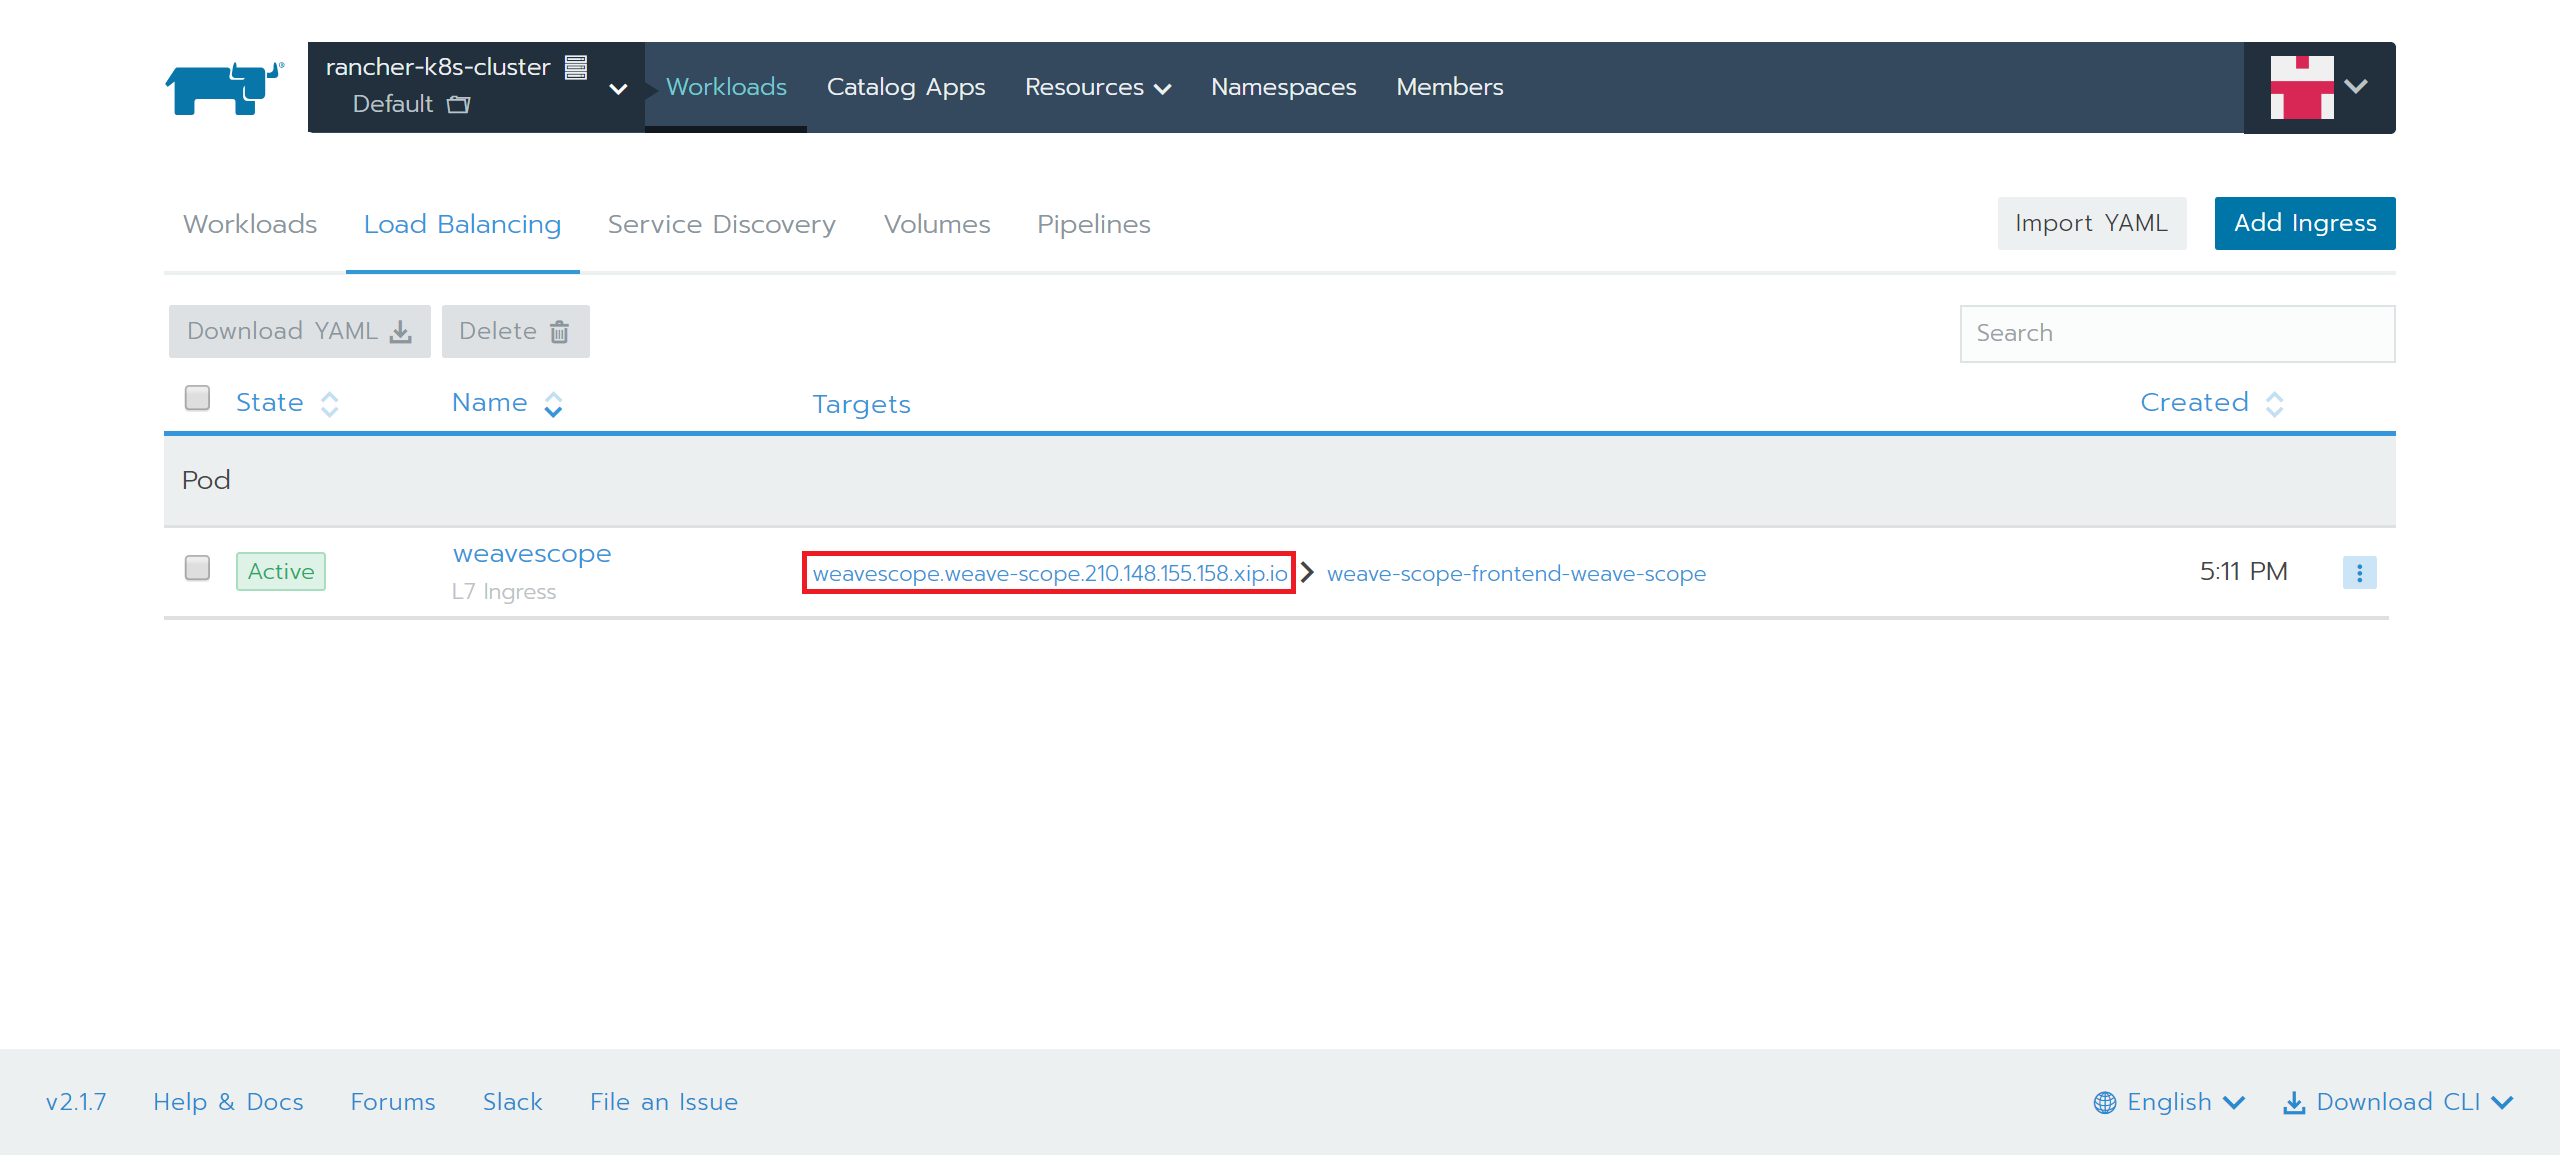
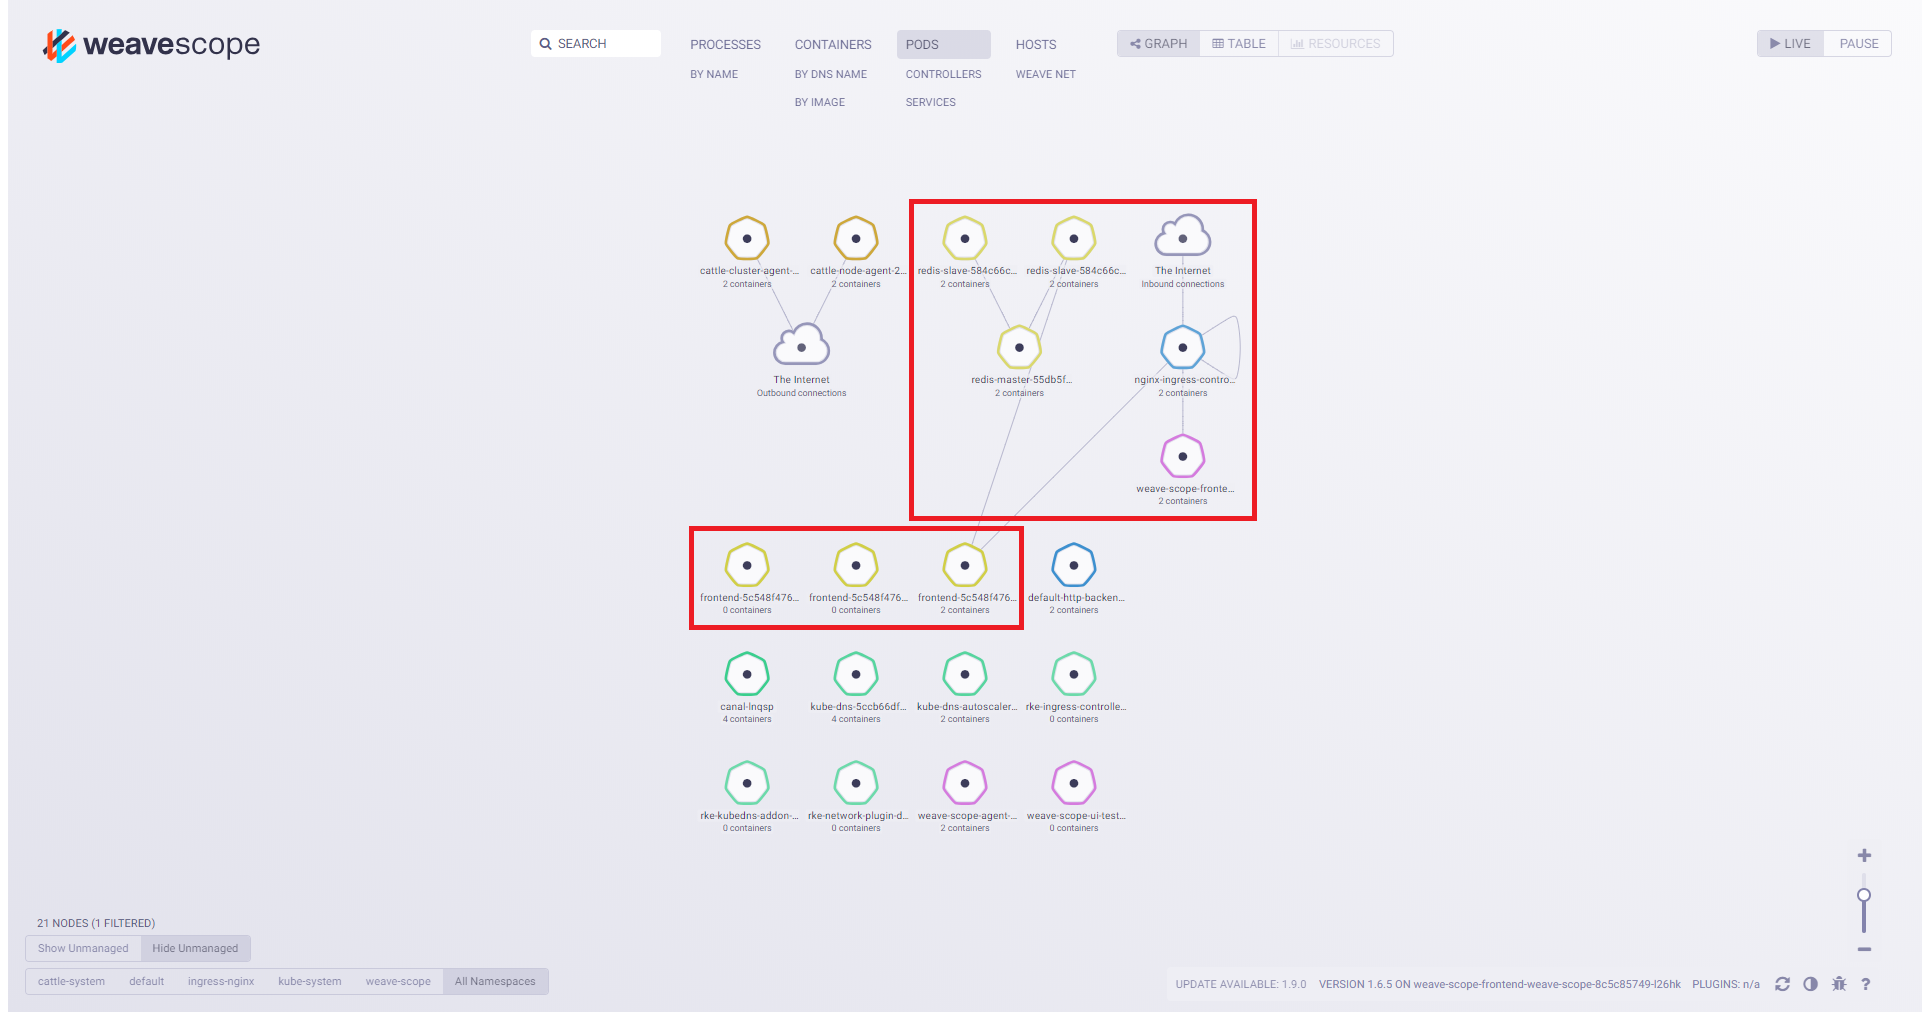
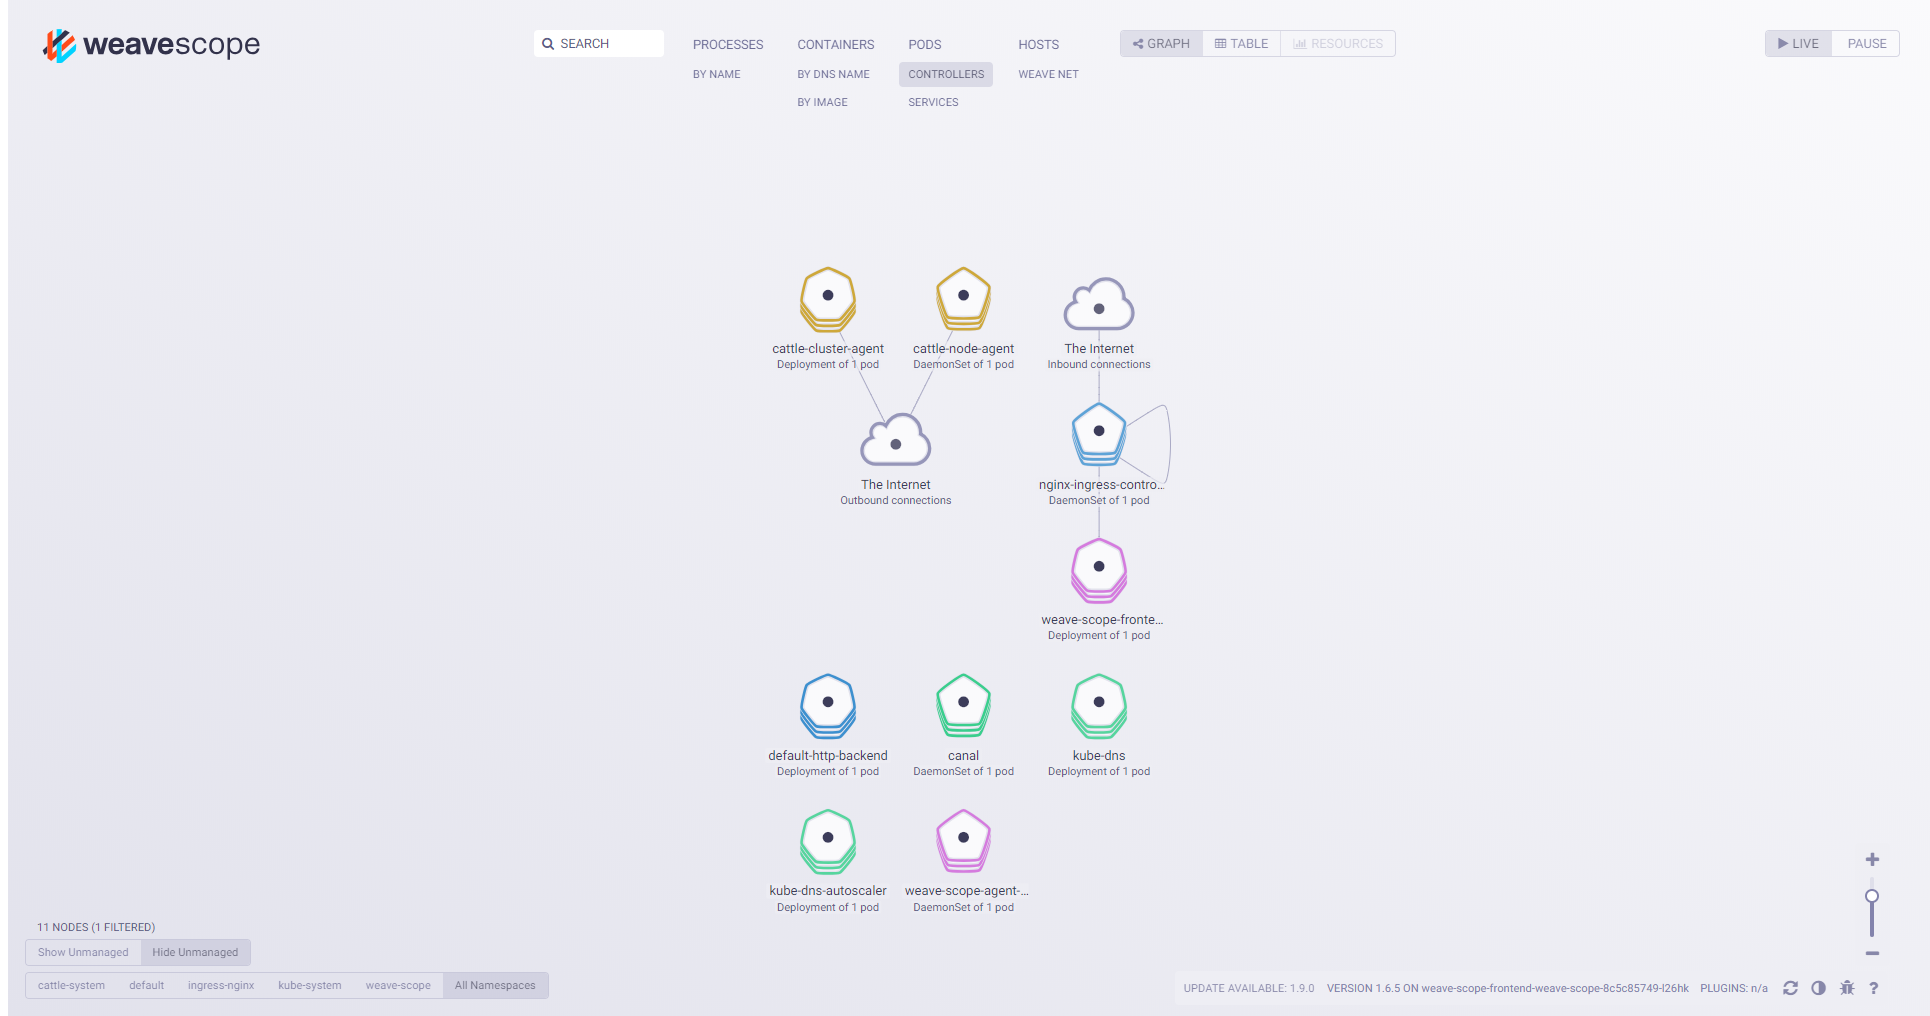
9.weavescope起動を確認
4.RancherUIからkubectlコマンドの実行
RancherUIからkubectlコマンドを実行できるので利用します。
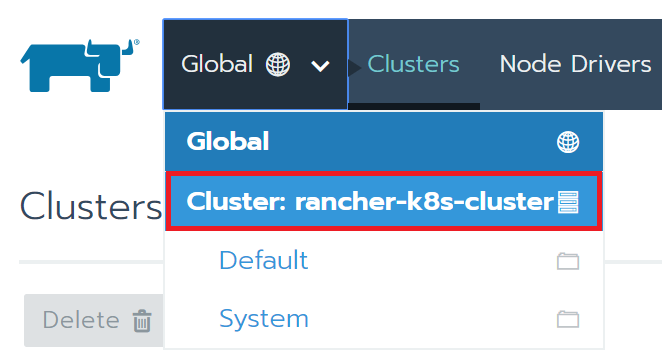
1.上部メニューから「Cluster.rancher-k8s-cluster」を選択
2.「Launch kubectl」ボタンを押下

3.コンソール起動確認
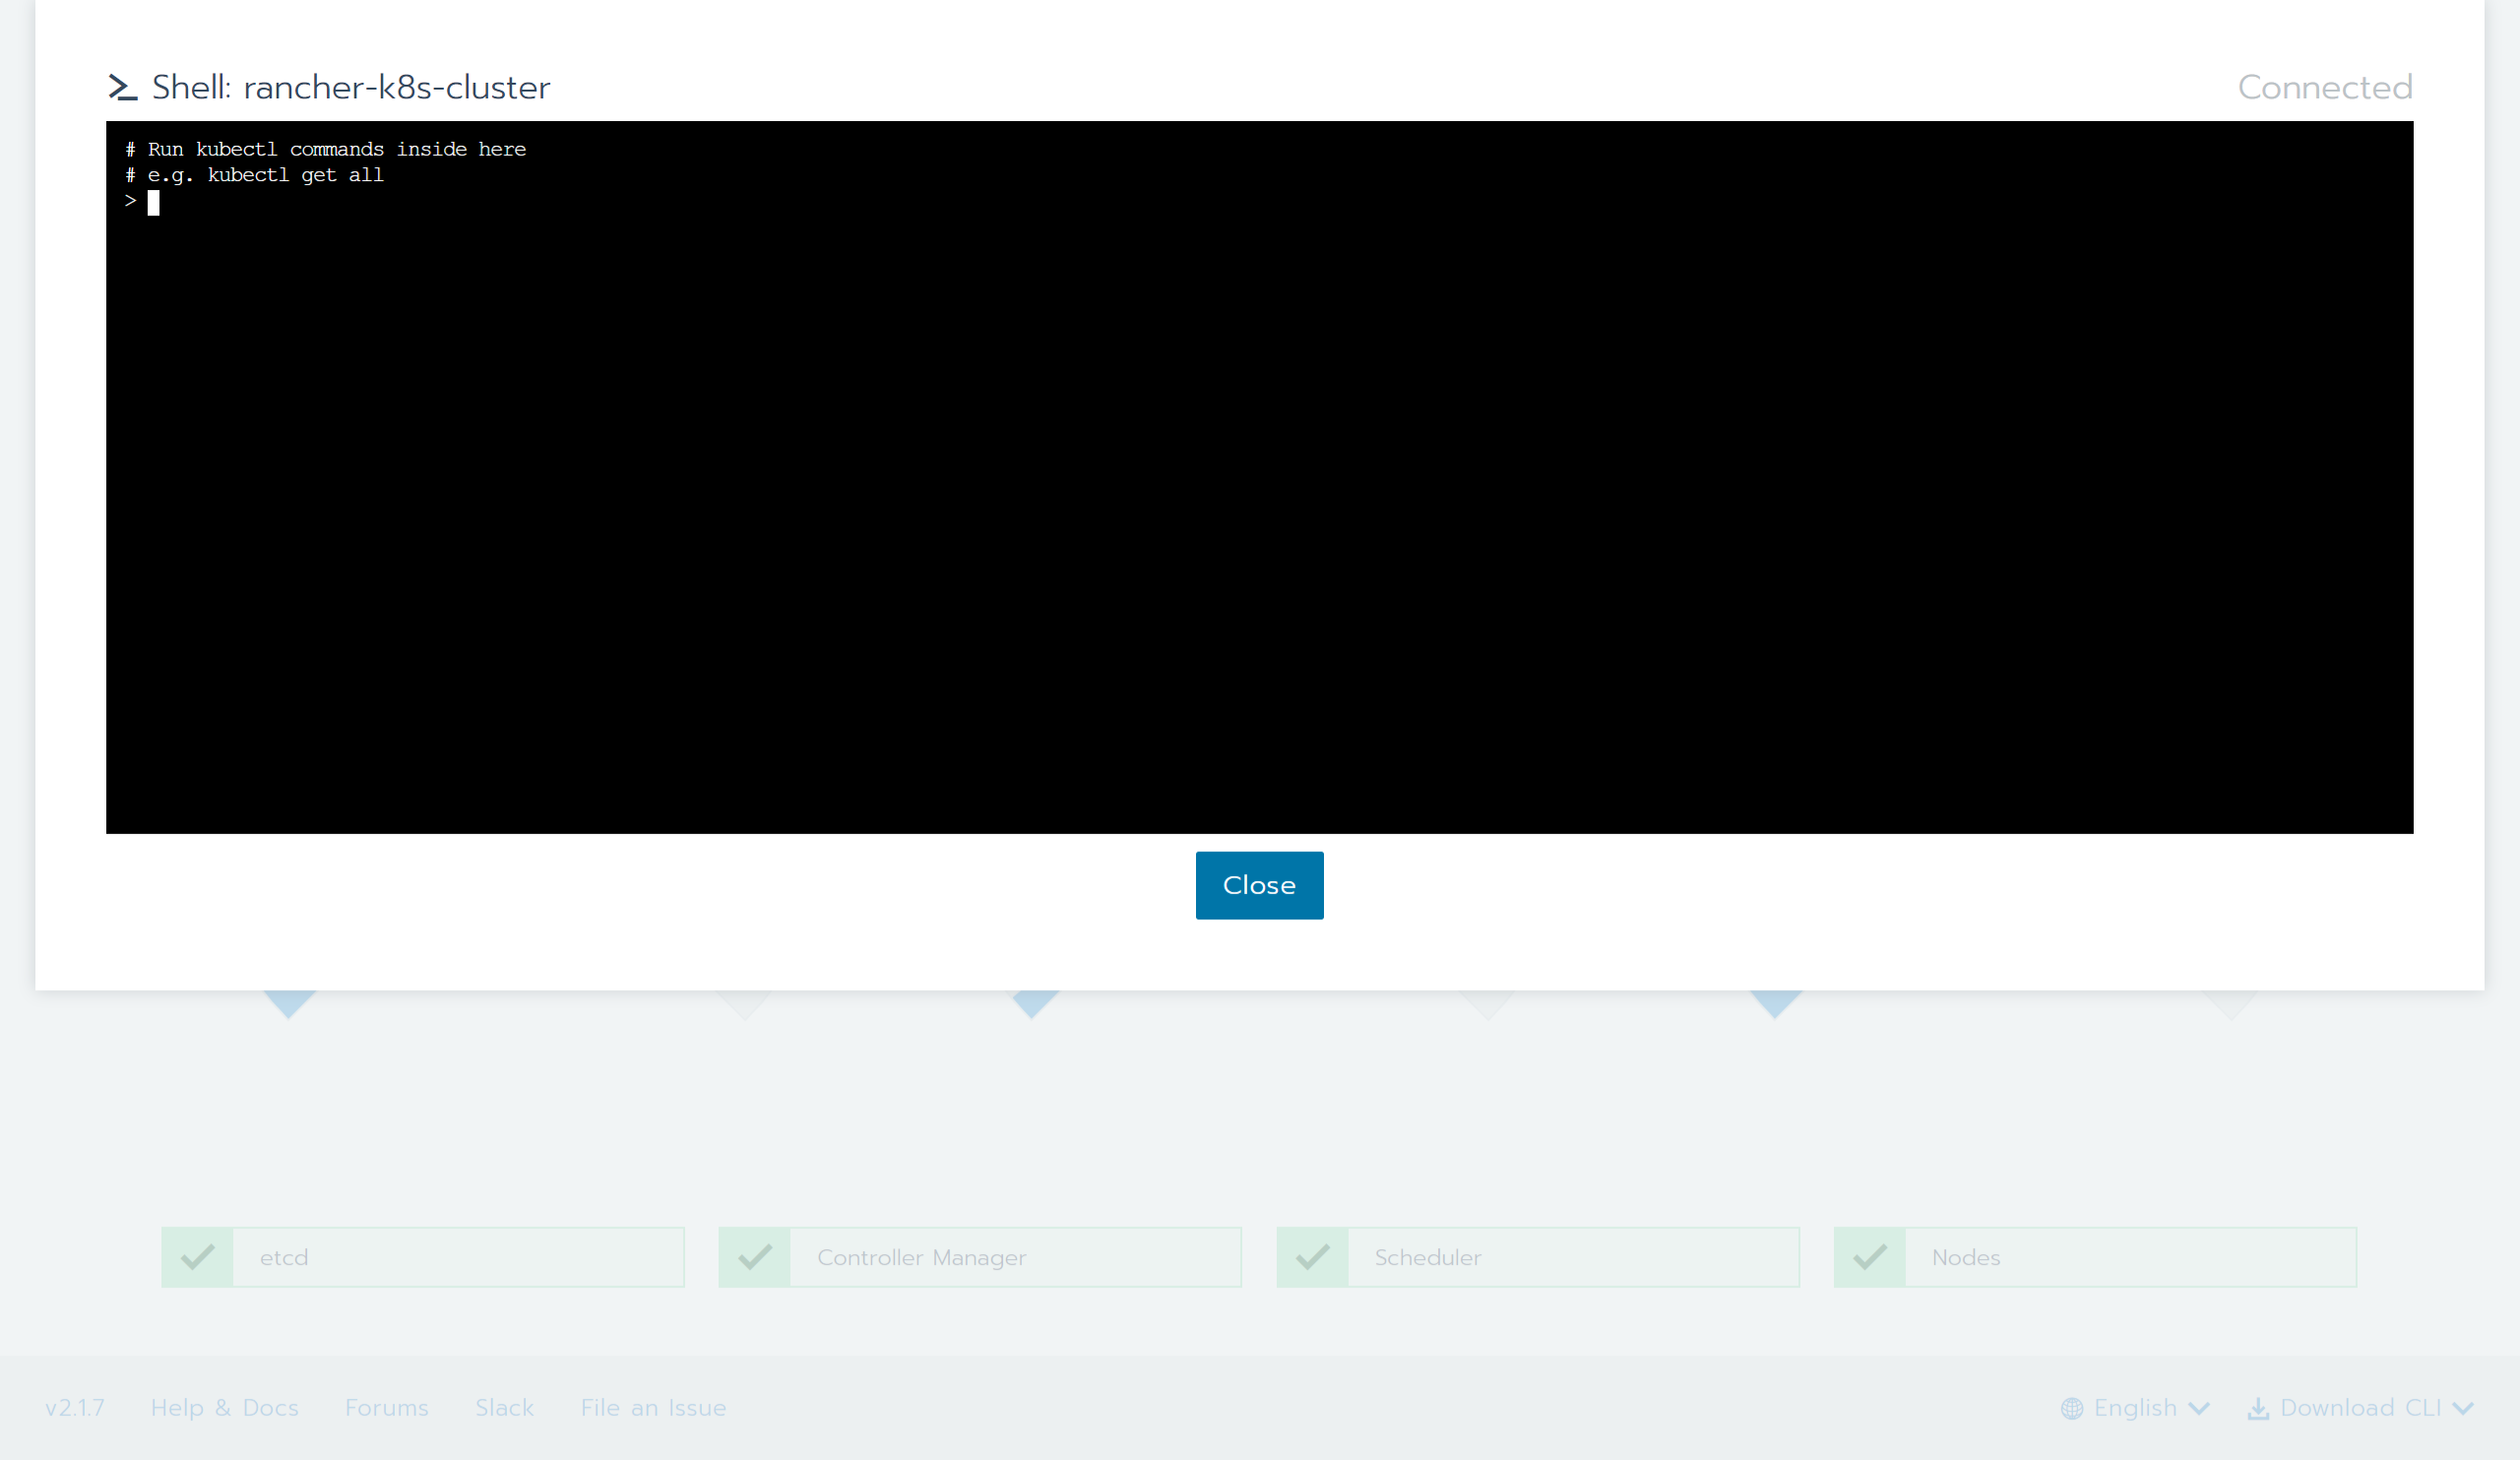
4.「kubectl get nodes」の実行
# Run kubectl commands inside here
# e.g. kubectl get all
> kubectl get nodes
NAME            STATUS    ROLES                      AGE       VERSION
apc-hands-101   Ready     controlplane,etcd,worker   2h        v1.13.4
>
5.「kubectl version」の実行
> kubectl version
Client Version: version.Info{Major:"1", Minor:"10", GitVersion:"v1.10.5", GitCommit:"32ac1c9073b132b8ba18aa830f46b77dcceb0723", GitTreeState:"clean", BuildDate:"2018-06-21T11:46:00Z", GoVersion:"go1.9.3", Compiler:"gc", Platform:"linux/amd64"}
Server Version: version.Info{Major:"1", Minor:"13", GitVersion:"v1.13.4", GitCommit:"c27b913fddd1a6c480c229191a087698aa92f0b1", GitTreeState:"clean", BuildDate:"2019-02-28T13:30:26Z", GoVersion:"go1.11.5", Compiler:"gc", Platform:"linux/amd64"}
>
5.Guestbookアプリケーションのデプロイ
以下Guestbookアプリケーションのyamlファイルを利用して、デプロイします。
Guestbookアプリケーション構成図
1.Guestbookアプリケーションのデプロイ
> kubectl apply -f https://raw.githubusercontent.com/kubernetes/examples/master/guestbook/all-in-one/guestbook-all-in-one.yaml
service "redis-master" created
deployment.apps "redis-master" created
service "redis-slave" created
deployment.apps "redis-slave" created
service "frontend" created
deployment.apps "frontend" created
>
2.デプロイの確認
> kubectl get services
NAME           TYPE        CLUSTER-IP     EXTERNAL-IP   PORT(S)    AGE
frontend       ClusterIP   10.43.22.166   <none>        80/TCP     13s
kubernetes     ClusterIP   10.43.0.1      <none>        443/TCP    2h
redis-master   ClusterIP   10.43.4.77     <none>        6379/TCP   13s
redis-slave    ClusterIP   10.43.39.239   <none>        6379/TCP   13s
>
「Close」ボタンを押下します。
3.RancherUIからIngressを作成
1.上部メニューから「Default」を選択します。
2.「Workloads」を選択します。

3.「Load Balancing」をクリックします。

4.「Add Ingress」ボタンを押下します。
4.「Name」に任意名を入力、「Target」で「frontend」を選択、「Port」に「80」と入力、「Save」ボタンを押下
1.「Name」に任意名を入力します。

2.「Target」で「frontend」を選択します。

3.「Port」に「80」と入力します。
4.「Save」ボタンを押下します。

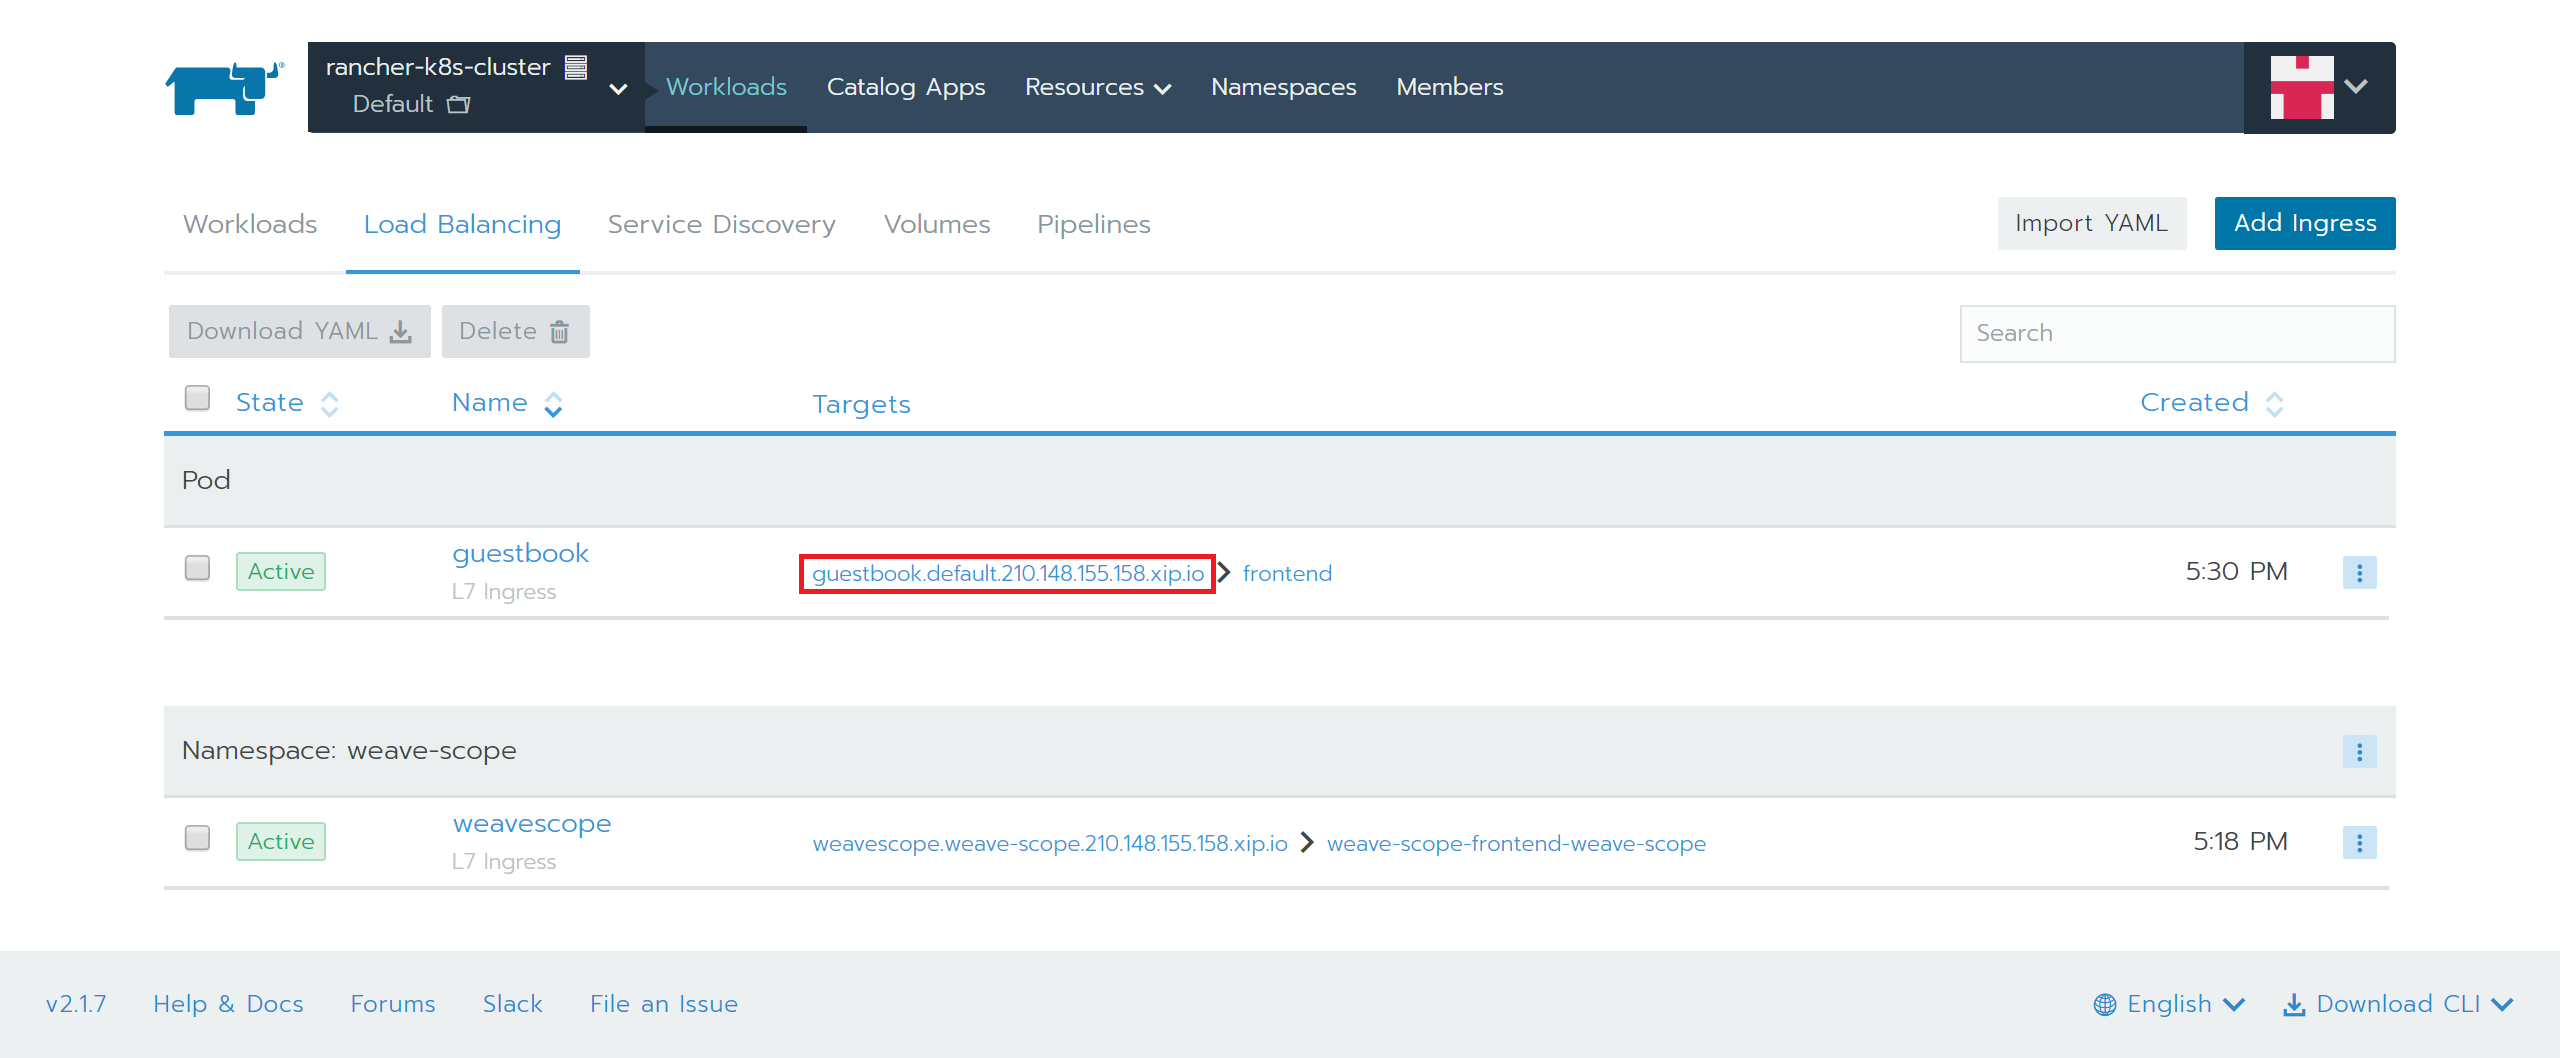
5.自動生成されたURLをクリック
しばらくするとURLが生成されますので、クリックします。
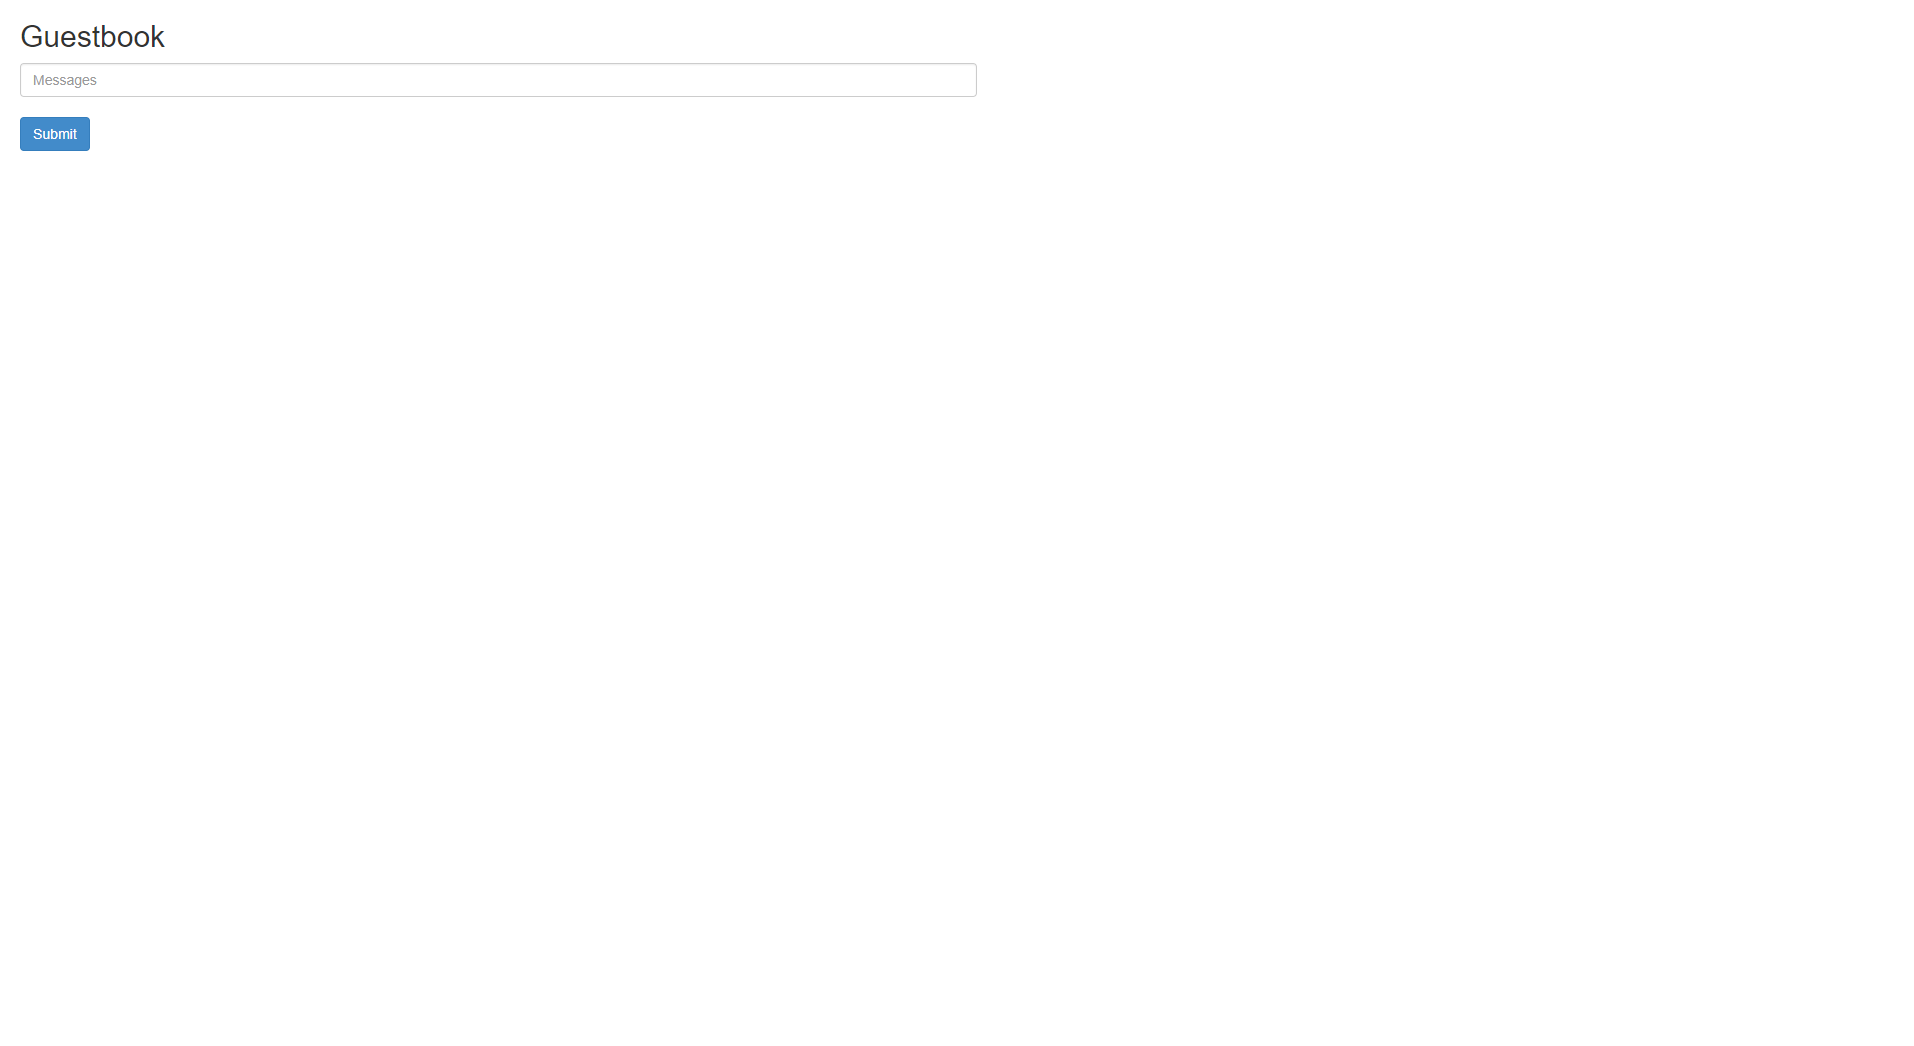
6.Guestbookアプリケーションの確認
7.weavescopeからもGuestbookアプリケーションを確認