Rancher2.0の事始めとして、Google Cloud Platform(以降GCP)を利用して以下の流れを実際に手を動かしてやってみましょう。
- Rancher Serverの構築
- Kubernetes Clusterの構築
- weavescopeカタログのデプロイ
- RancherUIからkubectlコマンドの実行
- Guestbookアプリケーションのデプロイ
概要図

1.Rancher Serverの構築
1.Instanceを2つ準備
Google Compute Engineで以下の2インスタンスを作成します。
1台目
| 項目 | 入力概要 |
|---|---|
| 名前 | rancher-server |
| リージョン | asia-northeast1(東京) |
| ゾーン | asia-northeast1-b |
| マシンタイプ | vCPUx1 |
| ブートディスク | Ubuntu 16.04 LTS ディスクサイズ80GB |
| ファイアウォール | HTTP トラフィックを許可する、HTTPS トラフィックを許可するの両方をチェックします。 |
2台目
| 項目 | 入力概要 |
|---|---|
| 名前 | rancher-host |
| リージョン | asia-northeast1(東京) |
| ゾーン | asia-northeast1-b |
| マシンタイプ | vCPUx1 |
| ブートディスク | Ubuntu 16.04 LTS ディスクサイズ80GB |
| ファイアウォール | HTTP トラフィックを許可する、HTTPS トラフィックを許可するの両方をチェックします。 |
GCPでは、デフォルトでファイアウォールが設定されていて、ホスト間でのコンテナの通信が行えないため、
設定を変更する必要があります。
GCPのダッシュボードで、「VPCネットワーク」-「ファイアウォール」を選択して、ファイアウォールルールを作成します。
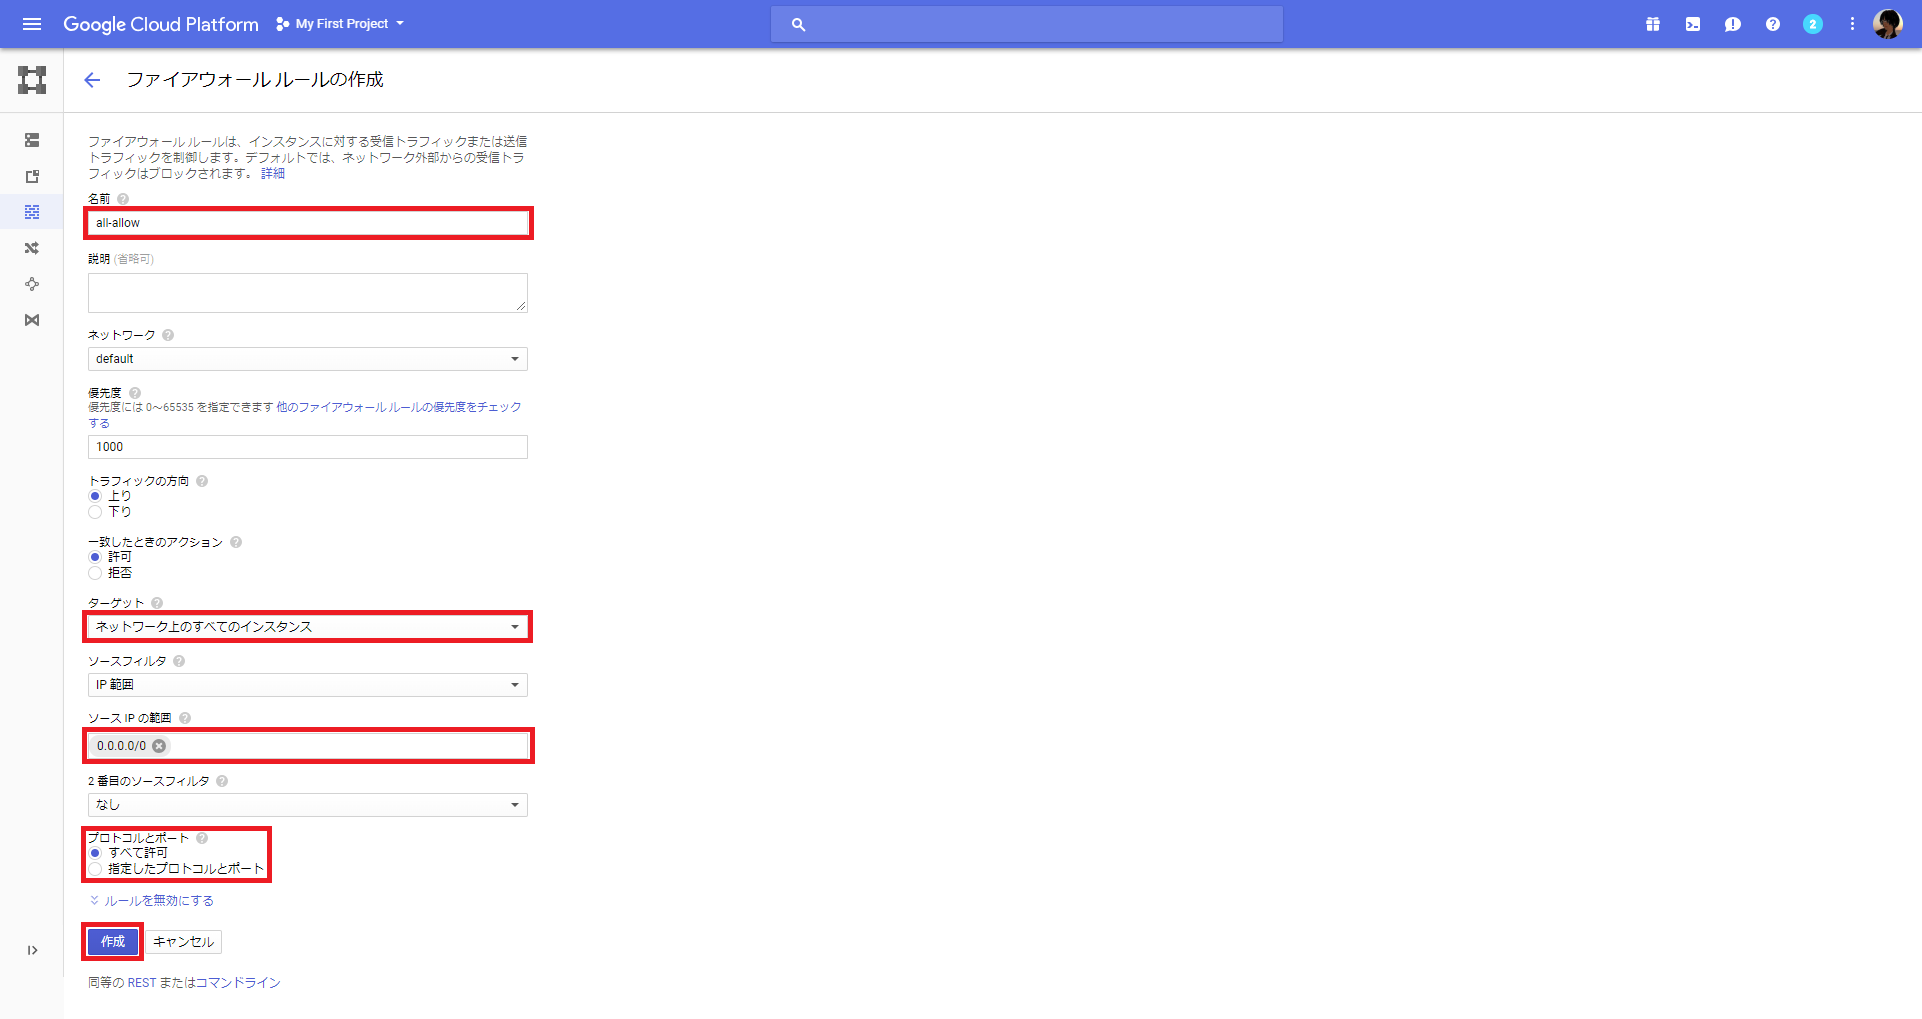
名前は任意名、ターゲットを「ネットワーク上のすべてのインスタンス」を選択、ソースIPの範囲は0.0.0.0/0、プロトコルとポートは全て許可とします。
今回はお試しということで、全許可にしています。
最後に「作成」ボタンをクリックします。
2.Dockerのインストール(2台:rancher-server,rancher-host)
2つのインスタンスに1.12.6, 1.13.1, 17.03.2のいずれかのDockerをインストールします。
今回は、17.03.2とします。
各サーバのコンソールを起動するために、それぞれの「SSH」ボタンを押下します。

$ curl https://releases.rancher.com/install-docker/17.03.2.sh | sh
・
・(省略)
・
+ sudo -E sh -c docker version
Client:
 Version:      17.03.2-ce
 API version:  1.27
 Go version:   go1.7.5
 Git commit:   f5ec1e2
 Built:        Tue Jun 27 03:35:14 2017
 OS/Arch:      linux/amd64

Server:
 Version:      17.03.2-ce
 API version:  1.27 (minimum version 1.12)
 Go version:   go1.7.5
 Git commit:   f5ec1e2
 Built:        Tue Jun 27 03:35:14 2017
 OS/Arch:      linux/amd64
 Experimental: false

If you would like to use Docker as a non-root user, you should now consider
adding your user to the "docker" group with something like:

  sudo usermod -aG docker iyutaka2018

Remember that you will have to log out and back in for this to take effect!

WARNING: Adding a user to the "docker" group will grant the ability to run
         containers which can be used to obtain root privileges on the
         docker host.
         Refer to https://docs.docker.com/engine/security/security/#docker-daemon-attack-surface
         for more information.
3.Rancher2.0 Serverのインストール(1台:rancher-serverのみ)
1台目のrancher-serverで以下のコマンドを実行します。
$ sudo docker run -d --restart=unless-stopped -p 80:80 -p 443:443 rancher/rancher
Unable to find image 'rancher/rancher:latest' locally
latest: Pulling from rancher/rancher
6b98dfc16071: Pull complete
4001a1209541: Pull complete
6319fc68c576: Pull complete
b24603670dc3: Pull complete
97f170c87c6f: Pull complete
c5880aba2145: Pull complete
de3fa5ee4e0d: Pull complete
c973e0300d3b: Pull complete
d0f63a28838b: Pull complete
b5f0c036e778: Pull complete
Digest: sha256:3f042503cda9c9de63f9851748810012de01de380d0eca5f1f296d9b63ba7cd5
Status: Downloaded newer image for rancher/rancher:latest
dd0e06fb0871d06635c68a53fca293379e8a9c4d5210d54acf202626c435b560
4.ブラウザを起動して、RancherUIにアクセス(rancher-server)
GCPダッシュボードからrancher-serverの外部IPの箇所をクリックします。

詳細設定をクリックします。
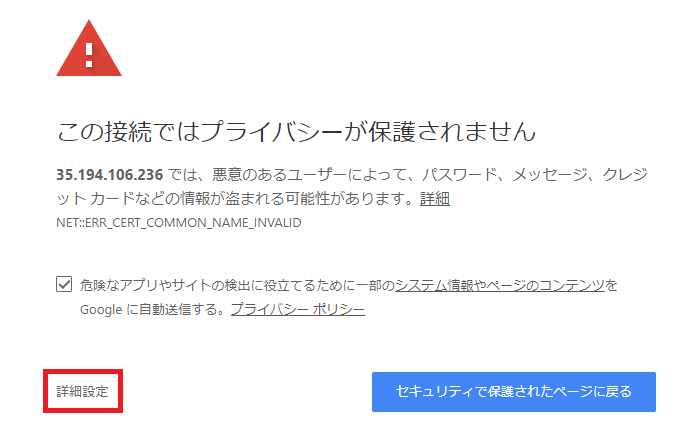
赤枠の箇所をクリックします。
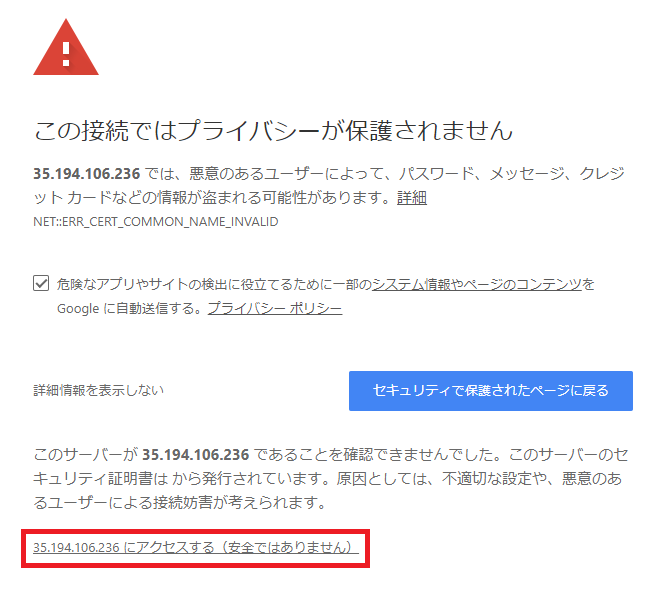
以下ログイン画面が表示されることを確認します。

5.初回ログイン設定
adminユーザのパスワードを設定します。
任意のパスワードを「New Password」「Confirm Password」に入力して「Continue」ボタンを押下します。

Rancher Server URLを登録するので、そのまま「Save URL」をクリックします。

ログイン完了となります。

6.Helmカタログの有効化
上部メニューから「Catalogs」を選択します。

「Helm Stable」を「Enable」に設定します。

「Global」を選択します。

2.Kubernetes Clusterの構築
1.「Add Cluster」をクリック

2.「CUSTOM」を選択、「Cluster Name」に任意名を入力、「Next」ボタンを押下

3.「Show advanced options」をクリック

4.「Node Role」の「etcd」と「Control Plane」にチェック、「Node Address」の「Public Address」と「Internal Address」に**2台目(rancher-host)のIPアドレスを入力、「Copy to Clipboard」ボタンを押下、そのコマンドを2台目(rancher-host)**のコンソールで実行後に「Done」ボタンを押下
1.「Node Role」の「etcd」と「Control Plane」にチェックします。

2.「Node Address」の「Public Address」と「Internal Address」に**2台目(rancher-host)**のIPアドレスを入力します。
GCPダッシュボードでIPアドレスを確認します。
内部IP=Internal Address
外部IP=Public Address


3.「Copy to Clipboard」ボタンを押下します。

4.そのコマンドを**2台目(rancher-host)**のコンソールで実行します。
3の手順でコマンド自体はクリップボードにコピーされているので、そのままペーストしてください。
$ sudo docker run -d --privileged --restart=unless-stopped --net=host -v /etc/kubernetes:/etc/kubernetes -v /var/run:/var/run rancher/rancher-agent:v2.0.6 --server https://35.194.106.236 --token rw4dhsfltd7t6w5688lg87nv88nv67j7q4v5trlvc2s62rmxp9ktp9 --ca-checksum d05b9a2c18af8671ff2d1e4419305d3425094f1d246698bd92d5755df755135c --address 35.189.159.53 --internal-address 10.146.0.3 --etcd --controlplane --worker
Unable to find image 'rancher/rancher-agent:v2.0.6' locally
v2.0.6: Pulling from rancher/rancher-agent
6b98dfc16071: Pull complete
4001a1209541: Pull complete
6319fc68c576: Pull complete
b24603670dc3: Pull complete
97f170c87c6f: Pull complete
9b084b212917: Pull complete
55583c251234: Pull complete
79a9ecb8ade0: Pull complete
bd6875f134fd: Pull complete
Digest: sha256:8b456ed80e6e21017d49b9f45c8528e347f0e683982c1cb5b0f622866a9f6fa0
Status: Downloaded newer image for rancher/rancher-agent:v2.0.6
05da4902f8a4a855d6027ea109ba7006ffabddd2baf67d56932d033af647c70c
5.「Done」ボタンを押下します。

5.クラスタ名をクリック
Activeの表示に変わった段階で、クラスタ名をクリックしてください。

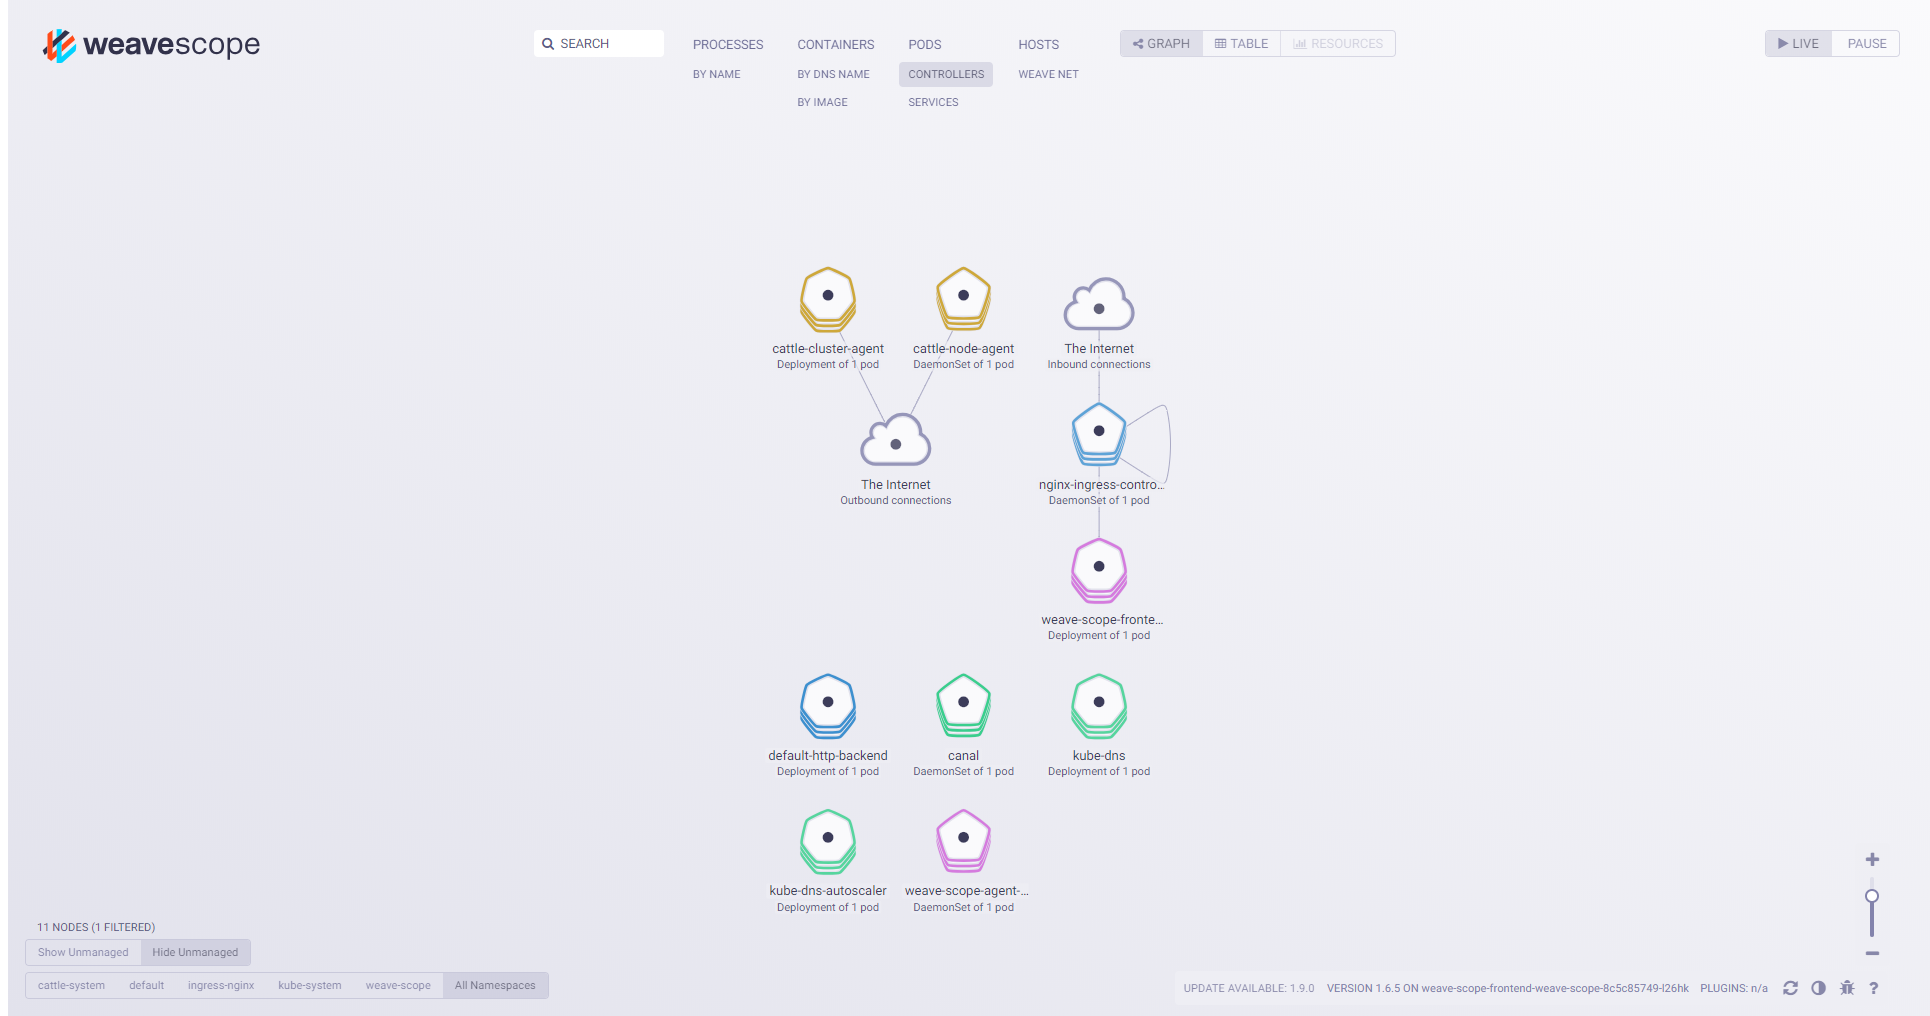
6.リソース状況を確認

3.weavescopeカタログのデプロイ
1.上部メニューから「Default」を選択、「Catalog Apps」を選択
「Default」を選択します。

「Catalog Apps」を選択します。

2.「Launch」ボタンを押下

3.「weave-scope」の「View Details」ボタンを押下

4.「Launch」ボタンを押下

5.デプロイ完了後、上部メニューから「Workloads」を選択

6.「Load Balancing」をクリック

7.「Add Ingress」ボタンを押下

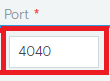
8.「Name」に任意名を入力、「Namespace」で「weave-scope」を選択、「Target」で「weave-scope-frontend-weave-scope」を選択、「Port」に「4040」と入力して、「Save」ボタンを押下
1.「Name」に任意名を入力します。

2.「Namespace」で「weave-scope」を選択します。

3.「Target」で「weave-scope-frontend-weave-scope」を選択します。

4.「Port」に「4040」と入力します。
5.「Save」ボタンを押下します。

9.自動生成されたURLをクリック
しばらくするとURLが生成されますので、クリックします。

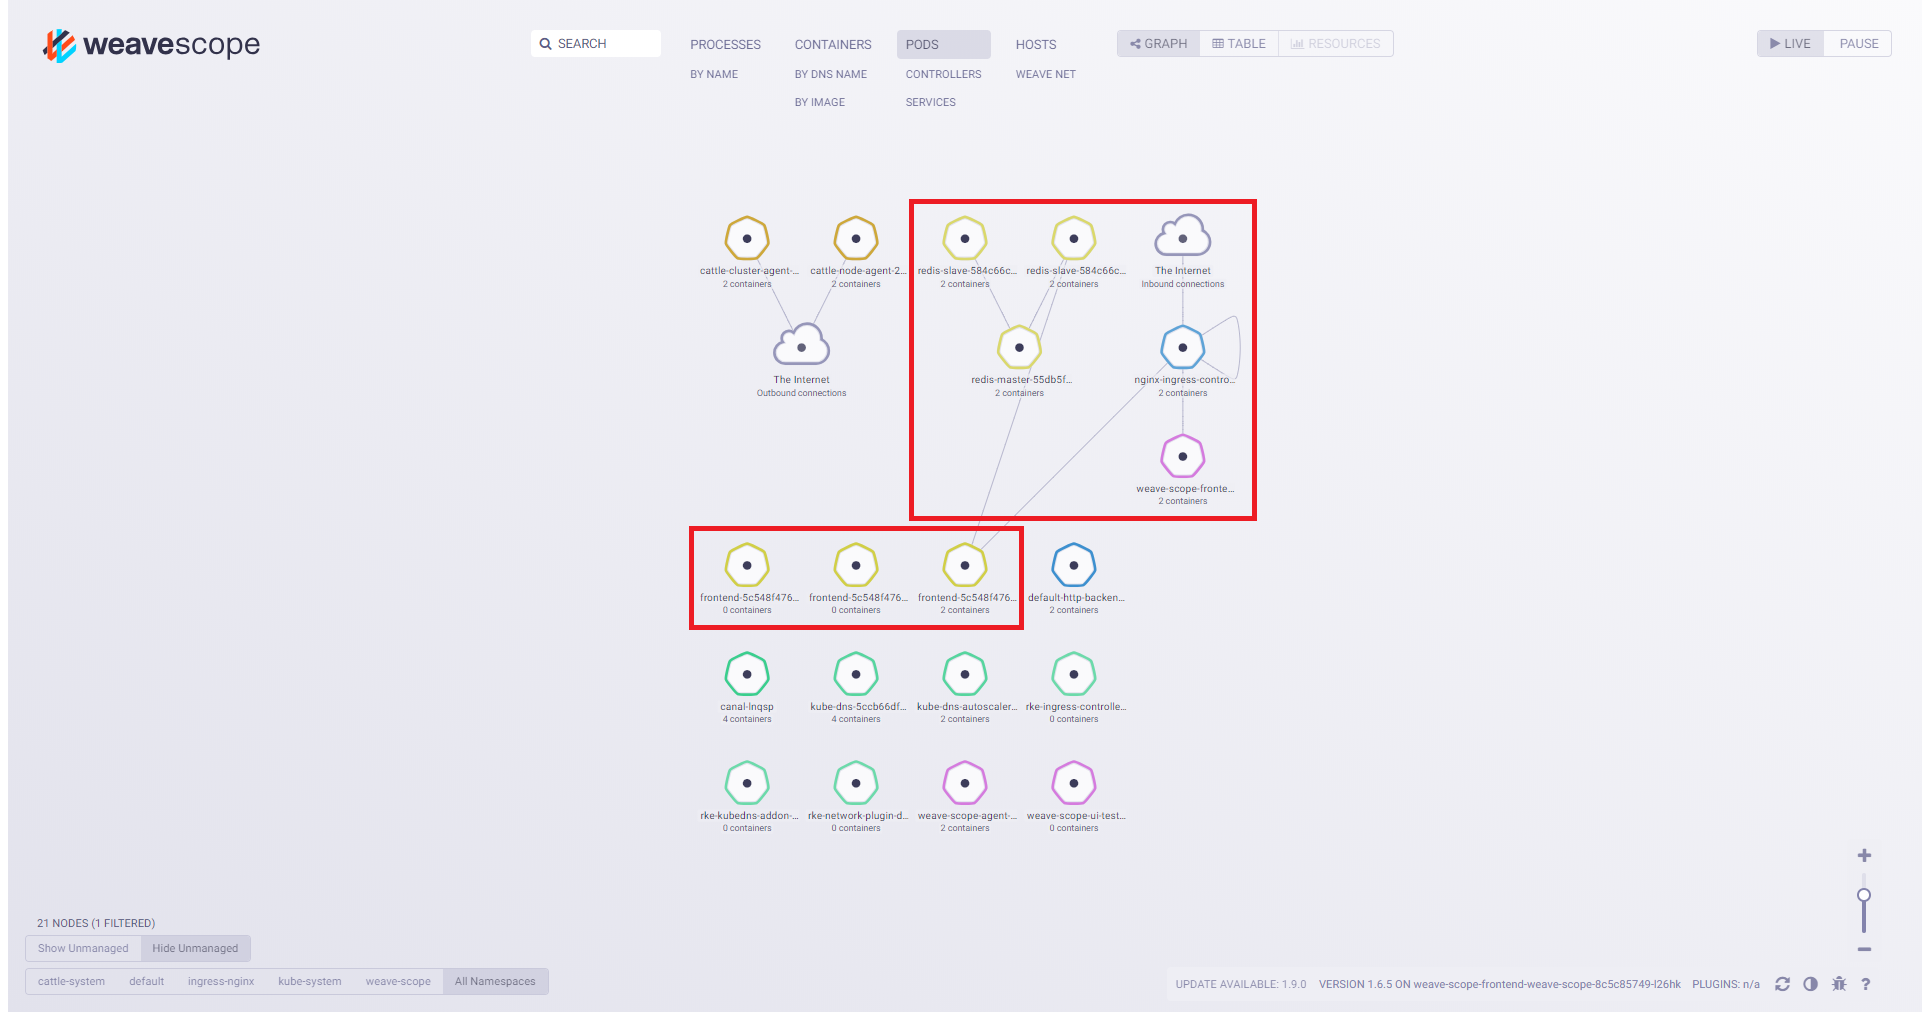
10.weavescope起動を確認
4.RancherUIからkubectlコマンドの実行
RancherUIからkubectlコマンドを実行できるので利用します。
1.上部メニューから「Cluster.k8s-cluster」を選択

2.「Launch kubectl」ボタンを押下

3.コンソール起動確認

4.「kubectl get nodes」の実行
# Run kubectl commands inside here
# e.g. kubectl get all
> kubectl get nodes
NAME           STATUS    ROLES                      AGE       VERSION
rancher-host   Ready     controlplane,etcd,worker   46m       v1.10.5
>
5.「kubectl version」の実行
> kubectl version
Client Version: version.Info{Major:"1", Minor:"9", GitVersion:"v1.9.8", GitCommit:"c138b85178156011dc934c2c9f4837476876fb07", GitTreeState:"clean", BuildDate:"2018-05-21T19:01:12Z", GoVersion:"go1.9.3", Compiler:"gc", Platform:"linux/amd64"}
Server Version: version.Info{Major:"1", Minor:"10", GitVersion:"v1.10.5", GitCommit:"32ac1c9073b132b8ba18aa830f46b77dcceb0723", GitTreeState:"clean", BuildDate:"2018-06-21T11:34:22Z", GoVersion:"go1.9.3", Compiler:"gc", Platform:"linux/amd64"}
>
5.Guestbookアプリケーションのデプロイ
以下Guestbookアプリケーションのyamlファイルを利用して、デプロイします。
Guestbookアプリケーション構成図

1.Guestbookアプリケーションのデプロイ
> kubectl apply -f https://raw.githubusercontent.com/kubernetes/examples/master/guestbook/all-in-one/guestbook-all-in-one.yaml
service "redis-master" created
deployment "redis-master" created
service "redis-slave" created
deployment "redis-slave" created
service "frontend" created
deployment "frontend" created
>
2.デプロイの確認
> kubectl get services
NAME           TYPE        CLUSTER-IP      EXTERNAL-IP   PORT(S)    AGE
frontend       ClusterIP   10.43.159.136   <none>        80/TCP     1m
kubernetes     ClusterIP   10.43.0.1       <none>        443/TCP    53m
redis-master   ClusterIP   10.43.117.197   <none>        6379/TCP   1m
redis-slave    ClusterIP   10.43.210.5     <none>        6379/TCP   1m
>
「Close」ボタンを押下します。
3.RancherUIからIngressを作成
1.上部メニューから「default」を選択します。

2.「Workloads」を選択します。

3.「Load Balancing」をクリックします。

4.「Add Ingress」ボタンを押下します。
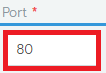
4.「Name」に任意名を入力、「Target」で「frontend」を選択、「Port」に「80」と入力、「Save」ボタンを押下
1.「Name」に任意名を入力します。

2.「Target」で「frontend」を選択します。

3.「Port」に「80」と入力します。
4.「Save」ボタンを押下します。

5.自動生成されたURLをクリック
しばらくするとURLが生成されますので、クリックします。

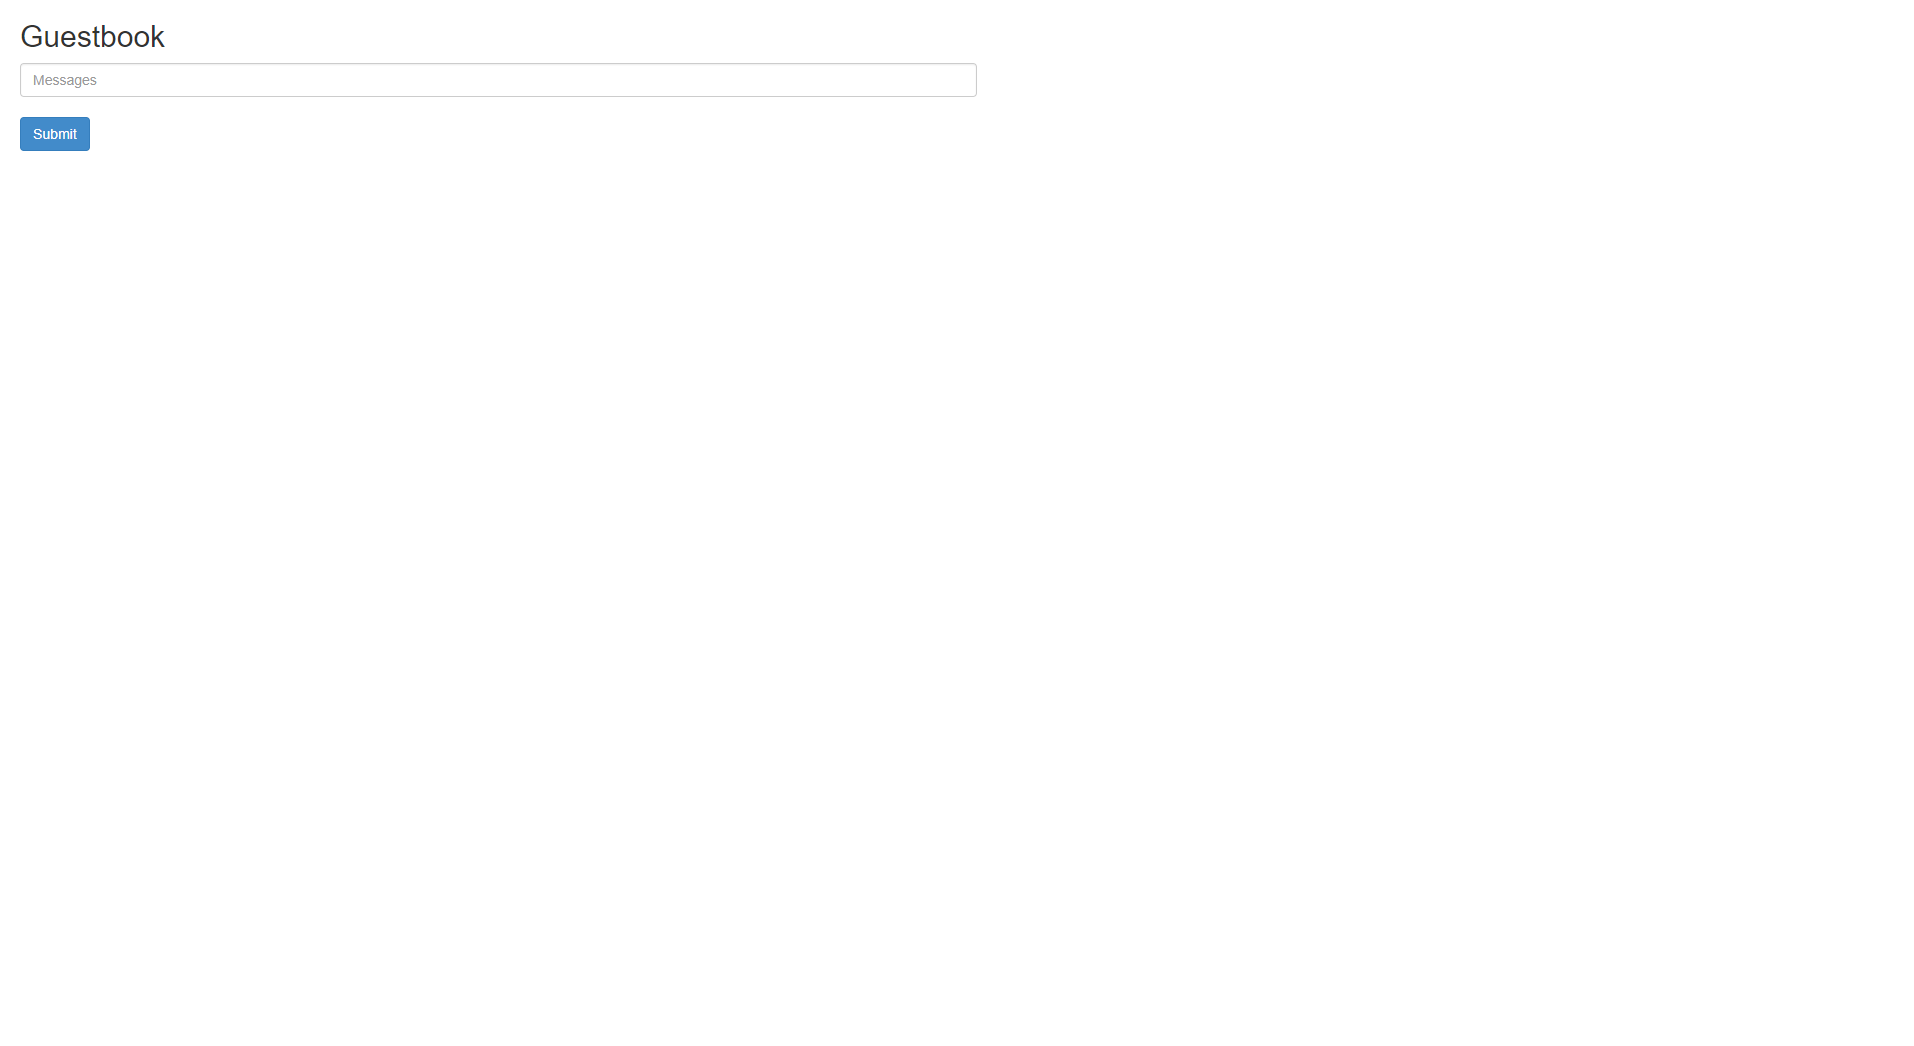
6.Guestbookアプリケーションの確認
7.weavescopeからもGuestbookアプリケーションを確認