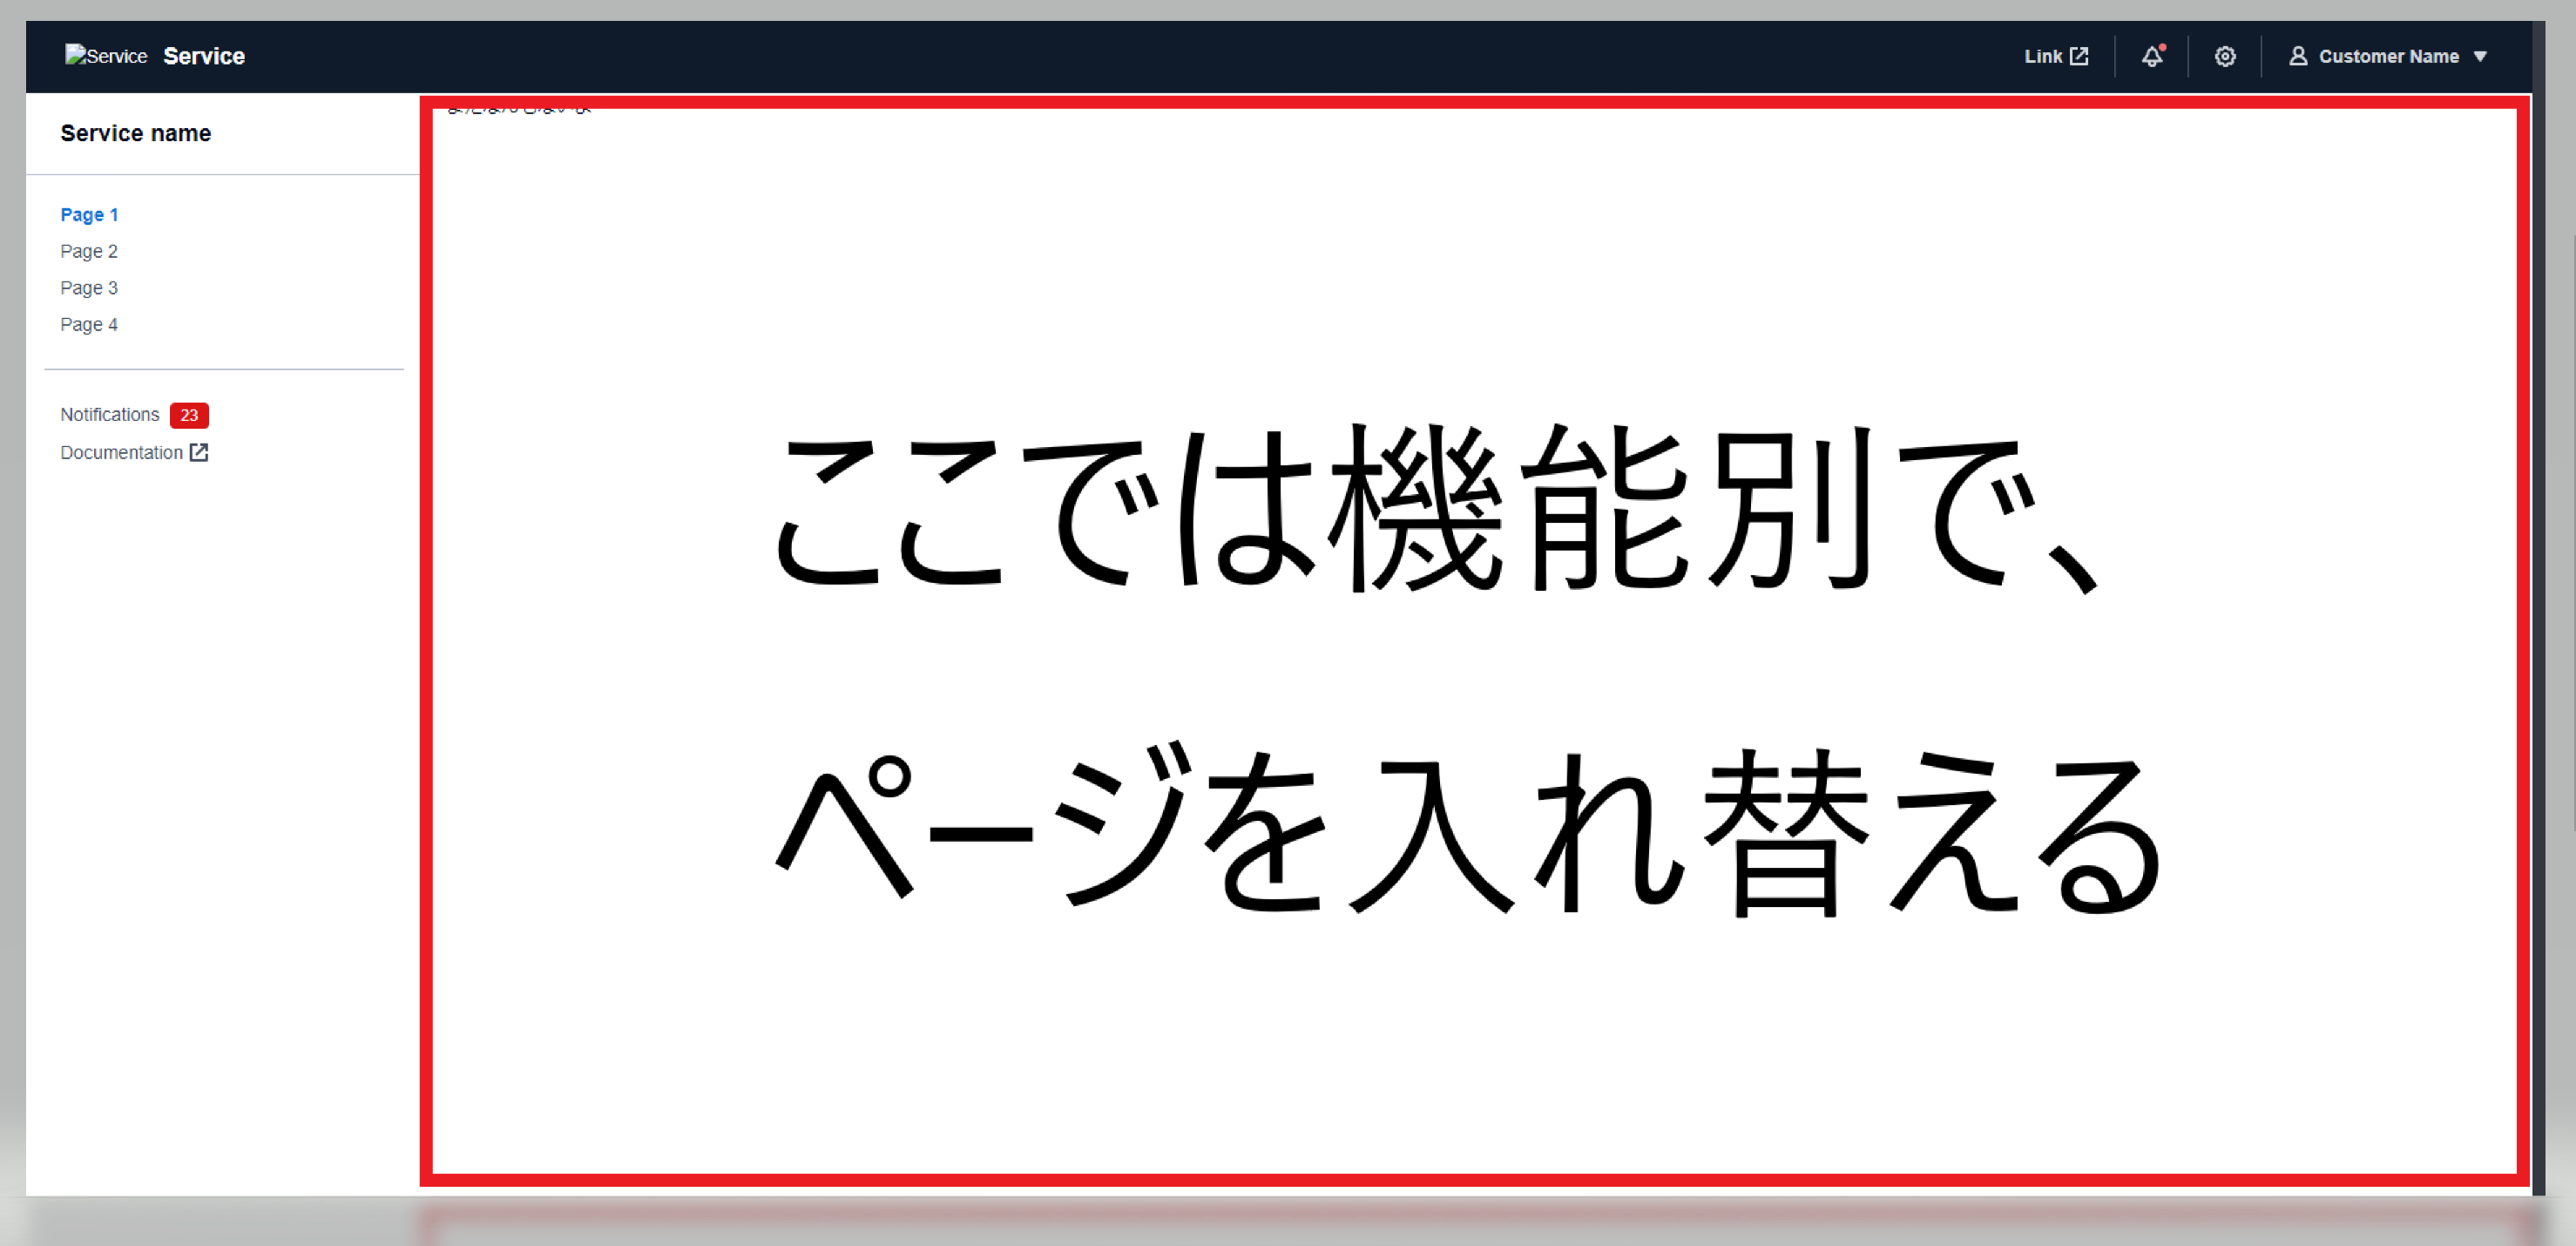
やりたいこと
AWSのマネジメントコンソールのような、サイト画面を作りたい~
前回は以下の記事通り、CloudScapeを入れてみたが、
今回は画像のように、もっとまじめな画面レイアウトを作りたいと思います~

ディレクトリ構成
主にReactアプリ生成時に作られたディレクトリとファイルですが、
今回ディレクトリを変えずに、index.jsの修正とLayout.jsの作成、機能別ページの作成をしたいと思います。
作り方
①Reactアプリを作り、CloudScapeをインストール
前述したこの記事に従って、Reactアプリの作成とCloudScapeのインストールをしてください
②react-router-domをインストール
今回はreact-router-domを導入して、Reactのルーター機能で画面のルートをコントロールしたいと思います
npm install react-router-dom
③AWS風の画面を作る
まずはindex.jsです
これはアプリ起動時にすぐに表示されるページとなります
react-router-domを使うことで、アクセスURLによって、異なる画面の表示ができます
createBrowserRouterの中に、全体レイアウトの設定や各アクセスpathの設定、アクセスされたら表示するページの設定、エラー時のエラーページなど、諸々設定をしてください~
import React from 'react';
import ReactDOM from 'react-dom/client';
import {
  createBrowserRouter,
  RouterProvider,
} from "react-router-dom";

import './index.css';
import reportWebVitals from './reportWebVitals';

import Layout from './Layout';
import ErrorPage from './ErrorPage';
import Test from './Test';

const router = createBrowserRouter([
  //TOPページの設定
  {
    path: "/home",
    element: <Layout />,
    errorElement: <ErrorPage />,
    children: [
      {
        path: "",
        element: "まだなんもないよ",
      },
    ],
  },
  {
    path: "/test",
    element: <Layout />,
    errorElement: <ErrorPage />,
    children: [
      {
        path: "",
        element: <Test />,
      },
    ],
  },
])

const root = ReactDOM.createRoot(document.getElementById('root'));
root.render(
  <React.StrictMode>
    <RouterProvider router={router} />
  </React.StrictMode>
);

reportWebVitals();
次に、全体レイアウトのソースコードです
これは、どの機能の画面でも表示する部品(ナビゲーションバーとか)を設定するファイルです
import { useState } from "react";
import { Outlet, useNavigate } from "react-router-dom";
import TopNavigation from "@cloudscape-design/components/top-navigation";
import SideNavigation from "@cloudscape-design/components/side-navigation";
import Grid from "@cloudscape-design/components/grid";
import Badge from "@cloudscape-design/components/badge";

export default function Layout() {
  const [activeHref, setActiveHref] = useState("#/page1");
  const navigate = useNavigate();

  return (
    <>
      <TopNavigation
        identity={{
          href: "#",
          title: "Service",
          logo: {
            src: "/logo-small-top-navigation.svg",
            alt: "Service",
          },
        }}
        utilities={[
          {
            type: "button",
            text: "Link",
            href: "https://example.com/",
            external: true,
            externalIconAriaLabel: " (opens in a new tab)",
          },
          {
            type: "button",
            iconName: "notification",
            title: "Notifications",
            ariaLabel: "Notifications (unread)",
            badge: true,
            disableUtilityCollapse: false,
          },
          {
            type: "menu-dropdown",
            iconName: "settings",
            ariaLabel: "Settings",
            title: "Settings",
            items: [
              {
                id: "settings-org",
                text: "Organizational settings",
              },
              {
                id: "settings-project",
                text: "Project settings",
              },
            ],
          },
          {
            type: "menu-dropdown",
            text: "Customer Name",
            description: "email@example.com",
            iconName: "user-profile",
            items: [
              { id: "profile", text: "Profile" },
              { id: "preferences", text: "Preferences" },
              { id: "security", text: "Security" },
              {
                id: "support-group",
                text: "Support",
                items: [
                  {
                    id: "documentation",
                    text: "Documentation",
                    href: "#",
                    external: true,
                    externalIconAriaLabel: " (opens in new tab)",
                  },
                  { id: "support", text: "Support" },
                  {
                    id: "feedback",
                    text: "Feedback",
                    href: "#",
                    external: true,
                    externalIconAriaLabel: " (opens in new tab)",
                  },
                ],
              },
              { id: "signout", text: "Sign out" },
            ],
          },
        ]}
      />
      <Grid gridDefinition={[{ colspan: 2 }, { colspan: 10 }]}>
        <SideNavigation
          activeHref={activeHref}
          header={{ href: "#/", text: "Service name" }}
          onFollow={(event) => {
            if (!event.detail.external) {
              event.preventDefault();
              setActiveHref(event.detail.href);
            }
          }}
          items={[
            { type: "link", text: "Page 1", href: "#/page1" },
            { type: "link", text: "Page 2", href: "#/page2" },
            { type: "link", text: "Page 3", href: "#/page3" },
            { type: "link", text: "Page 4", href: "#/page4" },
            { type: "divider" },
            {
              type: "link",
              text: "Notifications",
              href: "#/notifications",
              info: <Badge color="red">23</Badge>,
            },
            {
              type: "link",
              text: "Documentation",
              href: "https://example.com",
              external: true,
            },
          ]}
        />

        <div id="detail">
          <Outlet />
        </div>
      </Grid>
    </>
  );
}
各部品の作り方について、参照サイトを張り付けます~
それぞれ部品を組み合わせたら、上のソースコードとなります~
トップナビゲーションバー
サイドナビゲーションバー
画面の縦横比
そして、その他ファイルですが、indexとレイアウトを完成させたら、残りのは機能別でページを作るだけです。
今回はデモ用で簡単なものを作りましたが、一応共有します~
import { useState } from "react";
import Header from "@cloudscape-design/components/header";
import Container from "@cloudscape-design/components/container";
import SpaceBetween from "@cloudscape-design/components/space-between";
import Input from "@cloudscape-design/components/input";
import Button from "@cloudscape-design/components/button";

export default function Test() {
    const [value, setValue] = useState("");

    return (
        <Container>
            <SpaceBetween size="m">
                <Header variant="h1">Hello World!</Header>

                <Container>
                    <SpaceBetween size="s">
                        <span>Start editing to see some magic happen</span>
                        <Input
                            value={value}
                            onChange={(event) => setValue(event.detail.value)}
                        />
                        <Button variant="primary">Click me</Button>
                    </SpaceBetween>
                </Container>
            </SpaceBetween>
        </Container>
    );
}
import { useRouteError } from "react-router-dom";

export default function ErrorPage() {
  const error = useRouteError();
  console.error(error);

  return (
    <div id="error-page">
      <h1>Oops!</h1>
      <p>Sorry, an unexpected error has occurred.</p>
      <p>
        <i>{error.statusText || error.message}</i>
      </p>
    </div>
  );
}
終わりに
今回はCloudScapeとReactで、簡単なAws風の画面の作り方を紹介しました!
CloudScapeはほかにいろんなコンポーネントを提供しているので、公式ドキュメントを読みながら、必要に応じてコンポーネントを活用してください~


