やりたいこと
・JavaScriptでReactアプリを作る
・AWSの認証関連サービスと相性がいいCSSフレームワークであるAmplify-UIを導入する
①Reactアプリを作る
まず、Reactアプリを構築
npx create-react-app react-app
すると、react-appというフォルダが作られ、フォルダへcdしてください
cd react-app
Reactアプリに必要なモジュールが自動で入れられ、package.jsonがこんな感じ
qiita.rb
{
  "name": "react-app",
  "version": "0.1.0",
  "private": true,
  "dependencies": {
    "@testing-library/jest-dom": "^5.17.0",
    "@testing-library/react": "^13.4.0",
    "@testing-library/user-event": "^13.5.0",
    "react": "^18.3.1",
    "react-dom": "^18.3.1",
    "react-scripts": "5.0.1",
    "web-vitals": "^2.1.4"
  },
  "scripts": {
    "start": "react-scripts start",
    "build": "react-scripts build",
    "test": "react-scripts test",
    "eject": "react-scripts eject"
  },
  "eslintConfig": {
    "extends": [
      "react-app",
      "react-app/jest"
    ]
  },
  "browserslist": {
    "production": [
      ">0.2%",
      "not dead",
      "not op_mini all"
    ],
    "development": [
      "last 1 chrome version",
      "last 1 firefox version",
      "last 1 safari version"
    ]
  }
}
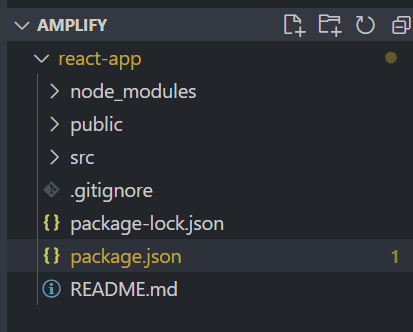
フォルダ構成がこんな感じ
アプリを起動してみてください。
npm start
ブラウザで開くと、
http://localhost:3000/
Reactの画面が出たら成功!
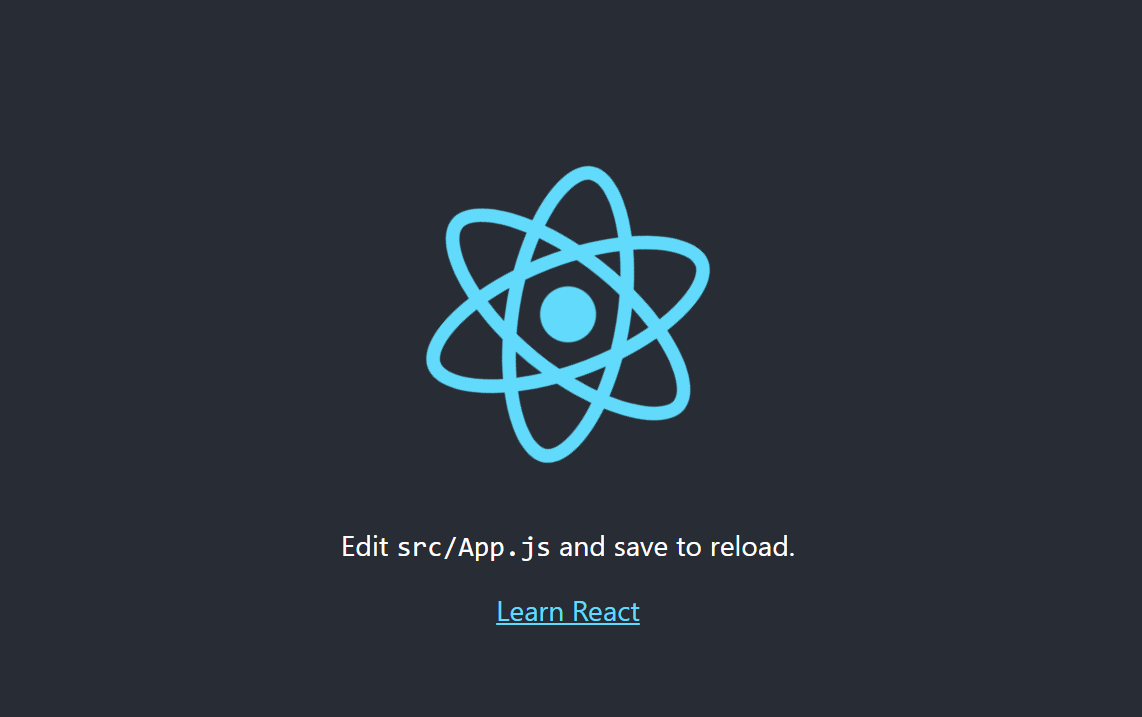
image.png
②Amplify-UIを入れてみる
まず、react-app配下にAmplify-UIの必要なモジュールを入れる
npm install @aws-amplify/ui-react aws-amplify
npm install -g @aws-amplify/cli@latest
すると、package.jsonのdependenciesがこうなるはず
qiita.rb
  "dependencies": {
    "@aws-amplify/ui-react": "^6.1.14",
    "@testing-library/jest-dom": "^5.17.0",
    "@testing-library/react": "^13.4.0",
    "@testing-library/user-event": "^13.5.0",
    "aws-amplify": "^6.4.3",
    "react": "^18.3.1",
    "react-dom": "^18.3.1",
    "react-scripts": "5.0.1",
    "web-vitals": "^2.1.4"
  },
③Amplify-UIで認証画面を作る
srcフォルダの下にあるファイルは、Reactのコンポーネントなので、ここAmplify-UIの認証画面を作る
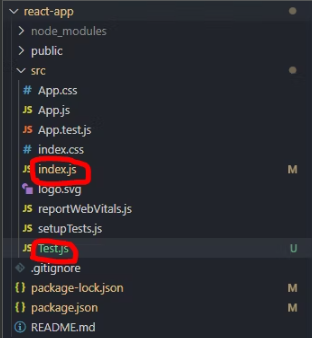
まず、初期段階で作られたindex.jsを微修正
index.js
import React from 'react';
import ReactDOM from 'react-dom/client';
import './index.css';
import App from './App';
import Test from './Test'; #これから作るAmplify-UIの認証画面のコンポーネント
import reportWebVitals from './reportWebVitals';

const root = ReactDOM.createRoot(document.getElementById('root'));
root.render(
  <React.StrictMode>
    <Test /> {/* Amplify-UIで作ったコンポーネントを入れ替える */}
  </React.StrictMode>
);

// If you want to start measuring performance in your app, pass a function
// to log results (for example: reportWebVitals(console.log))
// or send to an analytics endpoint. Learn more: https://bit.ly/CRA-vitals
reportWebVitals();
次に、Test.jsというコンポーネントを作成し、src配下に入れる
このソースでは、シンプルな入力フォームとボタンを配置している~
Test.js
import logo from './logo.svg';
import './App.css';

import { Amplify } from 'aws-amplify';

import { Authenticator } from '@aws-amplify/ui-react';
import '@aws-amplify/ui-react/styles.css';

function Test() {
  return (
    <Authenticator>
      {({ signOut, user }) => (
        <main>
          <h1>Hello {user.username}</h1>
          <button onClick={signOut}>Sign out</button>
        </main>
      )}
    </Authenticator>
  );
}

export default Test;
すると、もう一度で動作確認
http://localhost:3000/
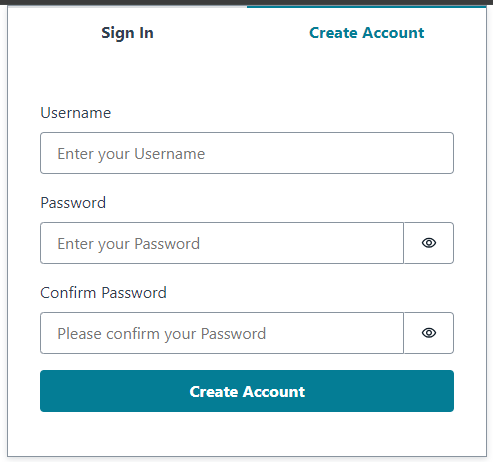
綺麗な認証画面ができました!
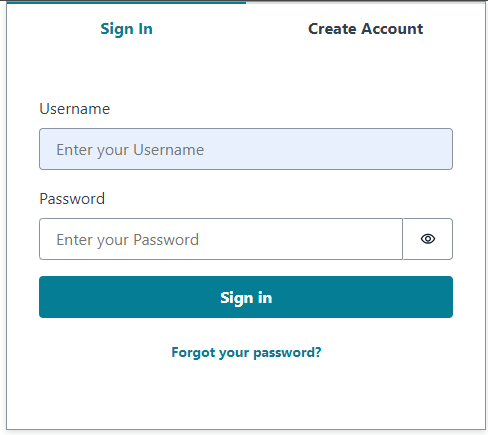
Create Accountをクリックすると、アカウント作成もできましたね!
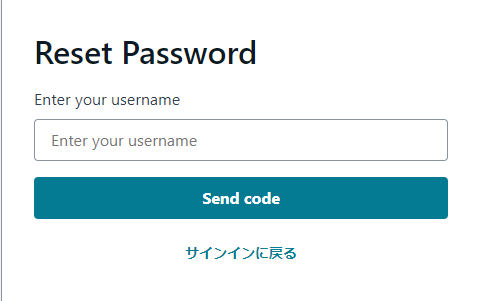
パスワード忘れた場合の画面はこんな感じ!
終わりに
Amplify-UIがすでにコンポーネントを提供しているので、割と何もしなくても認証画面が自動で出てくるイメージですね(笑)
今度はこれをベースにカスタマイズを試したいと思います~
また、Amplify-UIはAWSと相性がいいらしいので、これでCognito認証とやり取りしたい認証を実装してみたいと思います。
参考サイト