誰のための記事か
- Pythonで機械学習のコードは書けるが、プログラムを知らない人に対する周知に困っている人
- Streamlitを使ったWebアプリの一例を知りたい人
背景
Pythonで機械学習モデルを作ると未知データに対して簡単に予測できるようになります。いい時代ですね。
ただ、機械学習やPythonをよく知らない人に「このコードで予測出来ますよ!」と言っても「???」となる可能性大です。
そこで、GUIで数値をカタカタ入力するだけで予測値を出せるWebアプリを作ってみました。
環境
- Windows 11 Home
- Python 3.10.13 (Miniconda)
分類モデルの作成
今回は有名なirisデータセットを使って分類アプリを作ることにしました。
ただ、irisを分類する機械学習モデルを作らないことには始まらないので、作ります。
まずはscikit-learnを使ってデータの準備です。
from sklearn.datasets import load_iris
from sklearn.ensemble import RandomForestClassifier
from sklearn.model_selection import train_test_split, cross_val_score
from sklearn.metrics import accuracy_score
import optuna
import pickle

# irisデータの準備
iris = load_iris()

# トレーニングデータとテストデータの分割
X = iris['data']
y = iris['target']
X_train, X_test, y_train, y_test = train_test_split(X, y, test_size=0.3, random_state=0, shuffle=True)
次にトレーニングデータを使ってモデル構築し、ハイパーパラメータ調整します。
今回、モデルはRandomForestClassifierを、ハイパーパラメータ調整はOptunaを使います。
def objective(trial):
    # ハイパーパラメータの調整範囲の指定
    n_estimators =  trial.suggest_int('n_estimators', 1, 1000)
    max_depth = trial.suggest_int('max_depth', 1, 1000)
    min_samples_split = trial.suggest_int('min_samples_split', 2, 10)
    min_samples_leaf = trial.suggest_int('min_samples_leaf', 2, 10)
    max_leaf_nodes = trial.suggest_int('max_leaf_nodes', 1, 1000)

    # RandomForestClassifierのインスタンス化
    clf = RandomForestClassifier(n_estimators=n_estimators,
                                 max_depth=max_depth,
                                 min_samples_split=min_samples_split,
                                 min_samples_leaf=min_samples_leaf,
                                 max_leaf_nodes=max_leaf_nodes)

    # クロスバリデーションにより、accuracyの平均値を出す
    accuracy = cross_val_score(estimator=clf, X=X_train, y=y_train, scoring='accuracy', cv=5)
    mean_accuracy = accuracy.mean()
    print(f'average accuracy : {mean_accuracy}')

    # OptunaでAccuracyを最大化するハイパーパラメータを調整
    return mean_accuracy

# Optunaで探索
study = optuna.create_study(direction='maximize')
study.optimize(objective, n_trials=100)

# Optunaで探索したハイパーパラメータを設定し、インスタンス化
final_model = RandomForestClassifier(n_estimators=study.best_params['n_estimators'],
                                     max_depth=study.best_params['max_depth'],
                                     min_samples_split=study.best_params['min_samples_split'],
                                     min_samples_leaf=study.best_params['min_samples_leaf'],
                                     max_leaf_nodes=study.best_params['max_leaf_nodes'])

# final_modelにトレーニングデータをフィッティングさせテストデータを予測
final_model.fit(X_train, y_train)
y_pred = final_model.predict(X_test)

# 目的変数の予測値と実測値でaccuracyを計算
print(accuracy_score(y_pred, y_test))
0.9777777777777777
Accuracy=0.977もあるので、予測精度は十分と判断して次に進みます。
このモデルをpklファイルで保存します。
pickle.dump(final_model, open('clf.pkl', 'wb'))
このとき保存されたclf.pklは後で使います。
Streamlitについて
Streamlitは神です。DjangoとかFlaskとかよりもWebアプリ作成が遥かに楽です。
公式ドキュメントに、どのように書くとどのようなUIが作れるのか記載されているので、是非御覧ください!
Streamlitで機械学習Webアプリを作成
方針としては、irisデータセットの4つの説明変数
- がく片の長さ(sepal length)
- がく片の幅(sepal width)
- 花びらの長さ(patal length)
- 花びらの幅(petal width)
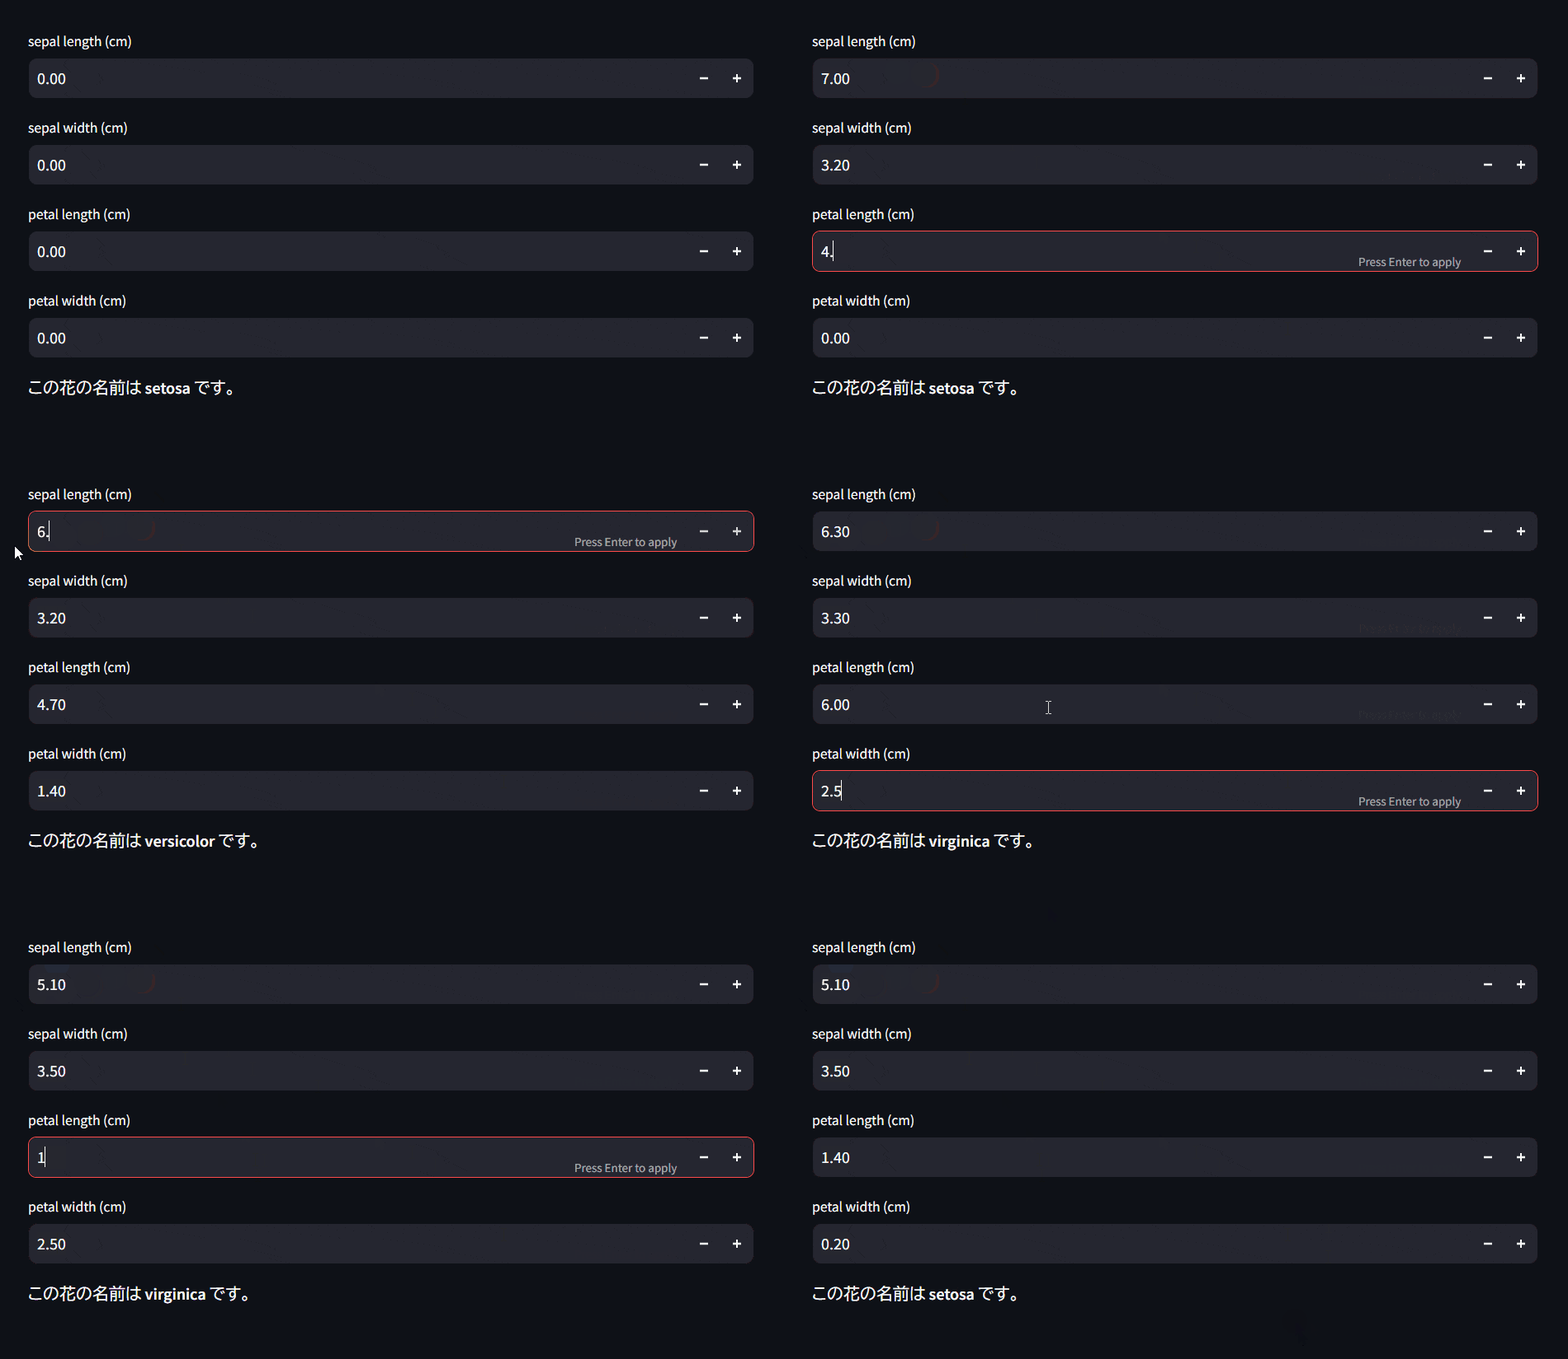
を入力することで、その花はsetosa, versicolor, virginicaいずれかを判断するようにWebアプリを設計します。
このとき、Streamlitのコードファイルとpklファイルの配置関係は以下にして設計しました。
app
├ main.py
└ pkl
  └ clf.pkl
main.pyの中身は以下の通りです。
import streamlit as st
import numpy as np
import pickle
import os

path = os.getcwd()

number1 = st.number_input('sepal length (cm)')
number2 = st.number_input('sepal width (cm)')
number3 = st.number_input('petal length (cm)')
number4 = st.number_input('petal width (cm)')

datasets = np.array([[number1, number2, number3, number4]])
model = pickle.load(open(f'{path}/pkl/clf.pkl', 'rb'))
pred = model.predict(datasets)

if pred == 0:
    flower = 'setosa'
elif pred == 1:
    flower = 'versicolor'
elif pred == 2:
    flower = 'virginica'

st.markdown(f'この花の名前は **{flower}** です。')
注意として、Streamlitで外部ファイルを使う場合は、絶対パスを記述しなければなりません。
これで一旦準備完了です。では、実行してみましょう!
Streamlitアプリの実行
僕の場合はMinicondaを使っているのでAnaconda Promptを使ってやります。pipでやっている人はコマンドプロンプトやPowershellでも可です。
まずは、仮想環境を使っている場合は仮想環境に移動しましょう。
conda activate <env_name>
そして、appフォルダ配下に移動(下記はDesktop配下に置いている例)
cd Desktop/app
最後にstreamlitを下記コマンドで実行すればブラウザ上でWebアプリが動きます。
streamlit run main.py
最初メールアドレス登録を求められる場合がありますが、しなくて問題ありません。
Streamlitアプリの画面
Pythonが無くても実行出来るようにしたい方へ
Zennに素晴らしい記事があります。こちらをご参照ください。
まとめ
Streamlitを使えば、Webアプリ作成がすごく楽です。
