はじめに
yupとvee-validateを用いれば簡単にフォームのバリデーションを行うことができます。
ただvee-validateは非常に便利なバリデーションライブラリなのですが、compositionAPIを用いている場合の情報があまりなかったので記事にしてみました。
yupとは
yupはJavaScriptでフォームのバリデーションルールを宣言的に記述することのできるライブラリです。
vee-validateとは
vee-validateは「素早い」「柔軟」「実装が容易」といった多くの特徴を持つVue.jsのバリデーションライブラリです。
検証環境
vue 3.0.0
TypeScript 4.1.5
vee-validate 4.5.6
yup 0.32.11
プロジェクトの作成
vue-cliを用いてプロジェクトを作成します。
vue-cliのバージョンが4.5以上でないとvue3のセットアップができないのでアップグレードします。
yarn global upgrade --latest @vue/cli
vue createコマンドでプロジェクトを作成し、vue3を選択します。
vue create <your-project-name>

Vue CLI v4.5.15
? Please pick a preset: Default (Vue 3) ([Vue 3] babel, eslint)
作成したプロジェクトのディレクトリに移動します。
cd <your-project-name>
vue addコマンドでTypeScriptを導入します。質問には以下のように答えてください。
vue add typescript

? Use class-style component syntax? No
? Use Babel alongside TypeScript (required for modern mode, auto-detected polyfills, transpiling JSX)? Yes
? Convert all .js files to .ts? Yes
? Allow .js files to be compiled? No
? Skip type checking of all declaration files (recommended for apps)? Yes
yarn serveでページにアクセスできたら準備完了です。

ライブラリのインストール
yarn add vee-validate@next
yarn add yup
上記コマンドを使用してyupとvee-validateをインストールします。
vee-validateは4系でないとVue3に対応していないので注意してください。
バリデーションの実装
App.vueを編集してフォームを作ります。
<template>
  <div class="container">
    <form>
      <div class="input-field">
        <input type="text" v-model="text" />
        <p class="error-message">{{ textError }}</p>
      </div>
      <button type="submit">送信</button>
    </form>
  </div>
</template>

<script lang="ts">
import { defineComponent, ref } from "vue";

export default defineComponent({
  setup() {
    const text = ref<string>("");
    return {
      text,
    };
  },
});
</script>

<style scoped>
.container {
  padding: 10px;
  width: 300px;
}
.input-field {
  margin-bottom: 16px;
}
.error-message {
  height: 16px;
  color: red;
}
</style>

vee-validateとyupをimportしてバリデーションスキーマを作成します。
import { defineComponent } from "vue";
import { useField, useForm } from "vee-validate";
import * as yup from "yup";

export default defineComponent({
  setup() {
    const formSchema = yup.object({
      text: yup.string().required('テキストは必須項目です')
    })

    useForm({ validationSchema: formSchema })

    const { value: text, errorMessage: textError } = useField<string>("text");

    return {
      text,
      textError,
    };
  },
});
ここでフォームのスキーマを定義しています。こちらの記述はtextはstring型の必須項目という意味です。またrequiredの中に任意のテキストを指定し、バリデーションエラーメッセージを作成することもできます。このようにyupを用いるとバリデーション関数をとても簡単に作成することができます。
const formSchema = yup.object({
  text: yup.string().required('テキストは必須項目です')
})
そしてここで作成したスキーマをフォームに適用しています。
useForm({ validationSchema: formSchema })
最後にuseField関数を用いてリアクティブな変数を定義しています。テキストフォームに入力された値がtextに代入され、バリデーションエラーが発生するとerrorMessageにエラーメッセージが代入されます。
const { value: text, errorMessage: textError } = useField<string>("text");

formタグにsubmitイベントを付ければバリデーションエラー発生時にデータを送信させないようにすることもできます。
  <div class="container">
+   <form @submit="handleSubmit">
      <div class="input-field">
        <input type="text" v-model="text" />
        <p class="error-message">{{ textError }}</p>
      </div>
      <button type="submit">送信</button>
    </form>
  </div>
+ const handleSubmit = (e: Event) => {
+   if (text.value && !textError.value?.length) {
+   return true
+ }
+   text.value = "";
+   e.preventDefault()
+ }

return {
  text,
  textError,
+ handleSubmit,
};

アカウントIDのバリデーション
ここからはWEBアプリでよくあるフォームのバリデーション実装例を紹介します。
  <div class="container">
    <form @submit="handleSubmit">
      <div class="input-field">
        <input type="text" v-model="text" />
        <p class="error-message">{{ textError }}</p>
      </div>
+     <div class="input-field">
+       <div><p>アカウントID</p></div>
+       <input type="text" v-model="accountId" />
+       <p class="error-message">{{ accountIdError }}</p>
+     </div>
      <button type="submit">送信</button>
    </form>
  </div>
アカウントIDのフォームを追加します。

アカウントIDは下記のように要件が決まっています。
半角英数字をそれぞれ1種類以上含み8文字以上32文字以下であること
このバリデーションを実現するにはmatchesを用います。
const formSchema = yup.object({
  text: yup.string().required("テキストは必須項目です"),
+ accountId: yup
+   .string()
+   .matches(
+     /^(?=.*?[a-z])(?=.*?\d)[a-z\d]{8,32}$/i,
+     "アカウントIDの形式が間違っています。"
+   ),
});
このようにmatchesを用いることでフォームに入力された値が正規表現にマッチするかバリデーションすることができます。あとは残りのコードを記述します。
+ const { value: accountId, errorMessage: accountIdError } = useField<string>("accountId");

const handleSubmit = (e: Event) => {
  if (
    text.value &&
    !textError.value?.length &&
+   accountId.value &&
+   !accountIdError.value?.length
  ) {
    return true;
  }
  text.value = "";
+ accountId.value = "";
  e.preventDefault();
};

return {
  text,
  textError,
+ accountId,
+ accountIdError,
  handleSubmit,
};

パスワード一致のバリデーション
2つのフォームにパスワードを入力した時、パスワードが一致するかをバリデーションします。
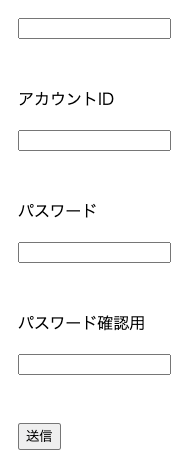
まずは2つのフォームを追加します。なお今回は説明のためinputタグのtypeはtextで行います。(本来はpasswordにするべき)
  <div class="container">
    <form @submit="handleSubmit">
      <div class="input-field">
        <input type="text" v-model="text" />
        <p class="error-message">{{ textError }}</p>
      </div>
      <div class="input-field">
        <div><p>アカウントID</p></div>
        <input type="text" v-model="accountId" />
        <p class="error-message">{{ accountIdError }}</p>
      </div>
+     <div class="input-field">
+       <div><p>パスワード</p></div>
+       <input type="text" v-model="password" />
+       <p class="error-message">{{ passwordError }}</p>
+     </div>
+     <div class="input-field">
+       <div><p>パスワード確認用</p></div>
+       <input type="text" v-model="passwordConfirm" />
+       <p class="error-message">{{ passwordConfirmError }}</p>
+     </div>
      <button type="submit">送信</button>
    </form>
  </div>
バリデーションスキーマは以下のように記述します。
 const formSchema = yup.object({
      text: yup.string().required("テキストは必須項目です"),
      accountId: yup
        .string()
        .matches(
          /^(?=.*?[a-z])(?=.*?\d)[a-z\d]{8,32}$/i,
          "アカウントIDの形式が間違っています。"
        ),
+     password: yup.string().required("パスワードは必須項目です"),
+     passwordConfirm: yup
+       .string()
+       .required("パスワード確認用は必須項目です")
+       .oneOf([yup.ref("password")]),
    });
ポイントはoneOf([yup.ref("password")])oneOf([yup.ref("password")])の部分です。oneOfは引数として与えられた配列の文字列に完全一致しているかをバリデーションできます。ここにyup.ref("password")を与えることでpasswordとpasswordConfirmが一致するかをテストすることができます。残りのコードも記述していきます。
const { value: text, errorMessage: textError } = useField<string>("text");
const { value: accountId, errorMessage: accountIdError } =useField<string>("accountId");
+ const { value: password, errorMessage: passwordError } =useField<string>("password");
+ const { value: passwordConfirm, errorMessage: passwordConfirmError } =useField<string>("passwordConfirm");


const handleSubmit = (e: Event) => {
  if (
    text.value &&
    !textError.value?.length &&
    accountId.value &&
    !accountIdError.value?.length &&
+   password.value &&
+   !passwordError.value?.length &&
+   passwordConfirm.value &&
+   !passwordConfirmError.value?.length
  ) {
    return true;
  }
  text.value = "";
  accountId.value = "";
+ password.value = "";
+ passwordConfirm.value = "";
  e.preventDefault();
};

return {
  text,
  textError,
  accountId,
  accountIdError,
+ password,
+ passwordError,
+ passwordConfirm,
+ passwordConfirmError,
  handleSubmit,
};

おわりに
yupとvee-validateを組み合わせることで簡単にバリデーション機能を実装することができます!またcompositionAPIで記述することでより、見通しの良いコードが書けます。興味が湧いた方は是非試してみてください。
参考
https://vee-validate.logaretm.com/v4/
https://github.com/jquense/yup
https://reffect.co.jp/vue/veevaliate4